
Related Manuals for D-Link Nuclias Connect Hub Plus DNH-200


Summary of Contents for D-Link Nuclias Connect Hub Plus DNH-200
- Page 1 2021 | Business Class Networking NUCLIAS CONNECT HUB PLUS DNH-200 User Manual V 1.00...
-
Page 2: Table Of Contents
Nuclias Connect Hub Plus User Manual Introduction Table of Contents Introduction ..........................5 Hardware Installation ........................ 6 System Requirements ......................6 Hardware Overview ....................7 LED Indicators ......................7 Interface Connectors ....................8 Configuration ........................9 Ethernet Connection ....................9 Console Connection .................... - Page 3 Nuclias Connect Hub Plus User Manual Introduction Monitor ..........................45 Access Point ......................45 Wireless Client ......................47 Neighbor AP ......................48 Floor Plan ......................... 50 Configuration ........................51 Create Profile ......................51 Profile Settings ......................54 Firmware Upgrade ....................74 SSL Certificate ......................
- Page 4 Nuclias Connect Hub Plus User Manual Introduction Alerts ........................106 Event Log ....................... 107 System ........................... 108 Recording Schedule ....................108 Event Settings ......................110 Display Settings ...................... 113 Recording Backup ....................114 Nuclias Connect App ......................116 Export Network Profiles....................116 Discover and Configure APs Using the Nuclias Connect App ........
-
Page 5: Introduction
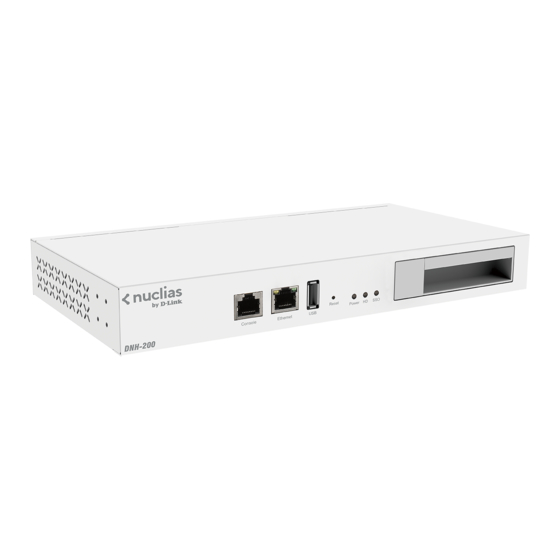
Introduction The DNH-200 Nuclias Connect Hub Plus is a hardware controller with pre-loaded Nuclias Connect software. Nuclias Connect is D-Link’s centralized management solution for Small-to- Medium-Sized Business (SMB) networks. Managing a group of access points and network cameras is made easy and economical through Nuclias Connect. Nuclias Connect gives you the scalability and technical flexibility to expand from a small network to a larger one, while retaining a robust and future-proof management system. -
Page 6: Hardware Installation
Ethernet cable Documentation If any of the above items are damaged or missing, please contact your local D-Link reseller. System Requirements Computers with Windows®, Macintosh®, or Linux-based operating systems Browser support for H.264 video stream: Microsoft® Edge, Google® Chrome, Mozilla®... -
Page 7: Hardware Overview
Nuclias Connect Hub Plus User Manual Hardware Installation Hardware Overview ①②③ ⑴ ⑵ ⑶ ⑷ LED Indicators Status Color and Behavior Power LED Power On Green: solid System Startup Green: blinking while the system boots up (Normal Speed)* System Ready Red: solid when the startup fails Firmware Update Green: solid... -
Page 8: Interface Connectors
Nuclias Connect Hub Plus User Manual Hardware Installation (SSO) account. * Normal speed = 1 second On, 1 second Off Interface Connectors Connector Description Console Port RJ-45 port to connect the RJ-45 connector of a serial-to-RJ-45 console cable for CLI management. Ethernet Port Gigabit RJ-45 port for LAN connection. -
Page 9: Configuration
Nuclias Connect Hub Plus User Manual Hardware Installation Configuration Note: D-Link recommends manual configuration of the DNH-200 before mounting it onto the rack. The management computer, DHCP server, and DNH-200 must be in the same network. Ethernet Connection You need the following equipment to access the web interface of the DNH-200: •... - Page 10 Nuclias Connect Hub Plus User Manual Hardware Installation Connect the adapter to the power input on the DNH-200, then plug the adapter into a nearby power outlet. Use an Ethernet cable to connect the DNH-200 with a switch or router that the management computer is connected to.
-
Page 11: Console Connection
Nuclias Connect Hub Plus User Manual Hardware Installation Console Connection Use a console cable to connect to the DNH-200’s console port. The console cable should be a RS-232 serial-to-RJ-45 cable designed to use with the device. A terminal emulation program is required for serial communication. -
Page 12: Installation
Nuclias Connect Hub Plus User Manual Hardware Installation Installation Mounting to a Solid Wall or Ceiling The DNH-200 can be mounted on a solid wall or in an EIA standard 19-inch rack, which can be placed in a wiring closet with other equipment. You can either hang the unit on the wall by using the wall mount keyholes on the rear of the unit or by using the supplied mounting bracket. -
Page 13: Basic Configuration
Nuclias Connect Hub Plus User Manual Basic Configuration Basic Configuration Launch Nuclias Connect The DNH-200 comes preloaded with Nuclias Connect. Open a web browser from the management computer and enter the IP address or Domain Name of the DNH-200. The default domain name is https://DNH-200-XXXX.local. - Page 14 Nuclias Connect Hub Plus User Manual Basic Configuration Notes: • The Forgot Password? function provides an option to reset your password in the event that you’ve forgotten your current password. To use this function, the SMTP server and email address must be configured first. Refer to System Settings > Mail Server Settings.
- Page 15 Nuclias Connect Hub Plus User Manual Basic Configuration If you have a Nuclias account for Single Sign-On, enter it now. If you do not already have a Nuclias account, you can click Create Account and a browser window will open to a link where you can create one.
-
Page 16: Home
Nuclias Connect Hub Plus User Manual Home Home After successfully logging in to the server, the Home page displays the 3 modules of the Nuclias Connect Hub Plus (may be referred to as the Hub hereafter): AP Network: Manage your current sites and networks through Nuclias Connect. ... -
Page 17: System Settings
Nuclias Connect Hub Plus User Manual System Settings System Settings Dashboard The Dashboard page presents a summary of information about relevant system resource utilization. CPU Loading The CPU’s workload in percentage. CPU Temperature The current CPU temperature under load. Memory The RAM usage: used/total. - Page 18 The firmware version of the System Settings module. Version Camera Surveillance The firmware version of the Camera Surveillance module. Version AP Network Version The firmware version of the AP Network module. DDPv5 Client Version The DDPv5 (D-Link Discovery Protocol) client version.
-
Page 19: Settings
Nuclias Connect Hub Plus User Manual System Settings Settings The Settings page provides configurable settings of the system. It contains these menus: General, Date and Time, Network Settings, Mail Server Settings, Firmware Update, System Operation, Single Sign On, Log Backup, Backup & Restore, Syslog Settings, and Event Settings. -
Page 20: Date And Time
Nuclias Connect Hub Plus User Manual System Settings (the CAPTCHA code) in the login screen. Click Save to save the values and update the screen. In the Console Settings section, parameters for data communication through the console port of the DNH-200 can be configured: Console Check to enable management through the console port. -
Page 21: Network Settings
Nuclias Connect Hub Plus User Manual System Settings DST End (24HR) Designate the end date and time for DST. Date & Time Settings Enter the date and time manually or choose Copy Your Computer’s Time to import the date and time from your computer’s time settings. - Page 22 Nuclias Connect Hub Plus User Manual System Settings IPv4 Settings Provision Select either Dynamic IP (DHCP) or Static IP Address: DHCP automates the assignment of IP addresses, subnet masks, default gateways and other settings. On the other hand, Static IP addressing scheme requires you to enter IP addresses, subnet masks, default gateways and other settings manually.
-
Page 23: Mail Server Settings
Nuclias Connect Hub Plus User Manual System Settings Gateway If Static IP Address is selected, enter the gateway IP address. This is the address of a router interface connected to the Hub that forwards packets out to another subnet or network. Primary DNS Enter the IP address of a DNS server. -
Page 24: Firmware Update
Nuclias Connect Hub Plus User Manual System Settings From Name Enter the sender’s name of an email. Security Type Select the security type to be used in the email system. The options include None or SSL. Encoding Type Select character encoding type to match that of the supported e-mail client. -
Page 25: System Operation
Nuclias Connect Hub Plus User Manual System Settings Choose From the Server as the Update Method and configure the following: Current Firmware Version Displays the current firmware version New Firmware Click Check to verify if the current firmware is up to date. - Page 26 Nuclias Connect Hub Plus User Manual System Settings The system operation functions are explained below: Shutdown the Device Click this button to shut down the Hub. Reboot the Device Click this button to restart the Hub. Restore the Factory Default Settings Click this button to restore the Hub to factory default settings.
-
Page 27: Single Sign-On
Nuclias Connect Hub Plus User Manual System Settings Single Sign-On The Single Sign-On page allows you to use one Nuclias account to access Nuclias Cloud and Nuclias Connect portal. If you do not already have a Nuclias account, you can click Create Account where a browser window will open to a link where you can create one. - Page 28 Nuclias Connect Hub Plus User Manual System Settings 2. Create organization and site. Once the region and country have been entered, you will see the user, organization, and site page. Enter the required information and agree to the Terms of Use and Privacy agreement.
- Page 29 Nuclias Connect Hub Plus User Manual System Settings Your Nuclias account must be validated before use. You will receive an email from verify@nuclias.com with a verification link included. Please click the verification link to activate your Nuclias account. Once finished, specify the following parameters on the Single Sign-On page, then click Login. Enable Nuclias Single Sign-on Check to enable Single Sign-On (SSO).
-
Page 30: Log Backup
Nuclias Connect Hub Plus User Manual System Settings the Hub from the Nuclias Connect portal. (Forget is only available when that device is offline.) Log Backup The Log Backup page allows you to back up logs generated from the system automatically or manually. -
Page 31: Backup & Restore
Nuclias Connect Hub Plus User Manual System Settings For Manual Log Backup, click Back Up Now. The log files will be compressed as a single tar file and will be saved in your browser’s download directory. The tar file contains 3 log files from the 3 modules of the DNH-200, i.e., AP Network, Camera Surveillance, and System Settings. -
Page 32: Syslog Settings
Nuclias Connect Hub Plus User Manual System Settings Syslog Settings The Syslog Settings page allows you to back up system logs to a remote site. Navigate to Settings > Syslog Settings to configure the location of an external backup server and the type of logs for backup. -
Page 33: Event Settings
Nuclias Connect Hub Plus User Manual System Settings Event Settings The Event Settings page allows you to configure automatic notifications based on event type. Navigate to Settings > Event Settings. To configure an event notification: 1. Select an event type in the left pane from the following: HDD Status Detection, Network Disconnected, Device Reboot, Device Shutdown, and Firmware Update. - Page 34 Nuclias Connect Hub Plus User Manual System Settings among different days of the week by clicking Click Save to save the values and update the screen. Note: The Authorized/Unauthorized Users List is obtained from the users list in User Management of System Settings. For email notifications, the emails are obtained from the entered email addresses of the User’s List.
-
Page 35: User Management
Nuclias Connect Hub Plus User Manual System Settings User Management The User Management page allows administrators to view the current status of all registered user profiles as well as edit and delete the profile. Navigate to User Management to view the relevant information. - Page 36 Nuclias Connect Hub Plus User Manual System Settings below roles. In addition, this role can view the Audit Log in Log. Root User: Can view all sites/networks on this server. Local Admin: Can manage his own network. Local User: Can view his own network. Front Desk Staff: Can generate and manage passcodes.
- Page 37 Nuclias Connect Hub Plus User Manual System Settings...
-
Page 38: Log
Nuclias Connect Hub Plus User Manual System Settings The Log page stores the activities of the system and the log entries are grouped into the following categories: System Log, Audit Log, and Alerts. To navigate among log types, select the respective tab. In each log window, you can apply type-specific filters, for example, event types to see log entries of your interest. -
Page 39: Audit Log
Nuclias Connect Hub Plus User Manual System Settings Audit Log This type of log records user activities such as configuration editing or deletion, and login and logout of the system. To generate an Audit Log report, select the time period, select the entries by operation type (operations that performed on the object entities) and object entity (i.e., the objects associated with the functional tabs in the left pane), and select username. -
Page 40: Alerts
Nuclias Connect Hub Plus User Manual System Settings Alerts This type of log records event activities for alert, i.e., HDD Status Detection, Network Disconnected, Device Reboot, Device Shutdown, and Firmware Update. The alerts are generated according to the rules based on event frequency and authorized users. Refer to Settings >... -
Page 41: Ap Network
Nuclias Connect Hub Plus User Manual AP Network AP Network Wizard A wizard is available to guide you through first-time setup of the device. Follow the instructions to complete the process of device configuration. The wizard can be accessed and run repeatedly by clicking the icon in the upper-right corner. - Page 42 Nuclias Connect Hub Plus User Manual AP Network Click Next to continue. On the Add Network page, from the Site menu, select an existing site or select newSite and enter a name that describes the site in the text field. In the Network Name field, enter a name to identify the new network.
- Page 43 Nuclias Connect Hub Plus User Manual AP Network define the type of network in which to find manageable access points. If Layer 3 is selected, click the drop-down menu to define either an IP or a network prefix. The Discovery AP page appears. Click Start Discovery to list all available unmanaged devices.
-
Page 44: Dashboard
Nuclias Connect Hub Plus User Manual AP Network Dashboard The Dashboard page presents a summary of network resources and resource utilization information. To view the information from the last hour vs. from the past 7 days, select the site and the network, and define the interested date and time. -
Page 45: Monitor
Nuclias Connect Hub Plus User Manual AP Network Monitor The Monitor page provides reports of all or a selected number of wireless clients and It contains these menus: Access Point, Wireless networks managed by the application. Client, and Neighbor AP. Access Point The Access Point page allows you to generate reports based on Site, Network, and AP. - Page 46 Nuclias Connect Hub Plus User Manual AP Network Search field. Then click to start your search. The results will be displayed below. You can also customize the fields of the report by clicking . The following field names are available: Status, Local IP Address, IPv6 Address, MAC Address, Model Type, FW Version, Name, Location, Network, Network ID, Client, Channel 2.4G, Channel 5G 1, Channel 5G 2 (tri-band), Power 2.4G, Power 5G 1, Power 5G 2 (tri-band), Download, Upload, Traffic Usage, Traffic Usage (%), CPU Usage (%), Memory Usage (%), Last Seen, and Uptime.
-
Page 47: Wireless Client
Nuclias Connect Hub Plus User Manual AP Network Wireless Client The Wireless Client page allows you to view reports of all connected clients managed by the application. The statistics can be shown based on Site, Network, and Clients. Navigate to Monitor >... -
Page 48: Neighbor Ap
Nuclias Connect Hub Plus User Manual AP Network To generate a report, select a specific site or All Sites, select a network or All Networks, then click to start your search. The result displays a list of blocked wireless client connections. - Page 49 Nuclias Connect Hub Plus User Manual AP Network meet the search criteria. You can also customize the fields of the report by clicking The following fields are available: BSSID, Detected By, Status, SSID, Security, RSSI (dBm), BW (MHz), Channel, and Supported Modes.
-
Page 50: Floor Plan
Nuclias Connect Hub Plus User Manual AP Network Floor Plan The Floor Plan page allows you to create geographic representation of your wireless networks. It helps you identify sites and networks quickly for maintenance purposes with visualized locations of the access points. plan, click + next to Floor Plan. -
Page 51: Configuration
Nuclias Connect Hub Plus User Manual AP Network Configuration Create Profile The Create Profile function allows for the creation of new sites and networks. Navigate to Configuration > Create Profile To create a new site/network, click Add Network. From the Site menu, select an existing site or select newSite and enter the name of the site in the text field. - Page 52 Nuclias Connect Hub Plus User Manual AP Network The Network Configurations page appears. Enter the Wireless and Device settings to define the wireless network and configure basic information about the device. Click Next to continue. The Discover Network Settings page appears. Select the data link layer (layer 2 or layer 3) for the capability of network devices for searching manageable access points.
- Page 53 Nuclias Connect Hub Plus User Manual AP Network The Discovery AP page appears. Click Start Discovery to list all available unmanaged devices. If a device is found, select it and click Apply to import the network profile. Click the Managed tab to select already defined devices and add them to the list. The list should display all sites and networks that have been defined with the following information: Site Name...
-
Page 54: Profile Settings
Nuclias Connect Hub Plus User Manual AP Network Online Devices The total number of access points in this network that are online. Clients The total number of clients connected to this network. Edit Profile Open Profile Settings page. From this page, you can configure more advanced settings for your network such as bandwidth optimization and VLAN. - Page 55 Nuclias Connect Hub Plus User Manual AP Network The Upload Configuration page will be available when a network is selected. For any updates on network configuration to take effect, the configuration must be uploaded to the access points. In the Upload Configuration section, click the Time Start menu and select the time (Immediate or Select Time) to upload the settings immediately or at a configured time.
- Page 56 Nuclias Connect Hub Plus User Manual AP Network list, and configure the following parameters: Band Select wireless frequency. Index Select SSID index (Primary and SSID 1 to SSID 7). To create a new SSID, select a new index parameter first. SSID Enter the wireless network name.
- Page 57 Nuclias Connect Hub Plus User Manual AP Network is only available when Security is WPA-Enterprise or 802.1X. Enter the server’s IP address, port number and secret. Accounting Mode Enable or disable the use of an accounting server. Accounting Server/Port/Secret The RADIUS Server uses an accounting server as a management system to manage users who use a network service.
- Page 58 Nuclias Connect Hub Plus User Manual AP Network Interval (0~720) minutes Limit the time interval of a login session. Enable White List Check the box to enable the white list function. This function is not available when Authentication Type is Web Redirection Only.
- Page 59 Nuclias Connect Hub Plus User Manual AP Network MAC Address. LDAP Server/Port Enter the LDAP server’s IP address and port number. This option is only available when Authentication Type is LDAP. LDAP Base DN Enter the base domain name of the LDAP database. This option is only available when Authentication Type is LDAP.
- Page 60 Nuclias Connect Hub Plus User Manual AP Network to update the walled garden list. Click Download to download the current list. The Walled Garden list has to be a line break delimited txt file. Social Login Enable login using social media such as Facebook and Google.
- Page 61 Nuclias Connect Hub Plus User Manual AP Network Access Network Type Choose the access network type. Internet Enable or disable Internet access for this network. ASRA Choose Enable if the network has Additional Steps Required for Access. Choose Enable to indicate that emergency services are reachable through this service.
- Page 62 Nuclias Connect Hub Plus User Manual AP Network delete it from the list. EAP Method Specify one or more EAP methods and its Authentication ID and Parameter type. RFC 4282 Enable or disable RFC 4282 for user identification. 3gpp Cellular Network Specify a list of the 3GPP cellular networks available through the AP.
- Page 63 Nuclias Connect Hub Plus User Manual AP Network Configuration > Profile Settings > [Site] > [Network] > VLAN to view existing settings. VLAN Status Click the drop-down menu to enable or disable VLANs. VLAN List The VLAN List shows a list of created VLANs and their members with Tag/Untag information. You can click to modify a selected VLAN or to delete a VLAN configuration.
- Page 64 Nuclias Connect Hub Plus User Manual AP Network You can also access this tab by clicking Edit for an existing VLAN configuration on the VLAN List tab. Note: An SSID can belong to only one Untagged VLAN member. When adding an SSID to a VLAN's Untagged VLAN member, the SSID will be unmembered from another VLAN assigned earlier.
- Page 65 Nuclias Connect Hub Plus User Manual AP Network Configuration > Profile Settings > [Site] > [Network] > Bandwidth Optimization to view existing settings. Enable Bandwidth Enable or disable bandwidth optimization. Enable this to Optimization configure with the following settings. Downlink Bandwidth Enter the total downlink bandwidth for the access points in Mbits/sec.
- Page 66 Nuclias Connect Hub Plus User Manual AP Network specified SSID depending on the rule type. Uplink Speed Enter the uplink speed assigned to each station or the specified SSID depending on the rule type. Click Add to add the rule for the network with the designated radio frequency into the Bandwidth Optimization Rules.
- Page 67 Nuclias Connect Hub Plus User Manual AP Network Schedule The Schedule page displays the wireless schedule settings. It can be used to enable wireless network in a defined set of schedules. Navigate to Configuration > Profile Settings > [Site] > [Network] >...
- Page 68 Nuclias Connect Hub Plus User Manual AP Network Profile Settings for more information. Device Settings The Device Settings page allows you to view and configure the login and accessibility settings for access points in this network. Navigate to Configuration > Profile Settings > [Site] > [Network] > Device Setting to view existing settings.
- Page 69 Nuclias Connect Hub Plus User Manual AP Network Facebook Authorize Domain If using Facebook Sign-in method, enter the authorization domain name. Google Client ID/Secret ID If using Google Sign-in method, enter the client and secret Google Authorize Domain If using Google Sign-in method, enter the authorization domain name.
- Page 70 Nuclias Connect Hub Plus User Manual AP Network Wireless Turn on or off the wireless band for the network. Wireless Mode Select the wireless mode used for the network. For 5GHz, Mixed 802.11n/a, 802.11a Only, 802.11n Only, and Mixed 802.11ax/ac/n/a are available. For 2.4GHz, Mixed 802.11ax/n/g/b, Mixed 802.11g/b, and 802.11n Only.
- Page 71 Nuclias Connect Hub Plus User Manual AP Network applied to other band frequencies. RTS Length (256-2346) Enter the RTS length value. The default value is 2346. Fragment Length (256-2346) Enter the fragment length value. The default value is 2346. Channel Width Select the channel width used by the network.
- Page 72 Nuclias Connect Hub Plus User Manual AP Network Link Integrity Go to this tab. Click the drop-down menu to enable or disable wireless link integrity. Enable this to disable the wireless network if the AP is not connected with an uplink router. Ethernet to Enable or disable Ethernet to WLAN access.
- Page 73 Nuclias Connect Hub Plus User Manual AP Network number of clients and bandwidth usage. User Limit (0~64) Enter the user connection limit. The default value is 20. When the number of users exceeds this value, no further client association will be allowed. 11n Preferred Enable or disable the use of 802.11n as the preferred standard.
-
Page 74: Firmware Upgrade
Please go to your local D-Link website to see if there is a newer firmware available. Navigate to Configuration > Firmware Upgrade and click [Site] > [Network] and configure the following for the selected wireless network. -
Page 75: Ssl Certificate
Nuclias Connect Hub Plus User Manual AP Network SSL Certificate The SSL Certificate page allows you to install an SSL certificate to secure connections to the AP’s web management interface. The intermediate certificate is used to establish the trust by binding it to the Certificate Authority’s root certificate. -
Page 76: Report
Nuclias Connect Hub Plus User Manual AP Network Report Peak Network Activity The Peak Network Activity page allows administrators to monitor wireless traffic and gain information about peak usage. Wireless activity for all or selected sites and networks shows the highest number of connected clients and amount of traffic with respect to the hour of a selected day for the past 7 days. -
Page 77: Daily Network Activity
Nuclias Connect Hub Plus User Manual AP Network the hour of a selected day. Navigate to Report > Hourly Network Activity to view the report. To generate an hourly report, select the site and network from the corresponding menu, and select a day from the past 7 days, then click to view the report. -
Page 78: Most Active Ap
Nuclias Connect Hub Plus User Manual AP Network Most Active AP The Most Active AP page displays a visual representation of the wireless network traffic with the location of the access points. To add a new map representation: Click to open the Create Map of Most Active APs window. Enter a name in the Map Name field. - Page 79 Nuclias Connect Hub Plus User Manual AP Network...
-
Page 80: Log
Nuclias Connect Hub Plus User Manual AP Network The Log page stores the activities of wireless devices and the log entries are grouped into the following categories: Device Syslog, System Event Log, Device Log, Audit Log, and Alerts. To navigate among log types, select the respective tab. In each log window, you can apply type- specific filters to see log entries of your interest, for example, IP and MAC address. -
Page 81: System Event Log
Nuclias Connect Hub Plus User Manual AP Network System Event Log The System Event Log allows administrators to view alerts such as connection requests and events related to device management that may require attention and necessary action to keep smooth operation and to prevent failures. Navigate to Log > System Event Log to view relevant information. -
Page 82: Audit Log
Nuclias Connect Hub Plus User Manual AP Network click to export it as a local CSV file. The file will be saved in your browser’s download directory and will be named as follows: Nuclias_Connect_Log Type_YYYY_MMDD_HHMMSS. Audit Log This type of log records user activities that can be performed on an object entity such as profile and network creation or deletion. -
Page 83: Alerts
Nuclias Connect Hub Plus User Manual AP Network Once a report has been generated, click to export it as a local CSV file. The file will be saved in your browser’s download directory and will be named as follows: Nuclias_Connect_Log Type_YYYY_MMDD_HHMMSS. Alerts This type of log abnormal or critical events for alert, e.g., firmware update failure, port linked or blocked, and device online or offline. -
Page 84: System
Nuclias Connect Hub Plus User Manual AP Network System Device Management The Device Management page allows you to view the list of all devices on a selected network for both managed and unmanaged devices. Navigate to System > Device Management >[Site] >... -
Page 85: Settings
Nuclias Connect Hub Plus User Manual AP Network Settings The Settings page allows you to configure settings such as access ports of the web management and alert events and contains these tabs: General, Connection, Rest API, and Alerts. General The General tab allows you to set the Live Packet Interval. Click the menu to select the live packet interval in minutes (range: 1-5 mins). -
Page 86: Resources
Nuclias Connect Hub Plus User Manual AP Network obtain an API key: REST API Enable or disable information requests through REST API. REST API Key Click Generate/Regenerate Key to generate an API key to be used for API data request authentication. Then copy this key in your application when initiating sessions with the Hub. -
Page 87: About
Nuclias Connect Hub Plus User Manual AP Network About The About page displays compatible access points that you can manage and monitor on the Hub. Navigate to System > About. The list can be updated by clicking Update Online. -
Page 88: Camera Surveillance
The DNH-200 is also a centralized surveillance platform that manages and monitors supported D-Link network cameras up to a maximum of 20 cameras. Live streams can be recorded and saved locally with the internal hard drive and they can be retrieved with the playback function. - Page 89 Nuclias Connect Hub Plus User Manual Camera Surveillance Last Motion Detection Time The time of the latest motion detected if motion detection is supported by the camera and is enabled in the system. Action It provides a quick link to the following functions: Camera Password, Live View, Playback - Timeline, E- Map, and Delete.
- Page 90 Nuclias Connect Hub Plus User Manual Camera Surveillance To assign channel numbers to cameras, click . A screen of available channels appears, and it allows you to drag and drop your camera to the desired slot (channel). Then click Save to apply your settings.
- Page 91 Nuclias Connect Hub Plus User Manual Camera Surveillance click respectively. The search bar at the top of the page can be used to display the cameras of your interest. To show cameras with only certain status, click the Statuses menu and select one of these options: All Statuses, Online, Offline, and Authentication Failed.
- Page 92 Nuclias Connect Hub Plus User Manual Camera Surveillance Image: This tab provides live view video and associated actions. Use the slider to adjust the image quality with the following settings: Brightness Adjust image brightness (value range: 0~100). Saturation Adjusts image color saturation. Use the slider to make colors more vivid or duller (value range: 0~100).
- Page 93 Nuclias Connect Hub Plus User Manual Camera Surveillance Select Night Mode to display image in black and white. Select Day Mode to display image in color. This technology improves image visibility when both a high brightness area and a relatively low-brightness area exist on the same screen.
- Page 94 Nuclias Connect Hub Plus User Manual Camera Surveillance Video: This tab provides video quality settings. You can also modify the streaming settings here: Mode (H.265 as the most advanced and efficient codec), Maximum Bit Rate, Image Quality (range: 1 to 100), Frame Size (the resolution offered by the camera), and Maximum Frame Rate (range: 1 to 30).
- Page 95 Nuclias Connect Hub Plus User Manual Camera Surveillance Drag to define a zone for motion detection. Different zones can be defined with different sensitivity (the maximum number of zones varies by camera model). To define a window- type detection zone (cell-type zone is also supported depending on camera model): 1.
-
Page 96: Live View
Nuclias Connect Hub Plus User Manual Camera Surveillance Live View This screen displays the live videos of all cameras connected to the DNH-200. You can select your desired channel layout by selecting the layout menu in the upper-left corner. If the grid does not accommodate all channels in one screen, select to switch among screens. - Page 97 Nuclias Connect Hub Plus User Manual Camera Surveillance Start/Stop recording of the camera’s video. If the camera Manual Recording is currently recording, it will display a red dot in the upper-right corner of the live view window. Note that only users with administrative roles can perform recording, i.e., System Admin, Root Admin and Local Admin (for authorized channels only).
-
Page 98: Playback
Nuclias Connect Hub Plus User Manual Camera Surveillance Playback The Playback tab allows you to play back video recordings stored in the HDD. You can browse and play back the recordings directly from the screen. Timeline This function retrieves video recordings based on date and time. To play a recording with the specified date and time, click... - Page 99 Nuclias Connect Hub Plus User Manual Camera Surveillance The Select Date Time Add Channel screen appears. Select the interested channel on the left. The dates having recordings can be selected on the calendar in the right-hand side. Specify the time below or click Now to fill in the current time automatically. You can also specify the time in the visualized timeline by dragging the red line across to the desired hour (0-24) and minute (in unit of 3 minutes).
-
Page 100: Event Recording
Nuclias Connect Hub Plus User Manual Camera Surveillance 11. Click to enable the sound of the video clip by adjusting the volume of the speaker through the browser’s support. Notes: The naming rule of the recorded file is CH#_YYYYMMDD_HHMMSS_to_YYYYMMDD_HHMMSS_xxx (where xxx is a unique serial number from 001 to 999 for this recording in the selected timespan). - Page 101 Nuclias Connect Hub Plus User Manual Camera Surveillance In the event list, check to select the video recording and click to export and download it to your browser’s download directory. The default video format is MP4. You can also delete the selected recordings by clicking .
-
Page 102: E-Map
Nuclias Connect Hub Plus User Manual Camera Surveillance E-Map The E-Map tab allows you to visualize the location of the camera on the map. It helps visualize the geographic data of IP cameras to allow for quick identification of the location of each IP camera, especially when an alert occurs. - Page 103 Nuclias Connect Hub Plus User Manual Camera Surveillance On the E-Map you can perform the following with the selected channel: Live View: Shows the live video of the camera. Clear Event: Reset the flashing alert of the camera. Edit: Unlock the position of the camera to change its position. To obtain detailed information of the camera, mouse over the camera and the following will be displayed: channel number, camera name, status, IP address, view angle, and last seen, which shows the information of the Camera and the last time that the camera was accessed...
-
Page 104: Log
Nuclias Connect Hub Plus User Manual Camera Surveillance The Log tab stores the activities of cameras and the log entries are grouped into the following categories: Camera Surveillance Log, Camera Log, Audit Log, Alerts, and Event Log. To navigate among log types, select a respective tab. In each log window, you can apply type-specific filters to see log entries of your interest, for example, channel or username. -
Page 105: Camera Log
Nuclias Connect Hub Plus User Manual Camera Surveillance Camera Log This type of log records camera management and operations such as motion detection zone setting and other parameter setting. For Camera Log, you can filter the entries by channel number, operation type (i.e., operations performed on the camera), and camera information such as name, IP address, MAC address, and message. -
Page 106: Alerts
Nuclias Connect Hub Plus User Manual Camera Surveillance Alerts This type of log records events activities for alert, i.e., Motion Event, Digital Input Event, and Connection Lost Event. For Alerts, you can filter the entries by channel number, event type (motion, digital input or connection lost), and camera name or message content. -
Page 107: Event Log
Nuclias Connect Hub Plus User Manual Camera Surveillance Event Log This type of log records events, i.e., Motion Event and Digital Input Event. For Event Log, you can filter the entries by channel number, even type (motion or digital input), and camera name or message content. To switch between list and graphic mode, click respectively. -
Page 108: System
Nuclias Connect Hub Plus User Manual Camera Surveillance System This tab provides management functions for the surveillance system and it contains the following configurations: Recording Schedule, Event Settings, Display Settings, and Recording Backup. Recording Schedule The Recording Schedule tab allows you to schedule automatic recording based on frequency and event type. - Page 109 Nuclias Connect Hub Plus User Manual Camera Surveillance Note: Only users with administrative roles can configure Recording Schedule, i.e., System Admin, Root Admin and Local Admin (for authorized channels only). To schedule a recording: Click a channel to set automatic recording on the left pane. Select the Recording Frequency from these options: Never, Always, or Schedule.
-
Page 110: Event Settings
Nuclias Connect Hub Plus User Manual Camera Surveillance Once a recording schedule for a channel is configured, you can replicate the settings among the channels by clicking in the upper-right hand side of the left pane. Event Settings The Event Settings tab allows you to configure automatic notifications based on event type. To configure an event notification: 1. - Page 111 Nuclias Connect Hub Plus User Manual Camera Surveillance Select the notification Frequency from these options: Never, Always, or Schedule. If Never is selected, no email notifications will be sent for this type of event. If Always is selected, also select users to receive email notifications whenever the event happens by keeping them in the Authorized Users list.
- Page 112 Nuclias Connect Hub Plus User Manual Camera Surveillance To configure alert notifications, click the Alerts tab and follow the same steps for setting E- mail Notifications above. The alert messages can be viewed in Log > Alerts. For Motion and Digital Input Detection event types, configure an additional E-Map notification method with schedules and contacts.
-
Page 113: Display Settings
Nuclias Connect Hub Plus User Manual Camera Surveillance Display Settings This tab allows you to customize the display of live videos such as the background image. To configure a customized live view setting: 1. Live View Background: Upload a picture to the upload area to add a background to all channels of the system. -
Page 114: Recording Backup
Nuclias Connect Hub Plus User Manual Camera Surveillance Note: Only users with administrative roles can configure Display Settings, i.e., System Admin, Root Admin and Local Admin. Recording Backup This tab allows you to back up recorded videos automatically or manually. You can save recording files to a USB drive or an FTP server. - Page 115 Nuclias Connect Hub Plus User Manual Camera Surveillance 5. Select Backup Type: USB or FTP. To upload video clips to an FTP site, enter the FTP Server’s IP Address or Domain Name, Port number, the FTP directory and folders (use ‘/’ to specify directories). Enter the Username and Password to connect with the FTP Server.
-
Page 116: Nuclias Connect App
Nuclias Connect Hub Plus User Manual Nuclias Connect App Nuclias Connect App With the Nuclias Connect app, users can manage sites and network remotely and easily by accessing the tool through a smart device. This section provides information on exporting the required network profiles from the Hub for managing the connected APs. - Page 117 Nuclias Connect Hub Plus User Manual Nuclias Connect App When access points are located on a public network and you are accessing the Hub remotely, you must ensure the Hub uses a public IP address or domain name. To verify the Hub’s IP address, go to AP Network >...
-
Page 118: Discover And Configure Aps Using The Nuclias Connect App
The Nuclias Connect app is a mobile tool that provides easy management of single or multiple sites and networks from your smartphone or tablet. With the Nuclias Connect app, you can quickly deploy standalone APs to the Hub, scan a network for D-Link access points or configure individual APs. - Page 119 Nuclias Connect Hub Plus User Manual Nuclias Connect App Tap Provision File to display a list of available local profiles. If no locally stored profile exists, a pop-up page will appear with further instructions on how to download a profile. Tap Download profile to specify a connection to the Hub.
- Page 120 Nuclias Connect Hub Plus User Manual Nuclias Connect App Tap Next to continue when the Quick Setup screen appears. Tap the L2 or L3 button to enable discovery of APs on the L2 or L3 network respectively. For L3 network, enter a range of IP addresses. Tap add + to create a new IP range. Tap remove - to delete a defined range.
- Page 121 Nuclias Connect Hub Plus User Manual Nuclias Connect App Tap Push Provision File to continue. The AP login pop-up window appears. Enter the username and password to access the selected AP. 10. Tap Apply to continue the login process. The Modify IP Information page appears. The entries can be modified.
- Page 122 Nuclias Connect Hub Plus User Manual Nuclias Connect App Subnet Mask Enter the subnet mask. Default Gateway Enter the IP address of the default gateway. Enter the IP address of the DNS (Domain Name Server) server. 11. Tap Done or Cancel to continue the process. The provision file will be pushed to the selected APs.
-
Page 123: Nuclias Connect
Nuclias Connect Hub Plus User Manual Nuclias Connect App Nuclias Connect Nuclias Connect is a wireless access point management tool that allows you to manage your sites and networks. Tap Nuclias Connect to connect to a Nuclias Connect Hub. If no previous Nuclias Connect Hub has been paired, it will ask you to create a new Nuclias Connect pairing. - Page 124 Nuclias Connect Hub Plus User Manual Nuclias Connect App The following page lists the information required to log in to a designated Nuclias Connect Hub. Enter the required information in each field. Specify Nuclias Connect Enter the secure URL/IP address of the Nuclias Connect URL/IP Address Hub to pair with the app.
-
Page 125: Standalone Access Point
Nuclias Connect Hub Plus User Manual Nuclias Connect App Tap on a Nuclias Connect Hub from the list. And enter the username and password to access the selected Nuclias Connect Hub. Then Tap Login. The dashboard appears. The Nuclias Connect dashboard will list the currently defined sites, networks, access points, and clients. - Page 126 Nuclias Connect Hub Plus User Manual Nuclias Connect App For L3 network, enter a range of IP addresses. Tap add + to create a new IP range. Tap remove - to delete a defined range. Tap Next to initiate the discovery process. Alternatively, tap Configure Access Point Profiles at the bottom of the page to add or delete any local profiles.
- Page 127 Nuclias Connect Hub Plus User Manual Nuclias Connect App Once a successful login is established, the AP information will be displayed. The IP information, Wireless, and Client menus can be accessed as shown below. Parameter Description Cancel Discard any changes and continue. Model Name Displays the model name of the listed AP.
- Page 128 Nuclias Connect Hub Plus User Manual Nuclias Connect App SSID-# Enable or disable the SSID. The # character indicates the index of the SSID. SSID Name Change the current name of the SSID. Security Select wireless security mode: Open System (default), WPA Personal, or WPA-Enterprise.
-
Page 129: Nuclias Protect App
Nuclias Connect Hub Plus User Manual Nuclias Protect App Nuclias Protect App With the Nuclias Protect app, users can monitor dozens of network cameras effortlessly while accessing live video feeds from your mobile devices. Discover and Configure Cameras Using the Nuclias Protect App The Nuclias Protect app is a smart and convenient tool that is designed for easy management of network cameras that are connected through the Nuclias Connect Hub Plus (may be referred to as the Hub ) . - Page 130 Nuclias Connect Hub Plus User Manual Nuclias Protect App After logging in to the Nuclias Protect app, the following screen appears. To add a new device, use the following procedure: Tap + to add a new Hub device: The automatic discovery starts to find hubs and lists available devices. Tap the desired device to be connected.
- Page 131 Nuclias Connect Hub Plus User Manual Nuclias Protect App Enter device authentication information to add the device. If the device has been successfully added, the following Setup Successful! screen will be...
- Page 132 Nuclias Connect Hub Plus User Manual Nuclias Protect App displayed. Tap Done to go to the device list.
-
Page 133: Access Camera List
Nuclias Connect Hub Plus User Manual Nuclias Protect App Access Camera List Tap the DNH-200 device icon to go to the camera list. For advanced management options, click . Then select one of the following options: Camera Management, Hub Dashboard, and Hub Settings. Camera Management Tap this option to see a list of connected cameras. - Page 134 Nuclias Connect Hub Plus User Manual Nuclias Protect App Tap the camera name to go to the respective Camera Settings page. To change its name, tap the name field. Tap Device Info to obtain detailed camera information. The following table explains the information: Name The displayed name of the network camera.
-
Page 135: Hub Dashboard
Nuclias Connect Hub Plus User Manual Nuclias Protect App to access Live View. Hub Dashboard This page displays system health information such as CPU loading and temperature. It allows you to monitor system operation and proactively prevent failures. You can update the information instantly by tapping the refresh icon in the upper-right corner. - Page 136 The model name of the HDD. Firmware Version The firmware version of the Hub. Camera Surveillance Version The version of the camera surveillance module. AP Network Version The version of the AP network module. DDPv5 Client Version The DDPv5 (D-Link Discovery Protocol) client version.
-
Page 137: Hub Settings
Nuclias Connect Hub Plus User Manual Nuclias Protect App Hub Settings This page displays the Hub information and allows you to configure it. Tap one of these fields to change or configure its value: Device Name Click on the field to modify the device name. Nuclias Connect SSO Enable or disable Single Sign-On (SSO). - Page 138 Nuclias Connect Hub Plus User Manual Nuclias Protect App format the HDD installed on the Hub. Hub Display Setting Configure the background of the live video for all channels. You can also select the camera information (i.e., Channel, Camera Name, Date, Time, Bitrate, and Frame Rate) and the color it should be displayed on the screen in OSD settings.
- Page 139 Nuclias Connect Hub Plus User Manual Nuclias Protect App Switch the display in standard or actual size. Standard/ Actual Size To control each channel, tap a channel. The following table shows the controls you can perform on each channel: Enable or disable output audio with the camera’s Sound microphone support.
- Page 140 Nuclias Connect Hub Plus User Manual Nuclias Protect App Switch between low and high video quality. Please refer Video Quality to the video profiles settings for exact video quality parameters. Go to Camera Surveillance module of the Hub, select Camera in the left pane and click a network camera to display its settings page, then select the Image tab.
-
Page 141: Troubleshooting
Hard disk drive (HDD) with at least 128GB capacity. Running continuous video recording for a long time may impact SSD’s lifetime. Please consider using an HDD for video recording instead. Please refer to DNH-200 HDD compatibility list from the D-Link web site in your region.