Table of Contents
Advertisement
Available languages
Available languages
Quick Links
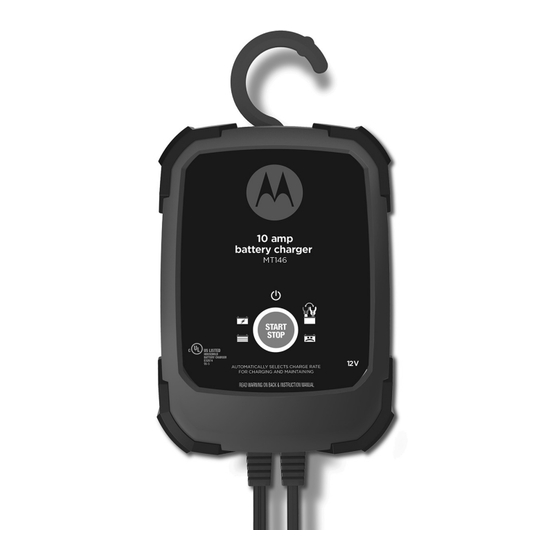
MODEL / MODELO / MODÈLE :
MT146
Automatic Battery Charger/Maintainer
Cargador de baterías automático /
Mantenedor
Chargeur / Mainteneur de batterie
automatique
OWNERS MANUAL / MANUAL DEL USUARIO
MANUEL D'UTILISATION
PLEASE SAVE THIS OWNERS MANUAL AND READ BEFORE EACH USE.
This manual will explain how to use the unit safely and effectively. Please read
and follow these instructions and precautions carefully.
POR FAVOR CONSERVE ESTE MANUAL DEL USUARIO Y LEALO ANTES DE
CADA USO. En este manual le explica cómo utilizar la unidad de manera segura
y confiable. Por favor, lea y siga las siguientes instrucciones y precauciones.
GARDER LE MANUEL D'INSTRUCTION ET LISEZ LE AVANT CHAQUE
UTILISATION. Ce manuel explique comment utiliser l'unité d'une façon securitaire
et efficace. S'il vous plaît lisez et suivez ces instructions et precautions.
0099002208-01
Advertisement
Table of Contents

Summary of Contents for Motorola MT146
- Page 1 MODEL / MODELO / MODÈLE : MT146 Automatic Battery Charger/Maintainer Cargador de baterías automático / Mantenedor Chargeur / Mainteneur de batterie automatique OWNERS MANUAL / MANUAL DEL USUARIO MANUEL D’UTILISATION PLEASE SAVE THIS OWNERS MANUAL AND READ BEFORE EACH USE.
-
Page 2: Table Of Contents
CONTENTS IMPORTANT SAFETY INSTRUCTIONS ..................5 PERSONAL SAFETY PRECAUTIONS .....................5 PREPARING TO CHARGE .......................6 CHARGER LOCATION ........................6 DC CONNECTION PRECAUTIONS ....................6 FOLLOW THESE STEPS WHEN BATTERY IS INSTALLED IN VEHICLE ........6 FOLLOW THESE STEPS WHEN BATTERY IS OUTSIDE VEHICLE ..........7 GROUNDING AND AC POWER CORD CONNECTIONS ..............7 ASSEMBLY INSTRUCTIONS ......................7 CONTROL PANEL ..........................7 OPERATING INSTRUCTIONS ......................8... - Page 3 CONTENIDOS INSTRUCCIONES IMPORTANTES DE SEGURIDAD ..............12 PRECAUCIONES DE SEGURIDAD PERSONAL ................12 PREPARACIÓN PARA LA CARGA ....................13 UBICACIÓN DEL CARGADOR .......................13 PRECAUCIONES DE CONEXIÓN EN CC ..................13 SIGA ESTOS PASOS CUANDO LA BATERÍA ESTÉ COLOCADA EN EL VEHÍCULO ....14 SIGA ESTOS PASOS CUANDO LA BATERÍA SE ENCUENTRE FUERA DEL VEHÍCULO ..14 CONEXIONES A TIERRA Y ENERGÍA DE CA ................15 INSTRUCCIONES DE MONTAJE ....................15 PANEL DE CONTROL ........................15...
- Page 4 TABLE DES MATIÈRES CONSIGNES DE SÉCURITÉ IMPORTANTES ................20 MESURES DE SÉCURITÉ PERSONNELLE .................20 PRÉPARATION POUR LE CHARGEMENT ...................21 EMPLACEMENT DU CHARGEUR ....................21 PRÉCAUTIONS SUR LA CONNEXION C.C..................21 ÉTAPES À SUIVRE QUAND LA BATTERIE EST INSTALLÉE DANS UN VÉHICULE ....21 ÉTAPES À...
-
Page 5: Important Safety Instructions
1. IMPORTANT SAFETY INSTRUCTIONS 1.1 SAVE THESE INSTRUCTIONS – a sharp blow, been dropped, or otherwise This manual contains important safety damaged in any way; take it to a qualified and operating instructions. serviceperson. 1.2 Keep out of reach of children. 1.9 Do not disassemble charger;... -
Page 6: Preparing To Charge
3. PREPARING TO CHARGE 3.1 If necessary to remove battery from battery without removable cell caps, such vehicle to charge, always remove as valve regulated lead acid batteries, grounded terminal from battery first. Make carefully follow manufacturer’s recharging sure all accessories in the vehicle are off, instructions. -
Page 7: Follow These Steps When Battery Is Outside Vehicle
7. FOLLOW THESE STEPS WHEN BATTERY IS OUTSIDE VEHICLE WARNING: A SPARK NEAR THE 7.4 Position yourself and free end of cable as BATTERY MAY CAUSE A BATTERY far away from battery as possible – then EXPLOSION. TO REDUCE THE RISK connect NEGATIVE (BLACK) charger clip OF A SPARK NEAR THE BATTERY: to free end of cable. -
Page 8: Operating Instructions
11. OPERATING INSTRUCTIONS WARNING: A SPARK NEAR A LEAD- CHARGE RATE ACID BATTERY MAY CAUSE AN The charge rate is measured in amps. EXPLOSION The charger will automatically adjust the charging current, based on battery size, IMPORTANT: Do not start the vehicle with in order to charge the battery completely, the charger connected to the AC outlet, or efficiently and safely. -
Page 9: Maintenance And Care
COMPLETION OF CHARGE battery. If there are, remove them. If there Charge completion is indicated by the are none, have the battery checked or Charged/Maintaining (green) LED. replaced. When solid, the charger has switched to MAINTAINING A BATTERY maintain mode. This unit maintains 12 volt batteries, MAINTAIN MODE keeping them at full charge. -
Page 10: Before Returning For Repairs
PROBLEM POSSIBLE CAUSE SOLUTION The battery voltage is still The battery may be defective. The red Bad Battery LED below 10V after 2 hours of Make sure there are no is lit. charging. loads on the battery. If there (or) are, remove them. -
Page 11: Limited Warranty
16. LIMITED WARRANTY SCHUMACHER ELECTRIC CORPORATION, 801 BUSINESS CENTER DRIVE, MOUNT PROSPECT, IL 60056-2179, MAKES THIS LIMITED WARRANTY TO THE ORIGINAL RETAIL PURCHASER OF THIS PRODUCT. THIS LIMITED WARRANTY IS NOT TRANSFERABLE OR ASSIGNABLE. Schumacher Electric Corporation (the “Manufacturer”) warrants this battery charger for two (2) years from the date of purchase at retail against defective material or workmanship that may occur under normal use and care. -
Page 12: Instrucciones Importantes De Seguridad
1. INSTRUCCIONES IMPORTANTES DE SEGURIDAD 1.1 GUARDE ESTAS INSTRUCCIONES – 1.8 No utilice el cargador si el mismo recibió Este manual contiene instrucciones un golpe fuerte, si se cayó o si sufrió operativas y de seguridad de importancia. daños de cualquier otra forma; hágalo revisar por una persona capacitada que 1.2 Manténgase fuera del alcance de los efectúe reparaciones. -
Page 13: Preparación Para La Carga
ácido puede producir una corriente de suministrar energía a sistemas eléctricos cortocircuito lo suficientemente elevada de baja tensión más que en una aplicación como para soldar un anillo o provocar de un motor de arranque. No utilice este efectos similares sobre el metal, causando cargador de batería para cargar baterías una quemadura de gravedad. -
Page 14: Siga Estos Pasos Cuando La Batería Esté Colocada En El Vehículo
6. SIGA ESTOS PASOS CUANDO LA BATERÍA ESTÉ COLOCADA EN EL VEHÍCULO ADVERTENCIA: UNA CHISPA batería al borne POSITIVO (POS, P, PROVOCADA CERCA DE LA BATERÍA +) sin descarga a tierra de la batería. PUEDE CAUSAR LA EXPLOSIÓN Conecte el gancho NEGATIVO DE LA BATERÍA. -
Page 15: Conexiones A Tierra Y Energía De Ca
8. CONEXIONES A TIERRA Y ENERGÍA DE CA 8.1 Este cargador de batería está destinado a 8.3 USO DE UN CABLE DE EXTENSIÓN un uso en un circuito con tensión nominal El uso de una extensión no se de 120 V. El enchufe se debe conectar recomienda. - Page 16 5. Coloque los cables de ca / cc lejos MODO DE CARGA AUTOMÁTICA de las aspas del ventilador, bandas, Cuando se realiza una carga automática, poleas y otras partes móviles. el cargador cambia del modo de mantenimiento automáticamente después 6. Conectar la batería según las que la batería se cargue.
-
Page 17: Mantenimiento Y Cuidado
Esto es ocacionalmente causado por NOTA: La tecnología de modo de una pérdida de energía en la batería o mantenimiento le permite cargar de la batería está dañada. Asegúrese que forma segura y mantener una batería no escape de carga en la batería y si la en buen estado durante largos períodos hay evítela, en caso contrario, verifique o de tiempo. -
Page 18: Antes De Devolver A Reparaciones
PROBLEMA POSIBLE CAUSA SOLUCIÓN El voltaje de la batería todavía La batería puede estar El LED rojo Batería está debajo de 10V después de defectuosa. Asegúrese de que Defectuosa se ilumina. 2 horas de carga. no hay cargas en la batería. Si hay eliminarlos. -
Page 19: Garantía Limitada
16. GARANTÍA LIMITADA SCHUMACHER ELECTRIC CORPORATION, 801 BUSINESS CENTER DRIVE, MOUNT PROSPECT, IL 60056-2179, REALIZA LA PRESENTE GARANTÍA LIMITADA AL COMPRADOR MINORISTA ORIGINAL DE ESTE PRODUCTO. LA PRESENTE GARANTÍA LIMITADA NO PUEDE TRANSFERIRSE NI CEDERSE. Schumacher Electric Corporation (el “Fabricante”) otorga garantía este cargador de baterías por dos (2) años contados a partir de la fecha de compra por menor por la existencia de cualquier material o de mano de obra defectuosos que pudieran surgir por su uso y cuidado normal. -
Page 20: Consignes De Sécurité Importantes
1. CONSIGNES DE SÉCURITÉ IMPORTANTES 1.1 CONSERVER CES INSTRUCTIONS – 1.8 Ne pas faire fonctionner le chargeur s’il a Ce manuel contient des instructions reçu un choc violent, est tombé par terre importantes concernant la sécurité et le ou a été endommagé d’une autre façon; fonctionnement. -
Page 21: Préparation Pour Le Chargement
pour alimenter un système électrique électroménager. Ces piles peuvent à basse tension autre que dans une exploser et causer des blessures et des application d’un démarreur. Ne pas utiliser dommages matériels. ce chargeur de batterie pour recharger 2.9 NE JAMAIS charger une batterie gelée. des piles sèches qui sont utilisées en 3. -
Page 22: Étapes À Suivre Quand La Batterie Est Installée Hors Du Véhicule
Raccorder la pince NÉGATIVE (NOIRE) pince au carburateur, aux canalisations au châssis du véhicule ou au moteur, d’essence ni aux pièces de la carrosserie loin de la batterie. Ne pas raccorder la en tôle. Raccorder à une pièce du cadre pince au carburateur, aux canalisations ou du moteur en tôle de forte. -
Page 23: Panneau De Contrôle
10. PANNEAU DE CONTRÔLE BOUTON START/STOP LED PINCES INVERSÉES Appuyez pour enclencher aussitôt le (rouge) clignotant: Les connexions chargement de la batterie auparavant bien sont inversées. branchée. Si le bouton n’est pas enfoncé, LED CHARGE (jaune / orange) le chargement débutera dans 10 minutes. allumée : Le chargeur charge la batterie. -
Page 24: Maintenance Et Entretien
MODE DE CHARGE AUTOMATIQUE FIN DE LA CHARGE Quand une charge automatique est Achèvement de charge est indiqué par effectuée, le chargeur passe en mode l’opération de Chargé / Maintien (vert) de maintien automatiquement lorsque la LED. Quand il est allumé, le chargeur est batterie est chargée. -
Page 25: Tableau De Dépannage
13. TABLEAU DE DÉPANNAGE PROBLÈME CAUSE POSSIBLE SOLUTION La prise de courant CA ne Vérifiez pour un fusible ouvert Le voyant vert LED fonctionne pas. ou un disjoncteur. d’alimentation ne s’allume pas lorsque le chargeur Mauvaise connexion électrique. Vérifiez le cordon est branché... -
Page 26: Avant De Retourner Pour Les Réparations
14. AVANT DE RETOURNER POUR LES RÉPARATIONS Si ces solutions ne permettent pas d’éliminer le problème, ou pour plus d’informations sur le dépannage, contacter le service technique au : Email : services@schumacherelectric.com www.MotorolaHome.com ou composez le 1-833-334-9925 15. SPÉCIFICATIONS Tension d’entrée................120V CA @ 60Hz, 2,5A Tension de sortie ......................12V Courant de sortie ..................10A CC @ 12V CC 16. -
Page 27: Warranty Card
WARRANTY CARD / TARJETA DE GARANTÍA SAVE ON POSTAGE! ACTIVATE YOUR WARRANTY ONLINE – THE QUICK AND EASY WAY! Go to www.batterychargers.com to register your product online. 2 YEAR LIMITED WARRANTY PROGRAM REGISTRATION MODEL: _____________________ DESCRIPTION: ________________________ This is the only express limited warranty, and the manufacturer neither assumes nor authorizes anyone to assume or make any other obligation. -
Page 28: Carte De Garantie
CARTE DE GARANTIE PAS BESOIN DE VOIE POSTAL ! ACTIVEZ VOTRE GARANTIE SUR INTERNET – LA VOIE PLUS RAPIDE ET FACILE! Aller sur www.batterychargers.com pour enregistrer votre produit en ligne. (Pas d’accès internet? Envoyer la carte de garantie par poste.) INSCRIPTION AU PROGRAMME DE GARANTIE LIMITÉE DE DEUX ANS...