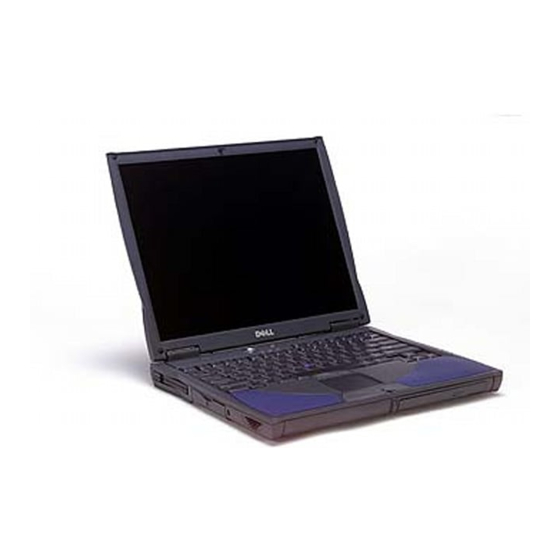
Dell Inspiron 4000 Solution Manual
Dell inspiron 4000: user guide
Hide thumbs
Also See for Inspiron 4000:
- Start here (2 pages) ,
- User manual (158 pages) ,
- Service manual (63 pages)
Table of Contents
Advertisement
Quick Links
Advertisement
Table of Contents

Related Manuals for Dell Inspiron 4000


Summary of Contents for Dell Inspiron 4000
- Page 1 ™ ™ Dell Inspiron 4000 System SOLUTIONS GUIDE www.dell.com support.dell.com...
- Page 2 Reproduction in any manner whatsoever without the written permission of Dell Computer Corporation is strictly forbidden. Trademarks used in this text: Dell , the DELL E COM logo, Dellnet , the Dellnet logo, Dell TravelLite , Inspiron , and DellWare are trademarks of Dell Computer Corporation; Intel and Pentium are registered trademarks and Celeron is a trademark of Intel Corporation;...
-
Page 3: Table Of Contents
Contents Safety Instructions When Using Your Computer When Removing or Installing Memory Modules Protecting Against Electrostatic Discharge 1 Setting Up Setting Up Dellnet Accessing the Internet Accessing Your E-Mail Viewing Your Account Information Sending and Receiving E-Mail Resetting E-Mail Address Settings Connecting a Printer Installing the Printer Driver Parallel Printer... - Page 4 2 Solving Problems Finding Solutions Accessing Help Files Power Problems Start-Up Error Messages Video and Display Problems If the display is blank If the display is difficult to read Sound and Speaker Problems Integrated Speakers External Speakers Printer Problems If you cannot print to a parallel port printer If you cannot print to a USB printer Modem Problems Scanner Problems...
- Page 5 Windows Error Messages General Program Problems A program crashes A program stops responding A solid blue screen appears Internet Connection Problems If you have a problem with your Dellnet account E-Mail Problems ......4 2 If Your Computer Gets Wet If You Drop or Damage Your Computer Resolving Other Technical Problems...
- Page 6 Monitor Stand Adding Memory Replacing a Hard Drive Returning a Hard Drive to Dell 4 Appendix Specifications ......
-
Page 7: Safety Instructions
Safety Instructions Use the following safety guidelines to help protect yourself and your computer. For comfort and efficiency, observe the ergonomic guidelines in "Sitting Comfortably at Your Computer" in the Tell Me How help file. When Using Your Computer CAUTION: Do not operate your portable computer for an extended period of time with the base resting directly on your body. - Page 8 • • • • • • • • • • Safe t y Ins tr u ct ions Before you connect the computer to a power source, ensure that the voltage rating of the AC adapter matches that of the available power source: –...
- Page 9 • When traveling with the hard drive removed from the computer, wrap the drive in a nonconducting material, such as cloth or paper. If you have the drive checked by hand, be ready to install the drive in the computer. You can put the hard drive through an X-ray security machine, but never put the drive through a metal detector.
-
Page 10: When Removing Or Installing Memory Modules
If your computer gets wet, see page 42 for instructions. If you drop or damage the computer, see page 43. If, after following these procedures, you confirm that your computer is not operating properly, contact Dell (see page 75). NOTICE: The only time you should ever access the inside of your computer is when you are installing memory modules. -
Page 11: Protecting Against Electrostatic Discharge
In addition, take note of these safety guidelines when appropriate: • When you disconnect a cable, pull on its connector, not on the cable itself. As you pull connectors apart, keep them evenly aligned to avoid bending any pins. Also, before you connect a cable, make sure that both connectors are correctly oriented and aligned. - Page 12 Safe t y Ins tr u ct ions...
-
Page 13: Setting Up
S E C T I O N 1 S e t t i n g U p Setting Up Dellnet™ Connecting a Printer Turning Off the Computer Using the Modular Bay Setting Up the APR to Connect to a Network... -
Page 14: Setting Up Dellnet
Setting Up Dellnet HINT: Dellnet is not available in certain regions. To set up Dellnet Internet Access Service, double-click the Dellnet Signup icon on the Microsoft appear on the screen. Accessing the Internet To access the Internet after completing the Dellnet registration process, double-click the Internet Explorer icon on your Windows desktop. -
Page 15: Sending And Receiving E-Mail
Sending and Receiving E-Mail • Double-click the Outlook Express icon to initiate a connection to the Internet through Dellnet. • Always check the address of each recipient when sending e-mail. Otherwise, your e-mail is returned to you. • Be sure that the person who is sending e-mail to you is typing your e-mail address correctly. -
Page 16: Connecting A Printer
If no information is provided, see the following sections. Installing the Printer Driver Dell installs drivers for some new printers. Click the Start button, point to Settings, and then click Printers. If your printer is listed in the Printers window, the printer is ready to use. - Page 17 Attach the parallel printer cable to the parallel port connector on the computer and tighten the two screws. Attach the cable to the parallel connector on the printer and snap the two clips into the two notches. screws (2) parallel port connector on computer parallel printer cable...
-
Page 18: Usb Printer
USB Printer HINT: You can connect USB devices while the computer is turned on. Turning Off the Computer Windows Millennium Edition (Me) and Windows 2000 S e tt i n g U p Install the printer driver if necessary (see page 16). Attach the USB printer cable to the USB port connector on the computer and the printer. -
Page 19: Windows 98
The computer automatically turns off after the shutdown process finishes. Using the Modular Bay Dell ships your computer with a CD drive (or an optional DVD drive) installed in the modular bay. The modular bay also supports the following devices: •... - Page 20 S e tt i n g U p Slide and hold the latch release, and pull the device out of the modular bay. NOTICE: To prevent damage, place devices in a travel case when they are not inserted in the computer. Store devices in a dry, safe place, and avoid placing heavy objects on top of them.
-
Page 21: Swapping Devices While Windows Is Running
Swapping Devices While Windows Is Running NOTICE: To prevent irreparable damage to the docking connector, do not replace devices while the computer is connected to an APR. In Microsoft Windows 98 or Windows Me Right-click the Softex BayManager icon on the Microsoft Windows taskbar. -
Page 22: Setting Up The Apr To Connect To A Network
Setting Up the APR to Connect to a Network HINT: A network adapter is also referred to as a network interface If you purchased the APR with an integrated network adapter, you must controller (NIC). first configure the computer to use the APR with a network. Setting Up the APR for Windows Me and Windows 98 S e tt i n g U p NOTICE:... -
Page 23: Setting Up The Apr For Windows 2000
Setting Up the APR for Windows 2000 NOTICE: Do not install the drivers from the CD that is shipped with the APR. The network adapter will not work if they are installed. If the computer is on, shut down the operating system and turn off the computer (see page 18). - Page 24 S e tt i n g U p...
-
Page 25: Solving Problems
S E C T I O N 2 S o l v i n g P r o b l e m s Finding Solutions Accessing Help Files Power Problems Start-Up Error Messages Video and Display Problems Sound and Speaker Problems Printer Problems Modem Problems Scanner Problems... -
Page 26: Finding Solutions
So lv ing Pr o ble m s See page 29. Press the power button to resume from standby mode. See the Tell Me How help file (see page 28) for more information on standby mode. Get technical assistance from Dell. See page 75. See page 30. - Page 27 See page 30. See page 32. See page 33. See page 34. See page 35. See page 35. See page 36. See page 36. See page 36. See page 39. See page 39. See page 40. See page 41. See page 42. See page 44.
-
Page 28: Accessing Help Files
O A C C E S S T H E H E L P F I L E Click the Start button, point to Dell Documents, and then click Tell Me How. 2000 H O A C C E S S... -
Page 29: Power Problems
Power Problems — When the power light is blinking, the computer H E C K T H E P O W E R L I G H T has power. If the power light is blinking, the computer is in standby mode—press the power button to resume from standby mode. -
Page 30: Start-Up Error Messages
O W E R R O P E R T I E S Windows Help. To access help files, see page 28. — Call Dell for technical assistance (see Ensure that the electrical outlet is working — Search for the keyword standby in... -
Page 31: If The Display Is Difficult To Read
If the display is difficult to read — See the Tell Me How help file (see page 28) for D J U S T T H E B R I G H T N E S S instructions on adjusting the brightness. O V E T H E S U B W O O F E R A W A Y F R O M T H E C O M P U T E R O R M O N I T O R your external speaker system includes a subwoofer, ensure that the subwoofer is at least 60 cm (2 ft) away from the computer or external monitor. -
Page 32: Sound And Speaker Problems
Sound and Speaker Problems Integrated Speakers External Speakers HINT: The volume control in some MP3 players overrides the Windows volume setting. If you have been listening to MP3 songs, make sure that you did not turn the player volume down or off. So lv ing Pr o ble m s D J U S T T H E I N D O W S V O L U M E C O N T R O L... -
Page 33: Printer Problems
— U N T H E S P E A K E R S E L F T E S T button on the subwoofer. See the speaker documentation for self-test instructions. O V E T H E S U B W O O F E R A W A Y F R O M T H E C O M P U T E R O R M O N I T O R your external speaker system includes a subwoofer, ensure that the subwoofer is at least 60 cm (2 ft) away from the computer or external monitor. -
Page 34: If You Cannot Print To A Usb Printer
If you cannot print to a USB printer Modem Problems So lv ing Pr o ble m s E R I F Y T H E P R I N T E R C A B L E C O N N E C T I O N S cable is connected as described on page 18. -
Page 35: Scanner Problems
— Verify that the telephone line is connected to the H E C K T H E C O N N E C T I O N modem. — H E C K T H E T E L E P H O N E L I N E are using a line that is 3 m (10 ft) or more in length, try a shorter one. -
Page 36: External Keyboard Problems
External Keyboard Problems Unexpected Characters Drive Problems If you cannot save a file to a floppy disk HINT: For information on saving files to a floppy disk, see the Tell Me How help file (see page 28). So lv ing Pr o ble m s I S C O N N E C T T H E K E Y B O A R D C A B L E page 18). -
Page 37: If You Cannot Play A Music Cd Or Install A Program From A
back of floppy disk write-protected not write- protected If you cannot play a music CD or install a program from a CD N S U R E T H A T I N D O W S R E C O G N I Z E S T H E D R I V E My Computer icon. -
Page 38: If You Cannot Play A Dvd Movie
If you cannot play a DVD movie HINT: Because of different worldwide file types, not all DVD titles work in all DVD drives. If the CD-RW drive stops writing HINT: If you must disable standby mode to write to a CD-RW drive, remember to enable standby mode again when you finish writing the CD. -
Page 39: Network Problems
Network Problems H E C K T H E N E T W O R K C A B L E C O N N E C T O R cable connector is firmly connected to the connector on the computer and the network wall jack. -
Page 40: General Program Problems
General Program Problems A program crashes A program stops responding So lv ing Pr o ble m s O T E N O U G H M E M O R Y O R R E S O U R C E S —... -
Page 41: A Solid Blue Screen Appears
A solid blue screen appears — If the computer does not respond to a keystroke U R N T H E C O M P U T E R O F F or a proper shutdown (see page 18), press the power button until the computer turns off. -
Page 42: E-Mail Problems
Perform this procedure only after you are certain that it is safe to do so. If the computer is connected to an electrical outlet, Dell recommends that you turn off AC power at the circuit breaker before attempting to remove the power cables from the electrical outlet. -
Page 43: If You Drop Or Damage Your Computer
Turn on the computer and verify that it is working properly. If the computer does not turn on, or if you cannot identify the damaged components, call Dell for technical assistance (see page 75). If You Drop or Damage Your Computer Save and close any open files, exit any open application programs, and shut down the computer (see page 18). -
Page 44: Resolving Other Technical Problems
Go to http://support.dell.com and then click E-Mail Dell in M A I L E L L the Communicate list. Send an e-mail message to Dell about your problem; you can expect to receive an e-mail message from Dell within hours. —... -
Page 45: Reinstalling Windows
Dell and possibly affect programs installed on your hard drive. Therefore, Dell does not recommend that you reinstall your operating system unless instructed to do so by a Dell technical support representative. NOTICE:... -
Page 46: Reinstalling Windows 2000
Reinstalling Windows 2000 So lv ing Pr o ble m s In the User Information window, type your name and, if applicable, company name, and then click Next. The Name field must be completed; the Company Name field is optional. The License Agreement window appears. - Page 47 Read the information in the License Agreement window, and then press <F8> to continue. When the Windows 2000 Professional Setup window appears, press the arrow keys to select the Windows 2000 partition option that you want. To continue, press the key specified in the partition option that you chose.
-
Page 48: Recreating The Hibernate File (Windows 98 Only)
If the computer is connected (docked) to an advanced port replicator (APR), undock it (see page 59). Turn on the computer. Press <F2> as soon as you see the Dell logo. System setup screen Page 1 appears after a few seconds. Press <Alt><p> to view Page 2. -
Page 49: Delete The Old Hibernate File
Delete the Old Hibernate File Boot your computer from the Drivers and Utilities CD as described on page 48. At the prompt, type R:\DIAGS At the prompt, type cd\win98\suspend Type and press <Enter>. rms2d Create the hibernate file. Create the Hibernate File Boot your computer from the Drivers and Utilities CD as described on page 48. - Page 50 So lv ing Pr o ble m s...
-
Page 51: Adding Parts
S E C T I O N 3 A d d i n g Pa r t s Replacing the Palm Rests Replacing the Display Cover Using the Advanced Port Replicator Adding Memory Replacing a Hard Drive... -
Page 52: Replacing The Palm Rests
Replacing the Palm Rests Ad d i n g Par ts Save and close any open files, exit any open programs, and shut down the computer (see page 18). If the computer is connected (docked) to an advanced port replicator (APR), undock it (see page 59). - Page 53 Remove the palm rests. To replace the palm rests, insert the tabs on the inside edge of the palm rest into the slots on the computer. Then press along the outside edges of the palm rest until it snaps into place. Repeat the process on each side.
-
Page 54: Replacing The Display Cover
Gently press the cover along the straight edge until it snaps into place. Gently press the Dell logo on the display cover to engage the final snap tab. NOTICE: Do not attempt to lift the computer while it is connected to the APR. -
Page 55: Connecting External Devices To The Apr
Connecting External Devices to the APR See the following illustrations for connector locations. Connect the external devices to an electrical outlet, if applicable. The I/O connectors on the back and side of the APR duplicate the primary connectors on the back and side of your computer. mouse connectors (2) connector... - Page 56 Connector Icon (continued) Connector Description Connect a parallel device, such as a printer. Connect an external monitor. Connect the AC adapter. The audio line-out connector is on the side of the APR. audio line-out connector Ad d i n g Par ts...
-
Page 57: Apr Controls And Indicators
APR. NOTICE: Always use the Dell AC adapter that came with the APR. If you use any other commercially available AC adapter—or the AC adapter from other Dell computers—you may damage the APR or the computer. - Page 58 Ad d i n g Par ts Connect the AC adapter to the connector on the APR, and connect the AC power cable to an electrical outlet. Horizontally center the computer on the APR base, with the back of the computer facing the APR docking connector. Slide the computer toward the connector until you feel the grooves on the bottom of the computer engage with the alignment rails.
-
Page 59: Undocking The Computer
Undocking the Computer NOTICE: If you do not have a charged battery installed in the computer when you undock the computer, you may lose unsaved data. NOTICE: If you do not use correct undocking procedures, you may lose data and the computer may not restart. Save and close all open files and exit all open programs. -
Page 60: Monitor Stand
Monitor Stand HINT: Be sure that the back legs on the monitor stand engage the slots on either side of the APR base. Ad d i n g Par ts NOTICE: The stand supports monitors that weigh up to 45.3 kg (100 lb). Heavier monitors may damage the stand, computer, and APR. -
Page 61: Adding Memory
You can increase your computer memory by installing memory modules on the system board. See page 68 for information on the type of memory supported by your computer. Your computer has two memory module sockets. Dell memory modules designed for your computer can be installed in either socket. CAUTION: Before working inside your computer, read the “Safety... - Page 62 HINT: If the memory module is not installed properly, the computer will not boot. No error message indicates this failure. Ad d i n g Par ts NOTICE: To prevent damage to the computer, do not use tools to spread the inner metal tabs of the socket when you are installing or removing a memory module.
-
Page 63: Replacing A Hard Drive
Do not remove the hard drive while the computer is in standby mode or hibernate mode, or if the power light is lit. screws (2) HINT: Dell does not guarantee compatibility or provide support for hard drives from sources other than Dell. - Page 64 HINT: You need the Operating System CD to install the Windows operating system. You also need the Drivers and Utilities CD to install the device drivers and utilities on the new hard drive. Ad d i n g Par ts Save and close any open files, exit any open programs, and shut down the computer (see page 18).
-
Page 65: Returning A Hard Drive To Dell
Install the Dell-provided operating system (see page 45). Install the Dell-provided drivers and utilities (see page 44). Returning a Hard Drive to Dell Return your old hard drive to Dell in its original foam packaging. Otherwise, the hard drive may be damaged in transit. hard drive... - Page 66 Ad d i n g Par ts...
-
Page 67: Appendix
S E C T I O N 4 A p p e n d i x Specifications Standard Settings Contacting Dell Regulatory Information Warranty and Return Policy Information Macrovision Product Notice... -
Page 68: Specifications
Specifications Microprocessor Microprocessor types Internal cache External bus frequency Math coprocessor System Information System chip set Data bus width DRAM bus width Microprocessor address bus width PC Card CardBus controller PC Card connectors Cards supported PC Card connector size Data width (maximum) Memory Architecture Memory module socket... - Page 69 Memory (continued) Maximum memory Memory access time: clock speed Ports and Connectors Serial (DTE) Parallel Video Audio S-video/TV-out PS/2 keyboard/mouse Infrared Docking Video Video type Data bus Video controller Video memory LCD interface TV support 512 MB 100 MHz 9-pin connector; 16550-compatible, 16-byte buffer connector 25-hole connector;...
- Page 70 Audio Audio type Audio controller Stereo conversion FM music synthesizer Interfaces: Speakers Internal speaker amplifier Volume controls Display Type Dimensions: Response time (typical) Operating angle Viewing angle: Dot pitch Appendix Sound Blaster (software emulation capable) ESS Technology Maestro-3i 16-bit (analog-to-digital and digital-to- analog) 20 voice, 72 operator Internal...
- Page 71 Display (continued) Luminance Power consumption: Panel (typical) Backlight Controls Keyboard Number of keys Key travel Key spacing Layout Touch Pad Interface X/Y position resolution (graphics table mode) Size: Thickness Width Height Weight Power: Supply voltage Supply current 120 nits 1.0 W 3.4 W brightness can be controlled through key combinations...
- Page 72 Track Stick Interface X/Y position resolution (graphics table mode) Size Power: Battery Type Dimensions: Voltage Capacity Charge time (approximate): Life span (approximate) Temperature range: Appendix PS/2 compatible 240 counts/sec @ 100 gf protrudes 0.5 mm higher that surrounding keycaps Supply voltage 5 V 0.5 VDC Supply current 25 mA (maximum operating for track stick...
- Page 73 AC Adapter Input voltage Input current (maximum) Input frequency Output current Output power Rated output voltage Dimensions: Height Width Depth Weight (with cables) Temperature range: Operating Storage Environmental (Computer) Temperature range: Operating Storage Relative humidity (maximum): Operating Storage Maximum vibration: Operating Storage 90 to 264 VAC...
-
Page 74: Standard Settings
Environmental (Computer) (continued) Maximum shock: Altitude: Standard Settings The system setup program contains the standard settings for your computer. System Setup Pages HINT: To see information about a specific item, The system setup pages display the current setup information and settings highlight the item and for your computer. -
Page 75: Contacting Dell
(see page 18) and try again. Contacting Dell When you need to contact Dell, use the telephone numbers, codes, and electronic addresses provided in the following table. If you need assistance in determining which codes to use, contact a local or an international operator. - Page 76 Website and E-mail Address Home/Small Business Sales Home/Small Business Fax Home/Small Business Customer Care Preferred Accounts/Corporate Customer Care Home/Small Business Technical Support Preferred Accounts/Corporate Technical Support Switchboard Website: http://support.euro.dell.com E-mail: tech_support_germany@dell.com Technical Support Customer Care Home/Small Business Sales Corporate Sales Switchboard Website: http://support.euro.dell.com E-mail: tech_be@dell.com...
- Page 77 Technical Support International Access Code: 00 Customer Care Country Code: 420 City Code: 2 TechFax Switchboard Website: http://support.euro.dell.com E-mail: czech_dell@dell.com Department Name or Service Area, Website and E-mail Address Area Codes, Local Numbers, and Toll Free Numbers toll free: 1-800-433-9014...
- Page 78 Website and E-mail Address Technical Support Relational Customer Care Home/Small Business Customer Care Switchboard Fax Technical Support (Upplands Vasby, Sweden) Fax Switchboard Website: http://support.euro.dell.com E-mail: den_support@dell.com Technical Support Technical Support Fax Relational Customer Care Home/Small Business Customer Care Switchboard Website: http://support.euro.dell.com E-mail: fin_support@dell.com...
- Page 79 Home and Small Business International Access Code: 00 Technical Support Country Code: 33 Customer Care City Code: (1) (4) Switchboard Switchboard (Alternative) Sales Website: http://support.euro.dell.com E-mail: web_fr_tech@dell.com Corporate Technical Support Customer Care Switchboard Sales Website: http://support.euro.dell.com E-mail: web_fr_tech@dell.com Germany (Langen)
- Page 80 Technical Support Customer Service (Penang, Malaysia) Transaction Sales Corporate Sales Technical Support Customer Care Sales SalesFax TechFax Switchboard Website: http://support.euro.dell.com E-mail: dell_direct_support@dell.com Home and Small Business Technical Support Customer Care Switchboard Website: http://support.euro.dell.com E-mail: web_it_tech@dell.com Corporate Technical Support Customer Care Switchboard Website: http://support.euro.dell.com...
- Page 81 Customer Care City Code: 44 Home and Small Business Group Sales Preferred Accounts Division Sales Large Corporate Accounts Faxbox Service Switchboard Website: http://support.jp.dell.com Korea (Seoul) Technical Support International Access Code: 001 Sales Country Code: 82 Customer Service (Seoul, Korea) City Code: 2...
- Page 82 Website and E-mail Address Technical Support (Brussels, Belgium) Home/Small Business Sales (Brussels, Belgium) Corporate Sales (Brussels, Belgium) Customer Care (Brussels, Belgium) Fax (Brussels, Belgium) Switchboard (Brussels, Belgium) Website: http://support.euro.dell.com E-mail: tech_be@dell.com Technical Support Customer Service (Penang, Malaysia) Transaction Sales Technical Support Customer Service...
- Page 83 Country Code: 31 Home/Small Business Sales City Code: 20 Home/Small Business Sales Fax Corporate Sales Corporate Sales Fax Switchboard Website: http://support.euro.dell.com E-mail: tech_nl@dell.com New Zealand Home and Small Business International Access Code: 00 Government and Business Country Code: 64 Sales...
- Page 84 Website and E-mail Address Technical Support Customer Service (Penang, Malaysia) Transaction Sales Corporate Sales Technical Support Customer Care Sales Switchboard Website: http://support.euro.dell.com E-mail: dell_za_support@dell.com Customer Technical Support, Customer Service, and Sales (Penang, Malaysia) Home and Small Business Technical Support Customer Care Sales Switchboard Website: http://support.euro.dell.com...
- Page 85 International Access Code: 009 Relational Customer Care Country Code: 46 Home/Small Business Customer Care City Code: 8 Fax Technical Support Sales Website: http://support.euro.dell.com E-mail: swe_support@dell.com Switzerland (Geneva) Technical Support International Access Code: 00 Customer Care Country Code: 41 City Code: 22 Switchboard Website: http://support.euro.dell.com...
- Page 86 Preferred Accounts (500-5000 employees) Customer Care Central Government Customer Care Local Government Customer Care Home/Small Business Sales Corporate/Public Sector Sales AutoFax Website: http://support.euro.dell.com E-mail: dell_direct_support@dell.com Area Codes, Local Numbers, and Toll Free Numbers 0870 908 0800 01344 723186 01344 723185...
- Page 87 Automated Order-Status System International Access Code: 011 AutoTech (for portable and desktop computers) Country Code: 1 Dell Home and Small Business Group (for portable and desktop computers): Customer Technical Support (Return Material Authorization Numbers) Customer Technical Support (Home sales purchased via http://www.dell.com)
-
Page 88: Returning Items For Warranty Repair Or Credit
Your Dell computer is designed to comply with applicable regulations regarding EMI. Changes or modifications not expressly approved by Dell could void the user’s authority to operate the equipment. Additional regulatory information regarding your computer can be found in the Tell Me How help file. -
Page 89: Nom Information (Mexico Only)
(NOM): Exporter: Dell Computer Corporation One Dell Way Round Rock, TX 78682 Importer: Dell Computer de México, S.A. de C.V. Paseo de la Reforma 2620 - 11° Piso Col. Lomas Altas 11950 México, D.F Ship to: Dell Computer de México, S.A. -
Page 90: Información Para Nom (Únicamente Para México)
For information about the Dell warranty for your computer, see the Tell Me How help file. To open the file, click the Start button on the Windows desktop, point to Dell Documents, and then click Tell Me How. -
Page 91: Macrovision Product Notice
Macrovision Product Notice The following product notice applies to the Macrovision Corporation product that is included with the DVD-ROM drive: This product incorporates copyright protection technology that is protected by method claims of certain U.S. patents and other intellectual property rights owned by Macrovision Corporation and other rights owners. - Page 92 Appendix...
-
Page 93: Index
26 floppy drive fixing problems, 36 hard drive fixing problems, 38 preventing damage, 64 preventing data loss, 63 replacing, 63 returning to Dell, 65 troubleshooting, 38 help file accessing, 28 hibernate file create, 49 delete, 49 Internet connecting to, 14... - Page 94 memory adding, 61 messages start-up, 30 Windows, 39 modem fixing problems, 34 modular bay devices, 19 swapping devices (computer off), 19 swapping devices (while Windows is running), 21 network fixing problems, 39 setting up the APR, 22 password changing for Dellnet, 14 port replicator connecting to a network, 22 docking the computer, 54...
- Page 95 troubleshooting (continued) touch pad problems, 35 unexpected characters, 36 USB printer problems, 34 wet computer, 42 Windows error messages, 39 turning off the computer, 18 video fixing problems, 30 warranty, 90 wet computer, 42 Windows 2000 error messages, 39 Help, 28 reinstalling, 46 shutdown, 18 Windows 98...
- Page 96 In d e x...