Table of Contents
Advertisement
Advertisement
Table of Contents
Troubleshooting

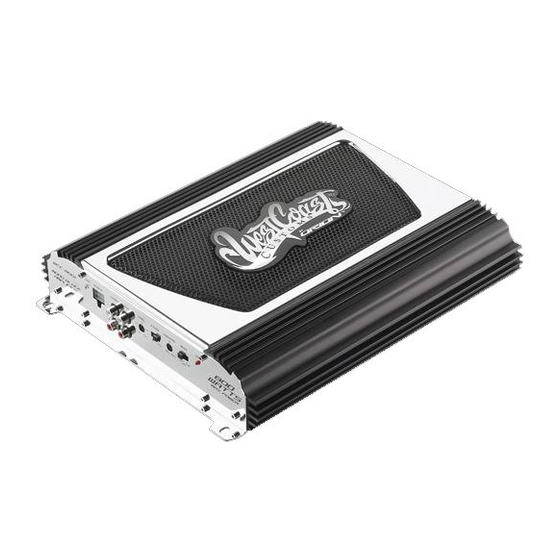
Related Manuals for Orion ORION WCC 5001


Summary of Contents for Orion ORION WCC 5001
- Page 1 a a m m p p l l i i f f i i e e r r s s a a m m p p l l i i f f i i e e r r s s...
-
Page 2: Table Of Contents
CONTENTS Introduction ..............2 What’s in the Box . -
Page 3: Introduction
INTRODUCTION Thank you for your purchase of a West Coast Customs by Orion power amplifier. Each WCC amplifier is designed to be the leader in its class offering the most power, advanced fea- tures, and extreme ease of use. In high-end sound systems or high SPL systems, WCC ampli- fiers will give you years of trouble-free performance. -
Page 4: Limited Two-Year Consumer Warranty
LIMITED TWO-YEAR CONSUMER WARRANTY The warranty is printed on the rear cover of this manual. This warranty does not cover labor costs for the removal and reinstallation of the unit. It is important for you to record and retain the following data. Record Your Serial Number and Date Model: __________________________________________________... -
Page 5: End Panel Layouts
END PANEL LAYOUTS 6002 HI-INPUT BRIDGED (R-) (R+) (L-) PWR (LED blue) - when illuminated indicates that the amplifier is on. HI Input (high level input) - Accepts 1v to 10v input from the headunit’s speaker output. The amplifier will automatically wake-up when the input is greater than RCA Inputs - accepts RCA input from a source unit, preamplifier, or equalizer. - Page 6 6004 INPUT LEVEL 0.25V BRIDGED (R-) (R+) (L-) FRONT REAR (R-) (R+) (L-) PWR (LED blue) - when illuminated indicates that the amplifier is on. RCA Inputs (front) - accepts RCA input from a source unit, preamplifier, or equal- izer. Level Control (front) - continuously adjusts from 250mV to 5V for full power out- put.
- Page 7 Bass (front) - sets the bass boost of the high-pass crossover to 0, or 8dB of boost. 10. Bass (rear) - sets the bass boost of the high-pass crossover to 0, or 8dB of boost. 11. Crossover Switch (rear) - activates low pass crossover, full (all pass), or high pass crossover.
- Page 8 5001–8001 HI-INPUT ( - ) ( - ) ( + ) PWR (LED blue) - when illuminated indicates that the amplifier is on. HI Input (high level input) - Accepts 1v to 10v input from the headunit’s speaker output. The amplifier will automatically wake-up when the input is greater than RCA Output - RCA output to another amplifier.
-
Page 9: Cea Specifications
CEA SPECIFICATIONS WCC-6002 Power Output: 100 Watts RMS x 2 at 4 ohms and < 1% THD+N Signal to Noise Ratio: -70 dBA (reference 1 Watt into 4 ohms) Additional Power: 150 Watts RMS x 2 at 2 ohm and < 1% THD+N WCC-6004 Power Output: 60 Watts RMS x 4 at 4 ohms and <... -
Page 10: Specifications
SPECIFICATIONS Amplifier Section Power Output 4W (Watts) 1 Power Output 2W (Watts) 2 Power Output 4W Bridged (Watts) Externally Bridgeable Distortion at Rated Power Frequency Response Linear Bandwidth Damping Factor Input Sensitivity Input Impedance Fuse Type Dimensions Weight Crossover Section Low Pass Crossover Low Pass Frequency Range... - Page 11 Amplifier Section Power Output 4W (Watts) 1 Power Output 2W (Watts) 2 Distortion at Rated Power Frequency Response Linear Bandwidth Damping Factor Input Sensitivity Input Impedance Fuse Type Dimensions Weight Crossover Section Low Pass Crossover Low Pass Frequency Range Bass Boost 1.
-
Page 12: Amplifier Settings
AMPLIFIER SETTINGS Input Level These amplifiers have level adjustments to allow for easy integration with any source unit. The input sensitivity can be adjusted from approximately 200mV to 5V. Refer to Testing the System and Adjusting the Sound of the System sections of this guide for detailed instruc- tions on setting the gain. -
Page 13: Amplifier Wiring
AMPLIFIER WIRING Power Connections for the WCC-amplifiers WCC- Fuse Size: refer to specifications ● Power connections accept up to 8 AWG wire. ● 8 AWG power and ground wire recommended for optimal performance. ● Connect 12V+ to the battery through fuse holder. This connection provides +12V ●... -
Page 14: Speaker Connections
SPEAKER CONNECTIONS 6002 Two Channel Speaker Connections SPEAKER 4 Ohm 6002 Two Channel Bridged Speaker Connection For bridging into a single speaker load, the WCC-6002 has the ability to be bridged. As shown in the diagram below: © 2005 Directed Electronics—all rights reserved SPEAKER 4 Ohm BRIDGED... -
Page 15: 6004 Four Channel Speaker Connections
6004 Four Channel Speaker Connections RIGHT SPEAKER 4 Ohm FRONT REAR RIGHT SPEAKER 4 Ohm 6004 Four Channel Bridged Speaker Connection For bridging front and rear into single speaker loads, the WCC-6004 has the ability to be bridged. As shown in the diagram below: FRONT REAR SPEAKER... -
Page 16: 5001, 8001 Mono Speaker Connections
5001, 8001 Mono Speaker Connections The WCC-5001, and WCC-8001 amplifiers offer two positive and two negative output terminals for ease of connecting the speakers to the amplifier. Since these are mono amplifiers, the speak- er connectors are paralleled internally. Each amplifier is stable to 2W. SPEAKER 4 Ohm NOTE! -
Page 17: 6004 High Level Connections
6004 High Level Connections Wire Color WHITE WHITE/BLACK BLACK GREEN/BLACK GREEN GRAY GRAY/BLACK VIOLET/BLACK VIOLET AMPLIFIER INSTALLATION Choosing Mounting Locations The location of your amplifier will depend on several important issues. Due to the low pro- file size of the WCC amplifiers, there are many possible installation locations that will yield satisfactory amplifier performance. -
Page 18: Tools Of The Trade
a dangerous projectile in the event of a crash. Never mount the amplifier where it might get wet. Mount the amplifier so the wire connections will not be pulled. Route the wires where they will not be scraped, pinched or damaged in any fashion. The +12V power supply wire must be fused as close as possible to the battery terminal, ide- ally within 18". -
Page 19: Step By Step Installation
Step By Step Installation Step 1 Determine the location for the amplifier. Refer to the Choosing Mounting Locations section of this guide for detailed information. Step 2 Decide on the system configuration for your amplifier. For system sugges- tions, refer to the Speaker Connections section of this guide. Step 3 Run all the wires from the amplifier location to the speakers, source unit, and battery. -
Page 20: Adjusting The Sound Of The System
Step 5 If using an aftermarket source unit, turn the level controls of the amplifier about one quarter of a turn. Slowly increase the volume level of the source unit to so that you can hear the output of the system. If no sound is heard or if the output is distorted, turn the system off immediately. -
Page 21: Troubleshooting Tips
Troubleshooting Tips Symptom Probable Cause No output Low or no remote turn-on Fuse blown Power wires not connected Check power wire and ground Audio input not connected Check RCA connections and Speaker wires not connected Speakers are blown Audio cycles on and off Thermal protection engages when amplifier heat sink... - Page 22 Symptom Probable Cause Distorted output Internal crossover not set properly for speakers Speakers are blown Poor bass response Speakers wired with wrong Check speaker polarity and fix polarity causing cancellation as needed. at low frequencies Crossover set incorrectly Impedance load at amplifier Check speaker impedance load, is too low Battery fuse blowing...
-
Page 23: Notes
NOTES ____________________________________________________ ____________________________________________________ ____________________________________________________ ____________________________________________________ ____________________________________________________ ____________________________________________________ ____________________________________________________ ____________________________________________________ ____________________________________________________ ____________________________________________________ ____________________________________________________ ____________________________________________________ ____________________________________________________ ____________________________________________________ ____________________________________________________ ____________________________________________________ ____________________________________________________ ____________________________________________________ ____________________________________________________ ____________________________________________________ ____________________________________________________ ____________________________________________________ ____________________________________________________ ____________________________________________________ ____________________________________________________ ____________________________________________________ ____________________________________________________ ____________________________________________________ ____________________________________________________ ____________________________________________________ ____________________________________________________ ____________________________________________________ ____________________________________________________ © 2005 Directed Electronics—all rights reserved... - Page 24 Warranty LIMITED TWO YEAR CONSUMER WARRANTY: Directed Electronics promises to the original purchaser, to replace this product should it prove to be defective in workmanship or material under normal use, for a period of two years from the date of purchase from the dealer as indicated by the date code marking of the product PROVIDED the product was installed by an authorized Directed dealer.