Table of Contents
Advertisement
Quick Links
Advertisement
Table of Contents

Related Manuals for AEG BPS351120M1


Summary of Contents for AEG BPS351120M1
- Page 1 BPS351120M1 User Manual Oven USER MANUAL...
-
Page 2: Table Of Contents
13. ENERGY EFFICIENCY..................... 33 FOR PERFECT RESULTS Thank you for choosing this AEG product. We have created it to give you impeccable performance for many years, with innovative technologies that help make life simpler - features you might not find on ordinary appliances. Please spend a few minutes reading to get the very best from it. - Page 3 ENGLISH manufacturer is not responsible for any injuries or damages that are the result of incorrect installation or usage. Always keep the instructions in a safe and accessible location for future reference. 1.1 Children and vulnerable people safety This appliance can be used by children aged from 8 •...
-
Page 4: Safety Instructions
Ensure that the appliance is switched off before • replacing the lamp to avoid the possibility of electric shock. Do not use a steam cleaner to clean the appliance. • Do not use harsh abrasive cleaners or sharp metal •... - Page 5 ENGLISH such a way that it cannot be removed • Do not let sparks or open flames to without tools. come in contact with the appliance • Connect the mains plug to the mains when you open the door. socket only at the end of the •...
- Page 6 • Before maintenance, deactivate the • Pyrolytic cleaning is a high appliance and disconnect the mains temperature operation that can plug from the mains socket. release fumes from cooking residues • Make sure the appliance is cold. and construction materials, as such...
-
Page 7: Product Description
ENGLISH • Use original spare parts only. • Cut off the mains electrical cable close to the appliance and dispose of 2.8 Disposal • Remove the door catch to prevent WARNING! children or pets from becoming Risk of injury or suffocation. trapped in the appliance. -
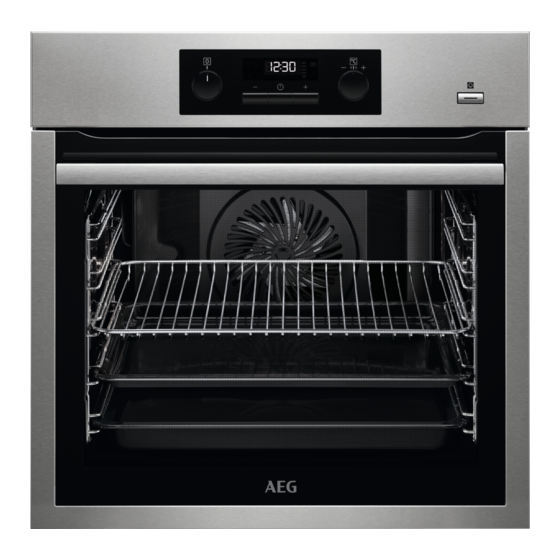
Page 8: Control Panel
For shelves and trays. Telescopic runners 4. CONTROL PANEL 4.1 Buttons Sensor field / Button Function Description MINUS To set the time. CLOCK To set a clock function. PLUS To set the time. PLUS STEAM To turn on the True Fan Cooking PLUS function. -
Page 9: Daily Use
ENGLISH 6. DAILY USE WARNING! Oven function Application Refer to Safety chapters. This function can be used 6.1 Retractable knobs for defrosting frozen foods, such as vegetables To use the appliance, press the control Defrost and fruits. The defrosting knob. The control knob comes out. time depends on the amount and size of the 6.2 Heating functions... - Page 10 1. Fill the cavity embossment with tap water. Oven function Application The maximum capacity of the cavity To activate the automatic embossment is 250 ml. Fill the cavity embossment with water pyrolytic cleaning of the only when the oven is cold.
-
Page 11: Clock Functions
ENGLISH 7. CLOCK FUNCTIONS 7.1 Clock functions table The display shows and the set hour. "00" flashes. Clock func- Application 3. Press to set the current tion minutes. 4. Press to confirm or the set time of To show or change the day will be saved automatically after time of day. -
Page 12: Using The Accessories
2. Press again and again until 1. Press again and again until starts to flash. "00" flash in the display. 3. Press to set the minutes and 2. Press to set the seconds then the hours for DURATION time. -
Page 13: Additional Functions
ENGLISH Deep pan: Small indentation at the top Put the deep pan on the telescopic increase safety. The runners. indentations are also anti-tip devices. The high rim around the shelf prevents cookware from slipping of the shelf. 8.2 Telescopic runners - inserting the accessories With the telescopic runners you can put in and remove the shelves more easily. -
Page 14: Hints And Tips
To turn off the Function Lock, repeat The signal sounds. SAFE and appear step 2. on the display. 9.3 Residual heat indicator The symbols appear on the display also when Pyrolysis When you turn off the oven, the display function operates. - Page 15 ENGLISH 10.2 Inner side of the door Food Tem- Time On the inner side of the door you can pera- (min) find: ture • the numbers of the shelf positions. (°C) • information about the oven functions, Lasagna 180 - 35 - recommended shelf positions and temperatures for dishes.
- Page 16 • You can extend baking times by 10 – browning occurs. The differences 15 minutes if you bake cakes on more equalize during baking. than one shelf position. • Trays in the oven can twist during • Cakes and pastries at different baking.
- Page 17 ENGLISH Food Function Temperature Time (min) Shelf position (°C) Flan base - short True Fan Cook- 10 - 25 170 - 180 pastry Flan base - True Fan Cook- 150 - 170 20 - 25 sponge mixture Cheesecake Top / Bottom 170 - 190 60 - 90 Heat...
- Page 18 Biscuits Food Function Temperature Time (min) Shelf position (°C) Short pastry bis- True Fan Cook- 150 - 160 10 - 20 cuits Biscuits made True Fan Cook- 150 - 160 15 - 20 with sponge mixture Pastries made True Fan Cook-...
- Page 19 ENGLISH Food Function Temperature Time (min) Shelf position (°C) Stuffed vegeta- True Fan Cook- 160 - 170 30 - 60 bles 1) Preheat the oven. 10.8 Moist Fan Baking For best results follow the baking times listed in the table below. Food Temperature Time (min)
- Page 20 Biscuits / small cakes / small cakes / pastries / rolls Food Temperature Time (min) Shelf position (°C) 2 positions 3 positions Short pastry bis- 150 - 160 20 - 40 1 / 4 1 / 3 / 5...
- Page 21 ENGLISH Food Temperature (°C) Time (min) Shelf position Piroggen (Russian 15 - 25 180 - 200 version of calzone) 1) Preheat the oven. 2) Use a deep pan. 10.11 Roasting To keep meat more succulent: • roast lean meat in the roasting tin with Use heat-resistant ovenware.
- Page 22 Food Quantity Function Tempera- Time (min) Shelf posi- (kg) ture (°C) tion Meatloaf 0.75 - 1 Turbo Grill- 160 - 170 50 - 60 Pork knuckle 0.75 - 1 Turbo Grill- 150 - 170 90 - 120 (precooked) Veal...
- Page 23 ENGLISH Food Quantity Function Temperature Time (min) Shelf posi- (kg) (°C) tion Chicken, 1 - 1.5 Turbo Grill- 190 - 210 50 - 70 poulard Duck 1.5 - 2 Turbo Grill- 180 - 200 80 - 100 Goose 3.5 - 5 Turbo Grill- 160 - 180 120 - 180...
- Page 24 Food Temperature (°C) Time (min) Shelf position Pizza, frozen 200 - 220 15 - 25 Pizza American, fro- 190 - 210 20 - 25 Pizza, chilled 210 - 230 13 - 25 Pizza Snacks, frozen 180 - 200 15 - 30...
- Page 25 ENGLISH Food Quantity Defrosting Further de- Comments (kg) time (min) frosting time (min) Cream 2 x 0.2 80 - 100 10 - 15 Whip the cream when still slightly frozen in places. Gateau 10.16 Preserving - Bottom • The jars cannot touch each other. •...
- Page 26 10.17 Drying - True Fan • For a better result, stop the oven halfway through the drying time, open Cooking the door and let it cool down for one night to complete the drying. • Cover trays with grease proof paper or baking parchment.
- Page 27 ENGLISH Baking on one level. Biscuits Food Function Temperature Time Shelf posi- (°C) (min) tion Short bread / Pastry True Fan Cooking 25 - 40 stripes Short bread / Pastry Top / Bottom Heat 160 20 - 30 stripes Small cakes (20 per True Fan Cooking 20 - 35 tray)
-
Page 28: Care And Cleaning
11. CARE AND CLEANING 11.3 Removing the shelf WARNING! supports Refer to Safety chapters. To clean the oven, remove the shelf 11.1 Notes on cleaning supports. Clean the front of the oven with a soft CAUTION! cloth with warm water and a mild Be careful when you remove cleaning agent. - Page 29 ENGLISH 8. When the oven is cool again, the Do not start the Pyrolysis if door unlocks. you did not fully close the oven door. In some models, 11.5 Cleaning reminder the display shows "C3" when this error occurs. To remind you that the pyrolysis is necessary, PYR flashes in the display for WARNING! 10 seconds after each activation and...
-
Page 30: Troubleshooting
A B C 7. Pull the door trim to the front to remove it. 8. Hold the door glass panels on their top edge one by one and pull them up out of the guide. 11.7 Replacing the lamp WARNING! Risk of electric shock. - Page 31 ENGLISH 12.1 What to do if... Problem Possible cause Remedy You cannot activate or oper- The oven is not connected Check if the oven is correctly ate the oven. to an electrical supply or it is connected to the electrical connected incorrectly.
- Page 32 Problem Possible cause Remedy The display shows an error There is an electrical fault. • Deactivate the oven with code that is not in this table. the house fuse or the safety switch in the fuse box and activate it again.
-
Page 33: Energy Efficiency
ENGLISH Problem Possible cause Remedy The appliance is activated The demo mode is activa- 1. Deactivate the oven. and does not heat up. The ted. 2. Press and hold the but- fan does not operate. The display shows "Demo". 3. The first digit on the dis- play and Demo indicator start to blink. - Page 34 Energy consumption with a standard load, fan-forced 0.69 kWh/cycle mode Number of cavities Heat source Electricity Volume 71 l Type of oven Built-In Oven Mass 36.5 kg EN 60350-1 - Household electric cooking Keep breaks between baking as short as...
- Page 35 ENGLISH...
- Page 36 www.aeg.com/shop...