Bosch SHE89PW55N Operating Instructions Manual
Hide thumbs
Also See for SHE89PW55N:
- Operating instructions manual (124 pages) ,
- Operating instructions manual (108 pages)
Table of Contents
Advertisement
Quick Links
Advertisement
Table of Contents

Related Manuals for Bosch SHE89PW55N


Summary of Contents for Bosch SHE89PW55N
- Page 1 Dishwasher SHE89PW55N en-us Operating instructions fr-ca Notice d'utilisation...
-
Page 3: Table Of Contents
en-us Table of contents e n - u s O p e r a t i n g i n s t r u c t i o n s Safety Definitions...5 IMPORTANT SAFETY INSTRUCTIONS . - Page 4 en-us...
-
Page 5: Safety Definitions
Safety Definitions en-us Safety Definitions S a f e t y D e f i n i t i o 9 WARNING This indicates that death or serious injuries may occur as a result of non-observance of this warning. 9 CAUTION This indicates that minor or moderate injuries may occur as a result of non-observance of... -
Page 6: Important Safety Instructions
IMPORTANT SAFETY INSTRUCTIONS READ AND SAVE THESE INSTRUCTIONS R U C T I O N S READ AND SAVE THESE INSTRUCTIONS I M P O R T A N T S A F E T Y I N S T IMPORTANT SAFETY INSTRUCTIONS This dishwasher is provided with 9 WARNING... - Page 7 IMPORTANT SAFETY INSTRUCTIONS READ AND SAVE THESE INSTRUCTIONS GROUNDING INSTRUCTIONS 9 CAUTION This appliance must be grounded to a metal, permanent wiring system or When loading items to be an equipment grounding conductor washed: must be run with the circuit Locate sharp items so they ■...
- Page 8 IMPORTANT SAFETY INSTRUCTIONS READ AND SAVE THESE INSTRUCTIONS To avoid dishwasher damage, do not Child Safety allow water to remain in your To reduce risk of injury, do not allow dishwasher systems through children to play in or on the extended periods of freezing dishwasher.
-
Page 9: Causes Of Damage
Causes of Damage en-us ƒ Causes of Damage NOTICES C a u s e s o f D a m a g e Never use steam cleaning ■ products to clean your dishwasher. The manufacturer will not be liable for the possible damages or consequences. -
Page 10: Getting Started
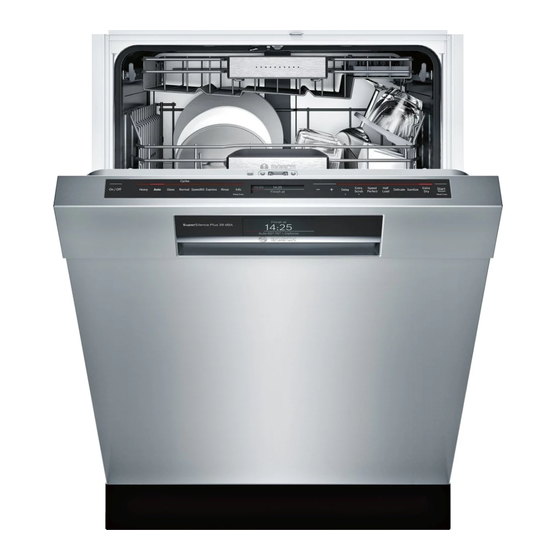
en-us Getting Started Getting Started Appliance overview G e t t i n g S t a r t e d... - Page 11 Getting Started en-us Info button The numbers stated below refer to the overview images on the previous The Info button 8 can be used to page of this manual. I n f o b u t t o n display additional wash cycle information.
- Page 12 en-us Getting Started Switching on the appliance Change the setting as follows: Keep pressing button > )* until for the first time the required setting is displayed. Make the selection with setting When the dishwasher is switched on buttons + - X. for the first time, you are taken Press and hold the Info button directly to the settings for switching...
- Page 13 Getting Started en-us Setting Factory setting Infotext by pressing Info button Time setting 12:00 Set the current time. Time format 12h or 24h. Time display Time Show end of wash cycle with display "Time" or "In hours". Language American English Language selection.
-
Page 14: Water Softening System
en-us Water softening system / special salt Instructions for use of Water softening included “Water Hardness system / special salt Test Strip” To ensure good rinsing results, the Only use salt designed for automatic s a l t s y s t e m / s p e c i a l W a t e r s o f t e n i n g dishwashers. - Page 15 Water softening system / special salt en-us Adjusting the water Top off the salt as follows: Undo the screw plug on the softening system dispenser 1Z. Fill the dispenser with water The amount of salt dispensed can be (required only when switching on set from 0 to 62°E.
-
Page 16: Rinse Aid
en-us Rinse Aid Switching off low salt Rinse Aid indicator / water softening system To achieve proper drying, always use R i n s e A i d a liquid rinse aid, even if your If the use of combined detergents s t e m t e r s o f t e n i n g s y S w i t c h i n g o f f w a... - Page 17 Rinse Aid en-us Add liquid rinse aid to the Set the amount of rinse aid as dispenser 9* until it is full. Do follows: not overfill. Open the door. Switch on On/Off button (. Press Info button 8 for 3 seconds until the following text is indicated on the display window at the top @: Scroll with <...
-
Page 18: Loading The Dishwasher
en-us Loading the Dishwasher Loading the Not Recommended Acrylic Crazing or small cracks Dishwasher throughout the acrylic, may occur. Dishware material a s h e r L o a d i n g t h e D i s h w Adhesive- Adhesives that join Before using your dishwasher... - Page 19 Loading the Dishwasher en-us Only wash household dishware When loading items in the third level ■ and kitchenware rated as rack that have concaved bottoms or dishwasher-safe. cavities, water may collect in the Refer to the Dishware Materials cavities. section for more information about dishware suitability.
- Page 20 en-us Loading the Dishwasher Third rack 1* Upper rack 12 Folding the cup shelves down Note: Additional loading pattern will allow the cups to sit at an increased angle and reduce water 10 place setting pooling on cup bottoms. Lower rack 9" Third rack 1*...
- Page 21 Loading the Dishwasher en-us Loading the silverware Side by side basket Place knives and sharp utensils with their handles up and forks and spoons with their handles down. If large or oddly-shaped items are loaded in the silverware basket, be sure they do not nest together.
- Page 22 en-us Loading the Dishwasher The silverware basket lid may Suggested loading patterns Note: also be folded downward in order to leave the basket open. Salad fork Teaspoon Dinner fork Knife Tablespoon Serving spoon Serving fork Recommended loading pattern This dishwasher is equipped with a For daily, regular or typical use silverware drawer that should accommodate most silverware...
- Page 23 Loading the Dishwasher en-us Adjusting the height of the Additional loading pattern rack 10 place setting If required, the height of the upper rack 12 can be adjusted to create more space for taller utensils either in the upper or lower rack. With Upper rack Lower rack...
- Page 24 en-us Loading the Dishwasher RackMatic ® The height of the upper rack 12 can be adjusted in 3 steps to create more space. Pull the upper rack out of the dishwasher until it stops. To lower the rack, push the RackMatic®...
- Page 25 Loading the Dishwasher en-us Cup shelves The cup shelves and the space underneath them can be used for small cups or for larger serving utensils. Extra tall item sprinkler If an item is too tall to be placed in the lower rack 9" even with the upper rack 12 in the raised position, remove the empty upper rack 12 by pulling it out of the...
- Page 26 en-us Loading the Dishwasher Removing/Installing third Installing third rack 1* rack Pull out third rack rails all the way (1). Insert third rack at an angle. Make sure that the stopper hooks of both rails slide in between the holding hooks and the lower rollers of the third rack (2).
- Page 27 Loading the Dishwasher en-us Removing upper rack 12 Installing upper rack 12 Pull out upper rack all the way (1). Pull out upper rack rails all the Lift front rollers over the stopper way (1). hook of the rail (2). Insert upper rack at an angle.
-
Page 28: Detergent
en-us Detergent This dishwasher uses less water than Detergent most, therefore, less detergent is required. With soft water, Use only detergent specifically 1 tablespoon (15 ml) of detergent D e t e r g e n t designed for dishwashers. For best will clean most loads. - Page 29 Detergent en-us Adding detergent Note: Do not place detergent tabs or utensils in the detergent tab tray 1B. Place tabs or other If the detergent dispenser 92 is detergent forms directly in the still closed, push the button 9: detergent dispenser 92. to open it.
-
Page 30: Dishwasher Cycles
en-us Dishwasher Cycles Dishwasher Cycles D i s h w a s h e r C y c l e s Wash cycle Recommended use Possible wash cycle option Best for cleaning items with baked-on Heavy food or grease. These dishes would normally require soaking or hand scouring. -
Page 31: Dishwasher Cycle Options
Dishwasher Cycle Options en-us Sanitize Dishwasher Cycle Increases the temperatures and Options retains them for an extra long time to obtain a defined disinfecting Delay performance. Continuous use of this O p t i o n s D i s h w a s h e r C y c l e function increases the hygiene status. - Page 32 en-us Dishwasher Cycle Options Wash Cycle Information makes decisions that can cause the cycle time and water usage to adjust To save energy, this dishwasher has intermittently. Wash cycle times are EcoSense where the sensors in the based on 120°F (49° C) water dishwasher automatically adjust the supply.
- Page 33 Dishwasher Cycle Options en-us Heavy Auto Glass Normal Express Rinse Speed60 ® Water 4.7/ 2.7-4.4/ 3.2/ 2.8-3.7/ usage 17.9 10.2-16.5 12.0 10.8-13.9 gal/L Rinse 162/ 131-151/ 140/ 162/ temp. 55-60 °F/°C Delicate Cycle 105-110 90-105 105-120 time min. Water 4.9-6.4/ 3.5-6.5/ 2.2-5.4/ usage...
-
Page 34: Operating The Dishwasher
en-us Operating the Dishwasher Operating the touch buttons Operating the Buttons are sensitive and should be Dishwasher touched gently. Avoid any grease or food particles resting on the buttons With hidden controls, the door Note: as they could activate the s h w a s h e r O p e r a t i n g t h e D i must be opened before changing... - Page 35 Operating the Dishwasher en-us AquaSensor and water consumption is increased accordingly. The AquaSensor is an optical A q u a S e n s o r measuring device which measures Very sensitive: This setting adjusts the cleanliness of the rinse water. the wash cycle strength for difficult conditions of use, for example firmly The AquaSensor is used according...
- Page 36 en-us Operating the Dishwasher Tone volume Delay start time The end of the wash cycle is You can delay the start of the wash indicated by a buzzer. You can also cycle by up to 24 hours. Depending change this setting. on the setting of the time display, the end of cycle is indicated with “Finish in”...
- Page 37 Operating the Dishwasher en-us Switching off the appliance Your dishwasher is protected Note: against unintentional operation. If the appliance door remains open for Short time after the end of the wash more than 4 seconds after pressing cycle: the Start button, the operation will be Press On/Off button (.
-
Page 38: Care And Maintenance
This saves time and prevents future problems. Filters Overall condition of the The Bosch filter system 1b is ® dishwasher designed to prevent the need to pre-rinse normally attached food soils from your dishes. - Page 39 Care and Maintenance en-us Flat Fine Filter To check or clean the filter system: Prevents food particles from Unscrew the Large Object Trap as entering the wash chamber and illustrated and remove the entire directs particles toward the micro filter system. filter.
- Page 40 en-us Care and Maintenance Spray arms Using a spoon, pry off the pump ■ cover until it clicks, then grip the cover and pull upward until it Check spray arms 1:, 1R for resists and then pull forward. grease and limescale deposits. If you find such deposits: Fill detergent dispenser 92 with ■...
- Page 41 Care and Maintenance en-us Preparing your unit for vacation NOTICE Before leaving for vacation during warmer weather, besides turning off the main valve, also turn off water supply at the nearest point to the dishwasher. Do not leave soiled dishware in unit and leave door slightly open.
-
Page 42: Troubleshooting
en-us Troubleshooting The following information may help Troubleshooting you with a dishwasher problem without involving a repair Dishwashers may occasionally professional. T r o u b l e s h o o t i n g exhibit problems that are unrelated to a malfunction of the dishwasher itself. - Page 43 Troubleshooting en-us Dishwasher Incoming water is not warm Before starting a cycle, run hot water faucet seems to run a enough. at the sink closest to the dishwasher. long time Cycle time can vary due to soil and Sensors in the dishwasher automatically water conditions.
- Page 44 en-us Troubleshooting Odor Food debris is present at the Remove the filters and clean them. bottom of the dishwasher. ~ "Care and Maintenance" on page 38 Water Note: testing is done Food particles are present near the ~ "Care and Maintenance" on page 38 in the factory.
- Page 45 Troubleshooting en-us Tub stains Stains on the dishwasher interior Concentrated lemon juice can reduce the are due to water hardness. build-up of hard water stains. Run Normal/Regular cycle until it flushes and interrupt the cycle and then place an 8 oz. cup of the concentrated lemon solution on the upper rack and finish the cycle.
-
Page 46: Customer Service
Call us at 1-800-944-2904 Customer Service Contact Customer Service from our web site: Your Bosch® dishwasher requires no www.bosch-home.com/us or C u s t o m e r S e r v i c e special care other than that www.bosch-home.ca... -
Page 47: Statement Of Limited Product Warranty
(BSH) in this Statement of Limited slight color variations due to inherent Product Warranty applies only to differences in painted and porcelain Bosch® dishwashers (“Product”) parts, as well as differences caused sold to you, the first using purchaser, by kitchen lighting, product location, provided that the Product was or other similar factors. - Page 48 en-us Statement of Limited Product Warranty Repair/Replace as Your affiliates or representatives of BSH). Notwithstanding the foregoing, BSH Exclusive Remedy will not incur any liability, or have responsibility, for the Product if it is During this warranty period, BSH or located in a remote area (more than one of its authorized service 100 miles from an authorized service...
- Page 49 Statement of Limited Product Warranty en-us Any party’s willful misconduct, including all electrical, plumbing or ■ negligence, misuse, abuse, other connecting facilities, for proper accidents, neglect, improper foundation/flooring, and for any operation, failure to maintain, alterations including without limitation improper or negligent installation, cabinetry, walls, floors, shelving, tampering, failure to follow etc.);...
- Page 50 en-us Statement of Limited Product Warranty shall be effective unless authorized in writing by an officer of BSH Home Appliances Corporation. How to Obtain Warranty Service TO OBTAIN WARRANTY SERVICE FOR YOUR PRODUCT, YOU SHOULD CONTACT THE NEAREST BSH AUTHORIZED SERVICE CENTER, OR CALL 1-800-944-2904...
- Page 54 *9001240455* 9001240455 (9701) Rev B...