
Summary of Contents for Kenmore 796.3155 series
- Page 1 Use & Care Guide high efficiency English Model: 796.3155* Kenmore Elite ® Top-Loading Automatic Washer * = color number P/N MFL68267013 Sears Brands Management Corporation ®...
-
Page 2: Table Of Contents
Master Protection Agreements IMPORTANT SAFETY INSTRUCTIONS GROUNDING REQUIREMENTS Congratulations on making a smart purchase. Your new FEATURES AND BENEFITS ® Kenmore Optional Accessories ............6 Included Accessories ............6 INSTALLATION REQUIREMENTS ........7 Choose the Proper Location ..........7 Flooring ................. 7 Clearances ................7... -
Page 3: Important Safety Instructions
SAFETY MESSAGES There are many important safety messages in this manual and on your appliance. Always read and obey all safety messages. This is the safety alert symbol. This symbol alerts you to potential hazards that can result in prop- erty damage and/or serious bodily harm or death. - Page 4 IMPORTANT SAFETY INSTRUCTIONS WARNING when using this appliance, follow basic precautions, including the following. adapter or extension cord. Plug into a grounded 3-prong outlet. Never use harsh chemicals, abrasive cleaners, or solvents to third clean the washer. (ground) prong from the power cord. Do not put oily or greasy rags or clothing on top of the washer.
-
Page 5: Grounding Requirements
IMPORTANT SAFETY INSTRUCTIONS WARNING: RISK TO CHILDREN GROUNDING REQUIREMENTS IMPORTANT: Please read carefully. GROUNDING INSTRUCTIONS TO CONNECT ELECTRICITY WARNING 3-prong grounding type wall receptacle Ensure proper ground exists grounding before use. -
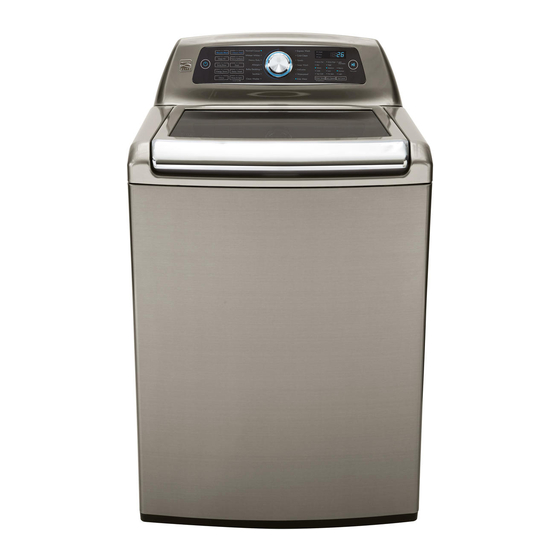
Page 6: Features And Benefits
FEATURES AND BENEFITS KEY PARTS AND COMPONENTS The washer lid is locked during operation. The lid can be unlocked by pressing the START/PAUSE button to stop the washer. The ultra-large stainless steel tub offers extreme durability. The soft close hinges allow the lid to close gently and quietly. -
Page 7: Installation Requirements
INSTALLATION REQUIREMENTS KEY DIMENSIONS AND SPECIFICATIONS Description Top-Loading Washer Rated Voltage/Frequency 120VAC, 60Hz Dimensions 27 in. (W) X 28 / in. (D) X 45 / in. (H), 56 in. (H with lid open) 68.6 cm (W) X 72.1 cm (D) X 115.9 cm (H), 142.3 cm (H with lid open) Net Weight 145.7 lbs. -
Page 8: Installation Instructions
INSTALLATION INSTRUCTIONS UNPACKING AND REMOVING SHIPPING MATERIAL When removing the washer from the carton base, be sure the plastic tub support comes off with the base. If you must lay the washer down to remove the base packaging materials, always protect the side of the washer and lay it carefully on its side. -
Page 9: Connecting The Water Lines
INSTALLATION INSTRUCTIONS CONNECTING THE WATER LINES IMPORTANT: IMPORTANT: Kenmore Cold Rubber Seal Rubber Seal Water Hose (to water inlet on washer) 4. Attach the (red) hot water line to the hot water inlet on Water Hose the back of the washer. Attach the (blue) cold water (to tap) line to the cold water inlet on the back of the washer. -
Page 10: Connecting The Drain Hose
INSTALLATION INSTRUCTIONS CONNECTING THE DRAIN HOSE Laundry Tub Drain Line Standpipe Tie Strap Drain Hose CONNECT TO THE POWER SUPPLY Washer should be plugged into a 120-VAC, 60-Hz grounded 3-prong outlet. Plug in the washer. WARNING 35"~47" (0.9~1.2 m) Cable Tie 35"~47"... -
Page 11: Leveling The Washer
INSTALLATION INSTRUCTIONS LEVELING THE WASHER NOTE: side to side NOTE: front to back Lower Raise Lower Raise Wrong Right... -
Page 12: How To Use
HOW TO USE WARNING: entire Use & Care Guide, including the Important Safety Instructions, before operating this washer. CONTROL PANEL FEATURES START/PAUSE BUTTON POWER (ON/OFF) BUTTON Press this button to start the selected cycle. Press to turn the washer ON. Press again to turn If the washer is running, use this button to pause the the washer OFF. -
Page 13: Operating The Washer
HOW TO USE OPERATING THE WASHER SORT LAUNDRY AND LOAD WASHER Sort laundry by fabric type, soil level, color and load size, as needed. Open the door and load the items into the washer . ADD CLEANING PRODUCT Detergent TURN ON THE WASHER Press the POWER button to turn ON the washer. -
Page 14: Cycle Guide
HOW TO USE CYCLE GUIDE The cycle guide below shows the default settings, available options and recommended fabric = Default Setting each cycle. Spin Steam Deep Temperature Speed Treat Medium No Spin Medium No Spin Medium No Spin Medium No Spin Medium Bedding No Spin... - Page 15 HOW TO USE CYCLE GUIDE The cycle guide below shows the default settings, available options and recommended fabric = Default Setting each cycle. Spin Steam Deep Treat Temperature Speed Medium No Spin Medium No Spin Medium No Spin Medium Deep No Spin No Spin garments...
-
Page 16: Sorting Wash Loads
HOW TO USE SORTING WASH LOADS Fabric Care Labels Many articles of clothing include a fabric care label. CAUTION Using the chart below, adjust the cycle and option selections to care for your clothing according to the manufacturer’s recommendations. If possible, do not wash any water-resistant items. For the best washing results, and to reduce the possibility of damage to clothing, care should be taken to sort the clothing into loads that are made up of similar items. -
Page 17: About The Dispensers
HOW TO USE Never 1. For best performance, load clothes as shown. Fabric Softener Compartment Never exceed the manufacturer’s recommendations when adding softener. Using too much fabric softener can result in buildup in cloth- ing and the washer. 2. Load clothes loosely, and do not load clothes over the maximum guideline on the tub. -
Page 18: Detergent And Dispenser Use
HOW TO USE DETERGENT AND DISPENSER USE To add detergent, bleach, and fabric softener to the automatic dispenser: Open the dispenser drawer. Load the laundry products into the appropriate compartments. Close the drawer before starting the cycle. NOTE: It is normal for a small amount of water to remain in the bleach and softener compartments at the Powdered Detergent... -
Page 19: Time And Status Display
HOW TO USE TIME AND STATUS DISPLAY The time and status display shows the estimated time remaining and cycle progress. CYCLE STATUS INDICATOR ESTIMATED TIME REMAINING These LEDs will illuminate when a cycle is selected to indicate which stages will run. When a cycle is running, the LED will blink for the active stage. - Page 20 HOW TO USE CYCLE MODIFIER BUTTONS NOTE: To protect your garments, not every wash/rinse temperature, spin speed, soil level, or option is avail- able with every cycle. A chime will sound and the LED will not light if a selection is not allowed. WASH TEMP SPIN SPEED WASH TEMP selects the wash and rinse temperature...
-
Page 21: Accela Wash
HOW TO USE OPTION BUTTONS Your washing machine features several additional cycle IMPORTANT NOTES ABOUT STEAM CYCLES: options that customize cycles to meet your individual needs. Turn ON the washer and turn the cycle selector knob to select the desired cycle. If the cycle selection is changed after the options have been selected, all settings will be changed to the default settings for the new cycle. -
Page 22: Fabric Softener
HOW TO USE OPTION BUTTONS Use this option to disable the controls. The washer can only be locked during a cycle. This feature can prevent children from changing cycles or operating the machine. Once the control lock is set, it must be deactivated before any controls, except the power button, can be used. -
Page 23: Care And Cleaning
CARE AND CLEANING WARNING: To reduce the Care Guide, including the Important Safety Instructions, before operating this washer. Failure to follow this warning can cause seri- REGULAR CLEANING If the washer will not be used for an extended period of time and is in an area that could be exposed to freezing Proper care of your washer can extend its life. -
Page 24: Maintenance
CARE AND CLEANING MAINTENANCE could be plugged by hard water scale, sediment in the water supply, or other debris. NOTE: The inlet screens protect the delicate parts of the inlet valve from being damaged by particles that could enter the valves with the water supply. Operat- damage. -
Page 25: Cleaning The Washer
CARE AND CLEANING CLEANING THE WASHER... -
Page 26: Diagnostics
Diagnostics Using Diagnostics HOLD NOTE: PUSH LISTEN NOTE:... -
Page 27: Troubleshooting Guide
TROUBLESHOOTING GUIDE NORMAL SOUNDS YOU MAY HEAR The following sounds may be heard while the washer is operating. They are normal. Clicking: Humming or gurgling: Lid lock relay when the lid locks and unlocks. Drain pump is pumping water from the washer at times during a cycle. - Page 28 TROUBLESHOOTING GUIDE BEFORE CALLING FOR SERVICE (continued) Problem Possible Cause Solutions Excessive sudsing Too much detergent or incorrect detergent. ciency (HE) logo. For detergent quantities refer to the How to Use section. Staining Always use the dispensers to ensure that laundry directly to the wash load in the tub.
- Page 29 TROUBLESHOOTING GUIDE BEFORE CALLING FOR SERVICE (continued) Washer will not operate Lid is open properly...
- Page 30 TROUBLESHOOTING GUIDE BEFORE CALLING FOR SERVICE (continued) Poor stain removal Bleach does not dispense Premature dispensing of bleach Incomplete or no dispensing of detergent...
-
Page 31: Error Codes
TROUBLESHOOTING GUIDE BEFORE CALLING FOR SERVICE (continued) Error Codes Problem Possible Cause Solutions The display shows: Lid lock switch error. Make sure that the lid is closed prop- erly and press the START/PAUSE but- ton. The washer will not operate unless the lid is locked. - Page 32 TROUBLESHOOTING GUIDE BEFORE CALLING FOR SERVICE (continued) Problem Possible Cause Solutions Water in the washer drains Drain hose is kinked, pinched, or Make sure the drain hose is free of slowly or not at all, or the clogged. clogs, kinks, etc., and is not pinched behind display shows: or under the washer.
-
Page 33: Warranty
WITH PROOF OF SALE, a defective appliance will receive free repair or replacement at option of seller. For warranty coverage details to obtain free repair or replacement, visit the web page: www.kenmore. com/warranty. This warranty applies for only 90 DAYS from the sale date in the United States, and is void in Canada, if this appliance is ever used for other than private household purposes.