
Related Manuals for Electrolux FEH60G2102


Summary of Contents for Electrolux FEH60G2102
- Page 1 ..................... FEH60G2102 EN COOKER USER MANUAL DE HERD BENUTZERINFORMATION...
-
Page 2: Table Of Contents
12. INSTALLATION ............26 WE’RE THINKING OF YOU Thank you for purchasing an Electrolux appliance. You’ve chosen a product that brings with it decades of professional experience and innovation. Ingenious and stylish, it has been designed with you in mind. -
Page 3: Safety Information
ENGLISH 1. SAFETY INFORMATION Before the installation and use of the appliance, carefully read the supplied instructions. The manufacturer is not responsible if an incorrect installation and use causes in- juries and damages. Always keep the instructions with the appliance for future reference. 1.1 Children and vulnerable people safety WARNING! Risk of suffocation, injury or permanent disability. -
Page 4: Safety Instructions
• Never try to extinguish a fire with water, but switch off the appliance and then cover flame e.g. with a lid or a fire blanket. • Do not store items on the cooking surfaces. • Do not use a steam cleaner to clean the appliance. - Page 5 ENGLISH • Do not change the specification of this Electrical connection appliance. WARNING! • Make sure that the ventilation openings Risk of fire and electrical shock. are not blocked. • Do not let the appliance stay unatten- • All electrical connections should be ded during operation.
- Page 6 • Do not let sparks or open flames to 2.3 Care and Cleaning come in contact with the appliance WARNING! when you open the door. Risk of injury, fire or damage to • Open the appliance door carefully. The the appliance.
-
Page 7: Product Description
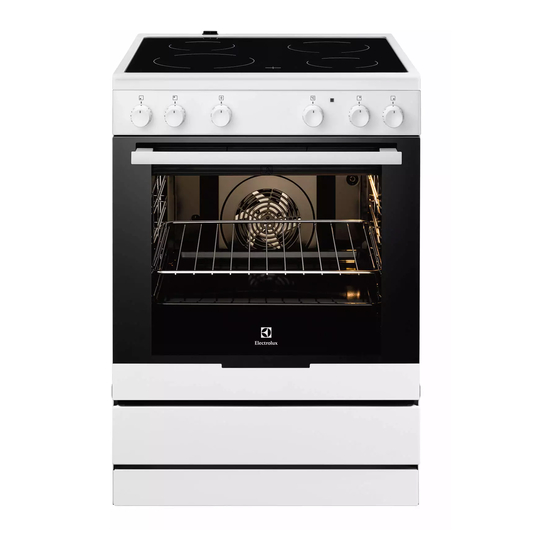
ENGLISH • Remove the door catch to prevent chil- dren and pets to get closed in the ap- pliance. 3. PRODUCT DESCRIPTION 3.1 General overview Knob for the oven functions Knob for the temperature Temperature indicator Knobs for the hob Heating element Oven lamp Shelf positions... -
Page 8: Before First Use
4. BEFORE FIRST USE WARNING! Set the function and the maximum Refer to the Safety chapters. temperature. Let the appliance operate for 45 mi- 4.1 Initial Cleaning nutes. Set the function and the maximum • Remove all accessories and removable temperature. -
Page 9: Hob - Care And Cleaning
ENGLISH • Put cookware on a cooking 6.1 Cookware zone before you start it. • The bottom of the cookware • Deactivate the cooking zones must be as thick and flat as before the end of the cooking possible. time to use residual heat. •... -
Page 10: Oven - Daily Use
10 www.electrolux.com Scratches or dark stains on the – Remove after the appliance is glass-ceramic cause no effect on sufficiently cool: limescale rings, how the appliance operates. water rings, fat stains and shiny metallic discolorations. Use a spe- To remove the dirt: cial cleaning agent for glass-ceram- ic or stainless steel. -
Page 11: Oven - Helpful Hints And Tips
ENGLISH Oven function Application Defrost To thaw frozen food. To grill flat food items in small quantities in the mid- Grilling dle of the shelf. To make toast. To bake in tins and dry on one shelf level at a low Light Cooking temperature. - Page 12 12 www.electrolux.com ature, cooking times) and shelf levels to • If you cannot find the settings for a spe- the values in the tables. cial recipe, look for the one that is al- most the same. • With longer baking times, the oven can be switched off about 10 minutes be- •...
- Page 13 ENGLISH 9.3 Light Cooking Hints for the Light Cooking function: • Use the function to bake in tins and dry on one shelf level at a low temperature. • Bake only one tin or tray at a time. • If you want to preheat the oven Type of baking Temperature °C Time in minutes...
- Page 14 14 www.electrolux.com Type of baking Shelf position Temperature °C Time in min. Fruit flans (made with yeast dough/ 35 - 55 sponge mixture) Fruit flans made 160 - 170 40 - 80 with short pastry 1) Use deep pan Biscuits...
- Page 15 ENGLISH Multileveled Baking Cakes/pastries/breads on baking trays Shelf position Type of baking Temperature °C Time in min. 2 levels Cream puffs/ 25 - 45 160 - 180 Eclairs Dry streusel cake 30 - 45 150 - 160 1) Pre-heat the oven Biscuits/small cakes/pastries/rolls Shelf position Type of baking...
- Page 16 16 www.electrolux.com Type of baking Shelf position Temperature °C Time in min. Apple pie (2tins Ø20cm, diagonally 1 - 2 60 - 90 off set) Savoury flan (e. g, 180 - 220 35- 60 quiche lorraine) Cheesecake 1 - 2...
- Page 17 ENGLISH Type of baking Shelf position Temperature °C Time in min. Tarts (CH) 210 - 230 35 - 50 1) Pre-heat the oven 2) Use deep pan Biscuits Type of baking Shelf positions Temperature °C Time in min. Short pastry bis- 170 - 190 10 - 20 cuits...
- Page 18 18 www.electrolux.com • Roast lean meats in a roasting tin with a 9.6 Roasting lid. This will keep the meat more succu- Roasting dishes lent. • Use heat-resistant ovenware to roast • All types of meat, that can be browned...
- Page 19 ENGLISH Lamb Shelf posi- Temperature Type of meat Quantity Time in min. tion °C Leg of lamb, 1- 1.5 kg 210 - 220 90 - 120 roast lamb Saddle of 1- 1.5 kg 210 - 220 40 - 60 lamb Game Shelf posi- Temperature...
- Page 20 20 www.electrolux.com 9.8 Roasting with Turbo Grilling Beef Shelf posi- Temperature Type of meat Quantity Time min. tion °C Roast beef or per cm. of 5 - 6 190 - 200 fillet: rare thickness Roast beef or per cm. of...
- Page 21 ENGLISH Poultry Type of meat Quantity Shelf posi- Temperature Time min. tion °C Poultry por- 200-250 g 200 - 220 30 - 50 tions each Half chicken 400-500 g 190 - 210 35 - 50 each Chicken, pou- 1-1.5 kg 190 - 210 50 - 70 lard...
- Page 22 22 www.electrolux.com • Fill the jars up to the same level and • When the liquid in the jars starts to sim- close with a clamp. mer (after approx. 35-60 minutes with one-litre jars), stop the oven or de- • The jars cannot touch each other.
-
Page 23: Oven - Care And Cleaning
ENGLISH Defrosting Further defrost- Dish Comment time in min. ing time in min. Strawberries, 300 30 - 40 10 - 20 Butter, 250 g 30 - 40 10 - 15 Cream can also be Cream, 2 x 200 g 80 - 100 10 - 15 whipped when still slightly frozen in places... - Page 24 24 www.electrolux.com Pull the rear end of the shelf support away from the side wall and remove WARNING! Installing the shelf supports Make sure that the glass panels Install the shelf supports in the opposite are cool before you clean the sequence.
- Page 25 ENGLISH Removing and cleaning the door glasses Hold the door trim (B) on the top edge of the door at the two sides and push inwards to release the clip seal. Pull the door trim to the front to re- move it.
-
Page 26: What To Do If
26 www.electrolux.com Inserting the drawer WARNING! When the oven is in use, heat can Set the drawer on the support rails. build up in the drawer. Do not Make sure that the catches engage keep flammable things in there correctly into the rails. - Page 27 ENGLISH 12.3 Anti-tilt protection Dimensions CAUTION! Depth 600 mm You must install the anti-tilt pro- Oven capacity 74 l tection. If you do not install it, the appliance can tilt. Your appliance has the symbol 12.1 Location of the appliance shown on the picture (if applica- ble) to remind you about the in- You can install your freestanding appli-...
- Page 28 28 www.electrolux.com 12.4 Electrical installation 49 mm The manufacturer is not responsi- ble if you do not follow the safety 77 mm precautions from the chapter "Safety information". This appliance is supplied without a main plug or a main cable.
- Page 29 12. MONTAGE ............54 WIR DENKEN AN SIE Vielen Dank, dass Sie sich für ein Electrolux Gerät entschieden haben. Sie haben ein Produkt gewählt, hinter dem eine jahrzehntelange professionelle Erfahrung und Innovation steht. Bei der Entwicklung dieses großartigen und eleganten Geräts haben wir an Sie gedacht.
-
Page 30: Sicherheitsinformationen
30 www.electrolux.com 1. SICHERHEITSINFORMATIONEN Lesen Sie vor der Montage und Verwendung des Geräts sorgfältig die mitgelieferte Anleitung. Der Hersteller haftet nicht für Verletzungen oder Schäden, die durch eine feh- lerhafte Montage entstehen. Bewahren Sie die Anleitung zum Nachschlagen auf. 1.1 Sicherheit von Kindern und schutzbedürftigen... -
Page 31: Sicherheitshinweise
DEUTSCH • Kochen mit Fett oder Öl auf einem unbeaufsichtigten Kochfeld ist gefährlich und kann zu einem Brand füh- ren. • Versuchen Sie nicht einen Brand mit Wasser zu lö- schen, sondern schalten Sie das Gerät aus und bede- cken Sie die Flamme mit einem Deckel oder einer Feu- erlöschdecke. - Page 32 32 www.electrolux.com • Die Mindestabstände zu anderen Gerä- • Stecken Sie den Netzstecker erst nach ten und Küchenmöbeln sind einzuhal- Abschluss der Montage in die Steckdo- ten. se. Stellen Sie sicher, dass der Netzste- cker nach der Montage noch zugäng- •...
- Page 33 DEUTSCH • Schalten Sie das Gerät nicht über eine • Um Beschädigungen oder Verfärbun- externe Zeitschaltuhr oder eine separa- gen der Emailbeschichtung zu vermei- te Fernsteuerung ein. den: • Halten Sie die Tür immer geschlossen, – Stellen Sie Kochgeschirr oder andere wenn das Gerät in Betrieb ist.
-
Page 34: Gerätebeschreibung
34 www.electrolux.com • Vergewissern Sie sich, dass das Gerät nutzen Sie sie nicht für die Raumbe- abgekühlt ist. Zusätzlich besteht die leuchtung. Gefahr, dass die Glasscheiben bre- WARNUNG! chen. Stromschlaggefahr. • Ersetzen Sie die Glasscheiben der Tür umgehend, wenn sie beschädigt sind. -
Page 35: Vor Der Ersten Inbetriebnahme
DEUTSCH 3.2 Kochfeldanordnung 145 mm 180 mm Kochzone 1200 W Dampfauslass Kochzone 1800 W Kochzone 1200 W 145 mm 210 mm Restwärmeanzeige Kochzone 2300 W • Fettpfanne 3.3 Zubehör Zum Backen und Braten oder zum Auf- • Rost fangen von austretendem Fett. Für Kochgeschirr, Kuchenformen, Bra- •... -
Page 36: Kochfeld - Praktische Tipps Und Hinweise
36 www.electrolux.com Nutzen Sie die Restwärme, um 5.1 Kochstufe den Energieverbrauch zu senken. Schalten Sie die Kochzone ca. Knopf Funktion 5-10 Minuten vor Ende des Gar- Warmhalten vorgangs aus. Position Aus 5.2 Restwärmeanzeige Kochstufen (1 - niedrigste Kochstufe, 9 Die Restwärmeanzeige leuchtet auf, wenn - höchste Kochstufe) -
Page 37: Kochfeld - Reinigung Und Pflege
DEUTSCH Koch Verwendung: Zeit Tipps stufe Dünsten von Gemüse, Fisch, 20 - Einige Esslöffel Flüssigkeit Fleisch 45 Min hinzugeben Dampfgaren von Kartoffeln 20 - 60 Max. ¼ l Wasser für 750 g Min. Kartoffeln verwenden Kochen größerer Speisemengen, 60 - Bis zu 3 l Flüssigkeit plus Zu- Eintopfgerichte und Suppen 150 Mi... - Page 38 38 www.electrolux.com dem Abschalten des Geräts läuft das Drehen Sie den Temperaturwahlknopf Kühlgebläse weiter, bis das Gerät abge- auf eine Temperatur. kühlt ist. Die Temperatur-Kontrolllampe leuch- tet, solange die Temperatur im Gerät 8.2 Ein- und Ausschalten des ansteigt. Geräts Drehen Sie zum Ausschalten des Ge- räts den Backofen-Einstellknopf und...
-
Page 39: Backofen - Praktische Tipps Und Hinweise
DEUTSCH 8.4 Einsetzen des Backofenzubehörs Die Brat- und Fettpfanne und der Rost haben Seitenränder. Durch die Seitenränder und die Form der Führungsstäbe wird das Kippen der Einschubteile verhindert. Brat- und Fettpfanne und Rost zu- sammen einsetzen Legen Sie den Rost auf die Brat- und Fettpfanne. - Page 40 40 www.electrolux.com schiede gleichen sich während des Backvorgangs aus. 9.2 Tipps zum Backen Backergebnis Mögliche Ursache Abhilfe Der Kuchen ist unten Setzen Sie den Kuchen nicht ausreichend ge- Falsche Einschubebene. tiefer ein. bräunt. Stellen Sie beim nächsten Der Kuchen fällt zusam-...
- Page 41 DEUTSCH 9.3 Bio-Garen Hinweise für die Funktion „Bio- Garen“: • Verwenden Sie diese Funktion zum Backen in Formen und zum Dörren von Lebensmitteln auf einer Einschubebene bei niedrigen Temperaturen. • Backen Sie nur in einer Form/ei- nem Blech gleichzeitig. • Wenn Sie den Backofen vorhei- zen möchten, verwenden Sie Backware Temperatur in °C...
- Page 42 42 www.electrolux.com Backware Einschubebene Temperatur in °C Zeit in Min. Obstkuchen (auf Hefeteig/Rühr- 35 - 55 teig) Obstkuchen mit 160 - 170 40 - 80 Mürbeteig 1) Tiefes Blech Plätzchen Backware Einschubebene Temperatur in °C Zeit in Min. Mürbeteigplätz- 150 - 160...
- Page 43 DEUTSCH Plätzchen/kleine Kuchen/Gebäck/Brötchen Einschubebene Backware Temperatur in °C Zeit in Min. 2 Ebenen Mürbeteigplätz- 20 - 40 150 - 160 chen Short bread/ Past- 20 - 45 ry Stripes Rührteigplätzchen 25 - 45 160 - 170 Eiweißgebäck, 80 - 100 130 - 170 Baiser Makronen...
- Page 44 44 www.electrolux.com Backware Einschubebene Temperatur in °C Zeit in Min. Christstollen 50 - 70 160 - 180 Brot (Roggen- brot): Erster Teil des Backvor- 1 - 2 gangs. 30 - 60 160 - 180 Zweiter Teil des Backvor- gangs. Windbeutel/Eclairs...
- Page 45 DEUTSCH Backware Einschubebenen Temperatur in °C Zeit in Min. Makronen 120 - 130 30 - 60 Hefekleingebäck 170 - 190 20 - 40 Blätterteiggebäck 20 - 30 190 - 210 Brötchen 10 - 55 190 - 210 Small cakes (20 3 - 4 20 - 30 pro Blech)
- Page 46 46 www.electrolux.com Fleischart Menge Einschub- Temperatur Zeit in Min. ebene in °C Roastbeef oder Filet: je cm Höhe 200 - 220 10 - 12 durchgebraten 1) Backofen vorheizen Schweinefleisch Einschub- Temperatur Fleischart Menge Zeit in Min. ebene in °C Schulter, Na-...
- Page 47 DEUTSCH Geflügel Einschub- Temperatur Fleischart Menge Zeit in Min. ebene in °C Geflügelteile je 200 - 250 g 220 - 250 20 - 40 Hähnchenhälf- je 400 - 500 g 220 - 250 35 - 50 Hähnchen, 1-1,5 kg 220 - 250 50 - 70 Poularde Ente...
- Page 48 48 www.electrolux.com Einschub- Temperatur Fleischart Menge Zeit (Min.) ebene in °C Schweinshaxe 750 g - 1 kg 150 - 170 90 - 120 (vorgegart) Kalbfleisch Fleischart Menge Einschub- Temperatur Zeit (Min.) ebene in °C Kalbsbraten 1 kg 160 - 180...
- Page 49 DEUTSCH Grillen Grillzeit in Minuten Lebensmittel Einschub- Temperatur in zum Grillen ebene °C Erste Seite Zweite Seite Roastbeef, 210 - 230 30 - 40 30 - 40 medium Rinderfilet, 20 - 30 20 - 30 medium Schweinerü- 210 - 230 30 - 40 30 - 40 cken...
-
Page 50: Backofen - Reinigung Und Pflege
50 www.electrolux.com Gemüse Einkochen bis Weiter kochen Einkochen Temperatur in °C Perlbeginn in bei 100 °C in Min. Min. 160 - 170 50 - 60 5 - 10 Karotten Gurken 160 - 170 50 - 60 Mixed Pickles 160 - 170... - Page 51 DEUTSCH sich Verschmutzungen leichter entfer- Geräte mit Edelstahl- oder Alu- nen und es kann nichts einbrennen. miniumfront: Reinigen Sie die Backofentür nur • Entfernen Sie hartnäckige Verschmut- mit einem nassen Schwamm und zungen mit einem speziellen Backofen- trocknen Sie sie mit einem wei- reiniger.
- Page 52 52 www.electrolux.com WARNUNG! WARNUNG! Zur Reinigung der Glastür müssen Wenn die Türglasscheiben be- die Glasscheiben vorher abgekühlt schädigt sind oder Kratzer aufwei- sein. Es besteht die Gefahr, dass sen, werden sie brüchig und kön- die Glasscheiben brechen. nen zerspringen. Um dies zu ver- hindern, müssen Sie sie ersetzen.
- Page 53 DEUTSCH Ziehen Sie die Türabdeckung nach vorn, um sie abzunehmen. Fassen Sie die Türgläser nacheinan- der am oberen Rand an. Ziehen Sie sie nach oben aus der Führung. Reinigen Sie die Glasscheiben. Um die Glasscheiben wieder einzusetzen, 10.5 Herausnehmen der führen Sie die Schritte oben in umgekehr- Schublade ter Reihenfolge durch.
-
Page 54: Was Tun, Wenn
54 www.electrolux.com 11. WAS TUN, WENN … WARNUNG! Siehe Sicherheitshinweise. Problem Mögliche Ursache Abhilfe Die Restwärmeanzeige Die Kochzone ist nicht Sollte die Kochzone ei- leuchtet nicht auf. heiß, da sie nur eine kur- gentlich heiß sein, wen- ze Zeit in Betrieb war. - Page 55 DEUTSCH 12.1 Standort des Geräts Sie können Ihr freistehendes Gerät neben oder zwischen Küchenmöbel sowie in ei- ner Ecke aufstellen. Mindestabstände Abmes- sungen Achten Sie darauf, den Kipp- schutz in der richtigen Höhe anzu- bringen. Stellen Sie die korrekte Höhe des Ge- 12.2 Ausrichten räts ein, bevor Sie den Kippschutz anbringen.
- Page 56 56 www.electrolux.com 12.4 Elektroinstallation 49 mm Der Hersteller haftet nicht für Schäden, die aufgrund der Nicht- 77 mm beachtung der Sicherheitsvorkeh- rungen des Kapitels „Sicherheits- hinweise“ entstehen. Das Gerät wird ohne Netzstecker und Netzkabel geliefert. Einsetzbare Kabeltypen: H07 RN-F, H05 RN-F, H05 RRF, H05 VV-F, H05 V2V2-F (T90), H05 BB-F.
- Page 57 DEUTSCH...
- Page 58 58 www.electrolux.com...
- Page 59 DEUTSCH...
- Page 60 www.electrolux.com/shop...