Advertisement
Quick Links
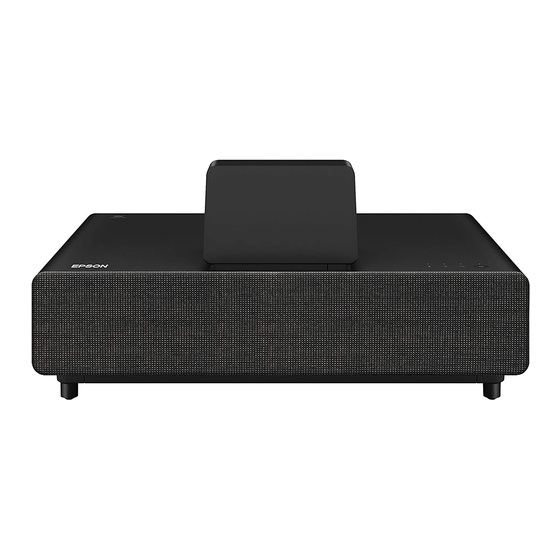
EPSON LS500 PROJECTOR CABINET
MODEL # X3/EPS2/237S
WARNING
Installation requires two people.
1.
Place shelf on the rear shelf peg with
the front of the shelf resting on the base.
2.
Continuing holding the back end of shelf
while a 2nd person sets the projector,
centering it on the width of the shelf front
with the rear of the projector 1.5" (38mm)
in from the shelf edge as shown in figure 1.
3.
Continuing holding the back end of shelf,
while a 2nd person lifts the shelf up and
slightly forward until the projetor lens
housing goes through the opening in the
top and the shelf can be rested on the front
shelf peg as shown in figure 2.
LIMITED WARRANTY
Salamander is proud to stand behind our products with industry-leading warranties. Should you ever encounter any problem with your
Salamander product, let us know. We are here to make it right. 1.800.535.5659 - 860.761.9500
Full warranty including limitations and warranty claim information may be found at http://www.salamanderdesigns.com/customerservice/warranty
SALAMANDER DESIGNS
REAR
Figure 1
Figure 2
FRONT
Lens Housing
503-237 [8.20]
1 of 2
Advertisement

Related Manuals for Epson LS500


Summary of Contents for Epson LS500
- Page 1 EPSON LS500 PROJECTOR CABINET MODEL # X3/EPS2/237S WARNING Installation requires two people. REAR FRONT Place shelf on the rear shelf peg with the front of the shelf resting on the base. Continuing holding the back end of shelf while a 2nd person sets the projector, centering it on the width of the shelf front with the rear of the projector 1.5”...
- Page 2 Reverse Door (Speaker Grill to Bottom of Door) Remove the four screws from the Hinge Base as shown below. Leaving the hinges and base attached to the door, remove the four screws from the hinge base as shown below, starting from the bottom and working up. Note the location of the hole positions used as removing.