Advertisement
Quick Links
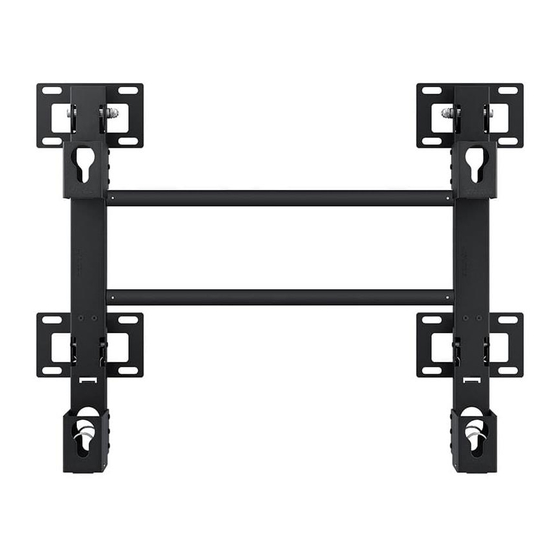
Wall Mount Installation Precautions
• Use only the provided accessories and parts to install the wall mount.
• Do not install on any surface other than a vertical wall.
• In order to ensure the product's performance and prevent malfunctions, do not install it in the following areas:
- Areas with strong vibration and/or impact: Can cause the product to fall and become damaged.
- In the vicinity of a fire sprinkler: Heat generated by the product may trigger the sprinkler.
- In the vicinity of a high-voltage cable: Interference from the cable can prevent the TV from displaying images correctly.
- In the vicinity of a heater: Can cause the product to overheat and malfunction.
- Check the stability of the wall.
- Weak walls will need to be reinforced before the TV can be mounted.
• Do not hollow out a wall and install the TV inside it.
• Connect all the external devices to the TV before installing the wall mount.
• If intending to mount on a non-concrete wall, contact a professional installer and verify first.
• Once installed, maintain a distance of at least 28mm between the wall surface and the TV.
• Check the model of your TV, the corresponding installation guide on the back, and the types of walls the TV can be mounted on.
[ Check the type of the wall before installing.
Standard Installation Requirements by Wall Type
• Can only be mounted on a concrete or interior wall of sufficient thickness. Refer to the diagrams below.
Min. 50mm
MDF
PW, etc.
With reinforcement
Min.
50mm
Min. 10mm
MDF, PW
NOTE
✎
MDF = Medium Density Fiberboard
PW = Plywood
• Cannot be mounted on unreinforced wall or drywall surfaces.
MDF, PW,
Concrete
0~24mm
Safety instructions
These safety instruction are intended to protect you and prevent property damage. Read them carefully and comply with these instructions. Failing to follow
them may result in physical injury.
1. This product must be installed by a qualified technician assigned by the retailer.
Install by a non-professional may result in physical injury or product damage.
2. Do not let children play around the product without supervision.
Children may bump their heads or bodies into the corners, resulting in injury.
3. Do not install the product on a wall that will not support its weight.
The product may fall, resulting in physical injury or product damage.
4. Do not install the product under abnormal or non-standard site conditions. The product may be severely damaged. In these circumstances, contact a local Sam-
sung service center.
Keep the product away from dust, chemicals, high or low temperatures, humidity, and/or vehicle traffic.
Min. 30mm
MDF, PW
Art Wall
Min. 10mm
MDF, PW
Min. 30mm
Concrete
Art Wall
Min. 10mm
MDF, PW
Without
Art Wall
reinforcement
If you want to move or replace the product
after installation, contact the technician as-
signed by the retailer again.
Min.
25mm
MDF, PW
(Exc. drywall
thickness)
Min.
25mm
Mixed Concrete
Wall (Exc. drywall
thickness)
Drywall
Cannot install on drywall
Do not hang from the installed product or
apply force to it.
English - 1
Advertisement

Related Manuals for Samsung WMN8200SFXEN


Summary of Contents for Samsung WMN8200SFXEN
- Page 1 Wall Mount Installation Precautions • Use only the provided accessories and parts to install the wall mount. • Do not install on any surface other than a vertical wall. • In order to ensure the product’s performance and prevent malfunctions, do not install it in the following areas: - Areas with strong vibration and/or impact: Can cause the product to fall and become damaged.
- Page 2 Accessories [ Use only the provided accessories and parts to install the wall mount. Wall Mount Brackets Length Adjustment Bars Mounting Pieces M8 X 35, M8 X 40, M6 X 30 M4 X 60 M8 X 71, M8 X 49, M8 X 64 User Manual Warranty...
- Page 3 4. Adjust the length adjustment bars for the chosen orientation. 4-1. Adjust the height-adjustment brackets. Normal Type Slim Type (remove 4 height-adjustment brackets.) 4-2. Assemble the length adjustment bars on to the two wall mount brackets using screws. 5. Place the assembly against the wall you wish to mount it on to and then mark the anchor insertion points on the wall. 6.
- Page 4 7. Remove the screws holding the wall mount brackets in place. 8. Assemble the mounting pieces to the back of the LFD as shown in the diagram. [ Make sure to insert the pieces into the right holes. [LH82DME] [QET82] M8 X L35 M8 X L49 [QER82]...
-
Page 5: Product Specifications
Lift up the bottom of the LFD and then turn the bottom safety hooks on either side to secure the mounting pieces in place. [ If the TV is not horizontally leveled, adjust the level by turning the screws as shown in the diagram. Product Specifications [ Tilt angle may vary depending on the model. - Page 6 벽걸이 설치 시, 주의사항 • 벽걸이 설치 시, 반드시 제공하는 구성품 및 부품을 사용해 주세요. • 수직 벽면 이외의 장소에는 설치하지 마세요. • 제품의 성능 보호와 고장 예방을 위해 다음 장소에는 설치하지 마세요. - 진동이나 충격이 가해질 염려가 있는 곳 : 제품이 떨어져서 파손될 우려가 있습니다. - 스프링클러...
- Page 7 부속품안내 [ 벽걸이 설치 시 반드시 제공되는 구성품 및 부품을 사용하여 주세요. 월마운트 브라켓 길이조절 바 걸이용 플라스틱 M8 X 35, M8 X 40, M6 X 30 M4 X 60 M8 X 71, M8 X 49, M8 X 64 (16) M5 X 65 (16) 앵커...
- Page 8 4. 설치조건에 맞게 제품사이즈를 조정하세요. 4-1. 높이조절 Bracket을 설치조건에 맞도록 조정합니다. Normal Type Slim Type (높이조절 Bracket 4개소 분리) 4-2. 길이조절 바를 월마운트 브라켓 2개에 고정용 나사를 이용하여 조립하세요. 5. 설치하고자 하는 벽면에 위치 후 벽면에 앵커 삽입 위치를 표시해주세요. 6.
- Page 9 7. 월마운트 브라켓을 고정하고 있는 나사를 제거해주세요. 8. LFD 본체 뒷면에 걸이용 플라스틱 를 나사를 이용하여 그림과 같이 결합해주세요. [ 반드시 결합 구멍 위치를 확인해주세요. [LH82DME] [QET82] M8 X L35 M8 X L49 위 [QER82] [QMR85, QBR85, WMR85] M8 X L71 M8 X L64 1T 와셔...
- Page 10 LFD 하단을 들어올린 상태에서 양쪽하단 2개소 안전고리를 회전하여 걸이용 플라스틱을 고정시켜 주세요. [ 제품의 수평이 맞지 않을 경우 그림의 나사로 수평을 조절하세요. 제품 사양 [ 회전 각도는 LFD 모델에 따라 달라질 수 있습니다. Slim Type Normal Type 폭 (mm) 폭 (mm) 높이...