Advertisement
Available languages
Available languages
Quick Links
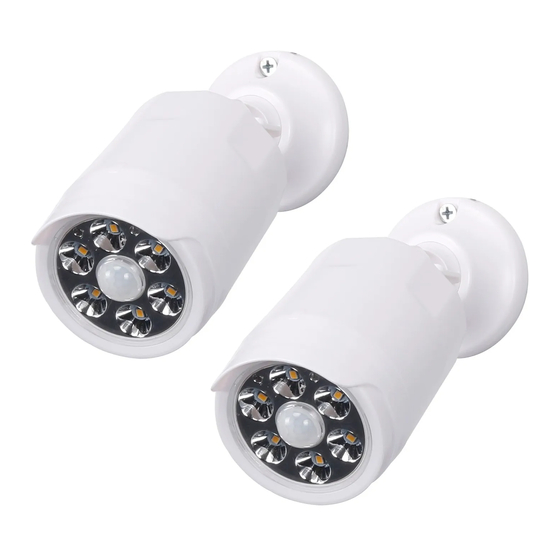
LED LINKABLE SPOT LIGHTS
WITH MOTION SENSOR
MODEL: A02AC012H-06
ASSEMBLY AND INSTALLATION INSTRUCTIONS
5 YEAR LIMITED WARRANTY
You should read all of the instructions before attempting to use this product.
International Development Company (IDC) warrants this product against defects in material or workmanship for a period
of five (5) years from the date of original purchase. IDC agrees to either repair the product or replace it, at the sole discretion
of IDC. Only the original purchaser of this product is extended this warranty. No warranty work will be provided under this
warranty without purchaser's receipt or other proof of the date of original purchase acceptable to IDC. Proof of the date of
purchase must be provided to IDC if the product is returned. Purchasing this product from a third party vendor negates
all warranties (expressed or implied) in this warranty.
The warranty does not apply to the following terms/conditions:
1.) Acts of God.
2.) Products that have been subjected to unauthorized repair, opened, disassembled, and/or otherwise modified.
8.5"
3.) Products used not in accordance with directions.
4.) Damages exceeding the total cost of product.
5.) Plastic or plastic shades.
6.) The finish of any portion of the product (i.e. surface scratches, weathering, corrosion, discoloration of brass
components, as this is considered normal wear and tear).
7.) Damages caused by shipping, improper handling, accident, misuse or abuse. IDC is not responsible for damage of
merchandise in transit. Repaired or replaced products shall be subject to the terms of this warranty and are inspected
prior to return shipment. Damages that are incurred during transit should be reported at once to the carrier and a claim
should be filed with them.
8.) warranty does not cover replacement of Alkaline batteries included with this product.
IDC SHALL NOT BE LIABLE FOR INCIDENTAL, SPECIAL OR CONSEQUENTIAL DAMAGES RESULTING FROM THE
USE OF THE PRODUCT OR ARISING OUT OF ANY BREACH OF THIS WARRANTY. ALL IMPLIED WARRANTIES, IF ANY,
INCLUDING IMPLIED WARRANTIES OF MERCHANTABILITY AND FITNESS FOR A PARTICULAR PURPOSE, ARE
LIMITED IN CURATION TO THE DURATION OF THIS EXPRESS WARRANTY. Some states do not allow the exclusion
or limitation of incidental or consequential damages, or limitations on how long an implied warranty lasts, so the above
exclusions or limitations may not apply to you. No other warranty, written or verbal, will be honored for this product.
This warranty grants you specific legal rights, you may also have other rights which vary from state to state. There are no
other warranties except those stated above.
Thank You
We appreciate your purchase of this IDC product.
IDC has made every effort to supply a quality product that insures long, trouble free service. In the event that you have
any type of problems with this product and require a return address or for any other assistance please call our
Toll Free Number 1-877-723-0723
8:00 A.M. - 5:00 P.M. Central Time, Monday - Friday
Email us at: customerservice@idctexas.com
You will need the following information:
Model/Item Number of Product, Receipt, and Date of Purchase
All drawings and text are © copyright of IDC • Printed in China
International Development Company
899 Henrietta Creek Rd.
Roanoke, TX 76262 USA
Toll-free: 1-877-723-0723
© 2019 IDC, all rights reserved.
The Honeywell Trademark is used under license from Honeywell International Inc.
Honeywell International Inc. makes no representations or warranties with respect
to this product. This product is manufactured for International Development Company.
Fold
11"
INSTRUCTIONS
Tools Required
Pencil
Screwdriver
Hardware Included
AA: Screw (4)
BB: Wall Anchors (4)
CC: AA Battery (6)
DD: Light (2)
Marking the Hole Location and Mounting the Light
(Figure 1)
STEP 1
1. Find the location where you want to mount the light.
2. Mark the location where you want to mount the light by ensuring the mounting base of the light (DD) is level and then
making two marks in the open holes on the mounting base of the light (DD). The distance between the two holes is 1.97in.
(50mm).
NOTE:
If attaching to drywall or plaster surface proceed to step 2, if attaching to wood proceed to step 4.
STEP 2
Remove light and drill two 0.24in. (6mm) holes in the marked locations.
STEP 3
Insert wall anchors (BB) into previously drilled holes, place light over hole locations and attach screws with screwdriver
or drill.
STEP 4
Pre-drill 0.08in. (2mm) holes. Place light over holes and attach screws with screwdriver or drill.
NOTE:
Be careful not to over-tighten.
x
x
step 1
step 2
step 3
Each light requires 3 AA batteries (included)
1. Turn counter-clockwise until the light head is separated from the light. (Figure 2)
2. To install the batteries (CC) open the battery cover within the light head. (Figure 3)
3. Install 3 AA batteries (included) ensuring the polarity +/- is correct.
4. After batteries are installed, close the battery cover and place light head back into the light body turning clockwise to
tighten.
NOTE:
Follow these steps for recurring battery installation.
Light Head
Battery Cover
Figure 2
Fold
CAUTIONS
Caution Statement
- Always purchase the correct size and grade of battery most suitable for the intended use.
- Always replace the whole set of batteries at one time,taking care not to mix old and new ones, or
batteries of different types or brands.
- Clean the battery contacts and also those of the device prior to battery installation.
- Ensure the batteries are installed correctly with regard to polarity (+ and -).
- Remove batteries from equipment which is not to be used for an extended period of time.
- Remove used batteries promptly.
Electric drill
- For recycling and disposal of batteries to protect the environment, please check the internet or
your local phone directory for local recycling centers and/or follow local government regulations.
drill bit size:
ø2.0mm or ø6.0mm
OPERATING INSTRUCTIONS
The lights can be operated independently or linked together (maximum of 2 lights).
Lights set up independently will sense motion 1 by 1 and not trigger another light.
Lights set up linked will sense motion on 1 light and turn on another linked light.
1. To operate lights independently, press the power/link button to turn on the light.
NOTE:
After turning on the light, allow 15s for the motion sensor to activate the light. The light is
programmed to stay on for 30s while motion is being sensed. Once no motion is sensed by the light
it will turn off after 30s.
2. To operate lights with linking function, press the power/link button two times on each light to be
linked. A red light will activate for 3s on each light meaning they have been linked successfully.
(Figure 4)
NOTE:
When lights enter linking mode, the red light will light for 3s and then change to flashing
every 6s to reduce power consumption.
NOTE:
The detection distance of the light is 13.12-19.68 feet (4-6m) and the detection angle is 90
degrees. Lights should not be placed more than 49.2 feet (15m) apart otherwise linking function will
not work properly.
SAFETY INFORMATION
AA
DD
BB
WARNING
1. This product is not a toy and contains small parts. Close supervision is necessary when this unit
is used near children.
step 4
2. To reduce the risk of electrical shock, do not put the unit in water or other liquid. For cleaning,
use a soft dry cloth. Do not place or store appliance where it can fall or be pulled into a tub or sink.
Figure 1
NOTE:
This equipment has been tested and found to comply with the limits for a Class B Digital Device,
pursuant to Part 15 of the FCC Rules. These limits are designed to provide reasonable protection
against harmful interference in a residential installation. This equipment generates, uses, and can
radiate radio frequency energy and, if not installed and used in accordance with the instructions,
may cause harmfull interference to radio communications. However, there is no guarantee that
interference will not occur in a particular installation. If this equipment does cause harmful
interference to radio or television reception, which can be determined by turning the equipment off
and on, the user is encouraged to try to correct the interference by one or more of the following
measures:
- Reorient or relocate the receiving antenna.
- Increase the distance between the equipment and receiver.
- Connect the equipment to an outlet on a circuit different from that which the receiver is connected.
- Consult the dealer or an experienced radio/TV technician for help.
This equipment complies with Part 15 of the FCC Rules.Operation is subject to the following two
conditions:
1) This device may not cause harmful interference.
2) This device must accept any interference received,including interference that may cause undesired
operation.
WARNING: Changes or modifications to this unit not expressly approved by the party responsible
for compliance could void the user's authority to operate the equipment.
RF EXPOSURE: This equipment complies with FCC radiation exposure limits set forth for an
uncontrolled environment. This equipment should be installed and operated with minimum
distance of 20 cm between the radiator and your body. This transmitter must not be co-located or
Figure 3
operating in conjunction with any other antenna or transmitter.
Fold
Photocell
Motion Sensor
Power/Link Button
Figure 4
Advertisement

Summary of Contents for Honeywell A02AC012H-06
- Page 1 © 2019 IDC, all rights reserved. 1) This device may not cause harmful interference. The Honeywell Trademark is used under license from Honeywell International Inc. Battery Cover 2) This device must accept any interference received,including interference that may cause undesired Honeywell International Inc.
- Page 2 EXPOSICIÓN A RF: Este equipo cumple con los límites de FCC de exposición a la radiación La marca Honeywell se usa con licencia de Honeywell lnternational lnc. establecidos para ambientes no controlados. Este equipo debe ser instalado y operado con una...