D-Link Express Ethernetwork DI-704P Manual
D-link express ethernetwork di-704p broadband router
Hide thumbs
Also See for Express Ethernetwork DI-704P:
- User manual (95 pages) ,
- Quick installation manual (17 pages) ,
- Quick install manual (17 pages)

Related Manuals for D-Link Express Ethernetwork DI-704P


Summary of Contents for D-Link Express Ethernetwork DI-704P
- Page 1 DI-704P D-Link Express Ethernetwork Broadband Router Manual Building Networks for People...
-
Page 2: Table Of Contents
Contents Package Contents ................3 Introduction....................4 Getting Started ..................10 Using the Configuration Menu.............. 11 Installing the Print Server Software ............36 Networking Basics ................40 Reset to Factory Default Settings ............68 Technical Specifications ..............69 Contacting Technical Support ..............70 Warranty and Registration ..............71... -
Page 3: Package Contents
Package Contents Contents of Package: D-Link DI-704P Express Ethernetwork Broadband Router Power Adapter – 5V DC Ethernet (CAT5-UTP/Straight-Through) Cable Manual on CD Quick Installation Guide Note: Using a power supply with a different voltage rating than the one included with the DI-704P will cause damage and void the warranty for this product. -
Page 4: Introduction
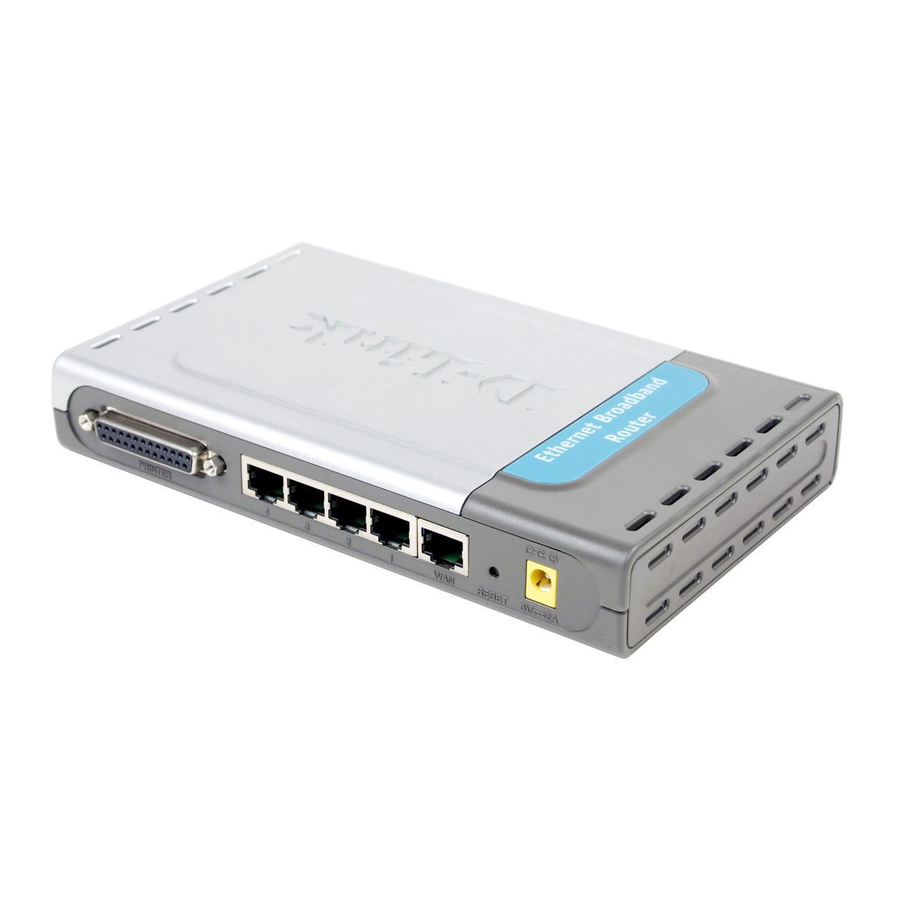
Introduction The D-Link DI-704P Broadband Router includes 4 ports and a printer port. It provides a complete solution for Internet surfing and office resources sharing. It is an ideal way to extend the reach and number of computers connected to your network. - Page 5 Connections Pressing the Reset Button All LAN ports auto-sense cable WAN port is the restores the types to accomodate straight- connection for the router to its through or cross-over cable. Ethernet cable to the original factory Cable or DSL modem default settings.
- Page 6 Features & Benefits continued Access Control supported Allows you to assign different access rights for different users Packet filter supported Packet Filter allows you to control access to a network by analyzing the incoming and outgoing packets and letting them pass or halting them based on the IP address of the source and destination.
- Page 7 Introduction to Firewalls A firewall is a device that sits between your computer and the Internet that prevents unauthorized access to or from your network. A firewall can be a computer using firewall software or a special piece of hardware built specifically to act as a firewall. In most circumstances, a firewall is used to prevent unauthorized Internet users from accessing private networks or corporate LAN's and Intranets.
- Page 8 Introduction to Virtual Private Networking Virtual Private Networking (VPN) uses a publicly wired network (the Internet) to se- curely connect two different networks as if they were the same network. For example, an employee can access the corporate network from home using VPN, allowing the employee to access files and printers.
- Page 9 LEDS stands for Light-Emitting Diode. The DI-704P has the following LEDs as described below: LED Activity A steady light indicates Power a connection to a power sourcea power source Flashes once per second to indicate an M1 LED active system Lights up when the device is busy M2 LED A solid light indicates connection on the...
-
Page 10: Getting Started
(see the Quick Installation Guide included with the DI-704P.) If you are connecting a desktop computer to your network, you can install the D-Link DFE-530TX+ ethernet adapter into an available PCI slot. (See the Quick Installation Guide included with the DWL-530TX+.) If you are connecting a laptop computer to your network, install the drivers for the Ethernet Cardbus adapter (e.g., D-Link DFE-690TXD) into a laptop... -
Page 11: Using The Configuration Menu
Using the Configuration Menu Whenever you want to configure your network or the DI-704P, you can access the Configuration Menu by opening the web-browser and typing in the IP Address of the DI-704P. The DI-704P default IP Address is shown below: Open the web browser Type in the IP Address of the DI-704P... - Page 12 Using the Configuration Menu Home > WAN Choose WAN Type WAN stands for Wide Area Network. In this case WAN represents the mode in which you connect to the Internet. If you are uncertain, please ask your ISP which of the following represents your connection mode to the Internet: Dynamic IP Address-...
- Page 13 Using the Configuration Menu Home > WAN > Dynamic IP Address Most Cable modem users will select this option to obtain an IP Address automatically from their ISP (Internet Service Provider). Host Name- This is optional, but may be required by some ISPs. The host name is the device name of the Router.
- Page 14 Using the Configuration Menu Home > WAN > Static IP Address If you use a Static IP Address, you will input information here that your ISP has provided to you. WAN IP Address- Input the IP Address provided by your ISP WAN Subnet Mask- Input the Subnet Mask provided by your ISP WAN Gateway-...
- Page 15 Using the Configuration Menu Home > WAN > PPPoE Most DSL users will select this option to obtain an IP address automatically from their ISP through the use of PPPoE. PPPoE Account- Your PPPoE password provided by your ISP PPPoE Password- Your PPPoE username is provided by your ISP Primary DNS- You will get the DNS IP automatically from your ISP but you...
- Page 16 Using the Configuration Menu Home > WAN > PPTP Point-to-Point Tunneling Protocol (PPTP) is a WAN connection used in Europe. My IP Address- Enter the IP Address My Subnet Mask- Enter the Subnet Mask Server IP Address- Enter the Server IP Address PPTP Account- Enter the PPTP account name PPTP Password-...
- Page 17 Using the Configuration Menu Home > WAN > BigPond Cable Dynamic IP Address for BigPond is a WAN connection used in Australia. Account- Enter in the username for the BigPond account Password- Enter the password for the BigPond account Login Server- (Optional) enter the Login Server name if required Renew IP forever- If enabled, the device will automatically connect to your ISP...
- Page 18 Using the Configuration Menu Home > LAN LAN is short for Local Area Network. This is considered your inter- nal network. These are the IP settings of the LAN interface for the DI-704P. These settings may be re- ferred to as Private settings.
- Page 19 Using the Configuration Menu Advanced > Virtual Server The DI-704P can be configured as a virtual server so that remote users accessing Web or FTP services via the public IP address can be automatically redirected to local servers in the LAN (Local Area Network). The DI-704P firewall feature filters out unrecognized packets to protect your LAN network so all computers networked with the DI-704P are invisible to the outside world.
- Page 20 Using the Configuration Menu Advanced > Application Some applications require multiple connections, such as Internet gaming, video conferencing, Internet telephony and others. These applications have difficulties working through NAT (Network Address Translation). Special Applications makes some of these applications work with the DI-704P. If you need to run applications that require multiple connections, specify the port normally associated with an application in the Trigger field, then enter the public ports associated with the trigger port into the Incoming Ports field.
- Page 21 Using the Configuration Menu Advanced > MAC Filters MAC (Media Access Control) Filters are used to deny or allow LAN (Local Area Network) computers from accessing the Internet and network by their MAC address. At the bottom of the screen, there is a list of MAC addresses from the DHCP client computers connected to the DI-704P.
- Page 22 Using the Configuration Menu Advanced > IP Filter Use IP (Internet Proto- col) filters to allow or deny computers ac- cess to the Internet based on their IP ad- dress. Disabled IP Filter- Select this option if you do not want to use IP filters.
- Page 23 Using the Configuration Menu Advanced > Domain Filter Use Domain filters to allow or deny computers access to specific Internet domains whether it is through www, ftp, snmp, etc. Domain filters apply both to wired computers connected to one of the four Ethernet LAN ports and also to wireless clients connected wirelessly to the DI-704P.
- Page 24 Using the Configuration Menu Advanced > SNMP SNMP (Simple Network Management Protocol) is a widely used network monitoring and control protocol that reports activity on each network device to the administrator of the network. SNMP can be used to monitor traffic and statistics of the DI-704P. The DI-704P supports SNMP v1.
- Page 25 Using the Configuration Menu Advanced > DDNS DDNS (Dynamic Domain Name System) keeps dynamic IP addresses (e.g., IP addresses assigned by a DHCP capable router or server) linked to a domain name. Users who have a Dynamic DNS account may use this feature on the DI-704P. DDNS- When an IP address is automatically assigned by a DHCP server, DDNS automatically updates the DNS server.
- Page 26 Using the Configuration Menu Advanced > DMZ If you have a computer that cannot run Internet applications properly from behind the DI-704P, then you can allow that computer to have unrestricted Internet access. Enter the IP address of that computer as a DMZ (Demilitarized Zone) host with unrestricted Internet access.
- Page 27 Using the Configuration Menu Tools> Admin You can change the admin password here. It is recommended that you change the admin password from the default setting. The default password is blank (no password). To change the admin password, enter in the old password, and Password- enter the new password twice to confirm Remote...
- Page 28 Using the Configuration Menu Tools> Time Set the time here by entering it manually or use NTP (Network Time Protocol.) NTP is standard protocol on the Internet that sychronizes the time settings accurately for all the computers on your network. Select to enable NTP and synchronize the time settings on Enable NTP- your network using an NTP server...
- Page 29 Using the Configuration Menu Tools > System The current system settings can be saved as a file onto the local hard drive. The saved file or any other saved setting file created by the DI-704P can be uploaded into the unit. To reload a system settings file, click on Browse to search the local hard drive for the file to be used.
- Page 30 Using the Configuration Menu Tools > Firmware You can upgrade the firmware by using this tool. First, check the D-Link support site for firmware updates at http://support.dlink.com. Make sure that the firmware you want to use is saved on the local hard drive of your computer. Click on Browse to search the local hard drive for the firmware that you downloaded from the D-Link website to be used for the update.
- Page 31 Using the Configuration Menu Tools > Misc Restart Device- Click reboot to restart the unit. Block WAN Ping- Click Enable to block the WAN ping. Computers on the Internet will not get a reply back from the DI-704P when it is being “ping”ed. This may help to increase security.
- Page 32 Using the Configuration Menu Status > Device Info This screen displays information about the DI-704P. Click Refresh to update the current information. Refresh-...
- Page 33 Using the Configuration Menu Status > Log This screen displays activities occurring on the DI-704P. Click for advanced features (see next page.) Log Settings- Click Back to return to the top of the log. Back- Click Refresh to update the log. Refresh-...
- Page 34 Using the Configuration Menu Status > Log Settings IP Address of the Syslog Server- Enter in the IP address of a syslog server within the network. Click Enable to activate the policy. The DI-704P will send all of it’s logs to the specified syslog server. E-Mail Alert- The DI-704P can be set up to send the log files to a specific email address.
- Page 35 Using the Configuration Menu Help This screen displays the complete Help menu. For help at anytime, click the Help tab in the Configuration menu.
-
Page 36: Installing The Print Server Software
Installing the Print Server Software Insert the installation CD-ROM into the CD-ROM drive. The following window will be shown automatically. If it is not, please run “install.exe” on the CD-ROM. Click Install Print Server Software Click Next... - Page 37 Installing the Print Server Software (continued) Select the destination folder. Click Browse select a destination folder Click Next Click Finish Select the option for restarting the computer. Click After rebooting your computer, the software installation procedure is finished.
- Page 38 Configuring on Windows 98SE/ME Platforms After you finish the software installation procedure, your computer will be capable of network printing provided by the DI-704P. For convenience, we call the printer connected to the printer port of the DI-704P a print server. On a Windows 95/98 platform, open the Printers window in the My Computer menu.
- Page 39 Configuring on Windows XP/2000/NT Platforms Click Port The configuration procedure for a Windows 2000/XP platform is similar to that of Windows 95/98 except the screen of printer Properties: Click Configure Port Type in the IP address of the DI-704P. Click (Note: Screen shots are taken in Windows 2000, similar screens will appear in Windows XP.)
-
Page 40: Networking Basics
Networking Basics Using the Network Setup Wizard in Windows XP In this section you will learn how to establish a network at home or work, using Microsoft Windows XP. Note: Please refer to websites such as http://www.homenethelp.com http://www.microsoft.com/windows2000 for information about networking computers using Windows 2000, ME or 98. - Page 41 Networking Basics Please follow all the instructions in this window: Click Next In the following window, select the best description of your computer. If your computer connects to the internet through a gateway/router, select the second option as shown. Click Next...
- Page 42 Networking Basics Enter a Computer description and a Computer name (optional.) Click Next Enter a Workgroup name. All computers on your network should have the same Workgroup name. Click Next...
- Page 43 Networking Basics Please wait while the Network Setup Wizard applies the changes. When the changes are complete, click Next. Please wait while the Network Setup Wizard configures the computer. This may take a few minutes.
- Page 44 Networking Basics In the window below, select the option that fits your needs. In this example, Create a Network Setup Disk has been selected. You will run this disk on each of the computers on your network. Click Next. Insert a disk into the Floppy Disk Drive, in this case drive A.
- Page 45 Networking Basics Please read the information under Here’s how in the screen below. After you complete the Network Setup Wizard you will use the Network Setup Disk to run the Network Setup Wizard once on each of the computers on your network. To continue click Next.
- Page 46 Networking Basics Please read the information on this screen, then click Finish to complete the Network Setup Wizard. The new settings will take effect when you restart the computer. Click Yes to restart the computer. You have completed configuring this computer. Next, you will need to run the Network Setup Disk on all the other computers on your network.
- Page 47 Networking Basics Naming your Computer To name your computer, please follow these directions:In Windows XP: Click Start (in the lower left corner of the screen) Right-click on My Computer Select Properties and click Select the Computer Name Tab in the System Properties window.
- Page 48 Networking Basics Naming your Computer In this window, enter the Computer name Select Workgroup and enter the name of the Workgroup All computers on your network must have the same Workgroup name. Click OK Checking the IP Address in Windows XP The wireless adapter-equipped computers in your network must be in the same IP Ad- dress range (see Getting Started in this manual for a definition of IP Address Range.) To check on the IP Address of the adapter, please do the following:...
- Page 49 Networking Basics Checking the IP Address in Windows XP This window will appear. Click the Support tab Click Close Assigning a Static IP Address in Windows XP/2000 Note: Residential Gateways/Broadband Routers will automatically assign IP Ad- dresses to the computers on the network, using DHCP (Dynamic Host Configura- tion Protocol) technology.
- Page 50 Networking Basics Assigning a Static IP Address in Windows XP/2000 Double-click on Network Connections Right-click on Local Area Connections Double-click on Properties...
- Page 51 IP Address: e.g., 192.168.0.2 Subnet Mask: 255.255.255.0 Default Gateway: Enter the LAN IP address of the Wireless Router. (D-Link wireless routers have a LAN IP 192 168 address of 192.168.0.1) 192 168 Select Use the following DNS server addresses.
- Page 52 Networking Basics Assigning a Static IP Address with Macintosh OSX Go to the Apple Menu and se- lect System Preferences cClick on Network Select Built-in Ethernet in the Show pull-down menu Select Manually in the Con- figure pull-down menu Input the Static IP Address, the Subnet Mask and the Router IP Address in the ap- propriate fields...
- Page 53 Networking Basics Selecting a Dynamic IP Address with Macintosh OSX Go to the Apple Menu and select System Preferences Click on Network Select Built-in Ethernet in the Show pull-down menu Select Using DHCP in the Configure pull-down menu Click Apply Now The IP Address, Subnet mask, and the Router’s IP Address will appear in a few...
- Page 54 Networking Basics Adding and Sharing Printers in Windows XP After you have run the Network Setup Wizard on all the computers in your network (please see the Network Setup Wizard section at the beginning of Networking Basics,) you can use the Add Printer Wizard to add or share a printer on your network. Whether you want to add a local printer (a printer connected directly to one computer,) share an LPR printer (a printer connected to a print server) or share a network printer (a printer connected to your network through a Gateway/Router,) use the Add Printer...
- Page 55 Networking Basics Adding a local printer (a printer connected directly to a computer) A printer that is not shared on the network and is connected directly to one computer is called a local printer. If you do not need to share your printer on a network, follow these directions to add the printer to one computer.
- Page 56 Networking Basics Adding a local printer Click Next Select Local printer attached to this computer (Deselect Automati- cally detect and install my Plug and Play printer if it has been selected.) Click Next Select Use the follow- ing port: From the pull-down menu select the correct port for your printer (Most computers use the LPT1: port,...
- Page 57 Networking Basics Adding a local printer Select and highlight the correct driver for your printer. Click Next (If the correct driver is not displayed, insert the CD or floppy disk that came with your printer and click Have Disk.) At this screen, you can change the name of the printer (optional.) Click Next...
- Page 58 Networking Basics Adding a local printer This screen gives you information about your printer. Click Finish When the test page has printed, Click OK...
- Page 59 Networking Basics Adding a local printer Go to Start> Printers and Faxes A successful installation will display the printer icon as shown at right. You have successfully added a local printer. Sharing a network printer After you have run the Network Setup Wizard on all the computers on your network, you can run the Add Printer Wizard on all the computers on your network.
- Page 60 Networking Basics Sharing a network printer Click on Add a printer Click Next Select Network Printer Click Next...
- Page 61 Networking Basics Sharing a network printer Select Browse for a printer Click Next Select the printer you would like to share Click Next Click Finish...
- Page 62 Networking Basics Sharing a network printer To check for proper installation: Go to Start > Printers and Faxes The printer icon will appear at right, indicating proper installation. You have completed adding the printer. To share this printer on your network: Remember the printer name Run the Add Printer...
- Page 63 Networking Basics Sharing an LPR printer To share an LPR printer (using a print server,) you will need a Print Server such as the DP-101P+. Please make sure that you have run the Network Setup Wizard on all the computers on your network. To share an LPR printer, please follow these directions: Go to Start >...
- Page 64 Networking Basics Sharing an LPR printer Select Create a new port From the pull-down menu, select Standard TCP/IP Port, as shown. Click Next Please read the instructions on this screen Click Next Enter the Printer IP Address and the Port Name, as shown.
- Page 65 Networking Basics Sharing an LPR printer In this screen, select Custom Click Settings Enter the Port Name and the Printer Name IP Address. Select LPR Enter a Queue Name (if your Print-Server/ Gateway has more than one port, you will need a Queue name.) Click OK...
- Page 66 Networking Basics Sharing an LPR printer This screen will show you information about your printer. Click Finish Select the printer you are adding from the list of Printers. Insert the printer driver disk that came with your printer. Click Have Disk If the printer driver is already installed, do the following: Select Keep existing...
- Page 67 Networking Basics Sharing an LPR printer You can rename your printer if you choose. It is optional. Please remember the name of your printer. You will need this information when you use the Add Printer Wizard on the other computers on your network.
-
Page 68: Reset To Factory Default Settings
After you have tried other methods for troubleshooting your network, you may choose to Reset the DI-704P to the factory default settings. To hard-reset the D-Link DI-704P to the Factory Default Settings, please do the following: Turn off the DI-704P... -
Page 69: Technical Specifications
Technical Specifications Standards IEEE 802.3 10BASET-T Ethernet IEEE 802.3u 100BASE-TX Fast Ethernet IEEE 802.3x Flow Control EEE 802.1p Priority Queue ANSI/IEEE 802.3 NWay auto-negotiation VPN Pass Through Function PPTP L2TP IPSec Device Management Web-Based – Internet Explorer 6x or later; Netscape Navigator 6x or later;... -
Page 70: Contacting Technical Support
Contacting Technical Support You can find the most recent software and user documentation on the D-Link website. D-Link provides free technical support for customers within the United States for the duration of the warranty period on this product. U.S. customers can contact D-Link technical support through our web site, or by phone. -
Page 71: Warranty And Registration
D-Link’s sole obligation shall be to repair or replace the defective Hardware during the Warranty Period at no charge to the original owner or to refund at D-Link’s sole discretion. Such repair or replacement will be rendered by D-Link at an Authorized D-Link Service Office. The replacement Hardware need not be new or have an identical make, model or part. - Page 72 D-Link may reject or return any product that is not packaged and shipped in strict compliance with the foregoing requirements, or for which an RMA number is not visible from the outside of the package. The product owner agrees to pay D-Link’s reasonable handling and return shipping charges for any product...
- Page 73 Product may be reproduced in any form or by any means or used to make any derivative such as translation, transformation, or adaptation without permission from D-Link Corporation/D-Link Systems, Inc., as stipulated by the United States Copyright Act of 1976. Contents are subject to change without prior notice. Copyright 2002 by ©...