Electrolux Smart Service Manual
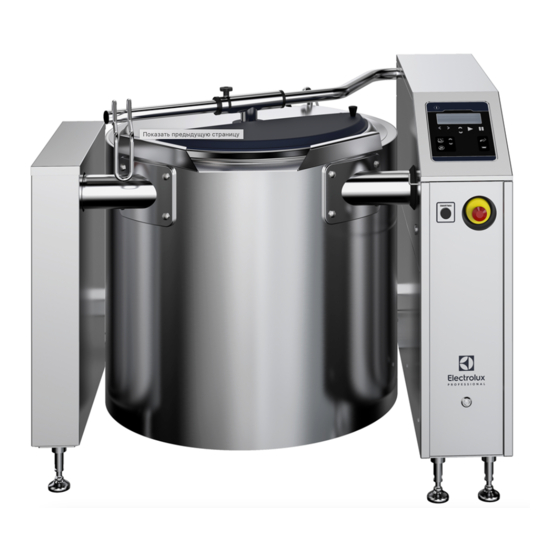
Boiling pan
Hide thumbs
Also See for Smart:
- Operating instructions manual (36 pages) ,
- Installation instructions manual (40 pages)
Table of Contents
Advertisement
Advertisement
Chapters
Table of Contents

Related Manuals for Electrolux Smart


Summary of Contents for Electrolux Smart
- Page 1 SPARE PARTS DIAGRAM FOR Boiling Pan PNC: 232120 Variomix Smart Promix Topline Standard Line Medium Line First Choice Group Blakeney Way, Kingswood Lakeside Cannock, Staffs, WS11 8LD TEL: 01543 577778 FAX: 01543504141 Email: enquires@firstchoice-cs.co.uk Web: www.firstchoice-cs.co.uk...
- Page 2 Reservdelskatalog Spare Parts Catalogue Ersatzteilliste Standard line, Medium Line Smart, Variomix, ® Promix Top Line Kokgryta Boiling pan Kochkessel ST0 1619-17 DOC. NO. EDITION 17 2012.06...
- Page 3 INNEHÅLLSFÖRTECKNING Sida • Högerpelare, Elektronik • Frekvensomformare 10-11 • Kärl+ Tippning+ Vänsterpelare 12-15 • Lock komplett 16-19 • Omrörare 20-27 • Uppvärmning, eluppvärmd 28-31 • Ellåda, eluppvärmd 50-100L 32-33 • Ellåda, eluppvärmd 150-300L 34-37 • Vattenanslutning 38-41 • Mantelkylning 42-43 •...
- Page 4 • Electric box, steam heated 150-300L 48-49 • Heating, steam heated 50-53 • Standard Line, steam heated 54-57 • Fästelement 58-60 INHALTSVERZEICHNIS Seite • Säule, rechts, Elektronik • Frequenzumformer 10-11 • Kessel+ Kippen+ Säule links 12-15 • Deckel komplett 16-19 •...
- Page 5 26 27 28 29 30 31 32 33 34 35 36 37 38 37 39 ILLUSTRATION 21666...
- Page 6 To 2005 week 20 Zu 2005 vochen 20 11). Fr.o.m. 2005 vecka 21 From 2005 week 21 Ab. 2005 vochen 21 12). Smart 13). Smart Variomix 14). Smart Promix ® 15). T.o.m. 2006 vecka 35 To 2006 week 35 Zu 2006 vochen 35 Fet stil = Ändring...
- Page 7 26 27 28 29 30 31 32 33 34 35 36 37 38 37 39 ILLUSTRATION 21666...
- Page 8 To 2005 week 20 Zu 2005 vochen 20 11). Fr.o.m. 2005 vecka 21 From 2005 week 21 Ab. 2005 vochen 21 12). Smart 13). Smart Variomix 14). Smart Promix ® 15). T.o.m. 2006 vecka 35 To 2006 week 35 Zu 2006 vochen 35 Fet stil = Ändring...
- Page 9 26 27 28 29 30 31 32 33 34 35 36 37 38 37 39 ILLUSTRATION 21666...
- Page 10 To 2005 week 20 Zu 2005 vochen 20 11). Fr.o.m. 2005 vecka 21 From 2005 week 21 Ab. 2005 vochen 21 12). Smart 13). Smart Variomix 14). Smart Promix ® 15). T.o.m. 2006 vecka 35 To 2006 week 35 Zu 2006 vochen 35 Fet stil = Ändring...
- Page 11 T.o.m. 2008 vecka 23, 24, 25 To 2008 week 23, 24, 25 Zu 2008 vochen 23, 24, 25 Fr.o.m. 2008 vecka 24, 25, 26 From 2008 week 24, 25, 26 Ab. 2008 vochen 24, 25, 26 ILLUSTRATION 21667...
- Page 12 Filter FIlter 2). 5). 9). ® Variomix Promix Top Line ® Smart Variomix Smart Promix T.o.m. 2004 vecka 45 To 2004 week 45 Zu 2004 vochen 45 Fr.o.m. 2004 vecka 46 From 2004 week 46 Ab. 2004 vochen 46 T.o.m. 2008 vecka 23...
- Page 13 13.1 13.2 13.4 13.3 13.1 ILLUSTRATION 21655...
- Page 14 10). 13.4 1 1 - - - ST0 61 55-00 Kabel Cable kabel 10). Smart Variomix, Top Line, Smart Variomix ® Promix , Smart Promix Tillbehör, Accessories, Zubehör T.o.m. 2004 vecka 06 To 2004 week 06 Zu 2004 vochen 06 Fr.o.m.
- Page 15 13.1 13.2 13.4 13.3 13.1 ILLUSTRATION 21655...
- Page 16 Bolt Bolzen 1 1 - - - 721 84 64-01 Bult Bolt Bolzen 10). Smart Variomix, Top Line, Smart Variomix ® Promix , Smart Promix Tillbehör, Accessories, Zubehör T.o.m. 2004 vecka 06 To 2004 week 06 Zu 2004 vochen 06 Fr.o.m.
- Page 17 26 25 24 34 33 23 ILLUSTRATION 21657...
- Page 18 Platta arm Plate Platte 1 1 1 1 1 ST0 18 56-00 Rörisolering Pipe insulation Rohrisolierung D10 T9 1). Standard Line, Smart 2). Variomix, Smart Variomix 3). Promix ® Smart Promix ® 4). Medium Line 5). Top Line 6). T.o.m. 2003.10 From 2003.10...
- Page 19 26 25 24 34 33 23 ILLUSTRATION 21657...
- Page 20 2). 3). 5). 7). 9). 1 1 1 1 1 ST2 39 25-00 RD-kit Lockbrytare 2). 3). 5). 7). 9). Spare parts kit, lid switch Ersatzteil Microschalter 1). Standard Line, Smart 2). Variomix, Smart Variomix 3). Promix ® Smart Promix ®...
- Page 21 ILLUSTRATION 21654...
- Page 22 O-ring O-Ring 1). 2). - - - 1 1 740 44 31-10 O-ring O-ring O-Ring 1). 2). 1). Variomix, Top, Smart Variomix ® 2). Promix, Smart Promix 3). Till 2003.08 To 2003.08 Zu 2003.08 Fet stil = Ändring 4). Fr.o.m. 2003.08 From 2003.08...
- Page 23 ILLUSTRATION 21654...
- Page 24 428 16 19-01 Medbringarskruv Carrier screw Mitnehmerschraube - - - - 1 428 16 19-03 Medbringarskruv Carrier screw Mitnehmerschraube 1). Variomix, Top, Smart Variomix ® 2). Promix, Smart Promix 3). Till 2003.08 To 2003.08 Zu 2003.08 Fet stil = Ändring 4).
- Page 25 ILLUSTRATION 21664...
- Page 26 1 1 1 - - 740 43 14-00 O-ring O-ring O-Ring 1). 2). - - - 1 1 740 43 14-10 O-ring O-ring O-Ring 1). 2). 1). Variomix, Top, Smart Variomix Fet stil = Ändring ® ® Promix Smart Promix Bold print = Change T.o.m. 2011 vecka 9...
- Page 27 ILLUSTRATION 21664...
- Page 28 - - - 1 - 428 12 86-00 Baffel Agitator plate Baffel - - - - 1 428 12 20-00 Baffel Agitator plate Baffel 1). Variomix, Top, Smart Variomix Fet stil = Ändring ® ® Promix Smart Promix Bold print = Change T.o.m.
- Page 29 ILLUSTRATION 21650...
- Page 30 (Überhitz.schutze) 1). Comfort, tillval mantelkylning &/auto. vattenpåfyllning Comfort, Option Auto.cooling &/Auto.water filling Comfort, Mantelkülung&/Auto. Vollschlagen 2). Standard Line, Medium Line 3). Variomix, Top, Smart Variomix 4). Promix, Smart Promix Fet stil = Ändring 5). Smart Bold print = Change 6). T.o.m. 2007 vecka 04...
- Page 31 ILLUSTRATION 21650...
- Page 32 Hutmutter 1). Comfort, tillval mantelkylning &/auto. vattenpåfyllning Comfort, Option Auto.cooling &/Auto.water filling Comfort, Mantelkülung&/Auto. Vollschlagen 2). Standard Line, Medium Line 3). Variomix, Top, Smart Variomix 4). Promix, Smart Promix Fet stil = Ändring 5). Smart Bold print = Change 6). T.o.m. 2007 vecka 04...
- Page 33 ILLUSTRATION 21652...
- Page 34 762 21 08-06 Hylsa Sleeve Hülse PR 15,2 491 45 00-00 Fäste Attachment Befestigung 1). Standard Line, Medium Line, Smart 2). Variomix, Top Line 3). Promix 4). Till 2003.10 To 2003.10 Zu 2003.10 Fet stil = Ändring 5). Fr.o.m. 2003.10 From 2003.10 Ab 2003.10...
- Page 35 ILLUSTRATION 21651...
- Page 36 552 22 15-00 Nätfilter Filter Filter 2 2 2 552 22 15-00 Nätfilter Filter Filter 1). Standard Line, Medium Line, Smart 2). Variomix, Top Line 3). Promix, Smart Promix 8). Smart Variomix 4). Till 2003.10 To 2003.10 Zu 2003.10 5). Fr.o.m. 2003.10 From 2003.10...
- Page 37 ILLUSTRATION 21651...
- Page 38 Verschraubung M20x1,5 1 1 1 ST0 36 56-03 Kabelförskruvning Pipe nipple and nut Verschraubung M25x1,5 1). Standard Line, Medium Line, Smart 2). Variomix, Top Line 3). Promix, Smart Promix 8). Smart Variomix 4). Till 2003.10 To 2003.10 Zu 2003.10 5). Fr.o.m. 2003.10 From 2003.10...
- Page 39 10 15 ILLUSTRATION 21653...
- Page 40 Rör Pipe Rohr 1). Comfort, tillval mantelkylning &/auto. vattenpåfyllning, Comfort, Option Auto.cooling &/Auto.water filling, Comfort, Mantelkülung&/Auto. Vollschlagen 2). Variomix ; Top Line, Smart Variomix 3). Promix, Smart Promix 4). Till 2003.04 To 2003.04 Zu 2003.04 Fet stil = Ändring 5. Fr.o.m. 2003.04 From 2003.04...
- Page 41 10 15 ILLUSTRATION 21653...
- Page 42 Pfropfen 1). 5). 7). 1). Comfort, tillval mantelkylning &/auto. vattenpåfyllning, Comfort, Option Auto.cooling &/Auto.water filling, Comfort, Mantelkülung&/Auto. Vollschlagen 2). Variomix ; Top Line, Smart Variomix 3). Promix, Smart Promix 4). Till 2003.04 To 2003.04 Zu 2003.04 Fet stil = Ändring 5.
- Page 43 ILLUSTRATION 21659...
- Page 44 1). Comfort, tillval mantelkylning &/auto. vattenpåfyllning, Comfort, Option Auto.cooling &/Auto.water filling, Comfort, Mantelkülung&/Auto. Vollschlagen Fet stil = Ändring 2). Variomix ; Top Line, Smart Variomix Bold print = Change 3). Promix, Smart Promix Fettdruck = Änderung 4). Standard Line, Medium Line, Smart...
- Page 45 ILLUSTRATION 21658...
- Page 46 Standard Line/ Medium Line, Eluppvärmd Utgåva Månad År Illustration 21658 Standard Line/ Medium Line, Electrical heated Edition Month Year Standard Line/ Medium Line, El. beheiz Ausgabe Monat Jahr 2010 Antal Art.nr Anm. Pos. Quantity Art. no Benämning Description Bezeichnung Notes Anzahl Art.
- Page 47 ILLUSTRATION 21662...
- Page 48 Ellåda,Ånguppvärmd 50-100L Utgåva Månad År Illustration 21662 Electric box, Steam heated 50-100L Edition Month Year Eletrischebüsche,Dampfbeheiz 50-100L Ausgabe Monat Jahr 2011 Antal Art.nr Anm. Pos. Quantity Art. no Benämning Description Bezeichnung Notes Anzahl Art. Nr Anm. 50 L 100 L 428 06 46-00 Ellåda Electric box Electrischebüsche...
- Page 49 ILLUSTRATION 21663...
- Page 50 Ellåda,Ånguppvärmd 150-300L Utgåva Månad År Illustration 21663 Electric box, Steam heated 150-300L Edition Month Year Eletrischebüsche,Dampfbeheiz 150-300L Ausgabe Monat Jahr 2011 Antal Art.nr Anm. Pos. Quantity Art. no Benämning Description Bezeichnung Notes Anzahl Art. Nr Anm. 150 L 200 L 300 L 1 1 1 428 06 33-00...
- Page 51 ILLUSTRATION 21661...
- Page 52 Uppvärmning, Ånguppvärmd Utgåva Månad År Illustration 21661 Heating, steam heated Edition Month Year Beheizug, dampfbeheizung Ausgabe Monat Jahr 2008 Antal Art.nr Anm. Pos. Quantity Art. no Benämning Description Bezeichnung Notes Anzahl Art. Nr Anm. 50 L 100 L 150 L 200 L 300 L 1 1 1 1 1 742 51 15-20 T-rör...
- Page 53 ILLUSTRATION 21660...
- Page 54 Uppvärmning, Ånguppvärmd Utgåva Månad År Illustration 21660 Heating, steam heated Edition Month Year Beheizug, dampfbeheizung Ausgabe Monat Jahr 2008 Antal Art.nr Anm. Pos. Quantity Art. no Benämning Description Bezeichnung Notes Anzahl Art. Nr Anm. 50 L 100 L 150 L 200 L 300 L 1 1 1 1 1 428 15 12-00...
- Page 55 31 30 ILLUSTRATION 21665...
- Page 56 Standard Line/ Medium Line, Ånguppvärmd Utgåva Månad År Illustration 21665 Standard Line/ Medium Line, Steam heated Edition Month Year Standard Line/ Medium Line, Dampfbeheiz Ausgabe Monat Jahr 2010 Antal Art.nr Anm. Pos. Quantity Art. no Benämning Description Bezeichnung Notes Anzahl Art.
- Page 57 31 30 ILLUSTRATION 21665...
- Page 58 Standard Line/ Medium Line, Ånguppvärmd Utgåva Månad År Illustration 21665 Standard Line/ Medium Line, Steam heated Edition Month Year Standard Line/ Medium Line, Dampfbeheiz Ausgabe Monat Jahr 2010 Antal Art.nr Anm. Pos. Quantity Art. no Benämning Description Bezeichnung Notes Anzahl Art.
- Page 59 Fästelement Utgåva Månad År Attachment element Edition Month Year Befestigungsteile Ausgabe Monat Jahr 2008 Art.nr Anm. Art. no Benämning Description Bezeichnung Notes Art. Nr Anm. 552 20 25-00 Korgmutter Cage nut Korbmutter 552 21 21-02 Flänsmutter Flange nut Flanschmutter 53 92 88-32 Bricka Washer Scheibe...
- Page 60 Fästelement Utgåva Månad År Attachment element Edition Month Year Befestigungsteile Ausgabe Monat Jahr 2008 Art.nr Anm. Art. no Benämning Description Bezeichnung Notes Art. Nr Anm. 724 32 87-40 Skruv Screw Schraube MFX 4x8 RFR 724 32 93-40 Skruv Screw Schraube MFX 4x16 RFR 724 33 31-40 Skruv...
- Page 61 Dataskylt Rating plate Kennschild Produktnummer Product no. Produktnummer Notes:...
- Page 62 Service manual Boiling pan Standard Line, Medium Line, Top Line ® Smart, Variomix, Promix DOC. NO. ST0 1637-02 EDITION 11 2012.01...
-
Page 63: Table Of Contents
Contents Page General instructions Control panel Choice of language Filling pressure vessel with water Electronic Calibration of temperature sensor Checking the safety valve Manometer and control manometer tap Agitator shaft 10-11 Lid switch Resistance control and replacing of heating element Fitting of the food temperature sensor Connecting of screened cabel Frequency converter... -
Page 64: General Instructions
General instructions Safety instructions If the instructions in this and other documentation Switch off the power before attempting to rectify faults or for the equipment are not followed, it could endang- operating problems. er the safety of the product and void the supplier’s Press On/Off •... -
Page 65: Control Panel
Control panel Smart, Promix ® Standard Line/ Variomix/ Top Line Medium Line On/Off Display Signal lamp Menu forwards Tilting/return switch Menu back Tilting Increase value Tilt return Decrease value Control switch Start Stop Agitator start Regulate heat Agitator stop Emergency stop... -
Page 66: Choice Of Language
Instructions. The water level in the vessel should be checked at least once/quarter. (SM) Smart = Boiling pan without agitator (SV) Smart Variomix = Boiling pan with Variomix agitator (SP) Smart Promix ® ® = Boiling pan with Promix agitator... -
Page 67: Electronic
Electronic · Press Menu forwards (V, P, T) up to Rev. UCP 0418 Replacement of effect PCB (se fig.1) TYPE OF PRINTER When replacing the effect PCB, the electronic shall be adjusted for the correct size boiling pan as below: ·... - Page 68 · Press Menu forwards AGITATOR o change the language, se even the section for Choice of language at page 5. · Select VARIOMIX/PROMIX or WITHOUT AGITATOR (Smart) pressing Increase value or Decrease va- PROGRAMMING · Press Menu forwards FOOD TEMP ·...
-
Page 69: Calibration Of Temperature Sensor
Calibration of temperature sensor Adjustment of the jacket cooling water NOTE! In case of replacement of effect- or display PCB, 1. Start the automatic cooling program, vait until a uniform flow of water running out of both pipes. the food temperature sensor or the heating element tem- 2. - Page 70 Control testing of safety valve During inspection of pressure vessels, a check is per- Confirm the code by pressing Start • formed to ensure the safety valve opens at the correct Select SAFETY TESTING with Decrease value • pressure 150 kPa (1.5 bar). In order to check this, the and press Menu forwards pan´s safety functions must be disabled.
-
Page 71: Agitator Shaft
Agitator shaft parts Carrier screw O-ring Carrier shaft O-ring Slide bearing, upper Slide bearing, lower (fixed part) Holder + Upper rubber packing Locking ring Spacer ring Ball bearing Wedge for carrier shaft Wedge for slide bearing Agitator shaft Wedge Ball bearing Spacer ring Locking ring fig. - Page 72 Dismantling of agitator bearing · Tighten the carrier shaft with the carrier screw. (See fig. 4) There should be an O-ring under the screw. This · Dismantle the worn gear motor. must also be replaced with a new one. · Lossen the carrier screw from inside the pan and ·...
-
Page 73: Lid Switch
Lid switch (See fig. 6A-B) To 2007.10 From 2007.10 1. Dismantle the roof and turn it to the side. ST2 39 25-00 RD-kit Lid Switch 2. Remove the old switch and the lid switch holder. 3. Assemble the new lid switch holder (A) but do not tigh- 1. -
Page 74: Resistance Control And Replacing Of Heating Element
Resistance control and replacing of heating element · Controll the resistant with the multimeter. · The heating element for 50,100 and 150 litre boiling pans have an rated effect of 7,5 kW, which is equiva- lent to approx. 21 Ohms per each heating loop at 3x400V/3x230V and 25 Ohms per each heating loop at 3x440V connected voltage. -
Page 75: Frequency Converter
Frequency converter (Yaskawa brand) Until June 2008 Although the Frequency converter is a complex product we refer to the delivered Operation manual by the supplier of the Frequency converter . The values in this manual refering to Frequency converter of the Yaskawa brand. The Operation manual can be ordered from supplier of the Frequency converter BEVI co. -
Page 76: Safety Plc
Programming (See Operation manual) When programming of frequency converter: · Press DSPL 6 times until PROG indicates · Select position by · Press to see the set-up · Change by · Confirm by · End programming pressing DSPL once FREF indica- tes. -
Page 77: Messages And Error Codes
Messages and Error codes Messages Cause Action The pan is not in working Press Tilt return Red LED in START flashing. position. The following text appears in the End limit switch S11 broken display: TILTING Xh XXmin XXX°C AGITATOR 000rpm Close the grid and press Agitator start The grid is fully or partially open. -
Page 78: Product Number
Smart 200 L Top Line-Comfort 9F23217600 Smart 300 L Prod.no Description 9F23217700 Smart Variomix 50 L 9F23216000 Top Line-C 50 L 9F23217800 Smart Variomix 100 L 9F23216100 Top Line-C 100 L 9F23217900 Smart Variomix 150 L 9F23216200 Top Line-C 150 L... - Page 81 Operating Instructions Product no. Type 9F23211300 97 67 00 1x-01 9F23211400 97 67 00 1x-11 9F23211500 97 67 02 1x-01 9F23211600 97 67 02 1x-11 9F23211700 97 67 03 1x-01 9F23211800 97 67 03 1x-11 9F23211900 97 67 04 1x-01 9F23212000 97 67 04 1x-11 9F23212100...
-
Page 83: General Instructions
General instructions Safety instructions Switch off the power before attempting to rectify faults or If the instructions in this and other documentation for operating problems. the equipment are not followed, it could endanger the • Press On/Off .(see Fig. 3) safety of the product and void the supplier’s guaran- tee and liability for the product. -
Page 84: Technical Data
Checking the safety valve Warning! Overheating In the event of overheating, a buzzer is activated and the following text appears in the display: ELEMENT OVERHEATED In the event of a fault in the element sensor, the heat is switched off. Fig. - Page 85 On/Off Display Menu forwards Menu back Increase value Decrease value Start Stop Agitator start Agitator stop Increase speed Decrease speed Tilting Tilt return Emergency stop Main circuit breaker Fig. 3...
-
Page 86: Instant Start
Operating instructions Variomix • Press Decrease value or STOP once and the Instant start (Fig.3) pan stops filling with water. If Menu forwards is activated before filling with water • Press On/Off for 1.5 seconds. The display is lit. has stopped, filling is interrupted with STOP The following text appears in the display: BOILING MENU SETTINGS... -
Page 87: Agitator
Agitator Pre-set agitator programs NOTE! When the agitator rotates There are 4 fixed agitator programs and 5 spaces for customised programs (adjustable). • The measuring stick must not be in the pan • Do not insert the measuring stick down into the pan •... - Page 88 • Press Agitator start • Press Increase speed , the agitator starts at the lowest speed of 20 rpm. (Max. speed 100 rpm.) • Press Decrease speed to reduce the speed. • Press Agitator stop to stop the program. WHIP The fixed program WHIP is used in order to whip the softer products e.g.
- Page 89 Programming customised agitator programs ..or • • Press Increase speed once. Press Increase value once and the following text The following text appears in the display: will flash: ADJ AGITATOR PROG 1 TIME R PAUSE NAME XX:XX Y XX:XX TIME PAUSE XX:XX XX:XX 1...
-
Page 90: Changing Values During Operation
Name agitator programs Changing values during operation The pan’s status appears in the display: • Press Increase speed to select agitator program. • Press Increase value and STOP simultaneou- BOILING sly for 3 seconds. -h --min XXX°C The following text appears in the display: WATER XXX+XXX AGITATOR 000rpm SELECT PROG. -
Page 91: Agitator Tool
Tilting the pan Choice of language NOTE! The factory setting is English. • Press Tilting and keep the button pressed until the Available languages are: pan has reached the desired position or stops at the Dansk maximum tipped position. Deutsch NOTE! Tilting can only take place when the lid and grid English are raised. -
Page 92: Messages And Error Codes
Messages and Error codes Messages Cause Action The pan is not in working Red LED in START flashing. The Press Tilt return position. following text appears in the display: TILTING Xh XXmin XXX°C AGITATOR 000rpm AGITATOR The grid is fully or partially Close the grid and press Agitator start GRID ON open. -
Page 93: Cleaning
Cleaning Maintenance of the agitator After use and during daily cleaning of the pan: The agitator’s bearing is filled with grease from the fac- tory. Refilling grease should take place during installa- • Use a neutral detergent and hot water. tion and then at least twice per year.