
Related Manuals for GE HumiLab


Summary of Contents for GE HumiLab
- Page 1 HumiLab Relative Humidity Generator Operator’s Manual 500 Research Drive Wilmington MA 01887-4498 Tel: 800-33HUMID (800-334-8643) Fax: 978-203-1919 www.generaleastern.com...
- Page 2 Windows and Windows XP are trademarks of Microsoft Corp. The information in this manual is believed to be reliable. However, GE General Eastern makes no warranty, expressed or implied, as to its accuracy and assumes no liability arising out of its use by others. We reserve the right to change this manual without prior notice.
-
Page 3: Table Of Contents
- - - - - - - - - - - - - - - - - - - - - - 1 Overview of the Humilab - - - - - - - - - - - - - - - - - - - - - - - 2 About this Owner’s Manual - - - - - - - - - - - - - - - - - - - - - - 2... - Page 4 Annual recertification - - - - - - - - - - - - - - - - - - - - - - - - 41 Troubleshooting the Humilab, system diagnostics - - - - - - - - - - 41 Is the system operating correctly? - - - - - - - - - - - - - - - - 41 APPENDIX A —...
-
Page 5: Introduction
Introduction About GE General Eastern GE General Eastern is devoted to the design and manufacture of accurate, reliable and rugged humidity measuring equipment. We specialize in providing solutions for applications where humidity measurements are critical. There are many ways to make humidity measurements, and no single humidity sensor meets all requirements for all applications. -
Page 6: Overview Of The Humilab
RH instruments and/or several smaller transmit- ters. The Humilab design is based on the proven divided flow tech- nology. Divided flow in the time domain excels as a reliable method for accurately controlling relative humidity at a fixed temperature. - Page 7 The lightning bolt within a triangle indicates that the accompa- nying information is important to the safety of the operator. Failure to heed this information will place the operator in danger. This symbol must not be ignored. The ground symbol indicates points that must be connected to earth ground.
-
Page 8: Chapter 1 - Installation And Initial Setup
Introduction This chapter explains site requirements for the Humilab system, what is shipped with the unit, how to install the Humilab, and how to set it up and perform the necessary procedures to ensure effi- cient and reliable operation to meet your calibration requirements. -
Page 9: System Diagram
• temperature bath/circulator (for maintaining a stable cham- Optional ber temperature from 20°C to 30°C) equipment If an item is missing, contact GE General Eastern. Our phone number and address are found on page 1. System diagram Interconnection of the HumiLab’s components is shown in Figure 1. -
Page 10: Installation
The HumiLab does not require an external dry gas source to operate. The unit is equipped with a desiccant cartridge that provides the Humilab with a –40°C dew point dry gas. The unit is designed to operate for approximately 24 hours of continuous usage (at an ambient humidity less than 50%) before having to replace the desiccant. - Page 11 Connect the dry air or dry nitrogen source using the 1/4” “instant-on” DRY AIR IN connector on the rear of the unit. See Figure 2, Humilab Rear View. Figure 2 — Humilab rear view (gas, A/C, and signal connections) Chapter 1 — Installation and Initial Setup Page...
-
Page 12: Electrical Connections
Electrical connections Electrical connections to the Humilab are made on the rear panel as shown in Figure 3. ANALOG OUTPUTS REFERENCE RS-232 CONTROLLER RS-232 LINE Figure 3 — Humilab electrical connections A. Analog outputs. Analog outputs are available to the operator via the DB-15 connector located on the rear I/O panel. -
Page 13: Rear Input/Output Fitting Connections
The fan must stay clean and clear of any obstruction to prevent damage to the internal electronics. Rear input/output fitting connections Mechanical connections to the Humilab are made on the rear panel as shown in Figure 4. COOLANT IN... - Page 14 fluid loss. If the optional chiller is used to accurately control the chamber temperature, connect the chiller output to the “Coolant In” fitting on the HumiLab and connect the chiller inlet to the “Coolant Out” fitting. Page...
-
Page 15: Initial Setup And Water Fill
Initial setup and water fill Distilled water is recommended for trouble-free operation. Always add water with the power turned off (the water level may pulse up and down during normal operation). After the water chamber has been filled (or refilled), allow sufficient time (typically one hour) to equilibrate the water temperature. -
Page 16: Chilled Mirror Setup
Chilled mirror setup The GE General Eastern HumiLab is shipped with the chilled mirror sensor (1111H-SR) and temperature probe (T-100) already installed. Although it was initialized at the factory, the dew point sensor Initialize the bridge should be initialized again to compensate for any change dew point during shipment. -
Page 17: Clean And Balance The Dew Point Sensor
2. Open the test chamber cover and remove the white dust cover. 3. Locate the sensor cleaning solution (in the GE General East- ern Maintenance Kit). Wet a cotton swab with the blue clean- ing solution, and rub it lightly over the mirror. Lightly buff the mirror dry with a clean, dry swab. - Page 18 number of bars is increased when you turn the screw coun- terclockwise.) The optical bridge has now been balanced. Figure 6 — 1111H Sensor Balance Adjustment Screw Location 6. Place the HEAT switch back in the OPERATE position. Run the instrument through another Pacer cycle. (Momen- tarily press the INIT iate switch.)
-
Page 19: Shipping The Humilab
Shipping the Humilab This procedure describes the process the customer should follow before shipping the HumiLab to an off site location or shipping the unit back to GE General Eastern. 1. Remove A/C power from the unit and disconnect the dry gas supply. -
Page 20: Chapter 2 - Operation
Chapter 2 — Operation Introduction The Humilab is very simple to operate. Minimal operator training is required for successful calibration of humidity recorders, transmit- ters, or hand-held portables. Typically, only the R.H. setpoint selector switch is used in a calibration. All other switches are set as desired and then left in position. -
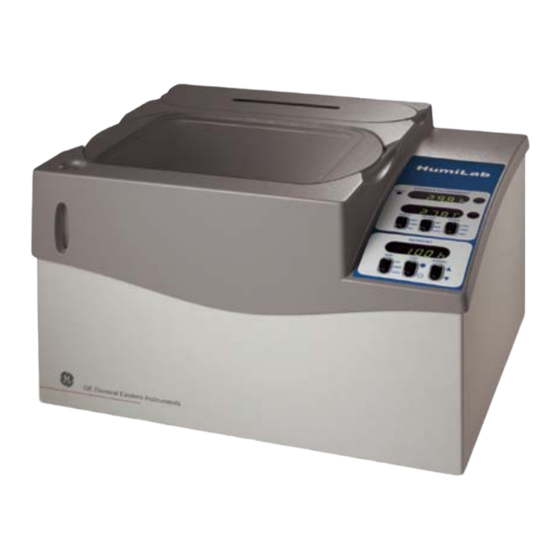
Page 21: Front Panel Displays And Switches
Figure 7 — Front Panel Controls The Humilab, as shipped, is set up by the factory for normal opera- tion. The two upper digital displays read Percent RH and Tempera- ture in °C. The lower digital display shows the desired chamber set point.With the exception of the setpoint selector switch, the other... - Page 22 If you wish to perform dew point calibrations in the test chamber, the display may be reprogrammed to read dew point. B. CONTROL STATUS Indicator. The green control indicator advises you that the control loop that maintains the dew layer on the chilled mirror is operating correctly, and that there is a proper layer.
- Page 23 In the manual position, you will never see the ervice light dis- “S” played, telling you that the sensor mirror needs cleaning. The upper ( INIT iate) momentary position manually triggers a Pacer cycle. F. SENSOR Switch. SENSOR switch is typically kept in the center OPER ate position.
-
Page 24: Performing Routine Calibrations
If you ever accidentally switch the Humilab to the “CAL” mode, simply shut the power OFF and then ON using the power switch (on the rear panel) to reset to normal operation. Performing routine calibrations The unit has been calibrated at the factory. Field calibration is only required if the measured humidity deviates from the setpoint humidity by more than 1% RH after one hour. -
Page 25: Chamber Response Time
Chamber response time Due to the large cavity size, typical response time will be approxi- mately 30–40 minutes. At the end of that period, the RH in the test chamber will be within 1% RH of the set point. After that time, the two will track each other within the accuracy specification of the instrument. -
Page 26: Chapter 3 - Using The Prostep Software
Prostep software generates humidity/temperature profiles to control the Humilab. It is supplied with the Humilab system on a CD-ROM. Using Prostep, a complete automatic test profile (relative humidity vs. time, with ramps and step changes) may be created using an IBM-compatible computer. -
Page 27: Installing The Prostep Software
For datalogging with PROSTEP, connect the host computer COM port connector to the 9-pin RS-232 REFERENCE connector on the rear of the Humilab. The Humilab must be in closed loop operation. Installing the Prostep software Load the supplied CD-ROM and open the folder containing the software. -
Page 28: Running Prostep
Humilab’s humidity profile. A profile must be uploaded to the screen Humilab before it can be used, and can be downloaded back into the PC for further editing. Use the File menu to manage the loading and storing of multiple profiles. To customize the profile display, see the Options / Scale Graph menu below. - Page 29 A setpoint sequence number 30°C B bath temperature Temp 20°C C an optional delay before the humidity change is initiated (to allow for temperature 80% RH stabilization) R.H. 40% RH D initial humidity E final humidity time F duration of the humidity ramp SETPOINT Figure 9 —...
- Page 30 Scale Graph. Sets the parameters for the main screen profile display: • units and maximum/minimum values for humidity and tem- perature (units set to %RH for typical Humilab profile) • time scale Page Chapter 3 — Using the PROSTEP software...
- Page 31 • graph colors. Set up Communications. Sets the comm port parameters: • baud rate: 1200 • flow control: None • stop bits: 1 • data bits: 8 • parity: not checked • comm port number: 1 Set up Data Logging Parameters. Sets units and formats for logged data.
- Page 32 • Enabled check box: must be checked to allow datalogging • the Comm Port that the Humilab or BlackBox is connected to • Channel base Address: default = 48 • Unused Channel Number: the number of the first Black Box channel that is not in use •...
- Page 33 Upload Profile. Send the current profile from the PC to the Humilab. Download Profile. Transfer a profile from the Humilab to the PC The Help menu supplies on-line instructions for using the Prostep The Help menu software. Chapter 3 — Using the PROSTEP software...
-
Page 34: Chapter 4 - Theory Of Operation
The Humilab Relative Humidity Generator uses a divided flow method to accurately generate a selected relative humidity in a large test chamber. The selected humidity is controlled using a GE General Eastern Chilled Mirror Hygrometer System. This chapter describes divided flow and the chilled mirror controller. -
Page 35: The Humilab Chilled Mirror Controller
The Humilab chilled mirror controller A GE General Eastern chilled mirror dew point hygrometer is built into the Humilab, providing continuous closed loop feedback to control the relative humidity of the test chamber. This device provides a fundamental, N.I.S.T. -
Page 36: What Is Optical Condensation Hygrometry
Also mounted within the test chamber is a platinum RTD air temperature sensor, providing air temperature information (dry bulb) to the chilled mirror hygrometer. A microprocessor calcula- tion converts the chamber dew point and air temperature data to percent relative humidity. A microprocessor-based relative humidity controller receives the RH information. -
Page 37: General Description Of The Chilled Mirror Hygrometer System
The Humilab includes a general purpose chilled mirror dew point General system that utilizes advanced microprocessor control. It is supplied description of with GE General Eastern’s patented PACER® (Programmable Auto- the chilled matic Contaminant Error Reduction). See Appendix B, page 62, for information on the Pacer feature. - Page 38 Figure 12 — Chilled Mirror Sensor Block Diagram ature is always at the dew point of the gas being measured, and it follows the dew point if it changes. A precision thermometer element embedded within the mirror directly monitors this dew point temperature and provides a continuous readout to the user.
-
Page 39: Chapter 5 - Maintenance And Troubleshooting
If you do spill any water, wipe it up completely. The water level may pulse up and down while the Humilab system is operating. Verifying desiccant condition. -
Page 40: Reference Measurement Maintenance
Humilab. Information addressing these problems is contained in Appendix B. Mirror maintenance Some Humilab owners routinely perform a mirror cleaning before each calibration run for best possible system operation. While this is truly optimum, it is theoretically possible (and generally most... -
Page 41: Balancing The Sensor Optics
2. Open the sensor by removing the sensor cover. 3. Moisten a cotton swab with a cleaning solution suitable for mirrors, such as the blue cleaning solution in the GE General Eastern maintenance kit, or dilute methanol or rubbing alco- hol. - Page 42 4. Initiate a Pacer cycle by switching the Balance switch to INIT At the completion of the cycle, the Humilab Chilled Mirror Hygrometer System is properly balanced. Figure 13 on the next page diagrams the complete balancing procedure.
- Page 43 Figure 13 — Mirror Check and Mirror Sensor Balancing Procedure Chapter 5 — Maintenance and Troubleshooting Page...
-
Page 44: Field Replacement Of The Sensor Mirror
One advantage of using a GE General Eastern chilled mirror dew Field point sensor is you can replace the mirror yourself. A sensor does replacement of not have to go back to the factory for replacement of the reflective the sensor surface, but of course you can return it for factory service if desired. -
Page 45: Annual Recertification
Annual recertification A dated Certificate of Conformance has been supplied with the Humilab system from the factory. This document indicates trace- ability to the National Institute of Standards and Technology (N.I.S.T.), in Gaithersburg, MD, USA. Under most regulatory stan- dards, this certification is good for one year from date of issue. If your regulations require that the Humilab be re-certified annually,... - Page 46 If that is possible, run it again with a stable water supply. • Relative humidity is a function of temperature. Are you cali- brating devices in the chamber that generate heat? If you are, try to locate the heat producer adjacent to the temper- ature sensor in the center of the chamber.
-
Page 47: Appendix A - Specifications
Appendix A — Specifications % RH range 10 to 90% RH at 77°F (25°C) Temperature range 68 to 86°F (20 to 30 °C) May be used with Tempera- ture-Controlled Water Bath/Circulator. Humidity limited by surface temperature of internal walls and cover (dew point in chamber must be less than interior surface temperature to avoid condensation). - Page 48 Materials Chamber: stainless steel I/O block: aluminum Water jacket: stainless steel Water capacity 2.2 gallons (8.3 liters) Mechanical I/O Fill port Fittings: 1/4" OD tubing, instant-on fittings for: water circu- lation (inlet and outlet); water drain (for gravity draining); and dry air inlet (compressed dry air to be regulated to < 5 PSI) Weight 66 lbs (30 kg) dry weight...
-
Page 49: Appendix B - Humilab Chilled Mirror Hygrometer Details
Appendix B — Humilab chilled mirror hygrometer details Introduction A general description of the Humilab chilled mirror is presented in Chapter 4. In most installations this general description is completely adequate. However, some applications may require system modification to meet specialized needs. This appendix describes how to make these changes. -
Page 50: Front Panel Operation And Displays
• A dew point sensor (GE General Eastern Model 1111H) • A Temperature Sensor (GE General Eastern Model T-100E) • Interconnecting cables (part of the Humilab) Front panel operation and displays The front panel was discussed in Chapter 2 from a daily operations standpoint. -
Page 51: Displays
The upper display can show R.H. or Dew Point °C or °F. The front panel DISPLAY switch is used to determine which parameter is displayed. The factory default for the Humilab is %R.H. The lower display shows temperature in °C or °F. The factory default is °C. Control status display. -
Page 52: Switches
OPER - Normal operation. HEAT - An on position that initiates heating of the chilled mirror sensor in order to clear it of dew or frost and verify proper control loop operation. Page Appendix B — Humilab chilled mirror hygrometer... -
Page 53: Option Selections Using The Display Switch
It is suggested that you now proceed to try it intuitively. The indi- cators will help you, and you may not need to use the manual. If you do run into trouble, consult the following sections. Appendix B — Humilab chilled mirror hygrometer details Page... -
Page 54: A More Rigorous Explanation Of The Option Selection System
. You can now do the same for the bottom display. • The CONTROL STATUS display shows “ ”, and the parameter annunciator shows “Humidity. ” If you press , you can view Page Appendix B — Humilab chilled mirror hygrometer... - Page 55 DISPLAY switch. Once again, you can do this only after you have changed the default behavior of the DISPLAY switch. Appendix B — Humilab chilled mirror hygrometer details Page...
-
Page 56: Rs-232C Re-Programming Mode
Once you have established communications, follow the menu descriptions here. RS-232C re-programming is done via a series of menus and oper- ates on firmware in the Humilab chilled mirror system. To access Page Appendix B — Humilab chilled mirror hygrometer... -
Page 57: The Main Menu
Electronics Module deactivates the sensor cooler control circuit and allows the sensor mirror to rise to ambient temperature. The front panel display of the Humilab will also blank. Press from the main menu to return to Operate mode. -
Page 58: Set Balance Type
Day =5 Balance every 5 1/2 days Hour = 12 At the Set Balance Type sub-menu, press to initiate a balance cycle. If you do this, the Electronics Module will be returned to Page Appendix B — Humilab chilled mirror hygrometer... -
Page 59: Set Rs-232 Units
There will not be any data output. Press the following key sequences followed by RETURN to see the parameter associated with the key sequence: D1 (DPC) D2 (RH) D3 (TMPC) Please note that the “D” must be uppercase Appendix B — Humilab chilled mirror hygrometer details Page... -
Page 60: Display Option
In the fix display mode, the display will show only the selected unit during normal operation. In the alternate display mode, the display will alternate between available units at a 2-second interval. This setting is not recommended for closed-loop operation. Page Appendix B — Humilab chilled mirror hygrometer... -
Page 61: Set Averaging
. The value will be echoed. When you are done, press to exit. Please consult the factory before attempting to calibrate the ana- log outputs of the Electronics Module. All analog outputs are fac- Appendix B — Humilab chilled mirror hygrometer details Page... -
Page 62: Service And Troubleshooting Procedures
The displayed reading is a microprocessor calcu- lation from the platinum Resistance Temperature Detector (RTD) that measures the mirror temperature, which is controlled auto- matically at the dew point. Page Appendix B — Humilab chilled mirror hygrometer... - Page 63 2. Check the temperature reading against another reliable ther- mometer placed near the dew point sensor. Allow sufficient Appendix B — Humilab chilled mirror hygrometer details Page...
- Page 64 They should agree. 3. If the platinum resistance thermometer in the dew point sen- sor is faulty, return the sensor to GE General Eastern for fac- tory servicing. (See Appendix E for return procedures.) “P” remains lit on the front panel.
-
Page 65: Helpful Hints
Helpful hints This Section contains background information that will help you better understand the Humilab’s chilled mirror hygrometer system operation and its use in the Humilab. At dew points above 0°C, the system stabilizes within a few seconds Time response on the correct dew or frost layer. - Page 66 In normal operation the Pacer feature actually reduces contaminants. You can largely avoid frequent need to clean the mirror by using the Pacer feature of the Humilab’s mirror system. This feature, used periodi- Page Appendix B — Humilab chilled mirror hygrometer...
- Page 67 Figure 14 — PACER® Cycle Figure 15 shows the effect on contaminants of using the Pacer cycle. Before Pacer After Pacer Figure 15 — contaminant Reduction Using the PACER® feature Appendix B — Humilab chilled mirror hygrometer details Page...
- Page 68 It may then take several minutes for the sensor to dry out. The process can be speeded by switching to HEAT temporarily heat the mirror. Page Appendix B — Humilab chilled mirror hygrometer...
-
Page 69: Appendix C - Configuring The Rs-232 Interface
This appendix contains information you will need to establish RS-232 connections to the Humilab (and Electronics Module). Cables, communication software, and protocol information is provided. Note that the Humilab does not use the alarm function described below. Establishing RS-232 communications The easiest method of establishing RS-232 communications is to use the Microsoft Windows Terminal program. -
Page 70: Using Rs-232C Communications
Using RS-232C communications RS-232C communications can be divided into two sections — Operate mode and Reprogramming mode. See Appendix B for a complete discussion of the Re-programming mode used with the Electronics Module. In Operate mode the RS-232C port outputs the following data. RS-232C operate mode - DP C=XXXX... -
Page 71: Computer Connections
In order to communicate with the Electronics Module, you need a Computer standard serial interface card installed in your computer. If your connections computer has one serial card, it is addressed as COM1. If there is a second serial card, it is addressed as COM2. You must also have a cable with the following connectors: •... -
Page 72: Appendix D - Humidity Equations And Conversion Charts
Appendix D — Humidity Equations and Conversion Charts Introduction The equations and charts in this appendix are supplied for users who are interested in more information about the relationships between vapor pressure, humidity, temperature, and dew point. Symbols used e = Vapor Pressure, millibars = Vapor Pressure with respect to ice, millibars = Vapor Pressure with respect to water, millibars = Saturation vapor pressure, ice, millibars... - Page 73 Saturation vapor pressure with respect to ice requires a minor adjustment of the constants as given by the following: 22.452 T ------------------------ - e is 6.1115 272.55 In addition to yielding saturation vapor pressure as a function of ambient temperature, the above equations also yield ambient vapor pressure as a function of dew/frost point.
- Page 74 Water vapor content expressed as parts per million by volume is given by the following: 6 e T d PPM V --------------------- - P e T d – Expressing water vapor content as parts per million by weight (or mixing ratio) requires multiplication of the above by the ratio of the molecular weight of water to that of air as given by the following: PPM W...
- Page 75 Figure 16 — Graphical Conversion Chart Appendix D — Humidity Equations and Conversion Charts Page...
- Page 76 Figure 17 — Psychrometric Chart Page Appendix D — Humidity Equations and Conversion...
-
Page 77: Appendix E - Warranty Information And Return Procedures
Appendix E — Warranty information and return procedures Warranty policy GE General Eastern warrants equipment of its manufacture against defective materials or workmanship for a period of one year from date of shipment. Liability of the Seller under this warranty is limited, at the Seller’s option, to:... - Page 78 3. If equipment is not covered by GE General Eastern’s Warranty Policy, a purchase order should be submitted with the equip- ment returned. The order should cover one of the following: •...
- Page 79 GE General Eastern recommends the open order or the dollar- or percentage-limited order. Either of these will expedite repairs and reduce costs.
- Page 80 Page Appendix E — Warranty information and return...