Advertisement
Quick Links
Advertisement

Related Manuals for Black & Decker Price Pfister 03-61XA


Summary of Contents for Black & Decker Price Pfister 03-61XA
- Page 1 99-1227 Copyright © 1999, Price Pfister, Inc.
- Page 2 CAUTION: Before Continuing ATTENTION: Avant de poursuivre ADVERTENCIA: Antes de continuar Thank you for purchasing this Tub and Shower. All Price Pfister products are carefully engineered, and factory tested to provide long trouble–free use under normal condi- 6'6" tions. This Tub and Shower is easy to install using basic 50"...
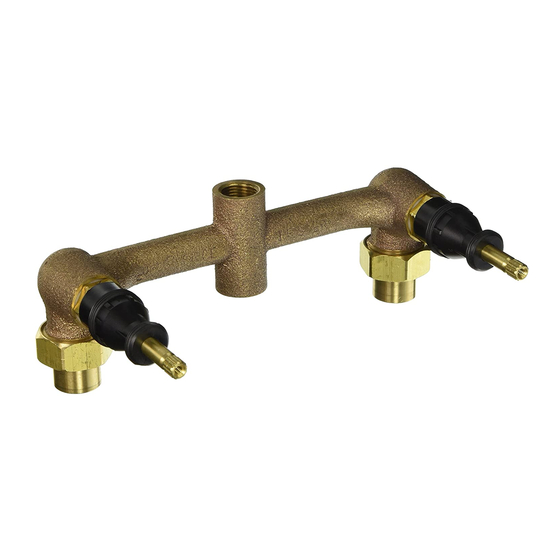
- Page 3 " " " É É É É É É É É " É É Français: FOR VALVE BODY INSTALLATION Position valve body (2B) so that Dimension from valve center- line (2D) to finished wall (2C) is 2-3/8” (Recommended), 1-7/8” minimum, or 2-7/8” maximum. Placez les raccords convertibles (3A) dans les écrous–union HOLE DETAIL FOR STANDARD 2 VALVE DIVERTER (3B).
- Page 4 FOR SHOWER INSTALLATION FOR TUB FILLER Install 1/2 inch iron pipe length per recommended dimensions Install 1/2 inch iron pipe length per recommended dimensions (see rough-in layout) to Elbow. Screw Shower Arm (4A) into (see rough-in layout) to elbow (5A) and attach nipple through Elbow (4B).
- Page 5 FLANGE INSTALLATION OR REMOVAL HANDLE TRIM INSTALLATION OR REMOVAL Remove stem protectors (6A) from threaded bonnets (6B). Before proceeding close both Valves. Place flange washers (6C) and then flange (6D) onto bonnets 7a Installing Decorative Lever Handles and against the wall. Attach sleeve washers (6E) to the short end Attach Handle Hubs (7B) onto Stems (7A) in desired position of the reversible sleeves (6F), and screw the reversible sleeves with Screws (7D).
- Page 6 FLUSHING THE VALVE HOT AND COLD VALVE MAINTANENCE Remove shower head and flush valve by turning water on full Turn off water. (Please see instructions 6 and 7 for trim removal) OPEN position, both HOT and COLD sides, until water is clear. Remove Button, Remove Screw, and Lift off Handle.
- Page 7 CAUTION: Maintenance NOTE: Trim Care ATTENTION: Entretien NOTE: Entretien des Garnitures ADVERTENCIA: Mantenimiento NOTÉ: Cuidado del Acabado DISASSEMBLY “Fragile Merchandise” 1. Replacement parts are available at the store where you Use Caution – Removal and Replacement of mounting hard- bought your faucet. ware Must Be Done With Care.
- Page 8 CAUTION: Be sure to position Valve Body correctly in wall, “SHOWER” marking up and “TUB” marking down. ATTENTION: Soyez sûr que le corps du robinet est correctement positionné dans le mur, le marquage “SHOWER” en haut et le marquage “TUB” en bas. PRECAUCIÓN: Es importante colocar el Cuerpo de la Llave...