Table of Contents
Advertisement
Available languages
Available languages
Quick Links
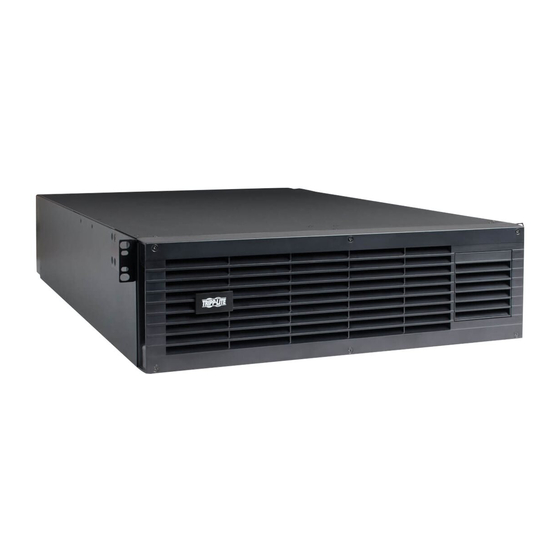
External Battery Pack for Select
SmartOnline
WARRANTY REGISTRATION
Register your product today and be
automatically entered to win an ISOBAR
surge protector in our monthly drawing!
tripplite.com/warranty
Owner's Manual
Model: BP192V12RT3US
Series Number: AG-03F7
Not suitable for mobile applications.
1111 W. 35th Street, Chicago, IL 60609 USA • tripplite.com/support
Copyright © 2020 Tripp Lite. All rights reserved.
UPS Systems
®
1
2
2
3
4
7
8
9
10
11
21
31
Advertisement
Chapters
Table of Contents

Related Manuals for Tripp Lite BP192V12RT3US


Summary of Contents for Tripp Lite BP192V12RT3US
-
Page 1: Table Of Contents
Русский WARRANTY REGISTRATION Register your product today and be automatically entered to win an ISOBAR surge protector in our monthly drawing! tripplite.com/warranty 1111 W. 35th Street, Chicago, IL 60609 USA • tripplite.com/support Copyright © 2020 Tripp Lite. All rights reserved. -
Page 2: Introduction
UPS. • Use only Tripp Lite battery packs with overcurrent protection. Contact Tripp Lite customer support at tripplite.com/support for appropriate models. -
Page 3: Removing Internal Battery
Removing Internal Battery Before mounting the battery pack to a 4-post or 2-post rack, first remove the battery trays and set them aside. To remove the batteries from the battery pack, follow the instructions below. Remove the six front screws from the front bezel and remove the bezel from the battery pack frame. -
Page 4: Mounting
Mounting (4-Post Rack) Mount your battery pack in a 4-post or 2-post rack or rack enclosure, or in an upright tower position. The user must determine the fitness of hardware and procedures before mounting. If hardware and procedures are not suitable for your application, contact the manufacturer of your rack or rack enclosure. - Page 5 Mounting (4-Post Rack) Using the included hardware, attach the mounting brackets to the forward mounting holes of the cabinet. The mounting bracket "ears" should face forward. (Some equipment may have pre-installed or integrated mounting brackets.) With the aid of an assistant (if necessary), lift the battery pack chassis and slide it into the shelves.
- Page 6 Refer to the illustrations for installation instructions. Tower Mounting The BP192V12RT3US External Battery Pack supports tower mounting. For increased stability, Tripp Lite recommends the use of the 2-9USTAND (sold separately). Follow the instructions included with the 2-9USTAND to complete the installation.
-
Page 7: Reinstalling Internal Battery
Reinstalling Internal Battery Each battery tray uses a blindmate DC connector . Position each battery pack tray so the red and black DC connector end is facing towards the rear of the battery pack unit and the communication port is facing toward the front of the battery pack housing. -
Page 8: Connection
DC connector is always located on the bottom. Daisy-Chaining Multiple Battery Packs For longer runtime, one or more BP192V12RT3US battery packs may be used with daisy-chain capability. To daisy-chain multiple battery packs to a single UPS, first connect the battery pack to the UPS (refer to Connecting a Battery Pack to the UPS). -
Page 9: Maintenance
12 hours. Service Your Tripp Lite product is covered by the warranty described in this manual. A variety of Extended Warranty and On-Site Service Programs are also available from Tripp Lite. For more information on service, visit tripplite.com/support. Before returning your product for service, follow these steps: 1. -
Page 10: Internal Battery Replacement
Product Registration Visit tripplite.com/warranty today to register your new Tripp Lite product. You’ll be automatically entered into a drawing for a chance to win a FREE Tripp Lite product!* * No purchase necessary. Void where prohibited. Some restrictions apply. See website for details. -
Page 11: Español
Retiro de la Batería Interna Instalación Reinstalación de la Batería Interna Conexión Mantenimiento Reemplazo de la Batería Interna Garantía English Français Русский 1111 W. 35th Street, Chicago, IL 60609 EE. UU. • tripplite.com/support Copyright © 2020 Tripp Lite. Todos los derechos reservados. -
Page 12: Introducción
Introducción El módulo de baterías externas BP192V12RT3US de Tripp Lite se diseñó para su uso con los siguientes sistemas UPS: Modelos de UPS con Tomacorrientes Incorporados: SU5KRT3UHV, SU5KRT3UX, SU5KRT3UG, SU5KRT3UHW, SU5KRT3UTF, SU6KRT3UHV, SU6KRT3UTF, SU6KRT3UX, SU6KRT3UG, SU6KRT3UHW Modelos de UPS con un Módulo de Distribución de Energía en Derivación Desmontable: SU5KRT3UHVMB,... -
Page 13: Retiro De La Batería Interna
Retiro de la Batería Interna Antes de instalar el módulo de baterías en un rack de 4 postes o 2 postes, retire las bandejas de baterías y colóquelas a un lado. Para retirar las baterías del módulo de baterías, siga las instrucciones siguientes. Retire los seis tornillos frontales del bisel frontal y retire el bisel del bastidor del módulo de baterías. -
Page 14: Instalación
Instalación (Rack de 4 Postes) Instale su módulo de baterías en un rack de 4 postes o 2 postes o en un gabinete o en posición de torre vertical. Antes de la instalación, el usuario debe determinar la conveniencia de los accesorios y procedimientos. Si los accesorios y procedimientos no son adecuados para su aplicación, póngase en contacto con el fabricante de su rack o gabinete. - Page 15 Instalación (Rack de 4 Postes) Coloque los soportes de instalación en los orificios delanteros del gabinete usando los accesorios incluidos. Las "orejas" del soporte de instalación deben apuntar al frente. (Algunos equipos pueden tener preinstalados o integrados los soportes de instalación). Con la ayuda de un asistente (si fuera necesario), levante el bastidor del módulo de baterías y deslícelo en los entrepaños.
- Page 16 2POSTRMKITWM o 2POSTRMKITHD). Para obtener instrucciones de instalación, consulte las ilustraciones. Instalación en Torre El módulo de baterías externas BP192V12RT3US soporta la instalación en torre. Para mayor estabilidad, Tripp Lite recomienda el uso del 2-9USTAND (vendido por separado). Siga las instrucciones incluidas con el 2-9USTAND para completar la instalación.
-
Page 17: Reinstalación De La Batería Interna
Reinstalación de la Batería Interna Cada bandeja de batería usa un conector blindmate de CD . Coloque cada bandeja de módulo de baterías de modo que el extremo del conector rojo y negro de CD esté orientado hacia la parte posterior de la unidad del módulo de baterías y el puerto de comunicación esté... -
Page 18: Conexión
Conexión en Cadena de Múltiples Módulos de Baterías Para una autonomía mayor, pueden usarse uno o más módulos de baterías BP192V12RT3US con capacidad de conexión en cadena. Para encadenar múltiples módulos de baterías a un solo UPS, conecte primero el módulo de baterías al... -
Page 19: Mantenimiento
(directo, indirecto, especial o resultante) al producto incurrido durante el embarque a Tripp Lite o un Centro de Servicio Autorizado de Tripp Lite no está cubierto por la garantía. Los productos enviados a Tripp Lite o un Centro de Servicio Autorizado de Tripp Lite deben tener cargos de transporte prepagados. -
Page 20: Reemplazo De La Batería Interna
El número de parte de la batería de reemplazo es: RBC58-3US. Tripp Lite ofrece un programa de intercambio para clientes de Norteamérica, en el que pueden intercambiar módulos de baterías gastadas por otros nuevos a un precio comparable al costo de reemplazo individual de la batería. Para obtener más detalles, visite tripplite.com/support. -
Page 21: Français
Retrait de la batterie interne Montage Réinstallation de la batterie interne Connexion Entretien Remplacement des batteries internes Garantie English Español Русский 1111 W. 35th Street, Chicago, IL 60609 USA • tripplite.com/support Droits d'auteur © 2020 Tripp Lite. Tous droits réservés. -
Page 22: Introduction
Introduction Le module de batteries externe BP192V12RT3US de Tripp Lite est conçu pour être utilisé avec les onduleurs suivants : Les modèles d'onduleurs avec des prises intégrées : SU5KRT3UHV, SU5KRT3UX, SU5KRT3UG, SU5KRT3UHW, SU5KRT3UTF, SU6KRT3UHV, SU6KRT3UTF, SU6KRT3UX, SU6KRT3UG, SU6KRT3UHW Les modèles d'onduleurs avec un module de distribution de l'alimentation de dérivation amovible : SU5KRT3UHVMB,... -
Page 23: Retrait De La Batterie Interne
Retrait de la batterie interne Avant de monter le module de batteries sur un bâti à 2 ou à 4 montants, retirer d'abord les supports de batteries et les mettre de côté. Pour retirer les batteries du module de batteries, suivre les instructions ci-dessous. Retirer les six vis avant du cadre avant, puis retirer le cadre du cadre du module de batteries. -
Page 24: Montage
Montage (bâti à 4 montants) Monter le module de batteries dans un bâti à 2 ou 4 montants ou dans une enceinte pour bâti, ou encore en position de tour verticale. L'utilisateur doit déterminer l'aptitude des matériaux et des procédures avant le montage. Si le matériel et les procédures ne conviennent pas à... - Page 25 Montage (bâti à 4 montants) En utilisant la quincaillerie incluse, fixer les supports de montage aux trous de montage avant de l'armoire. Les « oreilles » des supports de montage devraient faire face vers l'avant. (Certains équipements peuvent avoir des supports de montage intégrés ou préinstallés.) En faisant appel aux services d'un assistant (si nécessaire), soulever le châssis du module...
- Page 26 2POSTRMKITHD) peut être commandée séparément. Consulter les illustrations pour des instructions d'installation. Montage en tour Le module de batteries externe BP192V12RT3US prend en charge le montage en tour. Pour une stabilité accrue, Tripp Lite recommande l'utilisation de 2-9USTAND (vendu séparément). Suivre les instructions incluses avec le 2-9USTAND pour terminer l'installation.
-
Page 27: Réinstallation De La Batterie Interne
Réinstallation de la batterie interne Chaque support de batterie utilise un connecteur CC à enfichement aveugle Positionner chaque support de module de batteries de sorte que l'extrémité CC rouge et noir du connecteur soit tournée vers l'arrière du module de batteries et que le port de communication soit tourné... -
Page 28: Connexion
Connexion en guirlande de plusieurs modules de batteries Pour une durée de fonctionnement plus longue, un ou plusieurs modules de batteries BP192V12RT3US peuvent être utilisés avec la fonctionnalité de connexion en guirlande. Pour connecter plusieurs modules de batteries en guirlande à... -
Page 29: Entretien
Le remplacement des fusibles doit être confié à un technicien qualifié. Contacter le service à la clientèle de Tripp Lite pour de plus amples informations. -
Page 30: Remplacement Des Batteries Internes
: RBC58-3US. Tripp Lite offre un programme d'échange pour les clients de l'Amérique du Nord dans le cadre duquel ils peuvent échanger les modules de batteries usés pour des modules neufs à un prix comparable au coût de remplacement des batteries individuelles. -
Page 31: Русский
Руководcтво пользoвателя Внешний блок аккумуляторных батарей для отдельных моделей ИБП семейства SmartOnline ® Модель: BP192V12RT3US Номер серии: AG-03F7 Не предназначено для передвижной техники. Введение Важные указания по технике безопасности Извлечение внутренней батареи Монтаж Повторная установка внутренней батареи Подключение Техническое обслуживание... -
Page 32: Введение
подключения батарей, необходимо соединить между собой металлический корпус батарейного блока и металлический корпус ИБП. • Используйте только блоки аккумуляторных батарей марки Tripp Lite с защитой от перегрузок по току. За информацией о подходящих моделях обращайтесь к службу поддержки компании Tripp Lite на странице tripplite.com/support. -
Page 33: Извлечение Внутренней Батареи
Извлечение внутренней батареи Перед монтажом батарейного блока в двухрамную или однорамную стойку выньте батарейные отсеки и отложите их в сторону. Для извлечения батарей из батарейного блока выполните изложенные ниже инструкции. Выверните шесть передних винтов из лицевой панели и снимите ее с корпуса батарейного блока. Выверните... -
Page 34: Монтаж
Монтаж (в двухрамную стойку) Установите свой блок аккумуляторных батарей в двухрамную стойку или шкаф либо в вертикальное положение. Пользователь должен проверить пригодность оснастки и предполагаемых процедур дo начала установки. Если оснастка и процедуры не соответствуют условиям использования оборудования, свяжитесь с производителем своей стойки или стоечного шкафа. Описанные в настоящем руководстве процедуры предназначены для обычных типов шкафов и могут не подходить... - Page 35 Монтаж (в двухрамную стойку) Закрепите монтажные кронштейны в передних монтажных отверстиях корпуса с помощью крепежных деталей, входящих в комплект. "Язычки" монтaжных кронштейнов должны быть направлены вперед (некоторые виды оборудования могут иметь монтажные кронштейны, установленные на заводе-изготовителе или встроенные в конструкцию устройства). С...
- Page 36 Комплект для монтажа в однорамную стойку (мод. 2POSTRMKITWM или 2POSTRMKITHD) может быть заказан отдельно. Указания по монтажу представлены на иллюстрациях. Вертикальный монтаж Внешний блок аккумуляторных батарей мод. BP192V12RT3US предполагает возможность вертикального монтажа. Для повышения устойчивости компания Tripp Lite рекомендует использовать приспособление 2-9USTAND (продается отдельно).
-
Page 37: Повторная Установка Внутренней Батареи
Повторная установка внутренней батареи Каждый батарейный отсек имеет фальш-разъем постоянного тока . Расположите все батарейные отсеки таким образом, чтобы соединительные клеммы питания постоянного тока красного и черного цветов были обращены к тыльной стороне батарейного блока, а коммуникационный порт — к лицевой стороне корпуса батарейного блока. Начиная с правой... -
Page 38: Подключение
Примечание. Входной разъем постоянного тока всегда располагается сверху, а выходной разъем постоянного тока всегда располагается снизу. Шлейфовое соединение нескольких батарейных блоков Для продления времени автономной работы могут использоваться один или несколько батарейных блоков мод. BP192V12RT3US с возможностью шлейфового соединения. Для шлейфового подключения нескольких батарейных блоков к... -
Page 39: Техническое Обслуживание
перегрузки или короткого замыкания один из предохранителей размыкается (перегорает). Система внутренних батарей или внешний блок аккумуляторных батарей с перегоревшим предохранителем не обеспечивает выходного напряжения ни при какой нагрузке. Замена предохранителей должна производиться квалифицированным техническим специалистом. За дополнительной информацией обращайтесь в службу поддержки клиентов компании Tripp Lite. Хранение... -
Page 40: Замена Внутренних Батарей
персоналом. Сменный комплект батарей можно найти на странице tripplite.com/support/battery/index.cfm. Каталожный номер сменных батарей: RBC58-3US. Компания Tripp Lite предлагает своим клиентам в странах Северной Америки программу замены, по которой они могут менять отработанные батарейные блоки на новые по цене, сравнимой со стоимостью замены отдельной батареи. Более подробная информация изложена на странице tripplite.com/support.