Advertisement
Available languages
Available languages
Quick Links
Before you begin - Read these instructions completely and carefully.
IMPORTANT – OBSERVE ALL GOVERNING CODES AND ORDINANCES.
Note to Installer – Be sure to leave these instructions with the Consumer.
Note to Consumer – Keep these instructions with your Owner's Manual for future reference.
RAVTRANS2 will fit the following GE Appliances Plenum Kits: RAVWP6, RAVWP8, RAVWP12 and
RAVWP15. Remove any black transition plenum already installed.
RAVTRANS2 kit is required when replacing existing AZ75, AZ85, AZ90 or AZ91 series vertical air conditioner
with a new AZ95 series vertical air conditioner when the existing wall plenum is a 6", 8", 12" or 15" fixed
length tan color wall plenum. Changes in drain exit locations and drain routing, electrical connections,
platform height, conditioned air duct locations and additional space requirements for installation of
RAVTRANS2 kit are all items that need to be considered when replacing AZ75, AZ85, AZ90 or AZ91 series
units with an AZ95 series unit.
Installation of a new AZ95 series unit with a transition plenum will take up approximately 1 1/2" of additional
closet space once the unit is fully installed. Before starting the conversion be sure there is adequate closet
space to meet the manufacture's recommend minimum clearance requirements.
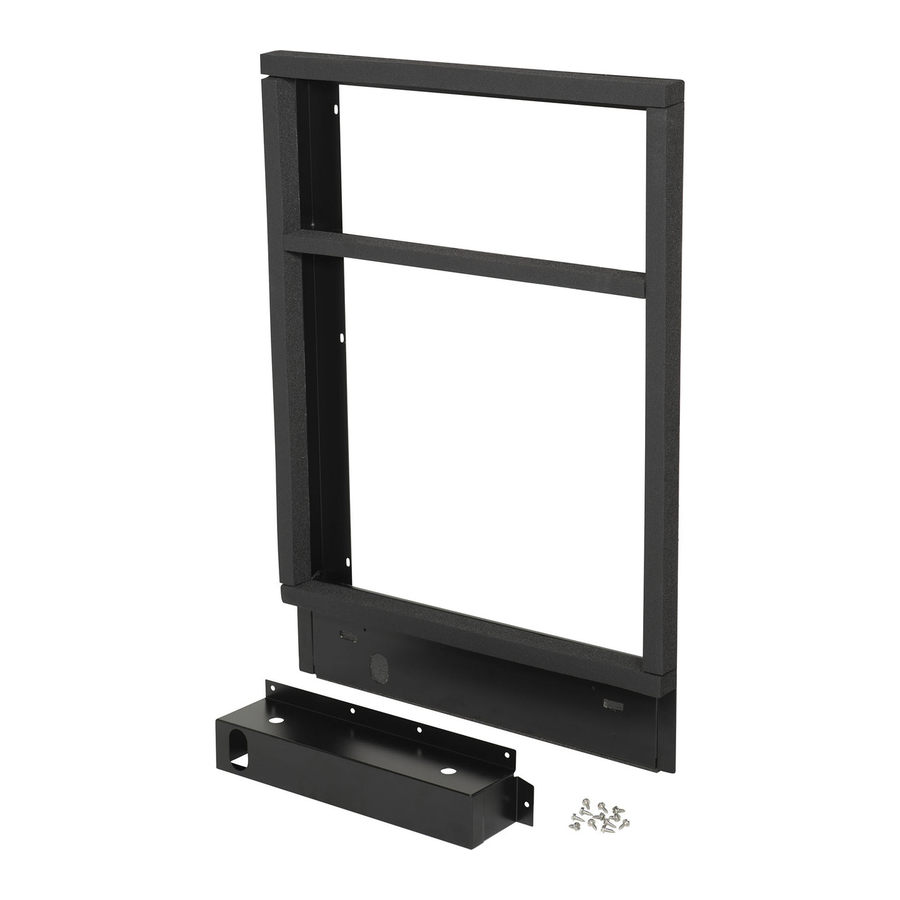
Parts Included
• Transition Plenum
• 12 - #10 ¾" long 5/16" hex head sheet metal screws
• Front Bracket
Installation Overview
UNIT*
GE is a trademark of the General Electric Company. Manufactured under trademark license.
Installation Instructions
for your new
RAVTRANS2
Transition Plenum
For replacing AZ75, AZ85 series units with a 6", 8",
12" or 15" plenums.
For replacing AZ90 and AZ91 series units installed
with black RAVTRANS transition plenum to 6", 8",
12" or 15" fixed length tan plenums.
Included in
RAVTRANS2
RAVTRANS2
RAVDPLAT*
Plenum
Mounting
Locations
Front Bracket
Existing Architectural
Louver*
Exterior/
Outside Wall
Existing
Wall Plenum*
*Sold Separately
31-5000568 Rev. 0 11-20 GEA
Advertisement

Related Manuals for GE RAVTRANS2


Summary of Contents for GE RAVTRANS2
- Page 1 Changes in drain exit locations and drain routing, electrical connections, platform height, conditioned air duct locations and additional space requirements for installation of RAVTRANS2 kit are all items that need to be considered when replacing AZ75, AZ85, AZ90 or AZ91 series units with an AZ95 series unit.
-
Page 2: Installation Instructions
Installation Instructions STEP 1: Prepare Installation Area by Removing the Existing Unit and RAVTRANS plenum (if applicable) WARNING the service panel and lock the area to prevent power from being switched on accidentally. To remove the AZ75/AZ85 series unit: 1. Disconnect the power coming into the unit from the main breaker or Inside Rigid closet mounted disconnect. - Page 3 Installation Instructions STEP 3: Attach the Front Bracket to the Plenum 1. Align the front bracket with the plenum. 2. Fasten the front bracket to the plenum with the 6 screws provided.
- Page 4 Notes Printed in the United States...
- Page 5 AZ91 par un nouveau climatiseur vertical de série AZ95 lorsque le plénum mural existant est de couleur brun clair (tan) de longueur fixe de 6, 8, 12 ou 15 po. L’installation de la trousse RAVTRANS2 lors du remplacement des unités de série AZ75, AZ85, AZ90 ou AZ91 par une unité...
-
Page 6: Instructions D'installation
Instructions d’installation ÉTAPE 1 : Préparer la zone d’installation en retirant l’unité existante et le plénum RAVTRANS (s’il y a lieu) AVERTISSEMENT Risque de choc électrique pouvant causer une blessure ou la mort. Avant de procéder à rétablissement accidentel du courant. Pour retirer une unité... - Page 7 Instructions d’installation ÉTAPE 3: Fixer le support frontal sur le plénum 1. Alignez le support frontal sur le plénum. 2. Fixez le support frontal sur le plénum à l’aide des 6 vis fournies.
- Page 8 Notes Imprimé aux États-Unis...
- Page 9 RAVWP15. Retire cualquier plénum de transición negro ya instalado. Se requiere el kit RAVTRANS2 al reemplazar los acondicionadores de aire verticales AZ75, AZ85, AZ90 o AZ91 por un acondicionador de aire vertical de la serie AZ95, cuando el plénum de pared existente sea un plénum de pared de color tostado de longitud fija de 6”, 8”, 12”...
-
Page 10: Instrucciones De Instalación
Instrucciones de Instalación PASO 1: Prepare el Área de Instalación Retirando la Unidad Existente y el Plénum RAVTRANS (si corresponde) WARNING Existe riesgo de descargas eléctricas que pueden ocasionar lesiones o la muerte. Antes de active de forma accidental. Para retirar la unidad de las series AZ75/AZ85: 1. - Page 11 Instrucciones de Instalación PASO 3: Adhiera el Soporte Frontal al Plénum 1. Alinee el soporte frontal con el plénum. 2. Ajuste el soporte frontal al plénum con los 6 tornillos provistos.
- Page 12 Notas Impreso en Estados Unidos...