Advertisement
Quick Links
ASSEMBLY INSTRUCTIONS
1. Check material received against the packing list. Check the number of packages received and then check the
contents of each package.
2. Check the material received for damage. If damage has occurred, secure a "damage notation" from the carrier
3. Identify each part as it is unpacked and put like parts together as close as possible to the working area where they are
to be assembled.
Be careful to use the correct hardware as specified in the assembly instructions.
4.
In the interest of safety, all lockers must be securely anchored to the floor and/or wall. For safety, handle all components
carefully and wear work gloves when assembling lockers. Install all units plumb and tighten all hardware securely. Retain
instructions for future reference.
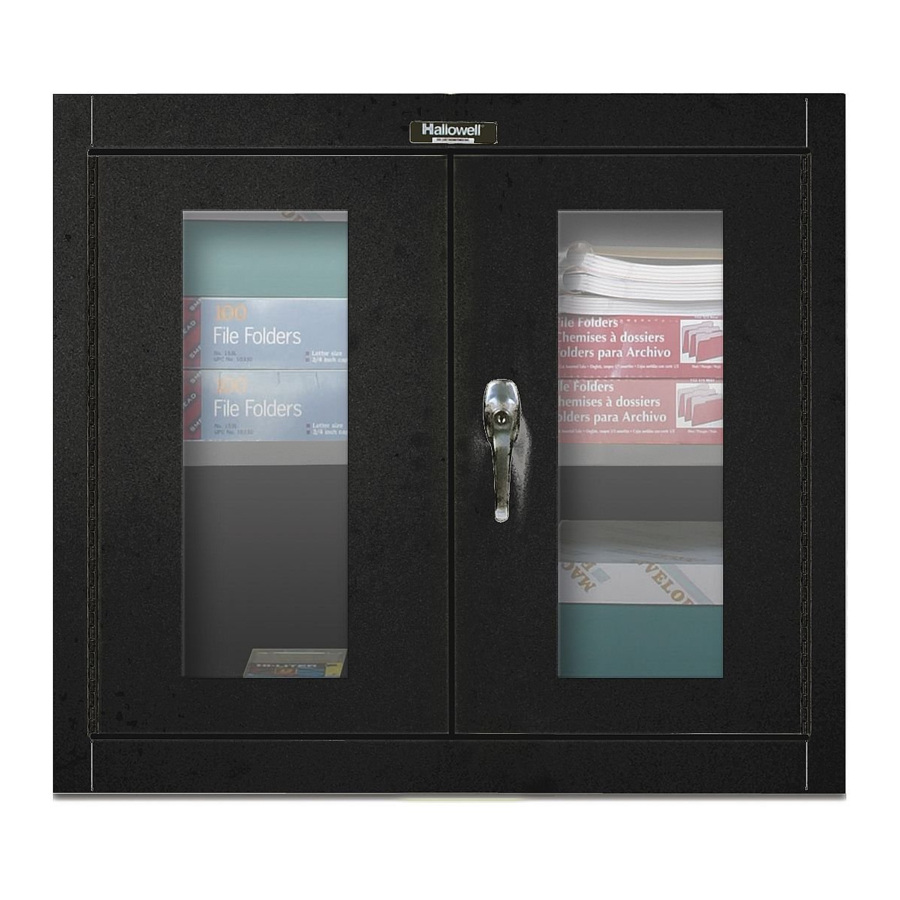
405 Wall Mount Cabinet
General Instructions
CAUTION
866-566-0500
info@Hallowell-List.com
www.Hallowell-List.com
Advertisement

Related Manuals for Hallowell 405 Wall Mount Cabinet


Summary of Contents for Hallowell 405 Wall Mount Cabinet
- Page 1 405 Wall Mount Cabinet ASSEMBLY INSTRUCTIONS General Instructions 1. Check material received against the packing list. Check the number of packages received and then check the contents of each package. 2. Check the material received for damage. If damage has occurred, secure a “damage notation” from the carrier 3.
- Page 2 11-30-15 405-3026/3630 LEGEND: ww : WIDTH hh : HEIGHT ITEM NO. PART NUMBER DESCRIPTION QTY. WLS12hh-22L SIDE PANEL WLS12hh-22R WLTBww12-22 TOP-BOTTOM WLRwwhh-22 BACK WLRDwwhhSV-22 DOOR CH100 DOOR HANDLE C100 DOOR PIN W114 WASHER CABINET SHELF CSS30WL SUPPORT WLASww12-22 SHELF TDS-3 DOOR STOP WLLBhhT LOCK BAR...
- Page 3 11-30-15 STEP 1 STEP 2 Insert side panel into the bottom/top hem and slide 2. Repeat step 1 on opposite side. until it bumps with the front. SA1526 PG. 2...
- Page 4 11-30-15 STEP 3 STEP 4 Make sure the back flange fully engages into the side panels. 4. Insert back panel into unit. Back is snapped in place with pressure. Once the Back Panel is set press the edge of the Side Panels to ensure full engagement of Back Panel.
- Page 5 11-30-15 Step 5 Channel Stop in place. 5. Insert pin through the top flange of the unit. Insert door through top pin. 6. Place washer between the door and frame. Insert pin through the inside of the door. Plastic Washer Insert Channel Stop to all 4 corners in the back of the unit.
- Page 6 11-30-15 DOUBLE DOOR HANDLE ASSEMBLY LOCK BAR LRG1 PLATE RETAINER HANDLE SCREW SPLIT WASHER SA1526 PG. 5...