Quasonix RDMS Firmware Update Procedure
3rd generation rack-mount telemetry receiver
Hide thumbs
Also See for RDMS:
- Installation and operation manual (253 pages) ,
- Technical manual (75 pages) ,
- Installation and operation manual (80 pages)
Table of Contents
Advertisement
Quick Links
ISO 9001:2015
Certified
Firmware Update Procedure
for the
3
rd
Generation Rack-Mount RDMS™ Telemetry Receiver
Quasonix, Inc.
6025 Schumacher Park Dr.
West Chester, OH 45069
04 October 2018
Revision 1.1.2
Specifications subject to change without notice.
All Quasonix products are under U.S. Department of Commerce jurisdiction; not covered by ITAR
No part of the document may be circulated, quoted, or reproduced for distribution without prior written approval from
Quasonix, Inc.
Copyright Quasonix, Inc., All Rights Reserved.
Advertisement
Table of Contents

Related Manuals for Quasonix RDMS


Summary of Contents for Quasonix RDMS
- Page 1 Revision 1.1.2 Specifications subject to change without notice. All Quasonix products are under U.S. Department of Commerce jurisdiction; not covered by ITAR No part of the document may be circulated, quoted, or reproduced for distribution without prior written approval from Quasonix, Inc.
-
Page 2: Table Of Contents
Firmware Update Procedure for RM Receivers Table of Contents Overview ..............................1 RDMS SD Card Update ....................... 1 RDMS Network Update ....................... 3 RDMS Local Update ........................8 Maintenance Instructions ........................12 Product Warranty ..........................13 Technical Support and RMA Requests....................14 List of Figures Figure 1: Front Panel, USB/Micro SD Port Access .................. -
Page 3: Overview
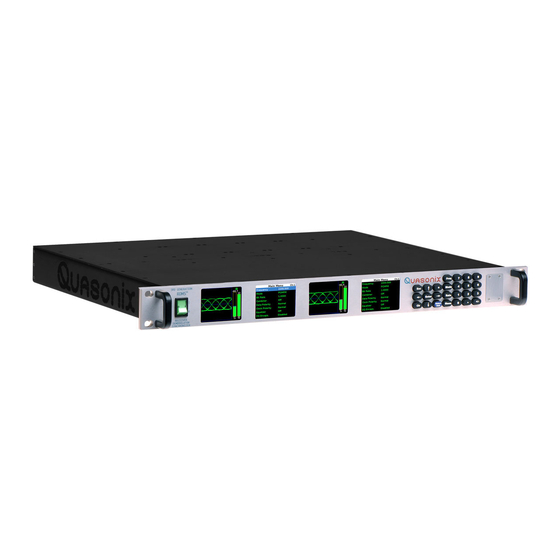
USB/Micro SD ports, as shown in Figure 1. Figure 1: Front Panel, USB/Micro SD Port Access Insert the programming card, supplied by Quasonix, into the Micro SD slot with the contacts facing up. Figure 2: Micro SD Programming Card, Insertion Directions Be sure the card is inserted completely in the Micro SD slot until it locks in, as shown in Figure 3. -
Page 4: Figure 3: Micro Sd Programming Card Inserted Into Slot And Locked In
Replace the SD slot access cover. Turn the RDMS back on. Upon completion of the update, the RDMS returns to normal operating mode and all parameters are reset to system defaults. 10. Navigate to the System Settings screen, then select System Info, as shown in Figure 5, to verify that the System Version matches the firmware update version. -
Page 5: Rdms Network Update
1.2 RDMS Network Update As of version R15, the RDMS now supports a remote Firmware Update via the browser interface. This feature relies on an encrypted and signed firmware update file provided by Quasonix upon release of all versions after R15. -
Page 6: Figure 7: About, System Version-Firmware Update Link
Figure 8: Firmware Update, Procedure and Notes After the selected filename displays, click on the Load Update File button to transfer the file to the RDMS This takes about 5-10 minutes, depending on network speed. Upload status is shown in Figure 9. -
Page 7: Figure 9: Firmware Update, Upload Status
After the file has been transferred, review the updated Notes, as shown in Figure 10. Click on the Begin Update button to start the update. No further input will be required unless an error is encountered. Figure 10: Firmware Update, File Selected—Ready to Update Quasonix, Inc. -
Page 8: Figure 11: Firmware Update In Progress, Status
During the update, the status and approximate time remaining will display, as shown in Figure 11. Figure 11: Firmware Update In Progress, Status • The RDMS front panel indicates that an update is currently being performed, as shown in Figure 12. Figure 12: Front Panel Network Update Status Messages •... -
Page 9: Figure 13: Firmware Update Complete
If the update fails for any reason, an information screen displays, as shown in Figure 15. Follow the instructions on the screen to retry the update or return to normal RDMS operation. An error code is provided and should be noted for use in correspondence with Quasonix. -
Page 10: Rdms Local Update
To perform a local update: Obtain a firmware update file from Quasonix. Transfer the update file to the root directory of a USB thumb drive, then plug the drive into the RDMS via the back port, or via the front port with an adapter. -
Page 11: Figure 16: System Update, Perform Local Update Selection
Select OK, then press Enter to start the update. The front panel displays the RDMS3 Local Update screen, as shown in Figure 18. Figure 18: RDMS3 Local Update Screen Press Enter to search the USB drive for the update file. Quasonix, Inc. -
Page 12: Figure 19: Rdms3 Local Update Screen, Update File Selected
Figure 19. Figure 19: RDMS3 Local Update Screen, Update File Selected Press Enter to start the update. The RDMS copies the update file from the USB drive and begins the update. • Do not power off the RDMS during the update. -
Page 13: Figure 21: System Settings, System Info
Firmware Update Procedure for RM Receivers Figure 21: System Settings, System Info Quasonix, Inc. -
Page 14: Maintenance Instructions
Firmware Update Procedure for RM Receivers 2 Maintenance Instructions The Rack Mount Receiver requires no regular maintenance, and there are no user-serviceable parts inside. Quasonix, Inc. -
Page 15: Product Warranty
Firmware Update Procedure for RM Receivers 3 Product Warranty The Rack Mount Receiver carries a standard parts and labor warranty of one (1) year from the date of delivery. Quasonix, Inc. -
Page 16: Technical Support And Rma Requests
Firmware Update Procedure for RM Receivers 4 Technical Support and RMA Requests In the event of a product issue, customers should contact Quasonix via phone (1-513-942-1287) or e-mail (support@quasonix.com) to seek technical support. If the Quasonix representative determines that the product issue must be addressed at Quasonix, a returned materials authorization (RMA) number will be provided for return shipment.