Advertisement
Quick Links
A
L1-7
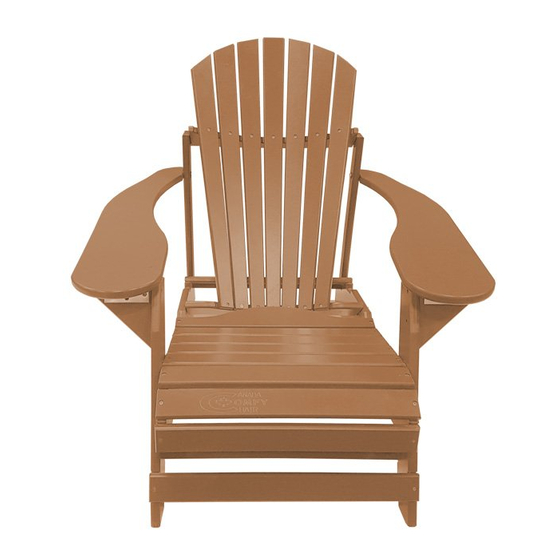
Parts List
A
B
M
C
D
C1-7
E
F
G
H
I
J
K
L
J
M
D
E
H
G
2
1
7
1
2
2
2
2
2
1
1
7
1
K B
42 x 4x40 mm screws
Same as C
F
2 x bolts and 2x nuts
6 x large screws
10 x washers
2 x hinges
12 x hinge screws; 4x20mm
F
K B
I
ELEVEN STEPS TO THAT COMFY CHAIR FEELING
To gain maximum enjoyment from your Comfy Chair, assemble the
chair according to the instructions in this sheet. For more strength and
stability, we advise glueing the joints with the water resistant wood
adhesive, which is included.
INSTRUCTION SHEET FCC200
Advertisement

Related Manuals for Canada Comfy Chair FCC200


Summary of Contents for Canada Comfy Chair FCC200
- Page 1 INSTRUCTION SHEET FCC200 K B 42 x 4x40 mm screws Same as C L1-7 2 x bolts and 2x nuts 6 x large screws 10 x washers 2 x hinges 12 x hinge screws; 4x20mm Parts List C1-7 ELEVEN STEPS TO THAT COMFY CHAIR FEELING To gain maximum enjoyment from your Comfy Chair, assemble the chair according to the instructions in this sheet. For more strength and stability, we advise glueing the joints with the water resistant wood adhesive, which is included.
- Page 2 STEP 1 Lay the sidepieces (A) with the curved sides uppermost on a smooth surface. Next, set the crossbar (B) at the back of (A) into the middle notch between the two deeper fixing slots. Screw the slat firmly in place with one 4x40 mm screw on each Back!! side. Make sure that the countersunk edge of the pre-drilled holes is facing upwards. Now take the slats (C) and place them in the notches. Make sure that the outermost edges of the slats are precisely aligned with the outermost edges of the notches and that the countersunk edges of the pre-drilled holes is facing upwards again. Secure the slats on each side with a 4x40 mm screw. Begin from the Front!! bottom. Do NOT attach part (M) yet. STEP 2 Now fix the low rear support (D) between the sidepieces (A). Take two washers and two large screws. Slide a washer over each large screw. Attach the large screws from the outside on the right and left through the large holes at the back of sidepieces (A). Place part (D) in the middle and secure it. Make sure that the plank fits properly. Do not turn the screws too tight. Plank (D) must be able to be turned round. STEP 3 Take two nuts and place them from the inside in the large holes at the front of the chair. Take the chair legs (E) and secure them on the outside of parts (A). Screw the bolts fast on the outside. Make sure that the slanted edge of the legs is facing the front and that the countersunk edge of the pre-drilled holes is facing the inside of the chair.
- Page 3 STEP 4 Take both cross boards (F). These are to be fastened underneath the chair legs (E). Set a plank in the foremost notches and secure it on each side with a 4x40 mm screw. Secure this in the same way as the other plank in the notches at the back of the legs. Make sure that the countersunk edge of the pre-drilled holes is facing upwards. STEP 5 The next step is to construct the armrests. Fasten the triangle (G) to chair leg (E) using two 4x40 mm screws. The two marked holes at the side of the triangle are reference points. The triangle should stick out 1.5 cm above the chair leg. The three marked holes on the triangle should face the front. Secure the hinge with a small hinge screw in the middle of the three holes. Secure the armrest opposite to the hinge. Use only one screw in the middle hole. Repeat on the other side of the chair. STEP 6 Now put the 'position stopper' together. Set the parts (I) onto the right and left side of the upper back support. Fasten the planks through the hole on the top of planks (I) using a large screw and a washer. Do NOT over tighten the screws. Part (J) must still be flexible. Now place slat (K) directly underneath part (I) and secure Position it using two 4x40 mm screw on each side. stopper...
- Page 4 STEP 7 Hold the 'position stopper' facing the front of the chair and set it upright into the first reclining position above the back of the chair. Slat (K) should sit perfectly in Positiion the notch. Turn the upper back support (J) so that the notches are facing the front stopper of the chair. STEP 8 Take the end of the armrest (H) and secure it to the 'position stopper'. Make sure that the front legs of the chair remain upright. Use two large screws and slide a washer over each screw. Turn the screws from the inside through the remaining low holes on top of the armrest. Use a spirit level to check that everything is level. Fasten the four remaining hinge screws - two under the armrest and two under the triangle. STEP 9 Now lay all seven slats (L) in the right order with the longest slat in the middle. Place three slats to the left and three to the right of the longest slat so that the top forms a curved line. Do not place the 2 outer slats too far to the outside, because the entire backrest must be able to pass. Remember! The countersunk edges of the holes should face upwards. Take the middle, longest slat and fasten it using a 4x40 mm screw to the low rear support (D) and then to the upper back support (J), also with a 4x40 mm screw. Make sure that the underside fits exactly in the notch and that the edge of the slat is flush with the edge of the low back support.
- Page 5 STEP 10 L1-7 Secure all slats in the right order underneath the low back support (D). Use one 4x40 mm screw per slat. Do not tighten the topmost screws yet. First, spread out all the slats so that they form a nice curve at the top and so that they are evenly spaced. Use the notches as reference points. When all slats are correctly positioned, the last 4x40 mm screws can be tightened up. STEP 11 Take the remaining slat (M) and place it in the notch at the back of the seat, with the curved side facing the back of the seat. Secure it using a 1½-inch screw on each side. The countersunk edges of the holes should face upwards. Relax and enjoy that Comfy Chair feeling to the full! Comfy Chair Oosterbrinkweg 5 3774 BW Kootwijkerbroek The Netherlands Tel: +31 (0) 6 105 929 65 Tel: +31 (0)342-443186 info@comfychair.nl | www.comfychair.nl...