HIKVISION DS-A81 Series Quick Start Manual
Hide thumbs
Also See for DS-A81 Series:
- User manual (109 pages) ,
- User manual (94 pages) ,
- Quick operation manual (80 pages)
Table of Contents
Advertisement
Quick Links
Advertisement
Table of Contents

Related Manuals for HIKVISION DS-A81 Series


Summary of Contents for HIKVISION DS-A81 Series
- Page 1 DS-A81 and DS-A83 Series ICVS Quick Start Guide...
-
Page 2: Table Of Contents
DS-A83 Series ICVS Quick Start Guide TABLE OF CONTENTS Chapter 1 Environment and Installation .............................6 1.1 Environment of Equipment Room .............................6 1.2 Installation and Initial Power-on ..............................7 1.3 Notes for Installation .................................7 1.4 Device Reliability ..................................8 Chapter 2 Panel Description .................................9 2.1 Overall View ....................................9 2.2 Front Panel .................................... - Page 3 INTERRUPTION, OR LOSS OF DATA, CORRUPTION OF SYSTEMS, OR LOSS OF DOCUMENTATION, WHETHER BASED ON BREACH OF CONTRACT, TORT (INCLUDING NEGLIGENCE), PRODUCT LIABILITY, OR OTHERWISE, IN CONNECTION WITH THE USE OF THE PRODUCT, EVEN IF HIKVISION HAS BEEN ADVISED OF THE POSSIBILITY OF SUCH DAMAGES OR LOSS.
- Page 4 DS-A83 Series ICVS Quick Start Guide Regulatory Information FCC Information Please take attention that changes or modification not expressly approved by the party responsible for compliance could void the user’s authority to operate the equipment. FCC compliance: This equipment has been tested and found to comply with the limits for a Class A digital device, pursuant to part 15 of the FCC Rules.
- Page 5 DS-A83 Series ICVS Quick Start Guide Applicable Models This manual is applicable to the models listed in the following table. Series Model DS-A81024S-ICVS DS-A81048S-ICVS 81 Series DS-A81024S-ICVS/Micro DS-A81048S-ICVS/Micro DS-A83024S-ICVS DS-A83048S-ICVS 83 Series DS-A83024S-ICVS/Micro DS-A83048S-ICVS/Micro Symbol Conventions The symbols that may be found in this document are defined as follows. Symbol Description Provides additional information to emphasize or supplement...
- Page 6 DS-A83 Series ICVS Quick Start Guide Safety Instructions Proper configuration of all passwords and other security settings is the responsibility of the installer and/or end-user. In the use of the product, you must be in strict compliance with the electrical safety regulations of the nation and region.
-
Page 7: Chapter 1 Environment And Installation
DS-A83 Series ICVS Quick Start Guide Chapter 1 Environment and Installation Devices described in this manual should be installed in the standard equipment room. 1.1 Environment of Equipment Room Power Supply System The storage system is sensitive to the change of a voltage, and an excessively high or low voltage, or a sudden change of the voltage may delete the data in the memory or even cause the damage of the components. -
Page 8: Installation And Initial Power-On
DS-A83 Series ICVS Quick Start Guide In a conditions of non-working status of the device, the horizontal and vertical vibration acceleration value of the floor surface of equipment room must be lower than 0.5 m/S². The rack or surface on which the device is installed must be properly grounded, and ensure that each device is grounded as well. -
Page 9: Device Reliability
DS-A83 Series ICVS Quick Start Guide Do not unplug the power cord when the device is running. In case of alarm beeper produced during the system running, please take immediate check and solution. 1.4 Device Reliability To enhance the reliability of the operating of the device, you can connect to the NTP server to adjust time for the storage server to avoid the inaccuracy of record time or record loss. -
Page 10: Chapter 2 Panel Description
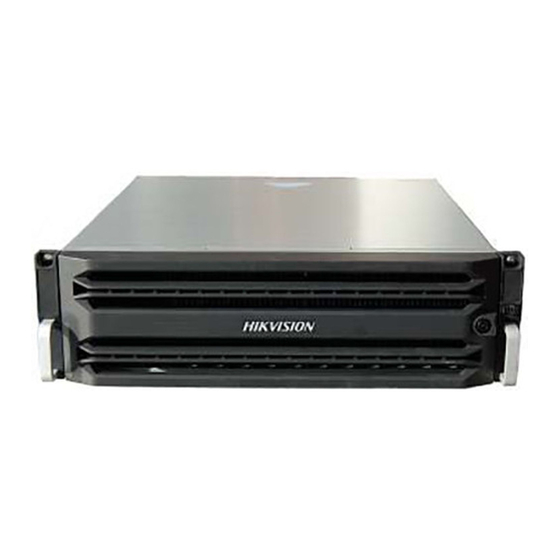
DS-A83 Series ICVS Quick Start Guide Chapter 2 Panel Description 2.1 Overall View The device adopts rack chassis. There are status indicators on the front panel. You can view the system status via the indicators directly. Figure 2-1 DS-A81024S-ICVS, DS-A83024S-ICVS, DS-A81024S-ICVS/Micro, DS-A83024S-ICVS/Micro Overall View... -
Page 11: Front Panel
DS-A83 Series ICVS Quick Start Guide Figure 2-2 DS-A81048S-ICVS, DS-A83048S-ICVS, DS-A81048S-ICVS/Micro, DS-A83048S-ICVS/Micro Overall View 2.2 Front Panel 2.2.1 DS-A83024S-ICVS There are 24 HDD slots on the front panel for DS-A83024S-ICVS, DS-A81024S-ICVS, DS-A81024S-ICVS/Micro, DS-A83024S-ICVS/Micro. Digits in figure show the HDD sequence. Figure 2-3 Front Panel 2.2.2 DS-A83048S-ICVS There are 48 HDD slots on the front panel for DS-A81048S-ICVS, DS-A83048S-ICVS,... -
Page 12: Buttons And Indicators On Front Panel
DS-A83 Series ICVS Quick Start Guide Figure 2-4 Front Panel 2.2.3 Buttons and Indicators on Front Panel Figure 2-5 Buttons and Indicators Table 2-1 Buttons and Indicators Description Name Description When device is off, press it to start device. Power button ... -
Page 13: Rear Panel
DS-A83 Series ICVS Quick Start Guide The button is solid green when device is running. Used to position device. The button starts/stops flashing in blue after you press it or FN button click the positioning button on configuration interface. Then you press it again and it will be unlit. -
Page 14: Ds-A81048S-Icvs And Ds-A81048S-Icvs/Micro
DS-A83 Series ICVS Quick Start Guide SAS interface 2.3.2 DS-A81048S-ICVS and DS-A81048S-ICVS/Micro Figure 2-7 Rear Panel Table 2-3 Rear Panel Description Name Name Power module Power switch Management LAN & USB FN button USB*2 RS232... -
Page 15: Ds-A83024S-Icvs And Ds-A83024S-Icvs/Micro
DS-A83 Series ICVS Quick Start Guide LAN 1 & LAN 3 LAN 5 LAN 2 & LAN 4 LAN 6 SAS interface 2.3.3 DS-A83024S-ICVS and DS-A83024S-ICVS/Micro Figure 2-8 Rear Panel Table 2-4 Rear Panel Description Name Name Power module 1 Power switch BBU (optional) LAN 5... -
Page 16: Ds-A83048S-Icvs And Ds-A83048S-Icvs/Micro
DS-A83 Series ICVS Quick Start Guide FN button 2.3.4 DS-A83048S-ICVS and DS-A83048S-ICVS/Micro Figure 2-9 Rear Panel Table 2-5 Rear Panel Description Name Name Power module 1 LAN 5 BBU (optional) LAN 6 RS-232 interface Power module 2 LAN 1 LAN 3 LAN 2 LAN 4 USB interface 1... - Page 17 DS-A83 Series ICVS Quick Start Guide USB interface 2 USB interface 3 SAS interface 2 SAS interface 1 SAS interface 3 FN button Power module 3 Power switch...
-
Page 18: Chapter 3 Hdd Installation
DS-A83 Series ICVS Quick Start Guide Chapter 3 HDD Installation Purpose: It is recommended to install the enterprise HDD to ensure data security. Refer to the list of compatible HDD models of our company for the recommended HDD models. Before you start: ... - Page 19 DS-A83 Series ICVS Quick Start Guide Step 3 Press the blue button to pop up the handle and hold the handle and pull the dummy HDD out of the slot. Figure 3-1 Pull Out Dummy HDD Step 4 Use the screwdriver to remove the baffle in the bottom of dummy HDD. Figure 3-2 Remove Baffle Step 5 Place the HDD in the dummy HDD.
- Page 20 DS-A83 Series ICVS Quick Start Guide You can judge if HDD is well installed by the dummy HDD indicators as shown in Figure 3-4. Solid blue: HDD is normal. Solid red: HDD is abnormal. Figure 3-4 Dummy HDD Indicators Step 8 Push the dummy HDD back into the slot.
-
Page 21: Chapter 4 Device Startup
DS-A83 Series ICVS Quick Start Guide Chapter 4 Device Startup Purpose: Proper startup and shutdown procedures are crucial to expanding the life of the device. Before you start: Connect all the data ports to Gigabit switch with the delivered CAT 5e cables. Step 1 Check if the power supply is plugged into an electrical outlet. -
Page 22: Chapter 5 Login And Activation
DS-A83 Series ICVS Quick Start Guide Chapter 5 Login and Activation 5.1 Access Device via Web Browser Purpose: You can get access to the device with a web browser. The recommended web browser includes Internet Explorer 8 to 11. Before you start: ... - Page 23 DS-A83 Series ICVS Quick Start Guide Figure 5-2 Activation Step 3 Click OK. STRONG PASSWORD RECOMMENDED–We highly recommend you create a strong password of your own choosing (Using a minimum of 8 characters, including at least three of the following categories: upper case letters, lower case letters, numbers, and special characters.) in order to increase the security of your product.
-
Page 24: Chapter 6 Network Configuration
DS-A83 Series ICVS Quick Start Guide Chapter 6 Network Configuration Purpose: Configure network after login. Step 1 Go to Device. Step 2 Click Information Overview. Step 3 Click Modify Network. Figure 6-1 Modify Network Step 4 Click Settings of a bound port. ... - Page 25 DS-A83 Series ICVS Quick Start Guide Figure 6-2 Set Bound Port Management port does not support port binding. Connect all bound ports to network.
-
Page 26: Chapter 7 Time Configuration
DS-A83 Series ICVS Quick Start Guide Chapter 7 Time Configuration Purpose: You can select time zone and synchronize time manually or by NTP. 7.1 Synchronize Time Manually Step 1 Go to Maintenance > Time Management. Figure 7-1 Time Management Step 2 Select Time Zone. Step 3 Select Time Sync as Manual Time Sync. - Page 27 DS-A83 Series ICVS Quick Start Guide Figure 7-2 NTP Time Sync.
-
Page 28: Chapter 8 Hdd Management
DS-A83 Series ICVS Quick Start Guide Chapter 8 HDD Management Purpose: You can search the information of all the HDD in storage device. Step 1 Go to Maintenance > Disk Management or Device > Information Overview > Disk Management. Figure 8-1 Disk Management Step 2 Specify search conditions. - Page 29 DS-A83 Series ICVS Quick Start Guide Step 3 Click Search. When disk status is alarm, unavailable, or processing, click the status in status column to show help. You can follow the help to recover disk. Step 4 (Optional) To locate a disk, check the disk and click Locate to turn on FN indicator of the disk. FN indicator will keep flashing (default flashing time is 600 seconds).
- Page 30 DS-A83 Series ICVS Quick Start Guide UD23482B...