NETGEAR M4250 Series User Manual
Av line of fully managed switches
Hide thumbs
Also See for M4250 Series:
- Configuration (10 pages) ,
- Installation manual (2 pages) ,
- User manual (100 pages)
Table of Contents
Advertisement
Quick Links
- 1 Chapter 1 Getting Started with the Av Ui
- 2 Use a Web Browser to Log in to the Av Ui
- 3 Log in to the Av Ui Using the Switch Default Ip Address
- 4 Overview of Preconfigured Av Profile Templates
- 5 Change the Default Management Vlan Profile
- 6 Reset the Switch to Factory Default Settings
- Download this manual
Advertisement
Table of Contents

Related Manuals for NETGEAR M4250 Series


Summary of Contents for NETGEAR M4250 Series
- Page 1 Audio Video User Manual AV Line of Fully Managed Switches M4250 Series NETGEAR, Inc. September 2020 350 E. Plumeria Drive 202-12148-01 San Jose, CA 95134, USA...
- Page 2 See the regulatory compliance document before connecting the power supply. For NETGEAR’s Privacy Policy, visit https://www.netgear.com/about/privacy-policy. By using this device, you are agreeing to NETGEAR’s Terms and Conditions at https://www.netgear.com/about/terms-and-conditions. If you do not agree, return the device to your place of purchase within your return period.
-
Page 3: Table Of Contents
Contents Chapter 1 Getting Started with the AV UI Supported Switches................5 Available publications................5 AV local browser UI overview..............5 Use a web browser to log in to the AV UI..........6 Log in to the AV UI using the switch default IP address....7 Log in to the AV UI with a known IP address........7 Register your switch................8 Chapter 2 Manage Audio-Video Profile Templates and Network... -
Page 4: Chapter 1 Getting Started With The Av Ui
Getting Started with the AV UI This user manual is for the AV Line of Fully Managed Switches M4250 Series and covers all M4250 switch models. This chapter provides an overview of how you can use your switch and access the audio-video (AV) local browser user interface (UI), in short AV UI. -
Page 5: Supported Switches
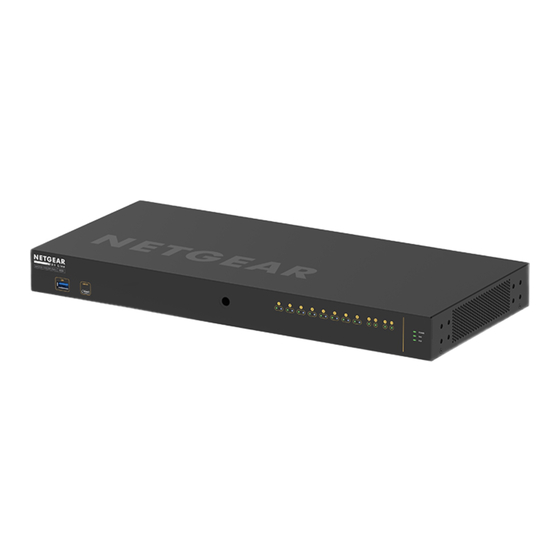
AV Line of Fully Managed Switches M4250 Series Supported Switches This release and this AV user manual are for the following M4250 switch models: • 8-port PoE+ and PoE++ models: M4250-10G2F-PoE+. Eight PoE+ (802.3at) 1GBASE-T RJ-45 ports, two 1GBASE-T RJ-45 ports, and two 1G SFP fiber uplink ports. The total PoE budget for the switch is 125W. -
Page 6: Use A Web Browser To Log In To The Av Ui
AV Line of Fully Managed Switches M4250 Series management software. However, you can use the management software to configure many advanced features that can improve AV flows, switch efficiency, and overall network performance. The switch software includes a set of comprehensive management features for configuring and monitoring the switch through one of the following methods: •... -
Page 7: Log In To The Av Ui Using The Switch Default Ip Address
AV Line of Fully Managed Switches M4250 Series Log in to the AV UI using the switch default IP address To use the switch default IP address to access the switch over the AV UI: 1. Prepare your computer with a static IP address: •... -
Page 8: Register Your Switch
5. Enter your NETGEAR account email address and password and click the NETGEAR Sign In button. If you did not yet create a NETGEAR account, click the Create an account link, follow the directions onscreen to create an account, and then register the switch with your NETGEAR email address and password. -
Page 9: Chapter 2 Manage Audio-Video Profile Templates And Network Profiles
Manage Audio-Video Profile Templates and Network Profiles The switch provides preconfigured audio-video (AV) profile templates that you can configure and assign to switch ports and VLANs, thereby creating network profiles. You can also set up your own AV profile templates. These are the essential differences between an AV profile template and a network profile: •... -
Page 10: Overview Of Preconfigured Av Profile Templates
Overview of preconfigured AV profile templates An AV profile template integrates NETGEAR proprietary settings, allowing you to optimize specific audio and video environments. You can use an AV profile template to create one or multiple network profiles. For example, you could use the same AV profile template to set up three network profiles based on a location within a building: one network profile for the lobby, one for the theater, and one for the patio. -
Page 11: Change The Default Management Vlan Profile
AV Line of Fully Managed Switches M4250 Series • Audio-over-IP Shure. Use this template to connect the switch to devices that support Shure Network Audio Encryption. • Video with Dante audio. IP video encoders for transmitting video, IP video decoders for receiving video, and a controller for these devices when Dante audio is supported in the same VLAN. -
Page 12: Manage Network Profiles
AV Line of Fully Managed Switches M4250 Series To configure ports, do the following: • Change a port to a tagged port. Click the port once. The port is marked with a T icon (for tagged). • Remove a port from the profile. Click the port twice to remove it from the profile. - Page 13 AV Line of Fully Managed Switches M4250 Series The Network Profiles page displays. 5. In the Profile Templates table, to the right of the AV profile template that you want to use, do one of the following: • Preconfigured AV profile template. Click the gear icon.
-
Page 14: Change A Network Profile
AV Line of Fully Managed Switches M4250 Series Change a network profile You can change an existing network profile. To change a network profile: 1. Launch a web browser such as Google Chrome, Apple Safari, Mozilla Firefox, or Microsoft Edge. -
Page 15: Manage Custom Av Profile Templates
AV Line of Fully Managed Switches M4250 Series The Login windows displays. 3. Enter admin as the user name, enter your local device password, and click the Login button. The first time that you log in, no password is required. However, you then must specify a local device password to use each subsequent time that you log in. - Page 16 AV Line of Fully Managed Switches M4250 Series Note: You can enable PTP and multicast for a custom AV profile template but you cannot configure the PTP and multicast settings in the AV UI. For DSCP and CoS, you can configure limited settings in the AV UI. To configure PTP and multicast settings and all DSCP and CoS settings that are available on the switch, use the main UI or the CLI.
- Page 17 AV Line of Fully Managed Switches M4250 Series 10. To add a QoS configuration to the template, do the following: a. To the right of the Quality of Service section, click the Add QoS link. b. From the QoS Type menu, select one of the following types of QoS: •...
-
Page 18: Change A Custom Av Profile Template
AV Line of Fully Managed Switches M4250 Series Change a custom AV profile template You can change an existing custom AV profile template. You cannot change a preconfigured AV profile template. To change a custom AV profile template: 1. Launch a web browser such as Google Chrome, Apple Safari, Mozilla Firefox, or Microsoft Edge. -
Page 19: Remove A Custom Av Profile Template
AV Line of Fully Managed Switches M4250 Series • Change a QoS configuration. Do the following: a. In the Quality of Service section, next to the QoS configuration that you want to change, click the 3 dots icon, and select Edit. - Page 20 AV Line of Fully Managed Switches M4250 Series 5. In the Profile Templates table, to the right of the custom AV profile template that you want to remove, click the 3 dots icon and select Delete. A confirmation window displays.
-
Page 21: Chapter 3 Manage The Switch
• Restart the switch from the AV UI • Reset the switch to factory default settings • Manually control the fans For information about all management and monitoring options of the switch, see the main user manual, which you can download by visiting netgear.com/support/product/m4250.aspx#download. -
Page 22: Manage Licenses
Add a license online If you received a license key, you can add a license online. Your switch must be connected to the Internet so that your license can be verified and activated by a NETGEAR license server. To add a license online: 1. -
Page 23: Add A License Offline
AV Line of Fully Managed Switches M4250 Series Add a license offline You can add a license offline. The license must already be activated by a NETGEAR license server and must be located on the computer that you use to access the AV UI. -
Page 24: Update The Firmware
AV Line of Fully Managed Switches M4250 Series The Login windows displays. 3. Enter admin as the user name, enter your local device password, and click the Login button. The first time that you log in, no password is required. However, you then must specify a local device password to use each subsequent time that you log in. -
Page 25: Manage The Date And Time Settings
AV Line of Fully Managed Switches M4250 Series Note: The switch can hold two firmware versions. If it does, the page displays the active firmware version. The main UI lets you manage firmware files, and change from one version to another. The AV UI lets you update the firmware but does not let you manage firmware versions. -
Page 26: Configure One Or More Sntp Servers
7. In the SNTP Server Address 1, SNTP Server Address 2, and SNTP Server Address 3 fields, enter the domain name or IP address for an SNTP server. By default, the SNTP Server Address 1 field contains the NETGEAR SNTP server (time-a.netgear.com), but you can replace that SNTP server with another one. -
Page 27: Change The System Name
AV Line of Fully Managed Switches M4250 Series Change the system name By default, the system name is the switch model number. You can change the system name. To change the system name: 1. Launch a web browser such as Google Chrome, Apple Safari, Mozilla Firefox, or Microsoft Edge. -
Page 28: Reset The Switch To Factory Default Settings
AV Line of Fully Managed Switches M4250 Series The Overview page displays. 4. In the upper right of the page, click the Reboot link. A warning or confirmation window does not display. The switch restarts immediately. During the restart process, do not power down the switch. When the process is complete, you might need to log in again to the AV UI. -
Page 29: Manually Control The Fans
AV Line of Fully Managed Switches M4250 Series process is complete, you can log in again to the AV UI, but you first might need to determine the IP address of the switch. Manually control the fans The switch includes internal fans that support intelligent operation, which enables the switch to automatically start the operation of the fans, gradually increase the speed of the fans, and either halt PoE or block traffic if the temperature exceeds a critical level. - Page 30 AV Line of Fully Managed Switches M4250 Series 4. In the Fans & Temperature section, select one of the following radio buttons. • Off . The fans are off and produce no noise. You can only manually set the fans in Off mode.