Advertisement
Quick Links
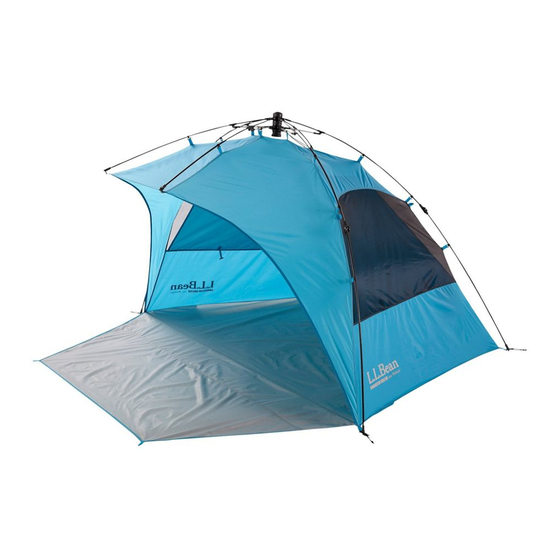
Sunbuster Shelter with Privacy
Safety Information
Note: Although this shelter can be used to maintain comfort and
shade in open areas, it is not intended to be set up for extended
periods of time.
Selecting a site: Select a site that is clear of debris and other
objects that could damage the floor of the shelter.
WARNING: KEEP ALL FLAME AND HEAT
!
SOURCES AWAY FROM THIS TENT FABRIC.
This tent meets the flammability requirements of CPAI-84. The
fabric may burn if left in continuous contact with any flame
source. The application of any foreign substance to the tent
fabric may render the flame resistant properties ineffective.
WARNING: WIND HAZARD
!
Please secure shelter to the ground with each use.
In the event of high winds, this shelter could break free causing it
to tumble into people resulting in serious injury to you or others.
Do not leave child unattended in the shelter.
WARNING: SUN/HEAT HAZARD
!
Extreme heat may cause temperature inside shelter to rise, do
not leave child unattended.
THIS SHELTER WILL NOT BLOCK ALL UV RAYS. This
shelter offers overhead sun protection. However, inside the
shelter you are still vulnerable to the sun's damaging lateral rays
as they reflect off the water and sand. We recommend sunscreen
and protective clothing for best sun protection.
Becoming Familiar with your Shelter
Before your first adventure we recommend that you set up the
shelter to become familiar with the parts and process involved.
Your storage bag should include:
1 shelter body
1 fiberglass pole with double tip
2 fiberglass poles with single tip
4 stakes
1 stake bag and 1 pole bag
Setting Up Your Shelter
1. Lay the shelter on the ground with the mesh windows facing up.
2. Assemble the poles by fully inserting the end of one pole section into the
aluminum ferrule of the adjoining pole section. Repeat until all of the poles are
assembled.
3. Loosen the webbing straps at the bottom of the pole sleeves to create slack.
4
. Insert one of the single tip poles into one of the blue pole sleeve on top of
the shelter. The end of the pole with the cap should go into the sleeve first.
Repeat with other single tipped pole in remaining sleeve. The poles will
make an "X" on top of the shelter.
cap end of pole
5. Tighten the webbing straps at the bottom of each of the pole sleeves.
6. Insert one end of the two tipped pole into brass grommet on corner
webbing. Flex the pole and insert the other end into the brass grommet on
the opposite corner of the shelter.
pole sleeve
Advertisement

Summary of Contents for L.L.Bean Sunbuster Shelter
- Page 1 3. Loosen the webbing straps at the bottom of the pole sleeves to create slack. Before your first adventure we recommend that you set up the Sunbuster Shelter with Privacy shelter to become familiar with the parts and process involved.
- Page 2 6. Clip the plastic clips to the pole. Be sure that the clips are evenly spaced The shelter should always be staked into the ground or secured by using along the pole. The shelter should stand on its own. the sandpockets to prevent it from moving in the wind. Stakes are suggested on grass or other semi-soft surface.