D-Link COVR User Manual
Hide thumbs
Also See for COVR:
- Simple setup manual (2 pages) ,
- Simple setup manual (2 pages) ,
- Simple setup manual (2 pages)

Related Manuals for D-Link COVR


Summary of Contents for D-Link COVR
- Page 1 U S E R M A N U A L C100 M0 Y19 K23 Covr your Whole Home in Seamless Mesh Wi-Fi Pantone 3145C High Performance One Seamless Network More Coverage COVR-1100 || COVR-1102 || COVR-1103 AC1200 Dual Band Whole Home Mesh Wi-Fi System...
- Page 2 Trademarks D-Link and the D-Link logo are trademarks or registered trademarks of D-Link Corporation or its subsidiaries in the United States or other countries. All other company or product names mentioned herein are trademarks or registered trademarks of their respective companies.
-
Page 3: Table Of Contents
IPv4/IPv6 Rules ...............46 Introduction and Features ............3 Port Forwarding ..............47 Hardware Overview ..............5 Port Forwarding .............47 COVR-1100 LED Indicator ..........5 Virtual Server ..............48 COVR-1100 Rear Panel ............6 Website Filter ..............49 D-Link Wi-Fi App Setup .............. 7 Static Routes .................50... - Page 4 Table of Contents Third Party Services ............66 Registering a D-Link Cloud Service Account ....67 Amazon Alexa Setup ............70 Amazon Alexa Voice Commands ........74 The Google Assistant Setup ..........75 The Google Assistant Voice Commands .....78 Resetting Your Device .............79 Wireless Basics ..............80 What is Wireless? .................81...
-
Page 5: Product Overview
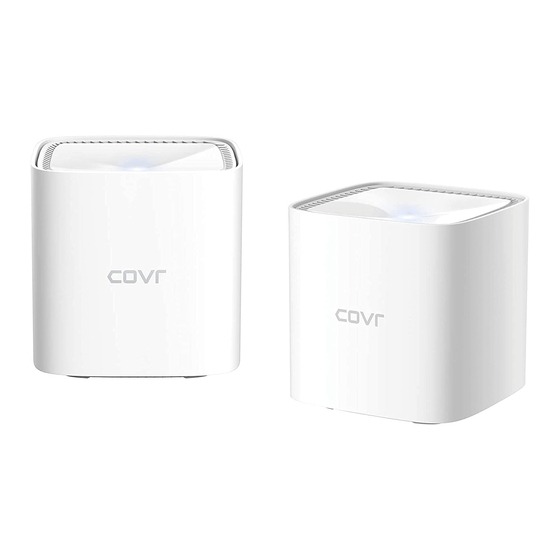
Section 1 - Product Overview Product Overview Package Contents COVR-1100 - COVR Point Router (x 1) COVR-1102 - COVR Point Router (x 2) Quick Installation Card COVR-1103 - COVR Point Router (x 3) Power adapter (x 1) Power adapter (x 2) -
Page 6: System Requirements
• Firefox 28 or higher • Safari 6 or higher • Chrome 28 or higher D-Link Wi-Fi App • iOS® or Android™ device (Please refer to the app's store page to Requirements check whether your device is compatible.) D-Link COVR-1102 User Manual... -
Page 7: Introduction And Features
High-Speed Wired and Wireless Connectivity With your COVR System you can bring the full potential of Wireless AC speeds of up to 1200 Mbps to any area in your home, including dead spots. The COVR System creates its own exclusive high-speed Wi-Fi zone for communication with your wireless devices, allowing you to fully experience demanding multimedia applications from anywhere in your home. - Page 8 Configure your network in no time with the free D-Link Wi-Fi app on your Android or iOS compatible device, or by using the intuitive web-based interface.
-
Page 9: Hardware Overview
Hardware Overview COVR-1100 LED Indicator Solid red The COVR-1100 is booting up. The COVR-1100 is syncing to another COVR-1100 COVR Point. Blinking orange Once set up, a blinking orange LED indicates there is no connection to the device. Blinking white Once set up, a blinking white LED indicates a weak connection. -
Page 10: Covr-1100 Rear Panel
Connect Ethernet devices such as computers, switches, storage (NAS) devices, and game consoles. Power Connector Connect the included power adapter here to power on the device. Reset Button Insert a paperclip in the hole, wait for 5 seconds, then release to reset the router to default settings. D-Link COVR-1102 User Manual... -
Page 11: D-Link Wi-Fi App Setup
The D-Link Wi-Fi app allows you to install and configure your device from your compatible Android or iOS device. Note: The screenshots may be different depending on your mobile device’s OS version. The following steps show the iOS interface of the D-Link Wi-Fi app. - Page 12 6. Alternatively, you can tap No to proceed to step 5. Step 5 Choose COVR from the product options and select COVR-1100, COVR-1102 or COVR-1103 from the list of available devices depending on your COVR system. Tap Next to continue. Step 6 You will now be guided through a step-by-step process for setting up your COVR network.
-
Page 13: Web Based Installation
Section 2 - Installation Web Based Installation If you do not wish to use the D-Link Wi-Fi app, you can manually set up your Covr device and configure your Covr Wi-Fi network using the web-based user interface. Step 1 Position the COVR Point close to your Internet-connected modem. Next, connect the power adapter and plug the COVR Point into a power outlet. -
Page 14: Configuration
Explorer and enter http://covr.local./ in the address bar. If you want to access the web interface using a wireless connection, connect to your COVR Wi-Fi, then open a web browser such as Internet Explorer and enter http://covr.local./ in the address bar. -
Page 15: Home
Section 3 - Configuration Home The Home page displays the current status of your COVR Wi-Fi network in the form of an interactive diagram. You can click each icon to display information about each part of the network at the bottom of the screen. The menu bar at the top of the page will allow you to quickly navigate to other pages. -
Page 16: Internet
Click IPv4 or IPv6 to see details of the IPv4 and IPv6 connection respectively. The Home page displays whether or not the master COVR Point is currently connected to the Internet. If it is disconnected, click Click to repair to bring up... -
Page 17: Covr-1100
Section 3 - Configuration COVR-1100 Click on the COVR-1100 icon to view details about the COVR Point's wireless and local network settings. This includes IPv4 and IPv6 local network, and Wi-Fi information. This overview is only informational. To configure these sections, refer to the corresponding configuration sections in this manual. -
Page 18: Connected Clients
Section 3 - Configuration Connected Clients Click on the Connected Clients icon to view details about the clients currently connected to your COVR Wi-Fi network. To edit each client’s settings, click the pencil icon on the client you want to edit. -
Page 19: Covr Points
Click on the COVR Points icon to view details about all additional COVR Points in your COVR whole home Wi-Fi network. To edit a COVR Point’s name, click the pencil icon in the top-right of the box of the COVR Point that you want to rename. -
Page 20: Settings
This Wizard will also launch when clicking the Click to Repair button when no Internet connection is detected. Refer to Manual Installation on 9 for more information. D-Link COVR-1102 User Manual... -
Page 21: Internet
For Dynamic IP (DHCP) refer to 18. For Static IP refer to 19. For PPPoE refer to 20. For PPTP refer to 22. For L2TP refer to 24. IPv6 link. Refer to 26. To configure an IPv6 connection, click the D-Link COVR-1102 User Manual... - Page 22 The default MAC address is set to the physical interface MAC address Clone: of port 1 on the master COVR Point. You can use the drop-down menu to replace the Internet port’s MAC address with the MAC address of a connected client.
- Page 23 The default MAC address is set to the physical interface MAC address Clone: of port 1 on the master COVR Point. You can use the drop-down menu to replace the Internet port’s MAC address with the MAC address of a connected client.
- Page 24 Enter the secondary DNS server IP address assigned by your ISP. This Server: address is usually obtained automatically from your ISP. MTU: Maximum Transmission Unit - you may need to change the MTU for optimal performance with your ISP. D-Link COVR-1102 User Manual...
- Page 25 MAC Address The default MAC address is set to the physical interface MAC address of port 1 on the master COVR Point. You can use the drop-down menu Clone: to replace the Internet port’s MAC address with the MAC address of a connected client.
- Page 26 Enter the secondary DNS server IP address assigned by your ISP. This Server: address is usually obtained automatically from your ISP. MTU: Maximum Transmission Unit - you may need to change the MTU for optimal performance with your ISP. D-Link COVR-1102 User Manual...
- Page 27 Enter the secondary DNS server IP address assigned by your ISP. Server: MTU: Maximum Transmission Unit - you may need to change the MTU for optimal performance with your ISP. Click Save when you are done. D-Link COVR-1102 User Manual...
- Page 28 Enter the secondary DNS server IP address assigned by your ISP. This Server: address is usually obtained automatically from your ISP. MTU: Maximum Transmission Unit - you may need to change the MTU for optimal performance with your ISP. D-Link COVR-1102 User Manual...
- Page 29 Enter the secondary DNS server IP address assigned by your ISP. Server: MTU: Maximum Transmission Unit - you may need to change the MTU for optimal performance with your ISP. Click Save when you are done. D-Link COVR-1102 User Manual...
-
Page 30: Ipv6
Click Advanced Settings... to expand the list and see all of the options. For Auto Detection refer to 27. For Static IPv6 refer to 29. For Auto Configuration (SLAAC/DHCPv6) refer to 31. For PPPoE refer to 33. For Local Connectivity Only refer to 36. D-Link COVR-1102 User Manual... - Page 31 LAN IPv6 Address Settings Enable DHCP-PD: Enable or disable DHCP Prefix Delegation. LAN IPv6 Link- Displays the master COVR Point's LAN link-local address. Local Address: If Enable DHCP-PD is disabled, these additional parameters are available for configuration: LAN IPv6 Address: Enter a valid LAN IPv6 address.
- Page 32 IPv6 Address Enter the ending IPv6 address for the DHCP server’s IPv6 assignment. Range (End): IPv6 Address If Enable DHCP-PD is disabled, enter the IPv6 address lifetime (in Lifetime: minutes). Click Save when you are done. D-Link COVR-1102 User Manual...
- Page 33 Enter the secondary DNS server address. Server: LAN IPv6 Address Settings LAN IPv6 Address: Enter the LAN (local) IPv6 address for the master COVR Point. LAN IPv6 Link- Displays the master COVR Point's LAN link-local address. Local Address: D-Link COVR-1102 User Manual...
- Page 34 Enter the starting IPv6 address for the DHCP server’s IPv6 assignment. Range (Start): IPv6 Address Enter the ending IPv6 address for the DHCP server’s IPv6 assignment. Range (End): IPv6 Address Enter the IPv6 address lifetime (in minutes). Lifetime: Click Save when you are done. D-Link COVR-1102 User Manual...
- Page 35 LAN IPv6 Address Settings Enable DHCP-PD: Enable or disable prefix delegation services. LAN IPv6 Link- Displays the master COVR Point's LAN link-local address. Local Address: If Enable DHCP-PD is disabled, these additional parameters are available for configuration: LAN IPv6 Address: Enter a valid LAN IPv6 address.
- Page 36 IPv6 Address Enter the ending IPv6 address for the DHCP server’s IPv6 assignment. Range (End): IPv6 Address If Enable DHCP-PD is disabled, enter the IPv6 address lifetime (in Lifetime: minutes). Click Save when you are done. D-Link COVR-1102 User Manual...
- Page 37 ISP. Service Name: Enter the ISP service name (optional). Reconnect Mode: Select either Always On or Manual. MTU: Maximum Transmission Unit - you may need to change the MTU for optimal performance with your ISP. D-Link COVR-1102 User Manual...
- Page 38 LAN IPv6 Address Settings Enable DHCP-PD: Enable or disable prefix delegation services. LAN IPv6 Link- Displays the master COVR Point's LAN link-local address. Local Address: If Enable DHCP-PD is disabled, these additional parameters are available for configuration: LAN IPv6 Address: Enter a valid LAN IPv6 address.
- Page 39 IPv6 Address Enter the ending IPv6 address for the DHCP server’s IPv6 assignment. Range (End): IPv6 Address If Enable DHCP-PD is disabled, enter the IPv6 address lifetime (in Lifetime: minutes). Click Save when you are done. D-Link COVR-1102 User Manual...
- Page 40 If you selected Enable ULA and disabled Default ULA Prefix: ULA Prefix: Enter your own ULA prefix. Current IPv6 ULA Settings Current ULA Displays the current ULA prefix. Prefix: LAN IPv6 ULA: Displays the LAN's IPv6 ULA. Click Save when you are done. D-Link COVR-1102 User Manual...
-
Page 41: Vlan
ISP. VOIP VLAN ID: Enter the VLAN ID for your Voice over IP network provided by your ISP. Click Advanced Settings to select the VOIP Connection type and input in the details from your ISP. D-Link COVR-1102 User Manual... - Page 42 Select a priority ID from the drop-down menu to assign to the corresponding VLAN. Interface Traffic Type Setting LAN Port: From the drop-down menu, select the VLAN for the LAN port. Click Save when you are done. D-Link COVR-1102 User Manual...
-
Page 43: Wireless
Wi-Fi Name (SSID): Enter a name for your COVR Wi-Fi network. Password: Create a password for your COVR Wi-Fi network. Wireless clients will need to enter this password to successfully connect to the network. DFS Channel: Dynamic Frequency Selection (DFS) is a Wi-Fi function that enables WLANs to use 5 GHz frequencies reserved for radars. -
Page 44: Guest Zone
In the Settings menu on the bar on the top of the page, click Wireless, then click the Guest Zone link. COVR Wi-Fi System Status: Enable or disable the COVR Guest Wi-Fi network. Wi-Fi Name (SSID): Enter a name for your guest wireless network. Password: Create a password for your guest Wi-Fi network. -
Page 45: Network
This section will allow you to change the local network settings of the master COVR Point and configure the DHCP settings. In the Settings menu on the bar on the top of the page, click Network. Click Advanced Settings... to expand the list and see all of the options. - Page 46 Enable or disable Universal Plug and Play (UPnP). UPnP provides compatibility with networking equipment, software, and peripherals. IPv4 Multicast Enable to allow IPv4 multicast traffic to pass through the master COVR Streams: Point from the Internet. Click Save when you are done.
-
Page 47: D-Link Cloud
D-Link Cloud In the Settings menu on the bar at the top of the page, click D-Link Cloud to see your D-Link Cloud Service details. This page lists whether you are registered with D-Link Cloud Service and email address associated with the account. Use the D-Link Wi-Fi app to find out more about D-Link Cloud's features. -
Page 48: Advanced
Enable Anti-Spoof Enable this feature to protect your network from certain kinds of Checking: “spoofing” attacks. IPv6 Simple Enable or disable IPv6 simple security. Security: IPv6 Ingress Enable or disable IPv6 ingress filtering. Filtering: D-Link COVR-1102 User Manual... - Page 49 NAT devices and work around them. This ALG may interfere with the operation of such devices. If you are having trouble making VoIP calls, try turning this ALG off. Click Save when you are done. D-Link COVR-1102 User Manual...
-
Page 50: Ipv4/Ipv6 Rules
The schedule may be set to Always Enable, or you can create your own schedules in the Schedule section. Refer to Refer to Schedule on page 55 for more information. Click Apply when you are done. D-Link COVR-1102 User Manual... -
Page 51: Port Forwarding
Port forwarding allows you to specify a port or range of ports to forward to specific devices on the network. This might be necessary for certain applications to connect through the master COVR Point. In the Features menu on the bar on the top of the page, click Port Forwarding. -
Page 52: Virtual Server
The virtual server allows you to specify a single public port on the master COVR Point for redirection to an internal LAN IP address and Private LAN port. To configure the virtual server, from the Port Forwarding page click Virtual Server.