NavePoint Performance Series Manual
Hide thumbs
Also See for Performance Series:
- Owner's manual (5 pages) ,
- Owner's manual (10 pages) ,
- Quick start manual (5 pages)
Advertisement
Quick Links
Advertisement

Related Manuals for NavePoint Performance Series


Summary of Contents for NavePoint Performance Series
- Page 1 2018 20180327...
-
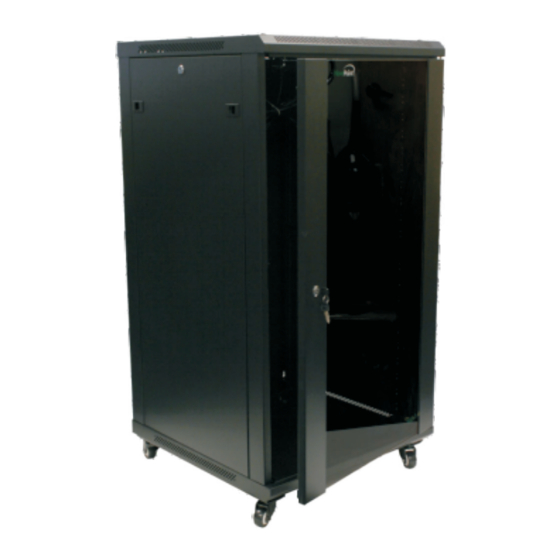
Page 2: Packaging List
Packaging List 1. Top Panel 6.Horizontal Beams 2. Bottom Panel 7.L Type Mounting Brackets 3. Frames 2pcs 8. Back Panel 2pcs 4. Front Door 9.Mounting Bracket 5. Side Panels 2pcs 2pcs 10.Vertical Mounting Rails Item List Accessories Packaging Assembly Hardwares: M6*12 Screw 12PCS M4*8 Self-tapping Screw... - Page 3 Step 1 – Attach Bottom Panel to Front and Rear Frames Lay Bottom Panel (#2) on a hard surface. Be sure to protect it from scratching with cardboard or cloth. Insert Front and Rear Frames (#3) with large flange oriented to the inside.Be sure that the slots in the center of the frames are facing inward as shown below.
- Page 4 Step 3 – Install the Vertical Mounting Rails (#10) Install the Vertical Mounting Rails (#10) to the Horizontal Beams at the desired depth using the Cage Nut Kit provided (Bag A). When determining the appropriate depth, be sure to consider the equipment that you plan to mount inside the enclosure.
- Page 5 Step 4 – Install L Type Mounting Brackets (Optional) Mount the provided L Type Mounting Brackets (#7) to the Vertical Mouting Rails on each side of the cabinet using the cage nut kits provided (Bag A) Page 5...
- Page 6 Step 5 – Attach the Back Panel Attach the Back Panel (#8) to the assembly using the M4 Screws (Bag C) (6 pcs) provided. Page 6...
- Page 7 Step 6 – Side Panels Click the Side Panels (#5) into place using the plastic tabs on either side. Page 7...
- Page 8 Step 7 – Assemble the front lock and attach the Door Assemble the front door lock as shown in the picture below: To install the Tempered Glass Door (#4), locate the side with two pins. Insert the fixed pin into door hinge hole. With your thumb, pull down on the spring pin and slide it into place over second door hinge hole and release.
- Page 9 Step 8 – Install Cable Management Covers (optional) Attach the top and Bottom Cable Management Panels using the M4 Screws (BagC 2 pcs each) provided. Cable Management Covers Page 9...
- Page 10 Step 9 – Mounting Bracket Page 10...
- Page 11 Step 10 – Install Casters - (Optional and only compatible and included with 15, 18 and 22U versions of the Performance Series Cabinets) Attach Casters(Bag F) with M6 screws (Bag G) to bottom of the cabinet. Page 11...