Samsung HT-DM550 Instruction Manual
Digital home theater system
Hide thumbs
Also See for HT-DM550:
- Instruction manual (25 pages) ,
- Manual (90 pages) ,
- Instruction manual (25 pages)

Related Manuals for Samsung HT-DM550


Summary of Contents for Samsung HT-DM550
- Page 1 DIGITAL HOME THEATER SYSTEM HT-DM550 Instruction Manual COMPACT COMPACT DIGITAL AUDIO DIGITAL VIDEO V I D E O...
-
Page 2: Safety Warnings
Safety Warnings CLASS 1 LASER PRODUCT KLASSE 1 LASER PRODUKT LUOKAN 1 LASER LAITE KLASS 1 LASER APPARAT PRODUCTO LASER CLASE 1 CAUTION RISK OF ELECTRIC SHOCK. DO NOT OPEN CAUTION: TO REDUCE THE RISK OF ELECTRIC SHOCK, DO NOT REMOVE REAR COVER. -
Page 3: Precautions
Precautions Ensure that the AC power supply in your house complies with the identification sticker located on the back of your player. Install your player horizontally, on a suitable base (furniture), with enough space around it for ventilation (3~4inches). Make sure the ventilation slots are not covered. -
Page 4: Do Not Use The Following Types Of Disc
DVD (Digital Versatile Disc) Digital surround sound and MPEG-2 video compression technology. Now you can enjoy these realistic effects in the home, as if you were in a movie theater or concert V I D E O hall. DVD players and the discs are coded by region. These regional codes must match in order for the disc to play. -
Page 5: Table Of Contents
Contents CHAPTER 1. PREPARATION Safety Warnings Precautions Description Remote Control Listening on headphones CHAPTER 2. CONNECTIONS Connecting the Speakers Connect Video to TV Connecting the FM and AM Antennas (MW/LW) AUX Connections Controlling a TV with the Remote Connecting your System to the Power Supply Before Using the DVD Player CHAPTER 3. -
Page 6: Description
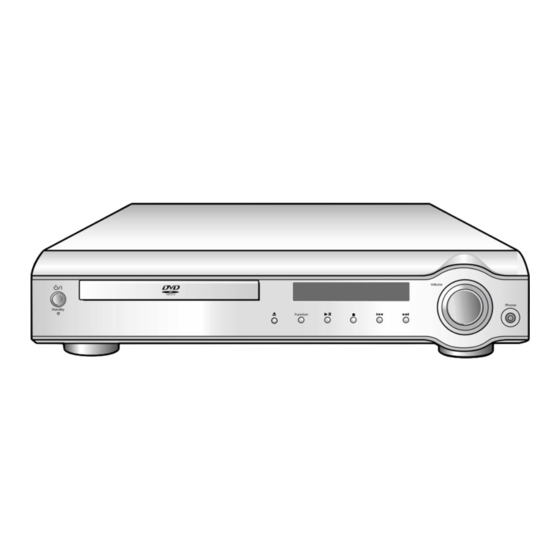
Description Front Panel Power ( ) button Disc Tray Standby indicator Display indicator DTS Disc indicator LINEAR PCM indicator LINEAR PCM DSP PRO LOGIC D I G I T A L MPEG MPEG indicator SPEAKER indicator DOLBY DIGITAL indicator PRO LOGIC indicator Function button Play/Pause ( Stop ( ) button... - Page 7 Rear Panel External Video Component Input Connector External Digital Component Input Connectors Use these for connections to external equipment capable of digital output. 5.1 Channel Speaker Output Terminals External Audio Component Accessories Remote Control Video/Audio Cable Video Output Connector Connect the TV's video input jacks (VIDEO IN) to the VIDEO OUT connector.
-
Page 8: Remote Control
Remote Control Unit DVD POWER button DVD button TUNER button AUX button Open/Close button Title button Menu button Audio MO/ST (mono/stereo) button Subtitle button Display button Return button DSP/DPL II Mode button DSP/DPL II Effect button Number(0~9) buttons Slow button Angle button Repeat button TV System/Zoom button... -
Page 9: Listening On Headphones
Insert Remote Batteries Remove the battery cover on the back of the remote by pressing down and sliding the cover in the direction of the arrow. Insert two 1.5V AAA batteries, paying attention to the correct polarities (+ and –). Replace the battery cover. -
Page 10: Connecting The Speakers
Connecting the Speakers • Connect the satellite speakers, center speaker, and subwoofer to the terminals on the rear panel using speaker cords supplied. • Connect the red cord to the red (+) terminal and the black cord to the black (-) terminal. Press and hold the terminal tab. -
Page 11: Connect Video To Tv
Connect Video to TV Depending on your TV, Component Video input connectors may be marked as DVD Video input connectors. Composite Video (Good Quality) Connect the supplied video cable from the VIDEO OUT jack on the back panel of the system to the VIDEO IN jack on your television. -
Page 12: Connecting The Fm And Am (Mw/Lw) Antennas
Connecting the FM and AM If AM reception is poor, connect an outdoor AM antenna(not supplied). If FM reception is poor, connect an outdoor FM antenna (not supplied). FM Antenna (supplied) FM antenna connection 1. Connect the FM antenna supplied to the FM 75 COAXIAL terminal. -
Page 13: Aux Connections
AUX Connections External Digital Components For connection to external equipment with digital output. Example: CD recorders, MD (Mini Disc) D/A converters or other components equipped with digital output jacks (not supplied) Optical Cable Audio Cable (Red/White) If the external analog component has only one output jack, you may connect either L or R. -
Page 14: Controlling A Tv With The Remote
• If there is more than one code listed in the table, enter one at a time to determine which code works. example : For SAMSUNG 1TVs While holding down the enter If the TV turns off, setup is complete. -
Page 15: Before Using The Dvd Player
Before Using the DVD Player Your DVD player is capable of playing DVD, VCD, and CD discs. User instructions may vary depending on the type of disc. Read the instructions carefully before use. Turn on the power to your DVD player Prepe- and TV. -
Page 16: Dvd Playback
DVD Playback • • • Pausing Playback Press the Play/Pause ( ) button during playback. • To resume, press the Play/Pause ( button again. • Depending on the disc, the initial disc information screen may look different from disc to disc. •... - Page 17 Using the On-Screen Display Press the Display button on the remote. Display DVD indicator Display SUBTITLE LANGUAGE Display Turning the sound off temporarily? What is a Title? A movie contained in a Press the Mute button during playback. DVD disc. •...
-
Page 18: Mp3-Cd Playback
MP3-CD Playback This system has a built-in MP3 decoder. You can play back MP3 tracks (files)recorded on CD-Rs, CD-RWs, and CD-ROMs. What is MP3? MP3 is an abbreviation of Motion Picture Experts Group (or MPEG) Audio Layer 3. MP3 is simply a file format with a data compression ratio of 1:10 (128 Kbps*). That means,by using MP3 format, one CD-R or CD-RW can contain 10 times as much data volume as a regular CD can. - Page 19 Operations Using the On-Screen Display Turn on your TV when playing back an MP3 disc. When the loaded MP3 disc is recognized, the following on-screen display appears on the TV screen. (The contents of this on-screen display vary according to the disc —...
-
Page 20: Forward/Reverse Searching
Forward/Reverse Searching During playback, you can search quickly through a chapter or track for a specific scene or tune. High-Speed Playback Press the button. Each time the button is pressed PLAY • playback (reverse playback) is possible on DVDs. Skipping through a Chapter Press the button. -
Page 21: Slow Playback/Checking The Remaining Time
Slow Playback/Checking the Remaining Time Playing Slowly Press the Slow button. Each time the Slow button is pressed SLOW 1/2 SLOW 1/4 PLAY Checking the Remaining Time Press the Remain button. • For checking check the total time and the remaining time of a title or chapter being played. -
Page 22: Repeat Playback
Repeat Playback Repeat playback allows you to repeat a chapter, title, or track. Playing Repeatedly Press the Repeat button. Each time the Repeat button is pressed • Repeat playback operation is not possible with version 2.0 VCD discs if PBC is turned on. To operate this feature, press the MENU button, and then select "PBC OFF". -
Page 23: Using Disc Menu/Title
Using Disc Menu/Title To Select the Disc Menu You can use the menus for the audio language, subtitle language, profile, etc. DVD menu contents differ from disc to disc. Press the Menu button during playback. • The Menu Screen appears. •... -
Page 24: Selecting The Audio Language/Subtitle Language
Selecting the Audio Language/Subtitle Language Selecting the Audio Language Press the Audio button. • Depending on the number of languages recorded on a DVD disc, a different audio language (ENGLISH, SPANISH, FRENCH, etc.) is selected each time the button is pressed. V I D E O •... -
Page 25: Zoom/Angle Functions
Zoom/Angle Functions To enlarge an image Press the Zoom button. • Images can be enlarged 2x and 4x. • During DVD playback, press the Zoom button to zoom in 2X/4X/normal, in that order. • Press to move the enlarged portion you want to watch. •... -
Page 26: Program Playback
Program Playback Use this function with video and music CDs to play the tracks in a particular order. To Program Tracks in a particular order Press the Program button. PROGRAM MENU SELECT : ENTER TITLE CHAPT TITLE CHAPT PREVIOUS NEXT PLAY : FINISH : PROGRAM Press the Enter button. - Page 27 To Change the Program Press the Up/Down ( button to select the track number to be changed. Press the Enter button. • The cursor moves to the number below. To delete the entire Program • Press the Stop ( ) button twice during playback. •...
-
Page 28: Sleep/D.r.c Function
Sleep/D.R.C Function To set up Sleep Press the Sleep button. • Each time the button is pressed the selection toggles as follows: SLEEP 10 SLEEP 30 SLEEP 60 SLEEP 120 SLEEP 150 To Review Sleep Setting • Press the Sleep button. The remaining time for the selected Sleep time is displayed on the front panel. -
Page 29: Setup
Setting up the Language Features Using the DVD player's Setup function, you can customize the Menu Language, Subtitle Language, and Disc Menu Language. To set up the language feature Press the Setup button from the stop mode. LANGUAGES SYSTEM OSD LANGUAGE ENGLISH AUDIO CHINESE... -
Page 30: System Setup
System Setup You can use the DVD player's Setup function to select the TV screen ratio, rating limit, or digital output mode. To Set up the System From the stop mode, press the Setup button. LANGUAGES SYSTEM OSD LANGUAGE ENGLISH AUDIO CHINESE SUBTITLE... -
Page 31: Rating Level
Adjusting the TV Aspect Ratio (Screen Size) The horizontal to vertical screen size ratio of conventional TVs is 4:3 while that of wide screen and high definition TVs is 16:9. This ratio is called the aspect ratio. When playing DVDs recorded in different screen size, you should adjust the aspect ratio to fit your TV or monitor. -
Page 32: Speaker Setup
Speaker Setup Setting up Speaker Mode and Delay Time Press the SPK Mode button. • Each time the button is pressed, a different mode selection is displayed on the front panel display as shown below. Front speaker: Small Center speaker: Small Rear speaker: Small Subwoofer: Use Center Speaker Delay Time... -
Page 33: Setting Up The Speaker Delay Time
Setting up the Speaker Delay Time When 5.1CH Surround Sound is played, you can enjoy the best sound if the distance between you and each speaker is the same. Since the sounds arrive at the listening position at different times depending on the placement of speakers, you can adjust this difference by adding a delay effect to the sound of the Center Speaker and Surround Speakers. -
Page 34: To Set Up Speaker Balance
To set up Speaker Balance To set up Speaker Balance Press the Sound Edit button. • Each time the button is pressed, the selection switches as shown below. Example: 5.1CH Sound Setup D I G I T A L Front Speakers: L level, R level D I G I T A L Rear Speakers: L level, R level D I G I T A L... -
Page 35: Creating Realistic Sound Fields
Creating Realistic Sound Fields You can use the following surround modes to reproduce a realistic sound field. • Digital Multichannel Surround —Dolby Digital and DTS Digital Surround • Dolby Pro Logic II Dolby Digital and DTS Digital Surround To enjoy surround effectively, all the speakers need to be connected and activated. Dolby Digital Used to reproduce multichannel sound tracks of the software encoded with Dolby Digital ( Dolby Digital encoding method (discrete 5.1 channel digital audio format)records and digitally compresses the left front... -
Page 36: Dolby Pro Logic Ii Decoder
Dolby Pro Logic II decoder Dolby Pro Logic II Dolby Pro Logic II is a new format for playing multichannel audio signals that offers improvements over conventional Dolby Pro Logic. It can be used to decode not only sources recorded in Dolby Surround, but also regular stereo sources into five channels (front left/right, center and surround left/right). - Page 37 Dolby Pro Logic II Effect Function This function works only in the DPL II M (Dolby Pro Logic II Music) Mode. Press the DSP/DPL II Effect button. • Each time the DSP/DPL II Effect button is pressed. • Panorama Mode This mode extends the front stereo image to include the surround speakers for an exciting “wraparound”...
-
Page 38: Dsp (Digital Signal Processor)
(Digital Signal Processor) DSP modes have been designed to simulate different acoustic environments. The sound heard in a hall, theater, pavilion, dance club, or live club consists of direct and indirect sound —early reflections and reflections from behind. Direct sounds reach the listener directly without any reflection. Indirect sounds are delayed by the distance of the ceiling and walls. -
Page 39: To Increase Effect Level
To increase Effect level To increase Effect level Press the DSP/DPL II Effect button. • The effect level can be set in steps from 1 to 4 EFFECT1 EFFECT2 EFFECT3 OFF(DEFAULT). Each time the button is pressed the selection moves to the next effect. -
Page 40: Listening To The Radio
Listening to the Radio You can listen to the chosen band (FM, MW or LW broadcast stations) by using either the automatic tuning or manual tuning operation. Remote Press the Tuner(Band) Control button. Unit • The selection toggles back and forth between "FM" "MW" and "LW"... -
Page 41: Presetting Stations
Presetting stations You can store up to: 15 FM stations 8 MW stations 7 LW(Option) stations Example: Presetting FM 89.1 in the memory Press the Tuner(Band) button and select the FM band. • The selection toggles back and forth between " each time the Tuner(Band) button is pressed. -
Page 42: Troubleshooting
Troubleshooting Problem The disc tray does not open. Disc does not play. Playback does not start immediately when the Play/Pause button is pressed. No sound is produced. Sound can be heard only from a few speakers and not all six. Picture does not appear;... - Page 43 Problem • The disc revolves but no picture appears. • Picture shows interference and quality is poor. Remote control unit does not operate. Audio or subtitle language does not operate. The Menu button is pressed but the Menu screen does not appear. The screen ratio cannot be changed.
-
Page 44: Cautions On Handling And Storing Discs
Cautions on Handling and Storing Discs Small scratches on the disc may reduce sound and picture quality or cause breaks in playback. Be especially careful not to scratch discs when handling them. Handling and Storing Discs Condensation may form if warm air comes into contact with cold parts inside the player. -
Page 45: Disc Type And Protection
Disc Type and Protection Usable Discs Disc Types Marks V I D E O COMPACT VIDEO-CD DIGITAL VIDEO COMPACT AUDIO-CD DIGITAL AUDIO DTS Disc Dolby Digital disc Recording Disc Size Types 12cm Audio + Video 12cm Audio + Video 12cm Audio Digital Audio Stereo disc... -
Page 46: Specifications
Specification Power Consumption Weight Dimensions (W x H x D) Operating Temperature Range Operating Humidity Range Usable Sensitivity S/N Ratio Distortion Usable Sensitivity S/N Ratio Distortion Composite Video Component Video S-VIDEO Front speaker output Center speaker output Rear speaker output Subwoofer speaker output Frequency range S/N Ratio... -
Page 47: Reference
Reference Note on Terminology Recorded onto some DVD discs are scenes which have been simultaneously shot from a number ANGLE of different angles (the same scene is shot from the front, from the left , from the right , etc.). With such discs, the Angle button can be used to change the angle of view for specific scenes. - Page 48 THIS APPLIANCE IS MANUFACTURED BY: AH68-01142J...