Advertisement
Quick Links
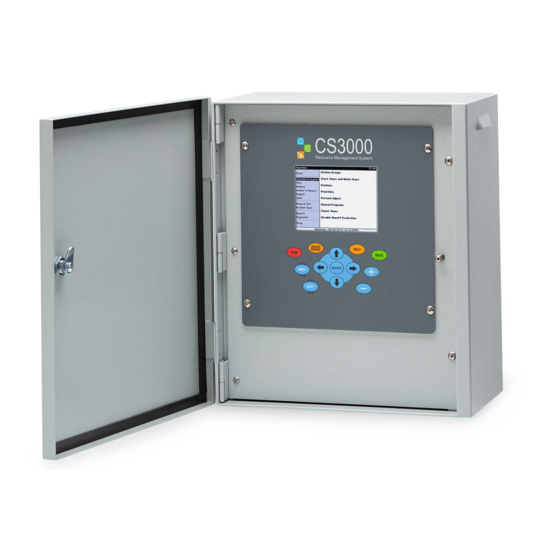
CS3000 Quick Start Guide
1
2
3
Key Map
1. ENGLISH/ESPANOL – Change screen text from English to Spanish and vice versa
2. STOP – Stop any currently running irrigation
3. PREV/NEXT – Selects the Previous or Next menu item
←↑→↓
4.
/SELECT – Move the cursor position around in the different programming and reports
screens and selects a main menu field or a particular programming field. SELECT also provides
dropdown menus for certain fields or numeric keypad for others.
5. +/– – Increase or decrease values on programming screens
6. BACK – Returns to the previous screen
7. HELP – Display different help based upon the status or menu screens and highlighted cursor
position on programming screens
C A L I F O R N I A
2075 Corte del Nogal, Suite P, Carlsbad, CA 92011 ph (760) 438-0525 fax (760) 438-2619 www.calsense.com
S E N S O R
C O R P O R A T I O N
4
7
6
5
Advertisement

Related Manuals for Calsense CS3000


Summary of Contents for Calsense CS3000
- Page 1 6. BACK – Returns to the previous screen 7. HELP – Display different help based upon the status or menu screens and highlighted cursor position on programming screens 2075 Corte del Nogal, Suite P, Carlsbad, CA 92011 ph (760) 438-0525 fax (760) 438-2619 www.calsense.com...
-
Page 2: Setting Date And Time
2-Wire decoder installation diagram included with each decoder. ↓ 1. From the Main Menu, use to navigate to Setup and press SELECT. The Setup menu displays. 2. Navigate to 2-Wire and press SELECT. The 2-Wire dialog displays (Figure 2). CS3000 Quick Start Guide... - Page 3 If no station is attached to an output, leave it as ---. 4. Press BACK to save the changes. 5. Repeat steps 2-4 for each decoder attached to the controller. CS3000 Quick Start Guide...
- Page 4 Stations that share the same irrigation and/or landscape characteristics are grouped together using Station Groups. To add and edit Station Groups: 1. From the Main Menu, navigate to Scheduled Irrigation and press SELECT. The Scheduled Irrigation menu displays. CS3000 Quick Start Guide...
- Page 5 Slope – The slope percentage Soil storage capacity – The root zone working water storage associated with the plant material and soil type Crop coefficients – The monthly crop or landscape coefficient associated with the plant material CS3000 Quick Start Guide...
-
Page 6: Setting A Schedule
2. Navigate to and select Start Times and Water Days. The Start Times and Water Days screen displays (Figure 7). The pane on the left displays the Station Groups on this controller while the right shows the settings for each. Figure 7 - Start Times and Water Days screen CS3000 Quick Start Guide... - Page 7 Distrib. uniformity – The distribution uniformity or application efficiency of the zone 3. Press NEXT to move to the next station and repeat step 2 to set the individual station’s settings. 4. Once done, press BACK to return to the Main Menu. CS3000 Quick Start Guide...
- Page 8 POC, select Not Used. Flow Meter – The flow meter type. This can be either a Calsense FM series flow meter, such as an FM-1.5B, an insertion-style flow meter (model FMBX), or a hydrometer.
- Page 9 If the controller does not have an ET Gage and Rain Bucket connected to it, you can share real-time weather to the controller using the Command Center Online web application. If you don’t have an account yet, contact Calsense Product Support at (800) 572-8608 to create one. Once an account is created: ↓...
- Page 10 3. Make note of the Site ID and Serial Number displayed on the screen. 4. Using a computer, log in to Command Center Online at www.calsense.net. 5. If the CS3000 already exists, skip to Step 7. Otherwise, tap or click Settings > Site Controllers. The Site/Controllers list displays.