Table of Contents
Advertisement
Quick Links
Advertisement
Table of Contents

Related Manuals for Motorola ARRIS SURFboard SBM1000 Series


Summary of Contents for Motorola ARRIS SURFboard SBM1000 Series
- Page 1 User Guide ® ARRIS SURFboard SBM1000 SMART Video Adapter Kit* *SBM1100 SBM1400...
- Page 2 MOTOROLA and the Stylized M Logo are trademarks or registered trademarks of Motorola Trademark Holdings, LLC, and are used by ARRIS under license. All other product or service names are the property of their respective owners.
-
Page 3: Safety And Regulatory Information
Safety and Regulatory Information Safety and Regulatory Information IMPORTANT SAFETY INSTRUCTIONS • Read This Before You Begin — When using your equipment, basic safety precautions should always be followed to reduce the risk of fire, electric shock, and injury to persons, including the following: •... - Page 4 Safety and Regulatory Information • Do not cover the device or block the airflow to the device with any other objects. Keep the device away from excessive heat and humidity and keep the device free from vibration and dust. • Wipe the device with a clean, dry cloth. Never use cleaning fluid or similar chemicals. Do not spray cleaners directly on the device or use forced air to remove dust.
-
Page 5: Table Of Contents
Contents Safety and Regulatory Information ......................iii Introduction ..............................1 Product Overview ............................1 Standard Features........................... 1 In the Box ..............................2 Contact Information ............................3 Product Overview ............................4 Front Panel ..............................4 Rear Panel ..............................6 Installing the MoCA Adapters ........................7 Pre-installation Guidelines .......................... - Page 6 Tables Prevent Unauthorized Access ........................46 Manage Your Passwords ..........................46 Change Your Administrator Security Password ................... 47 Change the MoCA Network Security Password .................. 48 Find Current Network Security Password .................... 49 Restore Factory Defaults ..........................50 Change the Adapter IP Configuration ......................51 Upgrade the Adapter Firmware........................
- Page 7 Figures Figures Figure 1 – SBM1100 Single-Port SMART Video Adapter Front View ............4 Figure 2 – SBM1400 Four-Port SMART Video Adapter Front View .............. 4 Figure 3 – SBM1100 One-Port SMART Video Adapter Rear View ............... 6 Figure 4 – SBM1400 Four-Port SMART Video Adapter Rear View ............... 6 Figure 5 –...
- Page 8 Figures Figure 39 – Change Default MoCA Channel of Operation Screen .............. 55 Figure 40 – Select Single Channel of Operation Screen ................56 Figure 41 – MoCA Adapter Device Status Screen ..................57 Figure 42 – MoCA Adapter(s) PHY Rates Screen ..................58 Figure 43 –...
-
Page 9: Introduction
Introduction Introduction Product Overview Your new ARRIS SURFboard ® SBM1000 SMART Video Adapters are high-performance network adapters which use Multimedia over Coax (MoCA) technology to enable connectivity of Ethernet-enabled devices in your home through the existing coaxial cable network. MoCA allows you to share high-definition IP-based multi-media content to multiple Ethernet-enabled devices such as home computers, Smart TVs, set-top boxes, gaming devices, and multi-room DVRs in every room of the house serviced by the coaxial cable network. -
Page 10: In The Box
Introduction In the Box Before getting started, check that the following items are included in the SBM1000 box. If any items are missing, please contact ARRIS Technical Support Center at: 1-877-466-8646. Table 1 – SBM1000 Video Adapter Package Contents ITEM DESCRIPTION Single Ethernet port MoCA adapter to connect a SBM1100 MoCA... -
Page 11: Contact Information
Introduction Contact Information To contact technical support or obtain additional ARRIS product information: • Visit the ARRIS Consumer Care website at www.arrisi.com/consumer • Call ARRIS Technical Support Center at 1-877-466-8646 (USA) SBM1000 SMART Video Adapter Kit • User Guide 590631-001-a... -
Page 12: Product Overview
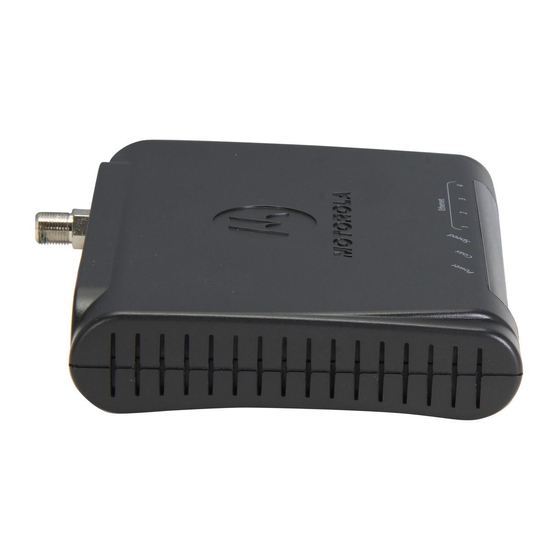
Product Overview Product Overview Front Panel Figure 1 – SBM1100 Single-Port SMART Video Adapter Front View Figure 2 – SBM1400 Four-Port SMART Video Adapter Front View SBM1000 SMART Video Adapter Kit • User Guide 590631-001-a... -
Page 13: Table 2 - Smart Video Adapter Front Panel Leds
Product Overview Table 2 – SMART Video Adapter Front Panel LEDs LED INDICATORS & STATUS Power Green-SOLID: Indicates power is properly connected to the MoCA adapter and is finished booting Green-FLASHING: Indicates the MoCA adapter is booting FLASHING: Concurrent flashing indicates a validation failure of both the primary and secondary firmware image on the device Coax... -
Page 14: Rear Panel
Product Overview Rear Panel Figure 3 – SBM1100 One-Port SMART Video Adapter Rear View Figure 4 – SBM1400 Four-Port SMART Video Adapter Rear View Table 3 – SMART Video Adapter Rear Panel Ports & Connectors PORT NAME DESCRIPTION Coax In Connects the adapter to the existing home coaxial cable network. -
Page 15: Installing The Moca Adapters
Installing the MoCA Adapters Installing the MoCA Adapters This product is for indoor use only. Do not route the Ethernet cable(s) outside of the building. Exposure of the cables to lightning could create a safety hazard and damage the product. Pre-installation Guidelines You can quickly and easily set up your home MoCA network with the SBM1000 adapters. -
Page 16: Network Service Providers List
Installing the MoCA Adapters If there is no available cable connection in the room, then you must take the appropriate steps to install a cable connection. This may include reconfiguring the internal home coaxial wiring or adding external devices and cabling. •... -
Page 17: Figure 5 - Installation Scenarios Flowchart
Installing the MoCA Adapters • DirecTV (non-SWiM) • Over-the-Air (OTA) with installation of the MoCA filter included with the SBM1000 adapters The following flowchart is provided to further help you determine the applicable installation procedure for your SBM1000 adapters. Please follow the questions in the flowchart: Figure 5 –... -
Page 18: Cable Network Installations
Installing the MoCA Adapters 1 Cable Network Installations Figure 6 – Cable Network Installations Flowchart SBM1000 SMART Video Adapter Kit • User Guide 590631-001-a... -
Page 19: 1.1 Installing For Cable With Separate Cable Modem & Router
Installing the MoCA Adapters 1.1 Installing for Cable with Separate Cable Modem & Router Figure 7 – Cable Installation with Separate Cable Modem & Router Follow these steps to set up the SBM1000 MoCA adapters in your home network, if you are receiving your Internet service through a cable modem and router: 1. -
Page 20: Figure 8 - Room 1: Sbm1400 Adapter Installation
Installing the MoCA Adapters Figure 8 – Room 1: SBM1400 Adapter Installation 6. Connect one of the Ethernet cables (included) to one of the Ethernet ports on the SBM1400 and the Ethernet/Network port on your Smart TV or other Smart device (see Figure 8). - Page 21 Installing the MoCA Adapters 9. Check if the coaxial cable is connected to an RF splitter. If it is not, then disconnect the cable from your cable modem and connect it to the IN connector on the RF splitter (included); see Figure 9. 10.
-
Page 22: Installing For Cable With An Integrated Cable Modem & Router (Without Moca Capability)
Installing the MoCA Adapters 1.2 Installing for Cable with an Integrated Cable Modem & Router (without MoCA Capability) Figure 10 – Cable/Telco Installation with Integrated Cable Modem & Router Follow these steps to set up the SBM1000 MoCA adapters in your home network if you are receiving your Internet service through a gateway, also referred to as an integrated cable modem and router: 1. -
Page 23: Figure 11 - Room 1: Sbm1400 Adapter Installation
Installing the MoCA Adapters Figure 11 – Room 1: SBM1400 Adapter Installation 7. Connect one of the power adapters (included) to the Power port on the SBM1400 and plug it into an electrical wall outlet (see Figure 11). 8. Locate the cable wall outlet (or RF splitter) and electrical wall outlet in the second room (see Room 2 in Figure 10). - Page 24 Installing the MoCA Adapters Notes: ο You can use either OUT connector on the RF splitter (included) for this installation. ο You may want to install a MoCA filter (included) between your gateway and RF splitter (see Figure 12) to ensure maximum cable modem network performance. 11.
-
Page 25: Installing For Cable With Integrated Cable Modem & Router (With Moca)
Installing the MoCA Adapters 1.3 Installing for Cable with Integrated Cable Modem & Router (with MoCA) Figure 13 – Cable/Telco Installation with Integrated Cable Modem/Router with MoCA Follow these steps to set up the SBM1000 MoCA adapters in your home network, if you are receiving your Internet service through a gateway, also referred to as an integrated cable modem and router: 1. -
Page 26: Figure 14 - Room 1: Sbm1400 Adapter Installation
Installing the MoCA Adapters Figure 14 – Room 1: SBM1400 Adapter Installation 6. Connect one of the Ethernet cables (included) to one of the Ethernet ports on the SBM1400 and the Ethernet/Network port on your Smart TV or other Smart device (see Figure 14). Repeat for each additional SBM1400 Ethernet connection with other networked audio-visual devices, if applicable. -
Page 27: At&T Telco Installations
Installing the MoCA Adapters 14. Power ON your Smart TV, set-top box, laptop, and any other Ethernet-connected devices. You can now configure your Smart TV and other Ethernet-enabled devices for Internet access through their related user interfaces. Configure_MoCA_Adapters for more information on setting up the MoCA adapters. 2 AT&T Telco Installations Figure 15 –... -
Page 28: 2.1 Installing For At&T U-Verse With A Separate Wi-Fi Router
Installing the MoCA Adapters 2.1 Installing for AT&T U-verse with a Separate Wi-Fi Router Figure 16 – AT&T U-verse Installation with Separate Wi-Fi Router 1. Identify the rooms that you want to add to your home network and make sure there is a coaxial cable connection in each room. -
Page 29: Figure 17 - Room 1: Sbm1400 Adapter Installation
Installing the MoCA Adapters Figure 17 – Room 1: SBM1400 Adapter Installation 6. Connect one of the Ethernet cables (included) to one of the Ethernet ports on the SBM1400 and the Ethernet/network port on your Smart TV or other Smart device. Repeat for each additional SBM1400 Ethernet connection with other networked audio-visual devices, if applicable. -
Page 30: Installing For At&T U-Verse With At&T Gateway-Integrated Modem & Router
Installing the MoCA Adapters You can now configure your Smart TV and other Ethernet-enabled devices for Internet access through their related user interfaces. Configure_MoCA_Adapters for more information on setting up the MoCA adapters. 2.2 Installing for AT&T U-verse with AT&T Gateway-Integrated Modem &... -
Page 31: Figure 19 - Room 1: Sbm1400 Adapter Installation
Installing the MoCA Adapters 4. Connect one of the coaxial cables (included) to one of the OUT connectors on the RF splitter and the Coax In connector on the SBM1400 (see Figure 19). Note: You can use either OUT connector on the RF splitter (included) for this installation. 5. -
Page 32: Installing For At&T U-Verse With An Ethernet-Connected Set-Top Box
Installing the MoCA Adapters ο If the Coax LED does not turn ON within five minutes, disconnect and then reconnect the power adapters on the SBM1100 and SBM1400. If the Coax LEDs still fail to turn ON, see Troubleshooting Solutions for more information. -
Page 33: Figure 21 - Room 1: Sbm1400 Adapter Installation
Installing the MoCA Adapters 4. Connect one of the Ethernet cables (included) to one of the Ethernet ports on the SBM1400 and the Ethernet/network port on your Smart TV or other Smart device (see Figure 21). Repeat for each additional SBM1400 Ethernet connection with other networked audio-visual devices, if applicable. -
Page 34: Verizon Fios Installation
Installing the MoCA Adapters 3 Verizon FiOS Installation Figure 22 – Verizon FiOS Installation 1. Identify the rooms that you want to add to your home network and make sure there is a coaxial cable connection in each room. 2. Locate the cable wall outlet (or RF splitter) and electrical wall outlet in the first room (see Room 1 in Figure 22). -
Page 35: Figure 23 - Room 1: Sbm1400 Adapter Installation
Installing the MoCA Adapters Figure 23 – Room 1: SBM1400 Adapter Installation 7. Connect one of the power adapters (included) to the Power port on the SBM1400 and plug it into the electrical wall outlet. To install the SBM1100 (see Room 3 in Figure 22): 8. -
Page 36: Dish/Echostar Installation
Installing the MoCA Adapters 4 Dish/EchoStar Installation Figure 24 – Dish/EchoStar Installation Important! You must ensure the MoCA coaxial network is completely separate from the Satellite coaxial network in your home. Otherwise, the Satellite Video may not function. 1. Identify the rooms that you want to add to your home network and make sure there is a coaxial cable connection in each room. -
Page 37: Figure 25 - Room 1: Sbm1400 Adapter Installation
Installing the MoCA Adapters Figure 25 – Room 1: SBM1400 Adapter Installation 7. Connect one of the coaxial cables (included) to the Coax In connector on the SBM1100 and one of the OUT connectors on the RF splitter (included). Note: You can use either OUT connector on the RF splitter (included) for this installation. 8. -
Page 38: Directv Installations
Installing the MoCA Adapters 5 DirecTV Installations Figure 26 – DirecTV Installations Flowchart Before starting, you must first determine if your DirecTV service is a Single Wire Multi-switch (SWiM) or non-SWiM installation. To verify that your DirecTV service is on a SWiM network, please follow the instructions below from DirecTV (support.directv.com/app/answers/detail/a_id/3794/kw/SWiM): 1. -
Page 39: Installing For Directv With Single Wire Multi-Switch (Swim)
Installing the MoCA Adapters 5.1 Installing for DirecTV with Single Wire Multi-Switch (SWiM) Figure 27 – DirecTV Installation with Single Wire Multi-Switch (SWiM) Follow these steps to set up the SBM1000 MoCA adapters in your home network, if you are receiving your Internet service through a DirecTV Single Wire Multi-switch (SWiM) service: 1. - Page 40 Installing the MoCA Adapters 5. Connect a second coaxial cable (included) to the Coax In connector on the SBM1400 and to the OUT connector that is NOT marked with a red line on the RF splitter (see figure above). WARNING! Connecting the MoCA adapter to the wrong OUT connector on the RF splitter may damage the MoCA adapter.
-
Page 41: Installing For Directv (Non-Swim)
Installing the MoCA Adapters 5.2 Installing for DirecTV (non-SWiM) Figure 28 – DirecTV Installation (Non-SWiM) Important! You must ensure the MoCA coaxial network is completely separate from the Satellite coaxial network in your home. Otherwise, the Satellite Video may not function. Follow these steps to set up the SBM1000 MoCA adapters in your home network, if you are receiving your Internet service through a DirecTV Non-Single Wire Multi-switch (Non-SWiM) service:... -
Page 42: Figure 29 - Room 1: Sbm1400 Adapter Installation
Installing the MoCA Adapters Figure 29 – Room 1: SBM1400 Adapter Installation To install the SBM1100 (see Room 2 in Figure 28): 6. Disconnect the coaxial cable from your gateway/router and connect it to the IN connector on one of the RF splitters (included). 7. -
Page 43: Over-The-Air (Ota) Installation
Installing the MoCA Adapters 6 Over-the-Air (OTA) Installation Figure 30 – Over-the-Air (OTA) Installation This scenario covers the Over the Air Video Service (OTA) installations that may coexist on the coaxial network with SBM1000 MoCA services. With OTA, the Broadband data service to the gateway/modem is on a separate physical data network than the OTA and MoCA services. -
Page 44: Figure 31 - Room 1: Sbm1400 Adapter Installation
Installing the MoCA Adapters Figure 31 – Room 1: SBM1400 Adapter Installation 4. Connect a second coaxial cable (included) to the Coax In connector on the SBM1400 and one of the OUT connectors on the RF splitter (included), see Figure 31. Note: You can use either OUT connector on the RF splitter (included) for this installation. -
Page 45: Setting Up Access To The Web Admin Interface
Setting Up Access to the Web Admin Interface Setting Up Access to the Web Admin Interface After installing the SBM1000 MoCA adapters and other network devices, you may have to change a few default parameters on your MoCA network using the online Web Admin Interface. Most users will be able to utilize the SBM1000 adapters without making any changes to the default out of the box configuration. - Page 46 Setting Up Access to the Web Admin Interface 3. Click Change adapter settings from the Control Panel Home pane to open the Network Connections window. 4. Click Local Area Connection to open the Local Area Connection Status window. SBM1000 SMART Video Adapter Kit • User Guide 590631-001-a...
- Page 47 Setting Up Access to the Web Admin Interface 5. Click Properties to open the Local Area Connection Properties window. 6. Click Internet Protocol Version 4 (TCP/IPv4) and Properties button to open the TCP/IP4 Properties window. SBM1000 SMART Video Adapter Kit • User Guide 590631-001-a...
- Page 48 Setting Up Access to the Web Admin Interface 7. Click Use the following IP address and then type the following values: IP address: 192.168.144.100 Subnet mask: 255.255.255.0 Note: If your computer is already configured with an IP address and Subnet mask, please write down all the current IP address and DNS server configuration values.
-
Page 49: Access The Sbm1000 Web Admin Interface
SBM1000 Web Admin Interface. The adapter login screen displays. 5. Type the following default user name and password. Both entries are case-sensitive. User name: admin Password: motorola 6. Click OK to open the SBM1000 Adapter Web Admin Interface. SBM1000 SMART Video Adapter Kit • User Guide... -
Page 50: Change My Ip Address Back To The Original Configuration
Setting Up Access to the Web Admin Interface Configuring_MoCA_Adapters to get started with your MoCA adapter configuration. Change My IP Address Back to the Original Configuration After you are finished configuring the SBM1100 and SBM1400 adapters, you must change the IP address on your computer back to its original network configuration. - Page 51 Setting Up Access to the Web Admin Interface 3. Click Change adapter settings from the Control Panel Home pane to open the Network Connections window. 4. .Click Local Area Connection to open the Local Area Connection Status window. SBM1000 SMART Video Adapter Kit • User Guide 590631-001-a...
- Page 52 Setting Up Access to the Web Admin Interface 5. Click Properties to open the Local Area Connection Properties window. 6. Click Internet Protocol Version 4 (TCP/IPv4) and Properties button to open the TCP/IP4 Properties window. SBM1000 SMART Video Adapter Kit • User Guide 590631-001-a...
- Page 53 Setting Up Access to the Web Admin Interface 7. Click Obtain an IP address automatically and then click OK. 8. Close any remaining open windows from the IP address change process. Note: If your computer was originally configured with an IP address instead of Obtain an IP address automatically, then you were prompted to save your current IP address and DNS server.
-
Page 54: Configuring The Moca Adapters
Configuring the MoCA Adapters Configuring the MoCA Adapters After installing the SBM1000 MoCA adapters and other network devices, you may have to change a few default parameters on your MoCA network using the online Web Admin Interface. Most users will be able to utilize the SBM1000 adapters without making any changes to the default out of the box configuration. -
Page 55: Change Your Administrator Security Password
SBM1100 Web Admin Interface. It is strongly recommended that you change the factory default password which is the default admin security password, motorola. All users who try to access the web-based admin interface on the SBM1000 adapters will be prompted for the adapter’s admin security password. -
Page 56: Change The Moca Network Security Password
Configuring the MoCA Adapters Change the MoCA Network Security Password You can modify and enable MoCA security for the MoCA network interface and also control which MoCA devices can join the MoCA network. To change your MoCA Network Security password: 1. -
Page 57: Find Current Network Security Password
Configuring the MoCA Adapters Find Current Network Security Password You can discover the current network security password on the current adapter. 1. From the Security main page, select Enable for Network Security. Figure 34 – Finding the Current Network Security Password 2. -
Page 58: Restore Factory Defaults
Configuring the MoCA Adapters Restore Factory Defaults You can restore your current network configuration back to the factory default configuration. However, you will lose all configuration changes that were made to the adapter(s) including your passwords. 1. Click MoCA Setup on the left side menu. Figure 35 –... -
Page 59: Change The Adapter Ip Configuration
Configuring the MoCA Adapters Change the Adapter IP Configuration You can configure the IP address assignment mode on your adapters. The IP address is not needed for functional operation of the SBM1000 adapters. It is only utilized to access the web- based administrative interface on the SBM1000 device. -
Page 60: Upgrade The Adapter Firmware
Configuring the MoCA Adapters Upgrade the Adapter Firmware Extreme care is advised when upgrading the SBM1000 firmware. Please make sure that the adapter does not lose power during the upgrade process. Whenever firmware upgrades for the SBM1000 MoCA adapters are necessary, you must first obtain your copies of the firmware from the ARRIS Support website at www.arrisi.com/consumer and then download and save the copies to your computer. -
Page 61: Change The Default Moca Beacon Power Level
Configuring the MoCA Adapters 5. Click OK when prompted, Are you sure that you want to upgrade the firmware?. 6. Click OK. The Transferring file to the device… message and file transfer progress will display. 7. Click OK when prompted, Firmware upgrade successfully, do you want to reboot?. The Reboot screen displays. -
Page 62: Figure 38 - Change Default Moca Beacon Power Level Screen
Configuring the MoCA Adapters Figure 38 – Change Default MoCA Beacon Power Level Screen 4. Select the new Beacon Power level from the drop-down list. Default is 10. 5. Click Save and then Reboot to save and apply your change. Note: After you have completed your SBM1000 configuration changes, you must change your computer IP address back to its original configuration. -
Page 63: Change The Default Moca Channel Of Operation
Configuring the MoCA Adapters Change the Default MoCA Channel of Operation Most users will be able to utilize the SBM1000 adapters without making any changes to the default out of the box Channel of Operation parameters. If any changes are made to the MoCA channel of operation, the same configuration changes must be applied to every SBM1000 adapter that you intend to operate on your home network. -
Page 64: Figure 40 - Select Single Channel Of Operation Screen
Configuring the MoCA Adapters Figure 40 – Select Single Channel of Operation Screen 6. When done, click Save and then Reboot to save and activate your changes. Note: After you have completed your SBM1000 configuration changes, you must change your computer IP address back to its original configuration. -
Page 65: Access The Sbm1000 Moca Statistics
Configuring the MoCA Adapters Access the SBM1000 MoCA Statistics You can access various MoCA statistics on the SBM1000 adapters. These statistics can be of value to the advanced user and can also help a technical service representative to diagnose or troubleshoot any reported problems with the SBM1000 adapters. -
Page 66: Figure 42 - Moca Adapter(S) Phy Rates Screen
Configuring the MoCA Adapters 3. Click PHY Rates to display the current data rates for the MoCA network between the MoCA devices. Figure 42 – MoCA Adapter(s) PHY Rates Screen Note: After you have completed your SBM1000 configuration changes, you must change your computer IP address back to its original configuration. -
Page 67: Troubleshooting Tips
Troubleshooting Tips Troubleshooting Tips If the solutions provided in this section do not resolve your problem, call the ARRIS Technical Support Center at 1-877-466-8646 for assistance. You may have to reset the SBM1000 adapter configuration to its original factory settings if the adapter is not working properly. - Page 68 Troubleshooting Tips PROBLEM POSSIBLE SOLUTION Coax LED on the SBM1400 • If none of the above steps fixed the Speed LED problem, it and SBM1100 adapters is is possible your home coax network has large signal loss ON, but Speed LED is OFF due to long coax lengths, number of coax splitters, or (continued) damaged components.
- Page 69 Troubleshooting Tips PROBLEM POSSIBLE SOLUTION Lost my Internet connection Reboot the router and recheck if you can get LAN side after connecting the connection to Internet. SBM1400 and SBM1100 If not, then power OFF both MoCA Adapters to confirm this adapters to my cable is the problem.
-
Page 70: Adapter Configuration Screen Definitions
Adapter Configuration Screen Definitions Adapter Configuration Screen Definitions You can use the SBM1000 Web Admin Interface to view and monitor the configuration settings and operational status of your SBM1000 MoCA adapters. You also have the option to change some of the default network configuration settings. But for most home network configurations, users can use the MoCA adapters without making any changes to the default out of the box configuration. -
Page 71: Table 5 - Moca Setup Screen-Field Descriptions
Adapter Configuration Screen Definitions Table 5 – MoCA Setup Screen-Field Descriptions FIELD DESCRIPTION Model Name Identifies the model of the SBM1000 adapter that you are currently logged on to: SBM1100 or SBM1400 Scan Mode Advanced users may want to modify the MoCA channel of operation selection process. -
Page 72: Device Setup
Adapter Configuration Screen Definitions Device Setup You can use the Device Setup screen to configure the IP address assignment mode on each adapter. The IP address is not needed for functional operation of the adapter. It is only utilized to access the SBM1000 Web Admin Interface on the SBM1400 and SBM1100 adapters. -
Page 73: Status Screens
Adapter Configuration Screen Definitions FIELD DESCRIPTION for the SBM1000 adapter (note that each static IP address must be unique on your network). Save button Saves any changes you made to the adapter configuration. After saving your changes, you must reboot the adapter to update the adapter configuration. -
Page 74: Table 7 - Device Status Screen-Field Descriptions
Adapter Configuration Screen Definitions Table 7 – Device Status Screen-Field Descriptions FIELD DESCRIPTION Link Status Displays the status of the MoCA coax network: Up or Down • Up – Indicates the listed SBM1000 adapter is online and is a part of your MoCA coax network. •... -
Page 75: Phy Rates
Adapter Configuration Screen Definitions PHY Rates You can use the Status PHY Rates screen to display the transmit and receive MoCA coax network bit rates between all the MoCA devices running on your home network. The PHY rates are displayed in megabits per second (Mbps). The PHY Rates data can also be helpful, if necessary, to aid a technical service representative in troubleshooting the SBM1000 adapter MoCA network. -
Page 76: Advanced Screens
Adapter Configuration Screen Definitions Advanced Screens The Advanced screens allow you to change some of the default parameters for your SBM1000 adapters and upgrade the adapter firmware when new versions are released from the manufacturer. Security Setup You can use the Advanced Security screen to change your Administrator Security and MoCA Network Security passwords. -
Page 77: Table 9 - Advanced Security Setup Screen-Field Descriptions
FIELD DESCRIPTION Admin Security Enter the current default Admin Security password Old Password (motorola) or last password you created. New Password Enter new admin password. Must contain any combination of 4 to 20 letters and numbers. Do NOT include spaces. -
Page 78: Upgrade
Adapter Configuration Screen Definitions Upgrade You can use the Advanced Upgrade screen to replace the current SBM1000 firmware with new firmware releases from ARRIS. This upgrade process must be performed on each SBM1000 adapter connected on your home network. Extreme care is advised when upgrading the SBM1000 firmware. Please make sure that the adapter does not lose power during the upgrade process. -
Page 79: Table 10 - Advanced Upgrade Screen-Field Descriptions
Adapter Configuration Screen Definitions Table 10 – Advanced Upgrade Screen-Field Descriptions FIELD/BUTTON DESCRIPTION File Shows the name of the firmware upgrade file you selected. Browse button Allows you to search for the firmware upgrade file that was previously downloaded and stored on the computer that is now connected to the SBM1000 adapter. -
Page 80: Warranty Information
Warranty Information Warranty Information SURFboard SBM1000 SMART Video Adapters ARRIS Enterprises, Inc. (“ARRIS”) Retail Purchasers: If you purchased this Product directly from ARRIS or from an authorized ARRIS retail reseller, ARRIS warrants to you, the original end user customer, that (A) the Product, excluding Software, will be free from defects in materials and workmanship under normal use, and (B) with respect to Software, (i) the media on which the Software is provided will be free from defects in material and workmanship under normal use, and (ii) the Software will perform... - Page 81 Warranty Information What additional provisions should I be aware of? Because it is impossible for ARRIS to know the purposes for which you acquired this Product or the uses to which you will put this Product, you assume full responsibility for the selection of the Product for its installation and use. While every reasonable effort has been made to insure that you will receive a Product that you can use and enjoy, ARRIS does not warrant that the functions of the Product will meet your requirements or that the operation of the Product will be uninterrupted or error-free.
- Page 82 ARRIS Enterprises, Inc. 101 Tournament Drive Horsham, PA 19044 USA www.arrisi.com 590631-001-a 07/2013...