Advertisement
Quick Links
Replacement Kit Instructions
Jandy
FOR YOUR SAFETY: This product must be installed and serviced by a professional service techni-
cian, qualified in pool/spa pump and filter installation and maintenance. Improper installation and/
or operation can create dangerous high pressure which can cause product failure or also cause
the filter lid to be blown off, possibly causing death, serious injury or property damage. Improper
installation and/or operation will void the warranty.
These instructions are to be used with the following Jandy Replacement Kit:
R0488500 -- JS100-SM O-Ring and Hardware Replacement Kit
Before installing this product, read and follow all warning notices and instructions that
accompany this filter replacement kit. Failure to follow warning notices and instructions may
result in property damage, personal injury, or loss of life.
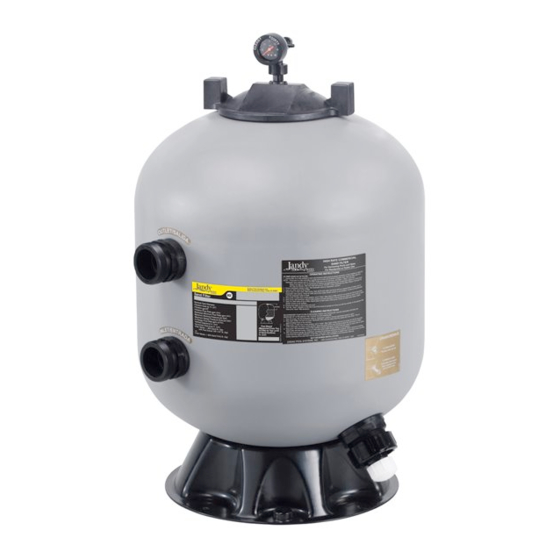
This document gives instructions for replacing all
of the o-rings, seals and screws in all Jandy JS100-SM
Model Side Mount Sand Filters. Replacement of all of
the o-rings and seals requires the complete disassem-
bly and reassembly of the filter components and piping
subassemblies.
The instructions were written with safety as the
priority and must be followed exactly. Not following the
written procedure or taking shortcuts may increase the
risk of personal injury. Read through the instructions
completely before starting the procedure.
Before starting the procedure, use the parts list at
the back of these instructions to identify the parts that
are in your kit. In addition to the parts supplied in this
kit, a small amount of silicone sealant is required. If
any parts are missing from the kit please call your local
Jandy distributor for assistance. For technical assistance,
please contact the Zodiac Pool Systems, Inc. Technical
Support Department at 1.800.822.7933.
A. Remove the Lid
WARNING
SHOCK HAZARD!
Turn off all switches and the main breaker in the
pool/spa heater electrical circuit before starting the
replacement procedure. Failure to comply may cause
a shock hazard resulting in severe personal injury or
death.
JS Sand Filter O-Rings, Seals and
®
Hardware Replacement Kit
WARNING
WARNING
Never attempt to adjust or remove the
lid when the pump is running or there is
pressure in the system. This can cause
product failure or also cause the filter lid
to be blown off which can result in
death, serious personal injury, or
property damage.
1.
Before attempting to loosen or remove the lid, turn
OFF the pump and OPEN the air release valve on
top of the filter. DO NOT attempt to loosen or
remove the lid while the pump is running or if the
filter pressure gauge indicates there is pressure in
the filter.
2.
First, try to remove the lid by hand using the
handles.
3.
If removal by hand is not successful, use a mallet
or soft-faced hammer to alternately strike the
handles to loosen the lid.
B. Drain Water From The Filter
1.
Remove the water drain cap and drain the water
from the filter. See Figure 1.
C. Remove the Sand From the Filter
1.
The sand may be removed by scooping it out
through the filter lid opening, vacuuming it out
with a suitable wet/dry shop vacuum supplied by
a GFCI protected circuit, or may be flushed out of
the filter through the large fitting at the drain. See
Figure 2.
2.
If desired, a universal tailpiece connection, part
number R0449000 (not included in kit), can be
WARNING
Advertisement

Related Manuals for Zodiac Pool Systems Jandy JS100-SM


Summary of Contents for Zodiac Pool Systems Jandy JS100-SM
- Page 1 This document gives instructions for replacing all WARNING of the o-rings, seals and screws in all Jandy JS100-SM Never attempt to adjust or remove the Model Side Mount Sand Filters. Replacement of all of...
- Page 2 Page 2 Large Fitting For Sand Flushing Hold fitting when removing or O-Ring installing drain cap Univeral Tailpiece (Not Included) Universal Coupling Nut 1 1/2” NPT Water Drain Cap Short Piping to Direct Flushed Sand Away From Filter Base Figure 3. Universal Tailpiece Connections Figure 1.
- Page 3 Page 3 E. Removal and Replacement of the Inlet F. Remove and Replace the Drain Fitting and Outlet Bulkhead Fittings Remove the drain fitting nut and o-ring from the outside of the tank. CAUTION This procedure must be followed exactly. Failure to Thoroughly rinse and wipe clean the inside and follow the procedure exactly can result in system outside surfaces of the tank around the drain fitting...
- Page 4 Page 4 Lower the hub and laterals assembly to rest on the tank bottom, and turn the elbow away from the Lid/Top of Filter bulkhead fittings to provide working room for the next steps. Vent Screen in Close Proximity Thread the outlet pipe assembly (this is the to Filter Lid assembly with the longer piece of pipe with four (4) holes drilled and a female adapter on the...
- Page 5 Page 5 Table 2. Required Zeobrite Level Model Freeboard Layered Media Freeboard "F" "F" inches Pea Gravel* Zeobrite lbs (cm) lbs (kg) (kg) JS100-SM 11 1/4" (31) 175 (80) 270 (122) * Pea Gravel is to be 1/8" to 1/4" in diameter. Lid Installation Sand or Sand and Gravel...
- Page 6 Page 6 bar hand soap with some water to the lid sealing Ensure the backwash piping is open. surface on the top of the tank before installing the Open the pump hair/lint pot lid and fill the pump lid. Do not use any type of oil or grease that can basket with water to prime the system.
- Page 7 Page 7 the filter cleans the water and the sand begins to clog, the pressure will increase. When the needle of the pressure gauge aligns with the arrow next to the word "DIRTY" on the bezel, it is time to clean the filter (see Cleaning Instructions).
- Page 8 Page 8 Zodiac Pool Systems, Inc. 6000 Condor Drive, Moorpark, CA, USA 93021 • 800.822.7933 FAX 877.327.1403 Litho in U.S.A. © Zodiac Pool Systems, Inc. 0908...