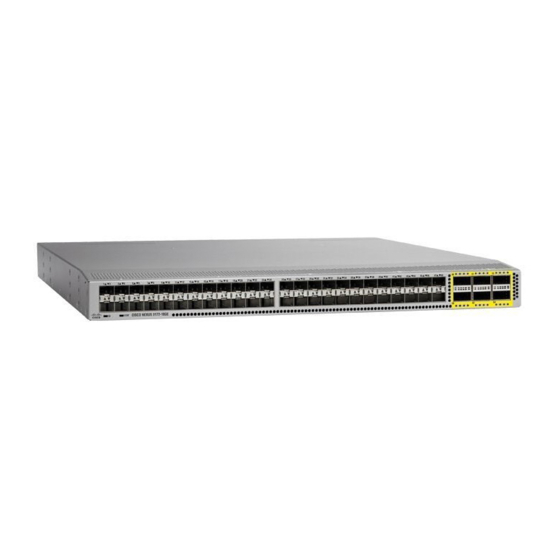
Cisco Nexus 3000 Series Installation Manual
Installing the switch chassis
Hide thumbs
Also See for Nexus 3000 Series:
- Command reference manual (356 pages) ,
- Configuration manual (338 pages) ,
- Installation manual (112 pages)
Advertisement
Quick Links
Installing the Switch Chassis
•
•
•
•
•
•
•
•
Safety
Before you install, operate, or service the switch, see the Regulatory, Compliance, and Safety Information for
the Cisco Nexus 3000 and 9000 Series for important Safety Information.
Statement 1071-Warning Definition
IMPORTANT SAFETY INSTRUCTIONS
This warning symbol means danger. You are in a situation that could cause bodily injury. Before you work
on any equipment, be aware of the hazards involved with electrical circuitry and be familiar with standard
practices for preventing accidents. Use the statement number provided at the end of each warning to locate
its translation in the translated safety warnings that accompanied this device.
SAVE THESE INSTRUCTIONS
Statement 1017-Restricted Area
This unit is intended for installation in restricted access areas. A restricted access area can be accessed only
through the use of a special tool, lock and key, or other means of security.
Statement 1030-Equipment Installation
Only trained and qualified personnel should be allowed to install, replace, or service this equipment.
Safety, page 1
Airflow Considerations, page 2
Installation Guidelines, page 2
Installing the Switch, page 4
Grounding the Chassis, page 8
Starting the Switch, page 11
Cisco Nexus 9372TX ACI-Mode Switch Hardware Installation Guide
1
Advertisement

Summary of Contents for Cisco Nexus 3000 Series
-
Page 1: Table Of Contents
Starting the Switch, page 11 Safety Before you install, operate, or service the switch, see the Regulatory, Compliance, and Safety Information for the Cisco Nexus 3000 and 9000 Series for important Safety Information. Statement 1071—Warning Definition IMPORTANT SAFETY INSTRUCTIONS This warning symbol means danger. You are in a situation that could cause bodily injury. Before you work on any equipment, be aware of the hazards involved with electrical circuitry and be familiar with standard practices for preventing accidents. -
Page 2: Installation Options With Racks And Cabinets
• Ensure that the site power meets the power requirements listed in Appendix B System Specifications. If available, you can use an uninterruptible power supply (UPS) to protect against power failures. Cisco Nexus 9372TX ACI-Mode Switch Hardware Installation Guide... -
Page 3: Unpacking And Installing The Switch
• Accessory kit, which includes the following: ◦ Ground lug kit ◦ ESD wrist strap • Rack-mount kit • Cables with connectors • Any optional items ordered Cisco Nexus 9372TX ACI-Mode Switch Hardware Installation Guide... -
Page 4: Installing The Switch
Position a front-mount bracket so that four of its screw holes are aligned to the screw holes on the side of the chassis. Cisco Nexus 9372TX ACI-Mode Switch Hardware Installation Guide... - Page 5 If you are aligning the guide to holes that are near the port connections end of the chassis, see Callout 3 in the previous figure. Otherwise, see Callout 7 in the previous figure. Cisco Nexus 9372TX ACI-Mode Switch Hardware Installation Guide...
- Page 6 To make sure that the slider rails are at the same level, you should use a level tool, tape measure, or carefully count the screw holes in the vertical mounting rails. Step 4 Insert the switch into the rack and attach it as follows: Cisco Nexus 9372TX ACI-Mode Switch Hardware Installation Guide...
- Page 7 Cisco Nexus 9372TX ACI-Mode Switch Hardware Installation Guide...
-
Page 8: Grounding The Chassis
• You connect the chassis (at its grounding pad) to the data center ground. If the rack is fully-bonded and grounded, you can ground the switch by connecting it to the rack. Cisco Nexus 9372TX ACI-Mode Switch Hardware Installation Guide... - Page 9 6 AWG wire. The length of the grounding wire depends on the proximity of the switch to proper grounding facilities. • Number 1 Phillips-head torque screwdriver. • Crimping tool to crimp the grounding wire to the grounding lug. Cisco Nexus 9372TX ACI-Mode Switch Hardware Installation Guide...
- Page 10 Prepare the other end of the grounding wire and connect it to an appropriate grounding point in your site to ensure an adequate earth ground for the switch. If the rack is fully bonded and grounded, connect the grounding wire as explained in the documentation provided by the vendor for the rack. Cisco Nexus 9372TX ACI-Mode Switch Hardware Installation Guide...
-
Page 11: Starting The Switch
• For grid redundancy, connect each of two power supplies to a different power source. Verify that the power supply LED is on and green. If the LED is off, check the power source circuit breaker to be sure that it is turned on. Cisco Nexus 9372TX ACI-Mode Switch Hardware Installation Guide... - Page 12 A setup utility automatically launches the first time that you access the switch and guides you through the basic configuration. For instructions on how to configure the switch and check module connectivity, see the appropriate Cisco Nexus 93xxx configuration guide.


