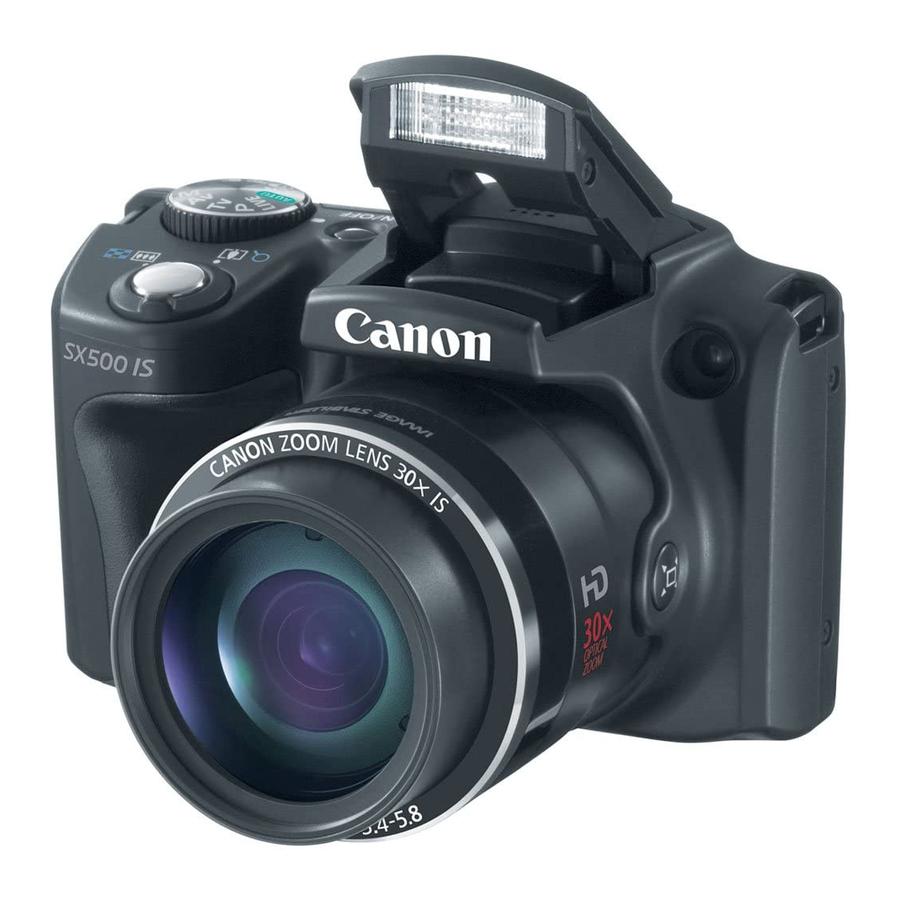
Canon PowerShot SX500 IS Getting Started
Hide thumbs
Also See for PowerShot SX500 IS:
- User manual (228 pages) ,
- Getting started (146 pages) ,
- Getting started manual (2 pages)
Table of Contents
Advertisement
Available languages
Available languages
Quick Links
Advertisement
Chapters
Table of Contents

Related Manuals for Canon PowerShot SX500 IS


Summary of Contents for Canon PowerShot SX500 IS
- Page 1 Getting Started Guía de inicio Please refer to the complete user guide included on the CD-ROM for more detailed information. Para información más detallada, consulte la guía del usuario completa que se incluye en el CD-ROM.
- Page 3 English • Make sure you read this guide, including the “Safety Precautions” section, before using the camera. • Reading this guide will help you learn to use the camera properly. • Store this guide safely so that you can use it in the future.
-
Page 4: Compatible Memory Cards
Package Contents Before use, make sure the following items are included in the package. If anything is missing, contact your camera dealer. Battery Charger Battery Pack NB-6L CB-2LY/CB-2LYE (with terminal cover) Camera Interface Cable Neck Strap IFC-400PCU NS-DC11 Lens Cap (with cord) DIGITAL CAMERA Warranty Card Solution Disk* Getting Started (CD-ROM) (this guide) * Contains software and PDF manuals (= 2 3). • A memory card is not included. Any supplements or revisions to the Camera User Guide are included at the • end of this guide. Compatible Memory Cards The following memory cards (sold separately) can be used, regardless of capacity. • • SD memory cards* SDXC memory cards* •... -
Page 5: Preliminary Notes And Legal Information
Preliminary Notes and Legal Information • Take and review some test shots initially to make sure the images were recorded correctly. Please note that Canon Inc., its subsidiaries and affiliates, and its distributors are not liable for any consequential damages arising from any malfunction of a camera or accessory, including memory cards, that results in the failure of an image to be recorded or to be recorded in a way that is machine readable. • Images recorded by the camera are intended for personal use. Refrain from unauthorized recording that infringes on copyright law, and note that even for personal use, photography may contravene copyright or other legal rights at some performances or exhibitions, or in some commercial settings. • The camera warranty is valid only in the area of purchase. In case of camera problems while abroad, return to the area of purchase before contacting a Canon Customer Support Help Desk. • Although the LCD monitor is produced under extremely high-precision manufacturing conditions and more than 99.99% of the pixels meet design specifications, in rare cases some pixels may be defective or may appear as red or black dots. This does not indicate camera damage or affect recorded images. • The LCD monitor may be covered with a thin plastic film for protection against scratches during shipment. If covered, remove the film before using the camera. • When the camera is used over an extended period, it may become warm. This does not indicate damage. Organization of Camera User Guide The following guides are included, each used for different purposes. -
Page 6: Part Names And Conventions In This Guide
Part Names and Conventions in This Guide Zoom lever Flash Shooting: <i (telephoto)> / Lamp <j (wide angle)> < (Framing Assist – Seek)> Playback: <k (magnify)> / button <g (index)> Lens Shutter button Tripod socket Strap mount DC coupler terminal cover Mode dial Memory card/battery cover Power button • Shooting modes and on-screen icons and text are indicated in brackets. : Important information you should know • : Notes and tips for expert camera use • • =xx: Pages with related information (in this example, “xx” represents a page number) • Instructions in this guide apply to the camera under default settings. • For convenience, all supported memory cards are simply referred to as “the memory card”. • The tabs shown above titles indicate whether the function is used for still images, movies, or both. - Page 7 Part Names and Conventions in This Guide Screen (LCD monitor) <l (Display)> button Microphone <n> button Speaker < (ISO speed)> / < (Filter image display)> / <1 (Playback)> button Up button Movie button <e (Macro)> / <f (Manual AV OUT (Audio/video output) / focus)> / Left button DIGITAL terminal Control dial HDMI terminal FUNC./SET button <b (Exposure compensation)> / <h (Flash)> / Right button <a (Single image erase)> button <Q (Self-timer)> / Down button Indicator Turning the control dial is one way to choose setting items, switch images, and perform other operations. Most of these operations are also possible with the <o><p><q><r> buttons. • In this guide, icons are used to represent the corresponding camera buttons and dials on which they appear or which they resemble. • The following camera buttons and controls are represented by icons. <o> Up button on back <p> Down button on back <q> Left button on back <5> Control dial on back <r> Right button on back...
-
Page 8: Table Of Contents
Table of Contents Package Contents ......2 Initial Preparations .......10 Compatible Memory Cards ....2 Trying the Camera Out ....18 Preliminary Notes and Legal Included Software, PDF Information ........3 Manuals ........23 Organization of Camera Accessories........30 User Guide ........3 Part Names and Conventions in This Guide........4 Table of Contents ......6 Safety Precautions ......6 Safety Precautions • Before using the product, please ensure that you read the safety precautions described below. Always ensure that the product is used correctly. • The safety precautions noted on the following pages are intended to prevent injuries to yourself and other persons, or damage to the equipment. • Be sure to also check the guides included with any separately sold accessories you use. Warning Denotes the possibility of serious injury or death. -
Page 9: Safety Precautions
Safety Precautions • Do not use organic solvents such as alcohol, benzine, or thinner to clean the product. • Do not let the product come into contact with water (e.g. sea water) or other liquids. • Do not allow liquids or foreign objects to enter the camera. This could result in electrical shock or fire. If liquids or foreign objects come into contact with the camera interior, immediately turn the camera off and remove the battery. If the battery charger becomes wet, unplug it from the outlet and consult your camera distributor or a Canon Customer Support Help Desk. • Use only the recommended battery. • Do not place the battery near or in direct flame. • Unplug the power cord periodically, and using a dry cloth, wipe away any dust and dirt that has collected on the plug, the exterior of the power outlet, and the surrounding area. • Do not handle the power cord with wet hands. • Do not use the equipment in a manner that exceeds the rated capacity of the electrical outlet or wiring accessories. Do not use if the power cord or plug are damaged, or not fully plugged into the outlet. • Do not allow dirt or metal objects (such as pins or keys) to contact the terminals or plug. The battery may explode or leak, resulting in electrical shock or fire. This could cause injury and damage the surroundings. In the event that a battery leaks and the battery electrolyte contacts eyes, mouth, skin or clothing, immediately flush with water. • Turn the camera off in places where camera use is prohibited. The electromagnetic waves emitted by the camera may interfere with the operation of electronic instruments and other devices. Exercise adequate caution when using the camera in places where use of electronic devices is restricted, such as inside airplanes and medical facilities. - Page 10 Safety Precautions Caution Denotes the possibility of injury. • When holding the camera by the strap, be careful not to bang it, subject it to strong impacts or shocks, or let it get caught on other objects. • Be careful not to bump or push strongly on the lens. This could lead to injury or damage the camera. • Be careful not to subject the screen to strong impacts. If the screen cracks, injury may result from the broken fragments. • When using the flash, be careful not to cover it with your fingers or clothing. This could result in burns or damage to the flash. • Avoid using, placing or storing the product in the following places: - Places subject to strong sunlight - Places subject to temperatures above 40 °C (104 °F) - Humid or dusty areas These could cause leakage, overheating or an explosion of the battery, resulting in electrical shock, fire, burns or other injuries. High temperatures may cause deformation of the camera or battery charger casing. • The slideshow transition effects may cause discomfort when viewed for prolonged periods. Caution Denotes the possibility of damage to the equipment. • Do not aim the camera at bright light sources (such as the sun on a clear day). Doing so may damage the image sensor. • When using the camera on a beach or at a windy location, be careful not to allow dust or sand to enter the camera. This may cause the product to malfunction.
- Page 11 Safety Precautions • In regular use, small amounts of smoke may be emitted from the flash. This is due to the high intensity of the flash burning dust and foreign materials stuck to the front of the unit. Please use a cotton swab to remove dirt, dust or other foreign matter from the flash to prevent heat build-up and damage to the unit. • Remove and store the battery when you are not using the camera. If the battery is left inside the camera, damage caused by leakage may occur. • Before you discard the battery, cover the terminals with tape or other insulators. Contacting other metal materials may lead to fire or explosions. • Unplug the battery charger from the power outlet after charging is complete, or when you are not using it. • Do not place anything, such as cloth, on top of the battery charger while it is charging. Leaving the unit plugged in for a long period of time may cause it to overheat and distort, resulting in fire. • Do not place the battery near pets. Pets biting the battery could cause leakage, overheating or explosion, resulting in fire or damage. • When putting the camera in your bag, ensure that hard objects do not come into contact with the screen. • Do not attach any hard objects to the camera. Doing so may cause malfunctions or damage the screen.
-
Page 12: Initial Preparations
Initial Preparations Prepare for shooting as follows. Attaching the Strap Attach the strap. Attach the included strap to the camera as shown. On the other side of the camera, attach the strap the same way. Attach the lens cap to the strap. Remove the lens cap from the camera and attach the lens cap cord to the strap. Always remove the lens cap before turning the camera on. Keep the lens cap on the lens when the camera is not in use. Holding the Camera Place the strap around your neck. When shooting, keep your arms close to your body and hold the camera securely to prevent it from moving. If you have raised the flash, do not rest your fingers on it. - Page 13 Initial Preparations Charging the Battery Before use, charge the battery with the included charger. Be sure to charge the battery initially, because the camera is not sold with the battery charged. Remove the battery cover and insert the battery in the charger. Remove the cover from the battery, align the p marks on the battery and charger, and insert the battery by pushing it in ( ) and down ( ). Charge the battery. CB-2LY: Flip out the plug ( ) and plug the charger into a power outlet ( ). CB-2LYE: Plug the power cord into the charger, then plug the other end into a CB-2LY power outlet. The charging lamp turns orange and charging begins. When the charging is finished, the lamp turns green. CB-2LYE Remove the battery. After unplugging the battery charger, remove the battery by pushing it in ( ) and up ( ). • To protect the battery and keep it in optimal condition, do not charge it continuously for more than 24 hours. • For battery chargers that use a power cord, do not attach the charger or cord to other objects. Doing so could result in malfunction or damage to the product.
- Page 14 Initial Preparations • For details on charging time and the number of shots and recording time possible with a fully charged battery, see “Specifications” (= 2 17) in the Camera User Guide . Inserting the Battery and Memory Card Insert the included battery and a memory card (sold separately). Note that before using a new memory card (or a memory card formatted in another device), you should format the memory card with this camera (see Camera User Guide ). Check the card’s write-protect tab. Recording is not possible on memory cards with a write-protect tab when the tab is in the locked (downward) position. Slide the tab up until it clicks into the unlocked position. Open the cover. Slide the cover ( ) and open it ( ). Insert the battery. While pressing the battery lock in the direction of the arrow, insert the battery as shown and push it in until it clicks into the locked position. If you insert the battery facing the wrong way, it cannot be locked into the correct position. Always confirm that the battery is facing the right way and locks when inserted.
- Page 15 Initial Preparations Insert the memory card. Insert the memory card facing as shown until it clicks into the locked position. Make sure the memory card is facing the right way when you insert it. Inserting memory cards facing the wrong way may damage the camera. Label Close the cover. Lower the cover ( ) and hold it down as you slide it, until it clicks into the closed position ( ). • For guidelines on how many shots or hours of recording can be saved on one memory card, see “Specifications” (= 2 17) in the Camera User Guide . Removing the Battery and Memory Card Remove the battery. Open the cover and press the battery lock in the direction of the arrow. The battery will pop up.
- Page 16 Initial Preparations Remove the memory card. Push the memory card in until it clicks, and then slowly release it. The memory card will pop up. Setting the Date and Time Set the current date and time correctly as follows if the [Date/Time] screen is displayed when you turn the camera on. Information you specify this way is recorded in image properties when you shoot, and it is used when you manage images by shooting date or print images showing the date. You can also add a date stamp to shots, if you wish (see Camera User Guide ). Turn the camera on. Press the power button. The [Date/Time] screen is displayed. Set the date and time. Press the <q><r> buttons to choose an option. Press the <o><p> buttons or turn the <5> dial to specify the date and time. When finished, press the <m> button.
- Page 17 Initial Preparations Set the home time zone. Press the <q><r> buttons or turn the <5> dial to choose your home time zone. Finish the setup process. Press the <m> button to complete the setting. The setting screen is no longer displayed. To turn off the camera, press the power button. • Unless you set the date, time, and home time zone, the [Date/ Time] screen will be displayed each time you turn the camera on. Specify the correct information. • To set daylight saving time (1 hour ahead), choose [ ] in step 2 and then choose [ ] by pressing the <o><p> buttons or turning the <5> dial.
- Page 18 Initial Preparations Changing the Date and Time Adjust the date and time as follows. Access the camera menu. Press the <n> button. Choose [Date/Time]. Move the zoom lever to choose the [3] tab. Press the <o><p> buttons or turn the <5> dial to choose [Date/Time], and then press the <m> button. Change the date and time. Follow step 2 on = 1 4 to adjust the settings. Press the <n> button to close the menu. • Date/time settings can be retained for about 3 weeks by the camera’s built-in date/time battery (backup battery) after the battery pack is removed. • The date/time battery will be charged in about 4 hours once you insert a charged battery or connect the camera to an AC adapter kit (sold separately, see Camera User Guide ), even if the camera is left off. • Once the date/time battery is depleted, the [Date/Time] screen will be displayed when you turn the camera on. Follow the steps on = 1 4 to set the date and time.
- Page 19 Initial Preparations Display Language The display language can be changed as needed. Enter Playback mode. Press the <1> button. Access the setting screen. Press and hold the <m> button, and then immediately press the <n> button. Set the display language. Press the <o><p><q><r> buttons or turn the <5> dial to choose a language, and then press the <m> button. Once the display language has been set, the setting screen is no longer displayed. • The current time is displayed if you wait too long in step 2 after pressing the < m > button before you press the <n> button. In this case, press the < m > button to dismiss the time display and repeat step 2. • You can also change the display language by pressing the <n> button and choosing [Language ] on the [3] tab.
-
Page 20: Trying The Camera Out
Still Images Movies Trying the Camera Out Follow these instructions to turn the camera on, shoot still images or movies, and then view them. Shooting (Smart Auto) For fully automatic selection of the optimal settings for specific scenes, simply let the camera determine the subject and shooting conditions. Turn the camera on. Press the power button. The startup screen is displayed. Enter <A> mode. Set the mode dial to <A>. Aim the camera at the subject. The camera will make a slight clicking noise as it determines the scene. Icons representing the scene and image stabilization mode are displayed in the upper right of the screen. Frames displayed around any detected subjects indicate that they are in focus. Compose the shot. To zoom in and enlarge the subject, move the zoom lever toward <i> (telephoto), and to zoom away from the subject, move it toward <j> (wide angle). - Page 21 Trying the Camera Out Shoot. Shooting Still Images Focus. Press the shutter button lightly, halfway down. The camera beeps twice after focusing, and green frames are displayed to indicate image areas in focus. If [Raise the flash] is displayed, lift the flash with your finger to prepare it for use. If you prefer not to use the flash, push it down with your finger, into the camera. Shoot. Press the shutter button all the way down. As the camera shoots, a shutter sound is played, and in low-light conditions when you have raised the flash, it fires automatically. Keep the camera still until the shutter sound ends. Your shot remains displayed on the screen for about two seconds. Even while the shot is displayed, you can take another shot by pressing the shutter button again.
- Page 22 Trying the Camera Out Shooting Movies Start shooting. Press the movie button. The camera beeps once as recording begins, and [ Rec] is displayed with the elapsed time. Elapsed Time Black bars displayed on the top and bottom edges of the screen indicate image areas not recorded. Frames displayed around any detected faces indicate that they are in focus. Once recording begins, you can take your finger off the movie button. Finish shooting. Press the movie button again to stop shooting. The camera beeps twice as recording stops.
- Page 23 Trying the Camera Out Viewing After shooting images or movies, you can view them on the screen as follows. Enter Playback mode. Press the <1> button. Your last shot is displayed. Browse through your images. To view the previous image, press the <q> button or turn the <5> dial counterclockwise. To view the next image, press the <r> button or turn the <5> dial clockwise. Press and hold the <q><r> buttons to browse through images quickly. Images appear grainy at this time. To access Scroll Display mode, turn the < 5 > dial rapidly. In this mode, turn the < 5 > dial to browse through images. To return to single-image display, press the <m> button. Movies are identified by a [ ] icon. To play movies, go to step 3.
- Page 24 Trying the Camera Out Play movies. Press the <m> button to access the movie control panel, choose [ ] (either press the <q><r> buttons or turn the <5> dial), and then press the <m> button again. Playback now begins, and after the movie Volume is finished, [ ] is displayed. To adjust the volume, press the <o><p> buttons. • To switch to Shooting mode from Playback mode, press the shutter button halfway. Erasing the Images You can choose and erase unneeded images one by one. Be careful when erasing images, because they cannot be recovered. Choose an image to erase. Press the <q><r> buttons or turn the <5> dial to choose an image. Erase the image. Press the <a> button. After [Erase?] is displayed, press the <q><r> buttons or turn the <5> dial to choose [Erase], and then press the <m> button. The current image is now erased. To cancel erasure, press the <q><r> buttons or turn the <5> dial to choose [Cancel], and then press the <m> button. You can also erase all images at once (see Camera User Guide ). •...
-
Page 25: Included Software, Pdf Manuals
Included Software, PDF Manuals The software and PDF manuals on the included DIGITAL CAMERA Solution Disk (CD-ROM) (= 2 ) are introduced below, with instructions for installation, and saving images to a computer. Software After installing the software on the CD-ROM, you can do the following things on your computer. CameraWindow Import images and change camera settings ImageBrowser EX Manage images: view, search, and organize Print and edit images Auto Update Function Using the included software, you can update to the latest version, and download new functions via the Internet (some software excluded). Be sure to install the software on a computer with an Internet connection so you can use this function. • Internet access is required to use this function, and any ISP account charges and access fees must be paid separately. PDF Manuals Camera User Guide Refer to this guide for a more in-depth understanding of camera operation. Software Guide Refer to this guide when using the included software. The guide can be accessed from the help system of included software (some software excluded). - Page 26 System Windows Vista SP2 Mac OS X 10.6 – 10.7 Windows XP SP3 Computers running one of the above operating systems Computer (preinstalled), with an included USB port and Internet connection* Still images Mac OS X 10.7: 1.6 GHz or higher Core 2 Duo or higher Processor Movies Mac OS X 10.6: Core 2 Duo 1.66 GHz or higher Core Duo 1.83 GHz or higher Still images Windows 7 (64 bit): 2 GB or more Windows 7 (32 bit), Vista: Mac OS X 10.7: 2 GB or more 1 GB or more Mac OS X 10.6: 1 GB or more Windows XP: 512 MB or more Movies 1 GB or more Interfaces Free Hard Disk 440 MB or more* 550 MB or more Space Display 1024 x 768 resolution or higher * Silverlight 4 or later (max. 100 MB) must be installed, and in Windows XP, Microsoft .NET Framework 3.0 or later (max. 500 MB) must be installed. Installation may take some time, depending on computer performance. • Check the Canon website for the latest system requirements, including supported OS versions.
- Page 27 Included Software, PDF Manuals Installing the Software Windows 7 and Mac OS X 10.6 are used here for the sake of illustration. Using the software auto update function, you can update to the latest version and download new functions via the Internet (some software excluded), so be sure to install the software on a computer with an Internet connection. Insert the CD-ROM in the computer’s CD-ROM drive. Insert the included CD-ROM (DIGITAL CAMERA Solution Disk) (= 2 ) in the computer’s CD-ROM drive. On a Macintosh computer, after inserting the disc, double-click the desktop disc icon to open it, and then double-click the ] icon displayed. Begin the installation. Click [Easy Installation] and follow the on-screen instructions to complete the installation process.
- Page 28 Included Software, PDF Manuals When a message is displayed prompting you to connect the camera, connect it to a computer. With the camera turned off, open the cover ( ). With the smaller plug of the included interface cable (= 2 ) in the orientation shown, insert the plug fully into the camera terminal ( ). Insert the larger plug of the interface cable in the computer’s USB port. For details about USB connections on the computer, refer to the computer user manual. Install the files. Turn the camera on, and follow the on-screen instructions to complete the installation process. The software will connect to the Internet to update to the latest version and download new functions. Installation may take some time, depending on computer performance and the Internet connection. Click [Finish] or [Restart] on the screen after installation and remove the CD-ROM when the desktop is displayed. Turn the camera off and disconnect the cable.
- Page 29 Included Software, PDF Manuals • When not connected to the Internet, there are the following limitations. - The screen in step 3 will not be displayed. - Some functions may not be installed. • The first time you connect the camera to the computer, drivers will be installed, so it may take a few minutes until camera images are accessible. • If you have several cameras that were bundled with ImageBrowser EX on the included CD-ROMs, be sure to use each camera with their included CD-ROM and follow the on-screen installation instructions for each. Doing so will ensure that each camera will receive the correct updates and new functions via the auto update function. Saving Images to a Computer Windows 7 and Mac OS X 10.6 are used here for the sake of illustration. Connect the camera to the computer. Follow step 3 on = 2 6 to connect the camera to a computer. Turn the camera on to access CameraWindow. Press the <1> button to turn the camera On a Macintosh computer, CameraWindow is displayed when a connection is established between the camera and computer. For Windows, follow the steps introduced below. In the screen that displays, click the [ link to modify the program.
- Page 30 Included Software, PDF Manuals Choose [Downloads Images From Canon Camera using Canon CameraWindow] and then click [OK]. Double click [ Save the images to the CameraWindow computer. Click [Import Images from Camera], and then click [Import Untransferred Images]. Images are now saved to the Pictures folder on the computer, in separate folders named by date. After images are saved, close CameraWindow, press the <1> button to turn the camera off, and unplug the cable. For instructions on viewing images on a computer, refer to the Software Guide (= 2 3).
- Page 31 Included Software, PDF Manuals • In Windows 7, if the screen in step 2 is not displayed, click the [ ] icon in the taskbar. • To start CameraWindow in Windows Vista or XP, click [Downloads Images From Canon Camera using Canon CameraWindow] on the screen displayed when you turn the camera on in step 2. If CameraWindow is not displayed, click the [Start] menu and choose [All Programs] ► [Canon Utilities] ► [CameraWindow] ► [CameraWindow]. • On a Macintosh computer, if CameraWindow is not displayed after step 2, click the [CameraWindow] icon in the Dock (the bar at the bottom of the desktop). • Although you can save images to a computer simply by connecting your camera to the computer without using the included software, the following limitations apply. - It may take a few minutes after you connect the camera to the computer until camera images are accessible. - Images shot in vertical orientation may be saved in horizontal orientation. - Image protection settings may be cleared from images saved to a computer. - Some problems may occur when saving images or image information, depending on the operating system version, the software in use, or image file sizes. - Some functions provided by the included software may not be available, such as editing movies or returning images to the camera. Using the PDF Manuals Camera User Guide Access this guide by double-clicking the desktop shortcut icon. Software Guide The guide can be accessed from the help system of included software (some software excluded). • It may not be possible to install the PDF manuals on computers that do not meet the system requirements (= 2 4). However, you can view the...
-
Page 32: Accessories
Battery Pack Charger NS-DC11 CAMERA (with cord) NB-6L* CB-2LY/ Solution Disk (with terminal CB-2LYE* cover) Interface Cable IFC-400PCU* Memory Card Card Reader Power Windows/ Macintosh Cable Computer HDMI Cable HTC-100 AC Adapter Kit TV/Video ACK-DC40 System Stereo AV Cable AVC-DC400ST Flash Unit Canon PictBridge-Compatible Printers High-Power Flash HF-DC2 * Also available for purchase separately. Use of genuine Canon accessories is recommended. This product is designed to achieve excellent performance when used with genuine Canon accessories. Canon shall not be liable for any damage to this product and/or accidents such as fire, etc., caused by the malfunction of non-genuine Canon accessories (e.g., a leakage and/or explosion of a battery pack). Please note that this warranty does not apply to repairs arising out of the malfunction of non-genuine Canon accessories, although you may request such repairs on a chargeable basis. - Page 33 FCC Notice (Digital Camera, Model PC1818 systems) This device complies with Part 15 of the FCC Rules. Operation is subject to the following two conditions; (1) this device may not cause harmful interference, and (2) this device must accept any interference received, including interference that may cause undesired operation. Note: This equipment has been tested and found to comply with the limits for Class B digital devices, pursuant to Part 15 of the FCC rules. These limits are designed to provide reasonable protection against harmful interference in a residential installation. This equipment generates, uses and can radiate radio frequency energy and, if not installed and used in accordance with the instructions, may cause harmful interference to radio communications. However, there is no guarantee that interference will not occur in a particular installation. If this equipment does cause harmful interference to radio or television reception, which can be determined by turning the equipment off and on, the user is encouraged to try to correct the interference by one or more of the following measures: • Reorient or relocate the receiving antenna. • Increase the separation between the equipment and receiver. • Connect the equipment into an outlet on a circuit different from that to which the receiver is connected. • Consult the dealer or an experienced radio/TV technician for help. The cable with the ferrite core provided with the digital camera must be used with this equipment in order to comply with Class B limits in Subpart B of Part 15 of the FCC rules. Do not make any changes or modifications to the equipment unless otherwise specified in the manual. If such changes or modifications should be made, you could be required to stop operation of the equipment. Canon U.S.A., Inc. One Canon Plaza, Lake Success, NY 11042, U.S.A. Tel No. (516) 328-5600 Canadian Radio Interference Regulations This Class B digital apparatus complies with Canadian ICES-003. For CA, USA only Included lithium battery contains Perchlorate Material - special handling may apply. See www.dtsc.ca.gov/hazardouswaste/perchlorate/ for details.
- Page 34 • The SDXC logo is a trademark of SD-3C, LLC. • This device incorporates exFAT technology licensed from Microsoft. • HDMI, the HDMI logo and High-Definition Multimedia Interface are trademarks or registered trademarks of HDMI Licensing LLC. • The iFrame logo and the iFrame symbol are trademarks of Apple Inc. About MPEG-4 Licensing This product is licensed under AT&T patents for the MPEG-4 standard and may be used for encoding MPEG-4 compliant video and/or decoding MPEG-4 compliant video that was encoded only (1) for a personal and non-commercial purpose or (2) by a video provider licensed under the AT&T patents to provide MPEG-4 compliant video. No license is granted or implied for any other use for MPEG-4 standard. * Notice displayed in English as required. Disclaimer • Reprinting, transmitting, or storing in a retrieval system any part of this guide without the permission of Canon is prohibited. • Canon reserves the right to change the contents of this guide at any time without prior notice. • Illustrations and screenshots in this guide may differ slightly from the actual equipment. • The above items notwithstanding, Canon accepts no liability for damages due to mistaken operation of the products. CAUTION RISK OF EXPLOSION IF BATTERY IS REPLACED BY AN INCORRECT TYPE. DISPOSE OF USED BATTERIES ACCORDING TO LOCAL REGULATION. Battery Charger CB-2LY IMPORTANT SAFETY INSTRUCTIONS- SAVE THESE INSTRUCTIONS. DANGER-TO REDUCE THE RISK OF FIRE OR ELECTRIC SHOCK, CAREFULLY FOLLOW THESE INSTRUCTIONS. For connection to a supply not in the U.S.A., use an attachment plug adapter of the proper configuration for the power outlet, if needed.
- Page 35 Español • Asegúrese de leer esta guía, incluida la sección “Precauciones de seguridad”, antes de utilizar la cámara. • La lectura de esta guía le ayudará a utilizar la cámara correctamente. • Guarde esta guía en un lugar seguro de modo que la pueda utilizar en el futuro.
- Page 36 Contenido del paquete Antes de usar la cámara, asegúrese de que los elementos siguientes estén incluidos en el paquete. Si falta algo, póngase en contacto con el distribuidor de la cámara. Cargador de batería Batería NB-6L CB-2LY/CB-2LYE (con tapa de terminales) Cámara Correa para el cuello Cable interfaz NS-DC11 IFC-400PCU Tapa del objetivo (con cordón) Disco DIGITAL CAMERA Tarjeta de garantía Guía de inicio Solution Disk* (esta guía) (CD-ROM) * Contiene software y manuales en PDF (= 2 3). • No incluye tarjeta de memoria. • Al final de esta guía se incluyen los complementos o revisiones de la Guía del usuario de la cámara , si los hubiere. Tarjetas de memoria compatibles Se puede utilizar las siguientes tarjetas de memoria (que se venden por separado), con independencia de su capacidad. •...
- Page 37 Notas preliminares e información legal • Tome algunas fotografías de prueba iniciales y revíselas para asegurarse de que las imágenes se graben correctamente. Canon Inc., sus subsidiarias, sus filiales y sus distribuidores no se hacen responsables de ningún daño derivado del mal funcionamiento de una cámara o de un accesorio, incluidas las tarjetas de memoria, que provoque que la imagen no se grabe o que el equipo no la pueda leer. • Las imágenes grabadas con esta cámara están destinadas al uso personal. Absténgase de realizar grabaciones no autorizadas que infrinjan las leyes de derechos de autor y tenga en cuenta que, aunque sea para uso personal, la fotografía puede infringir los derechos de autor u otros derechos legales en determinadas actuaciones o exposiciones, o en algunos escenarios comerciales. • La garantía de la cámara solo es válida en la zona donde se adquirió. Si tiene algún problema mientras está en el extranjero, vuelva a la zona donde adquirió la cámara antes de ponerse en contacto con el Servicio de asistencia al cliente de Canon. • Aunque la pantalla LCD se produce bajo condiciones de fabricación de precisión extremadamente alta y más del 99,99% de los píxeles cumplen las especificaciones de diseño, en raros casos es posible que haya píxeles defectuosos, o que aparezcan como puntos rojos o negros. Esto no indica que la cámara esté dañada, ni afecta a las imágenes grabadas. • La pantalla LCD puede venir cubierta con una fina película de plástico para protegerla de arañazos durante el transporte. Si está cubierta, retire la película antes de utilizar la cámara. • Cuando se utiliza la cámara durante un período prolongado de tiempo, es posible que se caliente. Esto no indica ningún daño. Organización de la Guía del usuario de la cámara...
- Page 38 Nombres de las partes y convenciones de esta guía Palanca del zoom Lámpara Disparo: <i (teleobjetivo)> / Botón < (Ayuda al encuadre – <j (gran angular)> Buscar)> Reproducción: < k (ampliar)> / Objetivo <g (índice)> Rosca para el trípode Botón de disparo Tapa del terminal del adaptador Enganche de la correa de CC Dial de modo Tapa de la tarjeta de memoria y Botón ON/OFF de la batería Flash • Los modos de disparo y los iconos y el texto en pantalla se indican entre corchetes. • : información importante que debe conocer • : notas y sugerencias para el uso experto de la cámara • =xx: páginas con información relacionada (en este ejemplo, “xx” representa un número de página) •...
- Page 39 Nombres de las partes y convenciones de esta guía Pantalla (pantalla LCD) Botón <l (Pantalla)> Micrófono Botón <n> Altavoz Botón < (Velocidad ISO)> / < (Visualización de imágenes Botón <1 (Reproducción)> filtrada)> / Arriba Botón Vídeo Botón <e (Macro)> / <f Terminal AV OUT (salida de audio (Enfoque manual)> / Izquierda y vídeo) / DIGITAL Dial de control Terminal HDMI Botón FUNC./SET Botón <b (Compensación de la Botón <h (Flash)> / Derecha exposición)> / <a (Borrado de una única imagen)> Botón <Q (Temporizador)> / Abajo Indicador Una manera de ajustar elementos, cambiar de imagen y realizar otras operaciones es girar el dial de control. La mayoría de estas operaciones son también posibles con los botones <o><p><q><r>. • En esta guía se utilizan iconos para representar los correspondientes botones y diales de la cámara donde aparecen, o a los que son similares. • Los siguientes botones y controles de la cámara se representan mediante iconos. <o> Botón arriba en la parte trasera <q> Botón izquierda en la parte trasera <r> Botón derecha en la parte trasera <p> Botón abajo en la parte trasera...
- Page 40 Tabla de contenido Contenido del paquete ....2 Preparativos iniciales ....10 Tarjetas de memoria Prueba de la cámara ....18 compatibles ........2 Software incluido, manuales Notas preliminares e información en PDF .........23 legal ..........3 Accesorios ........30 Organización de la Guía del usuario de la cámara .....3 Nombres de las partes y convenciones de esta guía ....4 Tabla de contenido ......6 Precauciones de seguridad ...6 Precauciones de seguridad • Antes de comenzar a utilizar este producto, asegúrese de leer las precauciones de seguridad que se describen a continuación. Asegúrese siempre de que el producto se utiliza correctamente. • Las precauciones de seguridad que se indican en las páginas siguientes tienen como misión evitar lesiones tanto al usuario como a las demás personas y daños en el equipo. •...
-
Page 41: Precauciones De Seguridad
Precauciones de seguridad • No utilice disolventes orgánicos, tales como alcohol, gasolina o disolvente, para limpiar el producto. • No permita que el producto entre en contacto con el agua (p. ej., agua del mar) ni otros líquidos. • No permita que entren en la cámara líquidos u objetos extraños. Todo esto podría provocar un incendio o descargas eléctricas. Si algún líquido u objeto extraño entra en contacto con el interior de la cámara, apáguela inmediatamente y extraiga la batería. Si hubiera humedad en el cargador de batería, desconéctelo de la toma de corriente y consulte con el vendedor de la cámara o con un Servicio de asistencia al cliente de Canon. • Utilice exclusivamente la batería recomendada. • No arroje la batería al fuego ni la deje cerca de las llamas. • Desconecte el cable de corriente periódicamente y, con un paño seco, limpie cualquier resto de polvo o suciedad que se pudiera encontrar en las clavijas, el exterior de la toma de corriente y en la zona circundante. • No manipule el cable de corriente con las manos mojadas. • No utilice el equipo de modo que supere la capacidad nominal de la toma de corriente o de los accesorios por cable. No utilice el cable de corriente ni el enchufe si están dañados, ni sin introducirlo totalmente en la toma de corriente. • Evite que cualquier objeto metálico (como chinchetas o llaves) o cualquier tipo de suciedad entre en contacto con la clavija o los terminales. La batería podría explotar o sufrir fugas que podrían provocar un incendio o descargas eléctricas. Esto podría producir lesiones o provocar daños. Si una batería tiene alguna fuga y el electrólito de la batería entra en contacto con los ojos, la boca, la piel o la ropa, lávelos inmediatamente con agua abundante. - Page 42 Precauciones de seguridad Precaución Indica el riesgo de lesiones. • Cuando sujete la cámara por la correa tenga cuidado de no golpearla, no someterla a impactos o sacudidas fuertes, y no dejar que se enganche con otros objetos. • Tenga cuidado de no golpear ni empujar con fuerza el objetivo. Esto podría dañar la cámara o producir lesiones. • Tenga cuidado de no golpear con fuerza la pantalla. Si la pantalla se rompe, los fragmentos rotos pueden provocar heridas. • Cuando utilice el flash, tenga cuidado de no taparlo con los dedos ni la ropa. Esto podría provocar quemaduras o dañar el flash. • Evite utilizar, colocar o almacenar el producto en los lugares siguientes: - Lugares expuestos a la luz solar intensa - Lugares sometidos a temperaturas superiores a 40 °C (104 °F) - Zonas húmedas o polvorientas En estos lugares se podrían producir fugas, sobrecalentamiento o una explosión de la batería, lo que puede ocasionar descargas eléctricas, incendios, quemaduras y otras lesiones. Las altas temperaturas pueden hacer que se deforme la carcasa de la cámara o del cargador de la batería. • Los efectos de transición de las presentaciones de diapositivas pueden resultar incómodos cuando se miran durante mucho tiempo. Precaución Indica la posibilidad de daños al equipo. • No apunte la cámara hacia fuentes de luz brillante (tales como el sol en un día claro). De lo contrario, el sensor de imagen podría dañarse. • Cuando la utilice en la playa o donde haya mucho viento, tenga cuidado para evitar que el polvo o la arena se introduzcan en la cámara.
- Page 43 Precauciones de seguridad • El flash, durante su uso normal, puede emitir pequeñas cantidades de humo. Esto se debe a la alta intensidad con la que el flash quema el polvo y los materiales extraños adheridos a su parte delantera. Utilice un bastoncillo de algodón para eliminar la suciedad, el polvo y cualquier material extraño del flash y evitar sobrecalentarlo y dañarlo. • Cuando no utilice la cámara, extraiga la batería y guárdela. Si la batería se queda dentro de la cámara, se pueden producir daños por fugas. • Antes de desechar una batería, cubra sus terminales con cinta adhesiva u otro aislante. El contacto con otros materiales metálicos podría provocar incendios o explosiones. • Cuando haya finalizado la carga o no lo utilice, desenchufe el cargador de batería de la toma de corriente. • No coloque sobre el cargador de batería ningún objeto, tal como un trapo, mientras se está cargando. Dejar la unidad conectada durante mucho tiempo puede hacer que se sobrecaliente y deforme, y originar un incendio. • No deje la batería al alcance de mascotas. Si una mascota mordiera una batería, se podrían producir fugas, sobrecalentamiento o explosiones, lo que puede ocasionar un incendio o daños. • Cuando la lleve en un bolso, asegúrese de que no haya objetos duros que entren en contacto con la pantalla. • No sujete ningún objeto duro a la cámara. De lo contrario, podría provocar un fallo de funcionamiento o dañar la pantalla.
-
Page 44: Preparativos Iniciales
Preparativos iniciales Prepárese para fotografiar de la manera siguiente. Montaje de la correa Monte la correa. Monte en la cámara la correa que se incluye, como se muestra. En el otro lado de la cámara, monte la correa de la misma manera. Sujete la tapa del objetivo a la correa. Quite la tapa del objetivo y sujete el cordón de la tapa a la correa. Retire siempre la tapa del objetivo antes de encender la cámara. Mantenga puesta la tapa del objetivo cuando no utilice la cámara. Cómo sujetar la cámara Colóquese la correa alrededor del cuello. Cuando dispare, mantenga los brazos cerca del cuerpo y sujete firmemente la cámara para evitar que se mueva. Si ha levantado el flash, no apoye los dedos sobre él. - Page 45 Preparativos iniciales Carga de la batería Antes de utilizarla, cargue la batería con el cargador que se incluye. No olvide cargar al principio la batería, porque la cámara no se vende con la batería cargada. Retire la tapa de la batería e inserte la batería en el cargador. Retire la tapa de la batería, alinee las marcas p de la batería y del cargador e inserte la batería empujándola hacia dentro ( ) y hacia abajo ( ). Cargue la batería. CB-2LY: levante las clavijas ( ) y conecte el cargador a la toma de corriente ( ). CB-2LYE: conecte el cable de corriente CB-2LY al cargador y, a continuación, el otro extremo a la toma de corriente. La lámpara de carga se ilumina en naranja, y se inicia la carga. Cuando la carga finaliza, la lámpara se CB-2LYE ilumina en verde. Retire la batería. Una vez desenchufado el cargador de la batería, retire la batería empujándola hacia adentro ( ) y arriba ( ). • Para proteger la batería y mantenerla en óptimas condiciones, no la cargue de manera continua durante más de 24 horas. •...
- Page 46 Preparativos iniciales • Para ver información detallada acerca del tiempo de carga, y del número de disparos y el tiempo de grabación posibles con una batería completamente cargada, consulte “Especificaciones” (= 2 32) en la Guía del usuario de la cámara . Introducción de la batería y la tarjeta de memoria Introduzca la batería incluida y una tarjeta de memoria (se vende por separado). Tenga en cuenta que antes de usar una tarjeta de memoria nueva (o una tarjeta de memoria formateada en otro dispositivo), debe formatear la tarjeta de memoria con esta cámara (consulte la Guía del usuario de la cámara ). Compruebe la pestaña de protección contra escritura de la tarjeta. No es posible grabar en tarjetas de memoria que tengan pestaña de protección contra escritura cuando la pestaña se encuentre en posición de bloqueo (hacia abajo). Deslice la pestaña hacia arriba hasta que encaje en la posición de desbloqueo. Abra la tapa. Deslice la tapa ( ) y ábrala ( ). Introduzca la batería. Mientras presiona el cierre de la batería en la dirección de la flecha, introduzca la batería como se muestra, y empújela...
- Page 47 Preparativos iniciales Introduzca la tarjeta de memoria. Introduzca la tarjeta de memoria con la orientación que se muestra hasta que encaje en la posición de bloqueo. Asegúrese de que la tarjeta de memoria tenga la orientación correcta al introducirla. Si introduce una tarjeta de memoria con una orientación equivocada Etiqueta podría dañar la cámara. Cierre la tapa. Baje la tapa ( ) y empújela hacia abajo mientras la desliza, hasta que encaje en la posición de cierre ( ). • Para ver datos orientativos sobre cuántos disparos u horas de grabación se pueden guardar en una tarjeta de memoria, consulte “Especificaciones” (= 2 32) en la Guía del usuario de la cámara . Extracción de la batería y de la tarjeta de memoria Retire la batería. Abra la tapa y presione el cierre de la batería en el sentido de la flecha. La batería saldrá.
- Page 48 Preparativos iniciales Retire la tarjeta de memoria. Empuje la tarjeta de memoria hasta que encaje y, a continuación, suéltela lentamente. La tarjeta de memoria saldrá. Ajuste de la fecha y la hora Ajuste correctamente la fecha y la hora actuales de la manera siguiente si se muestra la pantalla [Fecha/Hora] al encender la cámara. La información especificada de esta manera se registra en las propiedades de la imagen al disparar, y se utiliza para administrar las imágenes por fecha de toma o para imprimir imágenes mostrando la fecha. También puede añadir una fecha a las tomas, si lo desea (consulte la Guía del usuario de la cámara ). Encienda la cámara. Pulse el botón ON/OFF. Se mostrará la pantalla [Fecha/Hora]. Establezca la fecha y la hora. Pulse los botones <q><r> para elegir una opción. Pulse los botones <o><p> o gire el dial <5> para especificar la fecha y la hora. Cuando termine, pulse el botón <m>.
- Page 49 Preparativos iniciales Ajuste la zona horaria local. Pulse los botones <q><r> o gire el dial <5> para elegir la zona horaria local. Finalice el proceso de configuración. Pulse el botón <m> para completar el ajuste. La pantalla de ajustes deja de mostrarse. Para apagar la cámara, pulse el botón ON/OFF. • A menos que haya establecido la fecha, la hora y la zona horaria local, la pantalla [Fecha/Hora] aparecerá cada vez que encienda la cámara. Especifique la información correcta. • Para ajustar el horario de verano (se añade 1 hora), elija [ ] en el paso 2 y, a continuación, elija [ ] pulsando los botones <o><p> o girando el dial <5>.
- Page 50 Preparativos iniciales Cambio de la fecha y la hora Ajuste la fecha y la hora de la manera siguiente. Acceda al menú de la cámara. Pulse el botón <n>. Elija [Fecha/Hora]. Mueva la palanca del zoom para elegir la ficha [3]. Pulse los botones <o><p> o gire el dial <5> para elegir [Fecha/Hora] y, a continuación, pulse el botón <m>. Cambie la fecha y la hora. Siga el paso 2 de = 1 4 para realizar los ajustes. Pulse el botón <n> para cerrar el menú. • Los ajustes de fecha/hora pueden conservarse durante unas 3 semanas gracias a la pila de reloj integrada (pila de reserva), una vez retirada la batería. • La pila del reloj se cargará en unas 4 horas cuando se introduzca una batería cargada o se conecte la cámara a un kit adaptador de CA (se vende por separado, consulte la Guía del usuario de la cámara ), aunque se deje la cámara apagada. • Una vez agotada la pila del reloj, se mostrará la pantalla [Fecha/Hora] cuando se encienda la cámara. Siga los pasos de = 1 4 para establecer la fecha y la hora.
- Page 51 Preparativos iniciales Idioma de la pantalla El idioma de la pantalla se puede cambiar si es necesario. Acceda al modo de reproducción. Pulse el botón <1>. Acceda a la pantalla de ajustes. Mantenga pulsado el botón <m> y, a continuación, pulse inmediatamente el botón <n>. Establezca el idioma de la pantalla. Pulse los botones <o><p><q><r> o gire el dial <5> para elegir un idioma y, a continuación, pulse el botón <m>. Una vez ajustado el idioma de pantalla, la pantalla de ajustes deja de mostrarse. • Si espera demasiado en el paso 2 después de pulsar el botón <m> y antes de pulsar el botón <n>, se mostrará la hora actual. En este caso, pulse el botón <m> para hacer desaparecer la visualización de hora y repita el paso 2. • También puede cambiar el idioma de la pantalla pulsando el botón <n> y eligiendo [Idioma ] en la ficha [3].
-
Page 52: Prueba De La Cámara
Imágenes fijas Vídeos Prueba de la cámara Siga estas instrucciones para encender la cámara, captar imágenes fijas y vídeos y, a continuación, verlas. Fotografía (Smart Auto) Para seleccionar automáticamente los ajustes óptimos para escenas específicas, deje simplemente que la cámara determine el sujeto y las condiciones de disparo. Encienda la cámara. Pulse el botón ON/OFF. Se mostrará la pantalla inicial. Acceda al modo <A>. Establezca el dial de modo en <A>. Apunte la cámara al sujeto. La cámara hará un ligero sonido de clic mientras determina la escena. En la esquina superior derecha de la pantalla se muestran iconos que representan la escena y el modo de estabilización de imagen. Los recuadros que se muestran alrededor de los sujetos detectados indican que están enfocados. Componga la toma. Para acercarse con el zoom y ampliar el sujeto, mueva la palanca del zoom hacia <i> (teleobjetivo), y para alejarse del sujeto con el zoom, muévala hacia <j> (gran angular). - Page 53 Prueba de la cámara Dispare. Fotografía de imágenes fijas Enfoque. Pulse el botón de disparo ligeramente, hasta la mitad de su recorrido. La cámara emitirá un doble pitido cuando enfoque, y se mostrarán recuadros verdes para indicar las áreas enfocadas de la imagen. Si se muestra [Levante el flash], levante el flash con el dedo para prepararlo para su uso. Si prefiere no utilizar el flash, empújelo hacia abajo con el dedo para introducirlo en la cámara. Dispare. Pulse por completo el botón de disparo. Cuando la cámara dispara se reproduce un sonido de obturador y, cuando haya poca luz y haya levantado el flash, el flash destellará automáticamente. Mantenga la cámara quieta hasta que finalice el sonido de obturador. La imagen captada permanece en la pantalla durante unos dos segundos. Incluso mientras se muestra la imagen, es posible disparar otra vez pulsando de nuevo el botón de disparo.
- Page 54 Prueba de la cámara Grabación de vídeos Comience a grabar. Pulse el botón de vídeo. La cámara emite un pitido cuando se inicia la grabación, y se muestra [ Grab] con el tiempo Tiempo transcurrido transcurrido. Las barras negras que se muestran en los bordes superior e inferior de la pantalla indican áreas de la imagen que no se graban. Los recuadros que se muestran alrededor de las caras detectadas indican que están enfocadas. Cuando comience la grabación, puede quitar el dedo del botón de vídeo. Termine de grabar. Pulse otra vez el botón de vídeo para detener la grabación. La cámara emitirá dos pitidos cuando se detenga la grabación.
- Page 55 Prueba de la cámara Visualización Después de captar imágenes o vídeos, puede verlos en la pantalla de la manera siguiente. Acceda al modo de reproducción. Pulse el botón <1>. Se mostrará lo último que haya captado. Navegue por las imágenes. Para ver la imagen anterior, pulse el botón <q> o gire el dial <5> en sentido contrario al de las agujas del reloj. Para ver la imagen siguiente, pulse el botón <r> o gire el dial <5> en el sentido de las agujas del reloj. Mantenga pulsados los botones <q><r> para navegar rápidamente por las imágenes. En este momento, las imágenes aparecen con grano. Para tener acceso al modo Vista de desplazamiento, gire rápidamente el dial <5>. En este modo, gire el dial <5> para navegar por las imágenes. Para volver a la visualización de imágenes de una en una, pulse el botón <m>. Los vídeos se identifican mediante un icono [ ]. Para reproducir vídeos, vaya al paso 3.
- Page 56 Prueba de la cámara Reproduzca vídeos. Pulse el botón <m> para acceder al panel de control de vídeo, elija [ (pulse los botones <q><r> o gire el dial <5>) y, a continuación, pulse otra vez el botón <m>. Se iniciará la reproducción y, una vez que Volumen termine el vídeo, se mostrará [ Para ajustar el volumen, pulse los botones <o><p>. • Para cambiar del modo de reproducción al modo de disparo, pulse el botón de disparo hasta la mitad. Borrado de las imágenes Puede elegir y borrar las imágenes que no necesite una por una. Tenga cuidado al borrar imágenes, porque no es posible recuperarlas. Elija la imagen que desee borrar. Pulse los botones <q><r> o gire el dial <5> para elegir una imagen. Borre la imagen. Pulse el botón <a>. Cuando se muestre [¿Borrar?], pulse los botones <q><r> o gire el dial <5> para elegir [Borrar] y, a continuación, pulse el botón <m>. La imagen actual se borrará. Para cancelar el borrado, pulse los botones <q><r> o gire el dial <5> para elegir [Cancelar] y, a continuación, pulse el botón <m>. También puede borrar todas las imágenes a la vez (consulte la Guía del • usuario de la cámara ).
-
Page 57: Software Incluido, Manuales En Pdf
Software incluido, manuales en PDF A continuación se presenta el software y los manuales en PDF contenidos en el Disco DIGITAL CAMERA Solution Disk (CD-ROM) (= 2 ) que se incluye, con instrucciones para la instalación y para guardar imágenes en un ordenador. Software Después de instalar el software en el CD-ROM, podrá hacer lo siguiente en el ordenador. CameraWindow Importar imágenes y cambiar los ajustes de la cámara ImageBrowser EX Administrar imágenes: visualización, búsqueda y organización Imprimir y editar imágenes Función de actualización automática Puede utilizar el software que se incluye para actualizarse a la versión más reciente y descargar nuevas funciones a través de Internet (excepto algún software). Instale el software en un ordenador con conexión a Internet para poder utilizar esta función. • Para utilizar esta función se necesita acceso a Internet, y cualquier cargo del proveedor de acceso a Internet o tarifa de acceso deberá pagarse por separado. Manuales en PDF Guía del usuario de la cámara Consulte esta guía para conocer con más detalle el funcionamiento de la cámara. Guía del software Consulte esta guía cuando utilice el software que se incluye. Se puede acceder a la guía desde el sistema de ayuda del software incluido (excepto algún software). - Page 58 Windows Vista SP2 Mac OS X 10.6 – 10.7 Windows XP SP3 Ordenadores que ejecuten uno de los sistemas operativos Ordenador anteriores (preinstalados) e incluyan un puerto USB y una conexión a Internet* Imágenes fijas Mac OS X 10.7: 1,6 GHz o superior Core 2 Duo o superior Procesador Vídeos Mac OS X 10.6: Core 2 Duo 1,66 GHz o superior Core Duo 1,83 GHz o superior Imágenes fijas Windows 7 (64 bits): 2 GB o más Windows 7 (32 bits), Vista: Mac OS X 10.7: 2 GB o más 1 GB o más Mac OS X 10.6: 1 GB o más Windows XP: 512 MB o más Vídeos 1 GB o más Interfaces Espacio libre en 440 MB o más* 550 MB o más el disco duro Pantalla Resolución de 1024 x 768 o superior * Debe estar instalado Silverlight 4 o posterior (máx. 100 MB) y, en Windows XP, debe estar instalado Microsoft .NET Framework 3.0 o posterior (máx. 500 MB). Es posible que la instalación tarde algún tiempo, según el rendimiento del ordenador. • Consulte el sitio web de Canon para ver los requisitos del sistema actualizados, incluidas las versiones compatibles de los sistemas operativos.
- Page 59 Software incluido, manuales en PDF Instalación del software Aquí se utiliza Windows 7 y Mac OS X 10.6, a efectos ilustrativos. Puede utilizar la función de actualización automática del software para actualizarse a la versión más reciente y descargar nuevas funciones a través de Internet (excepto algún software), así que debe instalar el software en un ordenador con conexión a Internet. Introduzca el CD-ROM en la unidad de CD-ROM del ordenador. Introduzca, en la unidad de CD-ROM del ordenador, el CD-ROM (Disco DIGITAL CAMERA Solution Disk) que se suministra (= 2 ). En un ordenador Macintosh, después de introducir el disco, haga doble clic en el icono de disco del escritorio y, a continuación, haga doble clic en el icono ] que se muestra. Inicie la instalación. Haga clic en [Instalación simple] y siga las instrucciones de la pantalla para completar el proceso de instalación.
- Page 60 Software incluido, manuales en PDF Cuando se muestre un mensaje que solicita que se conecte la cámara, conéctela al ordenador. Con la cámara apagada, abra la tapa ( ). Con la clavija pequeña del cable interfaz que se incluye (= 2 ) con la orientación que se muestra, inserte por completo la clavija en el terminal de la cámara ( ). Introduzca la clavija grande del cable interfaz en el puerto USB del ordenador. Para ver información detallada acerca de las conexiones USB del ordenador, consulte el manual del usuario del ordenador. Instale los archivos. Encienda la cámara y siga las instrucciones de la pantalla para completar el proceso de instalación. El software se conectará a Internet para actualizarse a la última versión y descargar nuevas funciones. Es posible que la instalación tarde algún tiempo, según el rendimiento del ordenador y la conexión a Internet. Haga clic en [Finalizar] o [Reiniciar] en la pantalla después de la instalación y retire el CD-ROM cuando se muestre el escritorio. Apague la cámara y desconecte el cable.
- Page 61 Software incluido, manuales en PDF • Sin conexión a Internet, existen las siguientes limitaciones. - La pantalla del paso 3 no se mostrará. - Es posible que algunas funciones no se instalen. • La primera vez que conecte la cámara al ordenador se instalarán los controladores, así que es posible que pasen unos minutos hasta que las imágenes de la cámara estén accesibles. • Si tiene varias cámaras que traigan ImageBrowser EX en los CD-ROM que incluyen, utilice cada cámara con su CD-ROM y siga las instrucciones de instalación en pantalla correspondientes a cada una de ellas. Si lo hace así, se asegurará de que cada cámara reciba las actualizaciones y nuevas funciones correctas a través de la función de actualización automática. Guardar imágenes en un ordenador Aquí se utiliza Windows 7 y Mac OS X 10.6, a efectos ilustrativos. Conecte la cámara al ordenador. Siga el paso 3 de = 2 6 para conectar la cámara a un ordenador. Encienda la cámara para acceder a CameraWindow. Pulse el botón <1> para encender la cámara. En un ordenador Macintosh, se mostrará CameraWindow cuando se establezca una conexión entre la cámara y el ordenador. Para Windows, siga los pasos que se presentan a continuación. En la pantalla que se muestra, haga clic en el vínculo [ ] para modificar el programa.
- Page 62 Software incluido, manuales en PDF Elija [Descarga imágenes de Canon Camera con Canon CameraWindow] y haga clic en [Aceptar]. Haga doble clic en [ Guarde las imágenes en el CameraWindow ordenador. Haga clic en [Importar imágenes de la cámara] y, a continuación, haga clic en [Importar imágenes no transferidas]. Las imágenes se guardan ahora en la carpeta Imágenes del ordenador, en carpetas separadas denominadas por fecha. Una vez guardadas las imágenes, cierre CameraWindow, pulse el botón <1> para apagar la cámara y, a continuación, desconecte el cable. Para obtener instrucciones sobre la visualización de imágenes en un ordenador, consulte la Guía del software (= 2 3).
- Page 63 Software incluido, manuales en PDF • En Windows 7, si no se muestra la pantalla del paso 2, haga clic en el icono ] en la barra de tareas. • Para iniciar CameraWindow en Windows Vista o XP, haga clic en [Descarga imágenes de Canon Camera con Canon CameraWindow] en la pantalla que se muestra al encender la cámara en el paso 2. Si no se muestra CameraWindow, haga clic en el menú [Inicio] y elija [Todos los programas] ► [Canon Utilities] ► [CameraWindow] ► [CameraWindow]. • En un ordenador Macintosh, si no se muestra CameraWindow después del paso 2, haga clic en el icono [CameraWindow] del Dock (la barra de la parte inferior del escritorio). • Aunque puede guardar imágenes en un ordenador con solo conectar la cámara al ordenador, sin utilizar el software que se incluye, se aplican las siguientes limitaciones. - Es posible que tenga que esperar unos minutos después de conectar la cámara al ordenador hasta que las imágenes de la cámara estén accesibles. - Es posible que las imágenes tomadas en orientación vertical se guarden con orientación horizontal. - Puede que los ajustes de protección de las imágenes que se guarden en un ordenador se borren. - Es posible que se produzca algún problema al guardar imágenes o información de imágenes, según la versión del sistema operativo, el software que se utilice o el tamaño de los archivos. - Es posible que algunas funciones que proporciona el software que se incluye no estén disponibles, tales como la edición de vídeo y la devolución de imágenes a la cámara. Uso de los manuales en PDF Guía del usuario de la cámara Para acceder a esta guía, haga doble clic en el icono de acceso directo del escritorio. Guía del software Se puede acceder a la guía desde el sistema de ayuda del software...
-
Page 64: Accesorios
(con tapa de CB-2LYE* Solution Disk terminales) Cable interfaz IFC-400PCU* Tarjeta de Lector de Alimentación Ordenador memoria tarjetas Windows/ Cable Macintosh Cable HDMI HTC-100 Kit adaptador Sistema de de CA vídeo/ ACK-DC40 televisión Cable AV estéreo AVC-DC400ST Flash Impresoras Canon compatibles con PictBridge Flash de alta potencia HF-DC2 * También se puede comprar por separado. Se recomienda el uso de accesorios originales de Canon. Este producto se ha diseñado para alcanzar un rendimiento excelente cuando se utiliza con accesorios originales de la marca Canon. Canon no asume ninguna responsabilidad por los daños o accidentes ocasionados a este producto, tales como incendios, etc., que se deriven del funcionamiento incorrecto de accesorios no originales de la marca Canon (por ejemplo, la fuga o explosión de una batería). Tenga en cuenta que esta garantía no se aplica a las reparaciones relacionadas con el mal funcionamiento de accesorios que no sean originales de la marca Canon, si bien puede solicitar dichas reparaciones sujetas a cargos. - Page 65 NOTA...
- Page 66 PRECAUCIÓN EXISTE RIESGO DE EXPLOSIÓN SI SE SUSTITUYEN LAS BATERÍAS POR OTRAS DE UN TIPO INCORRECTO. DESECHE LAS BATERÍAS USADAS SEGÚN LAS NORMAS LOCALES. Los EE.UU. y Canadá solamente: La batería de ion de litio que acciona el producto es reciclable. Llame por favor 1-800-8-BATTERY para la información sobre cómo reciclar esta batería. Cuando se utilice la conexión a una toma eléctrica doméstica, utilice solamente el kit adaptador de CA ACK-DC40 (alimentación nominal: 100 – 240 V CA, 50/60 Hz, salida nominal: 4,3 V CC). El uso de cualquier otro aparato puede provocar incendios, sobrecalentamiento o descargas eléctricas. Cuando se utilice la conexión a una toma eléctrica doméstica, utilice solamente el cargador de batería CB-2LYE (alimentación nominal: 100 – 240 V CA, 50/60 Hz, salida nominal: 4,2 V CC). El uso de cualquier otro aparato puede provocar incendios, sobrecalentamiento o descargas eléctricas. Reconocimiento de marcas comerciales • El logotipo de SDXC es una marca comercial de SD-3C, LLC. • Este dispositivo incorpora la tecnología exFAT bajo licencia de Microsoft. • HDMI, el logotipo HDMI y High-Definition Multimedia Interface son marcas comerciales o marcas comerciales registradas de HDMI Licensing LLC. • El logotipo de iFrame y el símbolo de iFrame son marcas comerciales de Apple Inc. Acerca de la licencia MPEG-4 This product is licensed under AT&T patents for the MPEG-4 standard and may be used for encoding MPEG-4 compliant video and/or decoding MPEG-4 compliant video that was encoded only (1) for a personal and non- commercial purpose or (2) by a video provider licensed under the AT&T patents to provide MPEG-4 compliant video. No license is granted or implied for any other use for MPEG-4 standard. * Aviso mostrado en inglés según lo requerido.
- Page 67 Exención de responsabilidad • Está prohibido reimprimir, transmitir o guardar en un sistema de recuperación cualquier parte de esta guía sin el permiso de Canon. • Canon se reserva el derecho a modificar el contenido de esta guía en cualquier momento y sin previo aviso. • Las ilustraciones y capturas de pantalla de esta guía pueden diferir ligeramente de las que aparezcan en el equipo real. • A pesar de todo lo anterior, Canon no acepta ninguna responsabilidad por los daños debidos a un uso erróneo de sus productos.
- Page 68 CDP-S493-010 ©CANON INC. 2012...