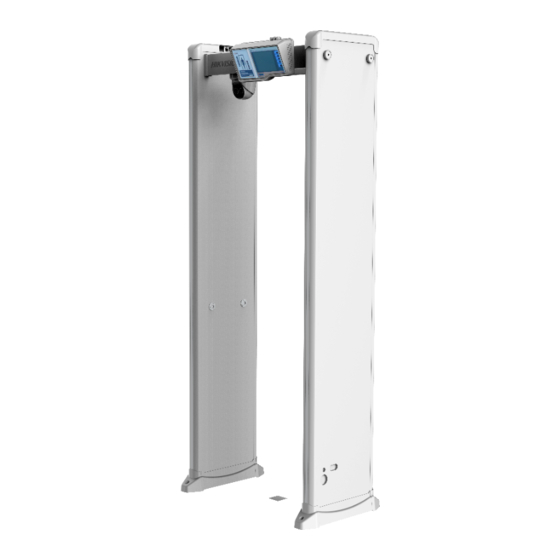
HIKVISION ISD-SMG318LT-F How To Install And Configure
Temperature screening metal detector door
Hide thumbs
Also See for ISD-SMG318LT-F:
- How to install (13 pages) ,
- Quick start manual (15 pages) ,
- Installation manual (14 pages)
Advertisement
Quick Links
Title:
How to Install and Configure Temperature Screening
Metal Detector Door
Product:
Temperature Screening Metal Detector Door
How to Install and Configure Temperature Screening Metal Detector Door
Introduction
ISD-SMG318LT-F walk-through metal detector, adopting thermal imagery technology, realizes non-
contact skin surface temperature measurement. Face detection function of the camera makes an
accurate positioning of the measurement. The detector also supports metal detection.
Product
Thermal camera
Walk metal detector
Firmware download:
For thermal camera on the metal detector door
http://www.hikvisioneurope.com/uk/portal/?dir=portal%2FProduct%20Firmware%2F00%20Temperature%
20Screening%2FMetal%20Detector%20Door
Product Model
NP-SGXXXLT-F
ISD-SMG318LT-F
Version:
Note
Please upgrade camera to special firmware
version
Metal detector doesn't need firmware
v1.0
Date:
01/07/2020
Page:
1 of 16
Advertisement

Related Manuals for HIKVISION ISD-SMG318LT-F


Summary of Contents for HIKVISION ISD-SMG318LT-F
- Page 1 How to Install and Configure Temperature Screening Metal Detector Door Introduction ISD-SMG318LT-F walk-through metal detector, adopting thermal imagery technology, realizes non- contact skin surface temperature measurement. Face detection function of the camera makes an accurate positioning of the measurement. The detector also supports metal detection.
- Page 2 Title: How to Install and Configure Temperature Screening Version: v1.0 Date: 01/07/2020 Metal Detector Door Product: Temperature Screening Metal Detector Door Page: 2 of 16 Tools needed during installation Tape measure or other distance measuring instruments: used to determine the distance when installing equipment on site ...
-
Page 3: Installation And Wiring
Title: How to Install and Configure Temperature Screening Version: v1.0 Date: 01/07/2020 Metal Detector Door Product: Temperature Screening Metal Detector Door Page: 3 of 16 A. Installation and wiring 1. Open package 1) Open package and check if all items are complete as following picture shows Safety Enhancement Kit Safety enhancement kit includes:... - Page 4 Title: How to Install and Configure Temperature Screening Version: v1.0 Date: 01/07/2020 Metal Detector Door Product: Temperature Screening Metal Detector Door Page: 4 of 16 2. Fix turret camera on the bracket 1) Remove trim from turret camera and fix it on the bracket with 3 screws, then put the trim back...
- Page 5 Title: How to Install and Configure Temperature Screening Version: v1.0 Date: 01/07/2020 Metal Detector Door Product: Temperature Screening Metal Detector Door Page: 5 of 16 3. Assemble LCD screen and camera 1) Connect left and right door panel and tighten the screw...
- Page 6 Title: How to Install and Configure Temperature Screening Version: v1.0 Date: 01/07/2020 Metal Detector Door Product: Temperature Screening Metal Detector Door Page: 6 of 16 2) Fix LCD screen and camera with screws...
- Page 7 Title: How to Install and Configure Temperature Screening Version: v1.0 Date: 01/07/2020 Metal Detector Door Product: Temperature Screening Metal Detector Door Page: 7 of 16 4. Connect cables of camera and LCD screen 1) Connect power cable and RS485 cable of camera and LCD screen like the following picture shows For first installation, we need to do configuration for camera on web client.
- Page 8 Title: How to Install and Configure Temperature Screening Version: v1.0 Date: 01/07/2020 Metal Detector Door Product: Temperature Screening Metal Detector Door Page: 8 of 16 5. Connect left and right door panel 1) Insert cable of LCD screen to left and right door panel. Right side will be power cable and signal cable, left side is signal cable only Note: Pay attention to the left and right sign and do not make mistake...
- Page 9 Title: How to Install and Configure Temperature Screening Version: v1.0 Date: 01/07/2020 Metal Detector Door Product: Temperature Screening Metal Detector Door Page: 9 of 16 2) Post the sticker ‘WARNING LIVE TERMINALS ENCLOSED’ above power terminal...
- Page 10 Title: How to Install and Configure Temperature Screening Version: v1.0 Date: 01/07/2020 Metal Detector Door Product: Temperature Screening Metal Detector Door Page: 10 of 16 3) After connecting the cable, fix left and right door panel on middle part 4) After tightening the screws, post the stickers ‘WARNING ISOLATE MAINS BEFORE REMOVING PANEL’...
- Page 11 Title: How to Install and Configure Temperature Screening Version: v1.0 Date: 01/07/2020 Metal Detector Door Product: Temperature Screening Metal Detector Door Page: 11 of 16 B. Turret camera configuration 1) Use SADP tool to activate device and type in IP address on web page to log in the device. Choose ‘body thermometry –basic settings-target thermometry parameters’, set emissivity as 0.98 and distance as 1m, and click save.
- Page 12 Title: How to Install and Configure Temperature Screening Version: v1.0 Date: 01/07/2020 Metal Detector Door Product: Temperature Screening Metal Detector Door Page: 12 of 16 Note: If temperature screening camera is upgraded from baseline firmware to customized firmware, please restore camera to default, then reboot both camera and metal detector door to take effect.
- Page 13 Title: How to Install and Configure Temperature Screening Version: v1.0 Date: 01/07/2020 Metal Detector Door Product: Temperature Screening Metal Detector Door Page: 13 of 16 C. Test effect Put the metal detector on, power on and it will do self-checking. After self-checking, it is ready to work If temperature is over pre-alarm threshold, the screen will display real time temperature and warning light will be on and buzzer will be triggered;...
- Page 14 Title: How to Install and Configure Temperature Screening Version: v1.0 Date: 01/07/2020 Metal Detector Door Product: Temperature Screening Metal Detector Door Page: 14 of 16 D. How to disable metal detection function If you want to disable metal detection alarm, you need to set sensitivity of all areas to 0. Use touch screen to set as the following picture shows 1) Click ‘sensitivity’...
- Page 15 Title: How to Install and Configure Temperature Screening Version: v1.0 Date: 01/07/2020 Metal Detector Door Product: Temperature Screening Metal Detector Door Page: 15 of 16 E. How to clear counting numbers 1) Click More on main interface 2) Log in with default account ‘00000000’ 3) Click clear to clear people counting numbers...
- Page 16 Title: How to Install and Configure Temperature Screening Version: v1.0 Date: 01/07/2020 Metal Detector Door Product: Temperature Screening Metal Detector Door Page: 16 of 16 See Far, Go Further HIKVISION Technical Support...