Yamaha AX-596 Owner's Manual
Yamaha stereo amplifier owner's manual
Hide thumbs
Also See for AX-596:
- Owner's manual (100 pages) ,
- Service manual (26 pages) ,
- Product catalog (44 pages)
Table of Contents
Advertisement
Advertisement
Table of Contents

Related Manuals for Yamaha AX-596


Summary of Contents for Yamaha AX-596
- Page 1 U C A AX-596 STEREO AMPLIFIER AMPLIFICATEUR STEREO OWNER’S MANUAL MODE D’EMPLOI...
-
Page 2: Safety Instructions
CAUTION RISK OF ELECTRIC SHOCK DO NOT OPEN CAUTION: TO REDUCE THE RISK OF ELECTRIC SHOCK, DO NOT REMOVE COVER (OR BACK). NO USER-SERVICEABLE PARTS INSIDE. REFER SERVICING TO QUALIFIED SERVICE PERSONNEL. IMPORTANT Please record the serial number of this system in the space below. - Page 3 This product, when installed as indicated in the instructions contained in this manual, meets FCC requirements. Modifications not expressly approved by Yamaha may void your authority, granted by the FCC, to use the product. IMPORTANT : When connecting this product to accessories and/or another product use only high quality shielded cables.
-
Page 4: Unpacking
UNPACKING DEBALLAGE Remote control Télécommande Opening and closing the front cover Close the front cover whenever the controls inside the panel are not used. Ouverture et fermeture du couvercle avant Fermer le couvercle avant lorsque les commandes placées à l’intérieur du panneau ne sont pas utilisées. To open the front cover Pour ouvrir le couvercle avant After unpacking, check that the following items are contained. -
Page 5: Table Of Contents
Thank you for selecting this YAMAHA stereo amplifier. FEATURES 100W + 100W (8 ) RMS Output Power, 0.015% THD, 20–20,000 Hz Highly Dynamic Power, Low Impedance Drive Capability Continuously Variable LOUDNESS Control CD/DVD DIRECT AMP Switch Used to Reproduce the Purest CD and DVD Sound... -
Page 6: Caution
Using this unit with a higher voltage than specified is dangerous and may result in fire or other accidents. YAMAHA will not be held responsible for any damage resulting from use of this unit with a voltage other than specified. -
Page 7: Notes About The Remote Control
NOTES ABOUT THE REMOTE CONTROL Battery installation Since the remote control will be used for many of this unit’s control operations, you should begin by installing the supplied batteries. 1. Turn the remote control over and remove the battery compartment cover by sliding it in the direction of the arrow. -
Page 8: Controls And Their Functions
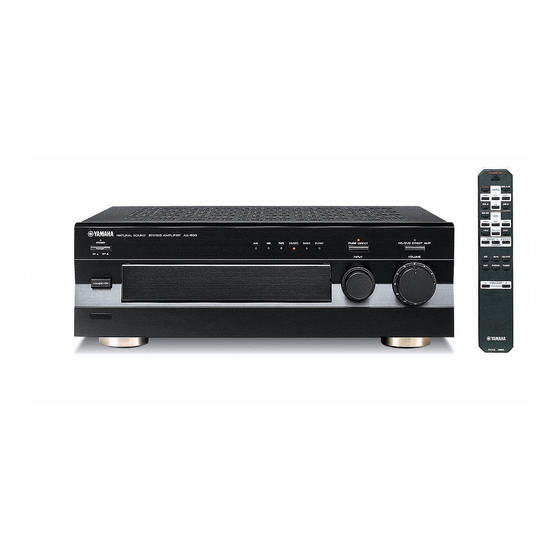
CONTROLS AND THEIR FUNCTIONS FRONT PANEL NATURAL SOUND STEREO AMPLIFIER STANDBY POWER SPEAKERS PHONES STANDBY/ON POWER Press this switch inward (ON) to use this unit. In this state, you can turn on this unit or turn this unit in the standby mode by pressing STANDBY/ON. - Page 9 PHONES jack When you listen with headphones, connect the headphones to the PHONES jack and set both SPEAKERS A and B switches to the OFF position. PHONES PHONES SPEAKERS Press the switch A or B (or both) inward (ON) for the speakers you will use.
- Page 10 REMOTE CONTROL The remote control is designed to control the most commonly used functions of the main unit. If you have a YAMAHA CD player, tuner, tape deck, etc. with remote control compatibility, this remote control will also control their various functions.
-
Page 11: Connections
● Use RCA type pin plug cables for audio/video units except speakers. ● The output (or input) terminals of YAMAHA audio/video units numbered 1, 2, 3, 4, etc. on the rear panel must be connected to the same-numbered terminals of this unit. -
Page 12: Connecting Speakers
Connecting speakers Connect the SPEAKERS terminals to your speakers with the wire with the proper gauge (keep it as short as possible). If the connections are faulty, no sound will be heard from the speakers. Make sure that the + and – polarity markings of the speaker wires are observed and set correctly. -
Page 13: Impedance Selector Switch
Rear panel parts GND terminal (For turntable use) Connecting the ground wire of the turntable to the GND terminal will normally minimize hum, but in some cases better results may be obtained with the ground wire disconnected. PRE OUT/MAIN IN terminals Removing the jumper pins from the PRE OUT/MAIN IN terminals enables this unit to operate separately as a control amplifier and a power amplifier. -
Page 14: Operation
Playing a source STANDBY –dB Press POWER inward (ON). STANDBY POWER If the STANDBY indicator is illuminated, press STANDBY/ON to turn on the power. (The STANDBY indicator turns off.) STANDBY/ON STANDBY POWER Select the desired input source. TAPE CD/DVD The indicator of the selected source lights up. OPERATION STANDBY TAPE... - Page 15 Recording a source to tape (or MD) STANDBY POWER STANDBY/ON Follow the steps 1–3 of “Playing a source” on page Select the source you want to record. REC OUT CD/DVD TAPE TUNER PHONO Play the source. Select the source with the INPUT selector and adjust VOLUME to check the sound output.
-
Page 16: Sound Control
Sound control Adjusting the BALANCE control Adjust the balance of the output volume to the left and right speakers to compensate for sound imbalance caused by speaker location or listening room conditions. BALANCE Using the CD/DVD DIRECT AMP switch You can enjoy the purest possible sound from your CD or DVD player by pressing this switch. -
Page 17: Troubleshooting
Refer to the chart below when this unit does not function properly. If the problem you are experiencing is not listed below or if the instructions given below do not help, disconnect the power cord and contact your authorized YAMAHA dealer or service center. -
Page 18: Specifications
SPECIFICATIONS Power Section Minimum RMS Output Power 8 , 20 Hz to 20 kHz, 0.015% THD ... 100W+100W Maximum Output Power (EIAJ) (1 kHz, 10% THD) Dynamic Power (IHF) 8/6/4/2 ... 140/170/220/290W DIN Standard Output Power (4 , 1 kHz, 0.7% THD) ... 155W IEC Output Power (8 , 1 kHz, 0.015% THD) ... - Page 19 YAMAHA ELECTRONIQUE FRANCE S.A. RUE AMBROISE CROIZAT BP70 CROISSY-BEAUBOURG 77312 MARNE-LA-VALLEE CEDEX02, FRANCE YAMAHA ELECTRONICS (UK) LTD. YAMAHA HOUSE, 200 RICKMANSWORTH ROAD WATFORD, HERTS WD1 7JS, ENGLAND YAMAHA SCANDINAVIA A.B. J A WETTERGRENS GATA 1, BOX 30053, 400 43 VASTRA FRÖLUNDA, SWEDEN Printed in Malaysia YAMAHA MUSIC AUSTRALIA PTY, LTD.