Table of Contents
Advertisement
Advertisement
Table of Contents

Related Manuals for Yamaha CBX-K2


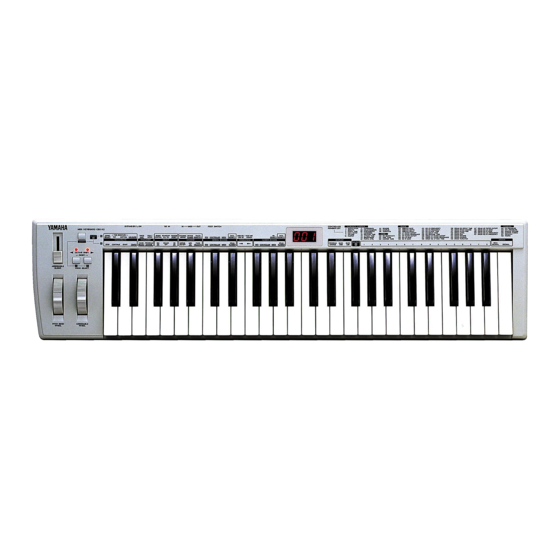
Summary of Contents for Yamaha CBX-K2
- Page 2 This product should be used only with the compo- nents supplied or; a cart, rack, or stand that is recommended by Yamaha. If a cart, etc., is used, please observe all safety markings and instruc- tions that accompany the accessory product.
- Page 3 Yamaha service personnel. • Use the specified adaptor (PA-1D or an equivalent recommended by Yamaha) only. Using the wrong adaptor can result in damage to the in- strument or overheating. • Before cleaning the instrument, always remove the electric plug from the outlet.
- Page 4 MIDI Swiss army knife, of sorts — for all MIDI musicians and performers. IMPORTANT The CBX-K2 does not contain an internal tone generator. In order to play sounds from the CBX-K2, you need an external tone generator, such as the Yamaha MU series or TG series tone generators. NOTE The many MIDI functions and features of the CBX-K2 may not be sup- ported by your particular MIDI device.
-
Page 5: Table Of Contents
The CBX-K2 — What It Is and What It Can Do What It Is ... 6 What It Can Do ... 6 How to Use This Manual ... 7 Panel Controls and Terminals ... 8 Note Range of the CBX-K2 (with Octave Shift ) -
Page 6: The Cbx-K2 - What It Is And What It Can Do
Using as a Second Keyboard or Dedicated MIDI Controller The CBX-K2 is small enough to fit on top of nearly any keyboard, making it perfect as a second keyboard. Since the CBX-K2 has a MIDI IN terminal, you can connect it... -
Page 7: How To Use This Manual
— especially before trying some of the more sophisticated MIDI functions. Read through all of the initial sections first, then go on to the “Guided Tour” to set up your CBX-K2, learn how to use its various functions, and try out some of the practical application examples to help you become more familiar with its operations. -
Page 8: Panel Controls And Terminals
L. These functions with dashed underline need no value entry, but require pressing Value entry on the CBX-K2 can be done in two number systems: Decimal and Hexadecimal. The keys labeled A through F are for Hexadecimal entry. NOTE CBX-K2 is from 1 to 127. -
Page 9: Note Range Of The Cbx-K2 (With Octave Shift)
LED display. r Assignable Slider When the CBX-K2 is turned on, this Slider is set to control the data entry of the connected MIDI device. It can be set to control other functions; see on pages 18 and 26 for details. -
Page 10: Default Settings Of The Cbx-K2
Default Settings of the CBX-K2 The CBX-K2 has no internal memory backup. As a result, all settings are returned to the factory default when turning the power off. The basic factory default settings are listed below. -
Page 11: Rear Panel
Rear Panel !0 POWER Switch Push this switch in to turn on the power. Each time the power is turned on, the CBX-K2 returns to the default condition. (See boxed section on page 10.) !1 DC IN Terminal This is for connection to a PA-1D AC adaptor or another adaptor recommended by Yamaha. -
Page 12: Guided Tour
Setting Up the CBX-K2 in Your Music System Whatever your system, you should follow the basic instructions below when setting up your CBX-K2. Use the example illustrations as a general guide when making the connections with your own system. Power Supply Your CBX-K2 will run from the included power adaptor, PA-1D or an equivalent. -
Page 13: Setting Up Your Cbx-K2
Basically, you will need: * The CBX-K2 and PA-1D AC power adaptor (or a set of batteries). * A MIDI device (such as a tone generator, keyboard or computer) which can receive and play back MIDI data, and at least one MIDI cable. -
Page 14: With Sequencer
Connect the MIDI OUT terminal on the CBX-K2 to the MIDI IN terminal on the sequencer. Computer In the simple system below, the CBX-K2 is used to play the voices of the MU100R Tone Generator. This setup could also serve as a simple, yet powerful live performance rig, with the CBX-K2 being used as a portable keyboard controller. -
Page 15: With Main Keyboard And Tone Generator
CBX-K2 is used to play the sounds of the tone generator on another channel. This lets you play two sounds at once from the Clavinova, and play a third sound from the CBX-K2. -
Page 16: Playing And Using Your Cbx-K2
CBX-K2. It also provides some advanced operation examples, so that you can get a feel for what the CBX-K2 is capable of, and how you can best use it. Master the basics in this section, and you’ll have the experience and know-how to easily and... -
Page 17: Changing The Voice Banks
Many currently available tone generators feature multiple banks of voices. The CBX-K2 can be used to quickly and easily select these additional banks. Some banks may not be available on your particular tone generator; check the manual for details. Operation... -
Page 18: Using The Pitch Bend Wheel, Assignable Wheel, And Assignable Slider
Playing and Using Your CBX-K2 Using the Pitch Bend Wheel, Assignable Wheel, and Assignable Slider These two wheels and slider let you control different aspects of the sound in realtime as you play. These con- trols affect the connected MIDI instrument. -
Page 19: Changing The Touch Sensitivity Of The Keyboard
Touch Sensitivity value. This concludes the basic tour of some of the important functions of the CBX-K2. To find out more about how to use your CBX-K2, look through the Reference section that follows and try out some of the func- tions and operations that interest you. -
Page 20: Reference
Using the SHIFT-Related Functions The enormous flexibility and power of the CBX-K2 is in its “hidden” or SHIFT-related functions — allowing you to send virtually any kind of MIDI message directly from the keyboard or use the Assignable Wheel/Slider for real-time control change. -
Page 21: Basic Operations
C. (See on pages 28 – 29 for specific Group B functions and how to use them.) Entering Values Value entry on the CBX-K2 can be done in two number systems: Decimal and Hexadecimal. The keys labeled A through F are for Hexadecimal entry. -
Page 22: Setting The Functions
+ Function Key Relevant Functions: Merge On/Off Example: Switching the MIDI Merge function of the CBX-K2 on or off ever, when you wish to enter a decimal value, make sure to press K. Likewise, when entering a hexadeci- mal number, make sure to press J. - Page 23 Setting a Specific Value for a Function (MSB, LSB) Operation: + Function Key value Relevant Functions: Bank Select; RPN; NRPN Example: This example shows how to use the Bank Select function to select different banks. This example also shows you how to use the functions that require entry of two values: MSB and LSB.
-
Page 24: Group B Operations
Setting a Simple Command (on/off) Operation: Relevant Function: Merge On/Off (each channel) Example: Switching the MIDI Merge function of the CBX-K2 on or off for MIDI channel 12 ç MIDI channel 12) Keys 1 – f and 0 correspond to MIDI channel 1–... - Page 25 Sending a Simple Command with L ç Operation: Function Key Relevant Function: TG300B Reset Example: Sending the current CBX-K2 settings to a MIDI storage device or sequencer with the Bulk Dump Out function ç ™ Setting a Specific Value for a Function ç...
-
Page 26: Group A Functions - List
C is held. *2 Depending on the selected message or the particular device that is connected to the CBX-K2, there may be no response. Refer to the owner’s manual of the device for details. *3 Be careful not to press the connected footswitch when footswitch is assigned to “SUS”;... - Page 27 When set to ON, this merges all data received at MIDI IN with the data generated by the CBX-K2. Merge can be set independently for each channel in the Group B. (For details about MIDI Merge, refer to page 34.) This determines the MIDI transmit channel for the CBX-K2.
-
Page 28: Group B Functions - List
Footnotes *1 Depending on the selected message or the particular device that is connected to the CBX-K2, there may be no response. Refer to the owner’s manual of the device for details. *2 The Time Signature Top value is selected in the following order: 4, 5, 6, ... - Page 29 This performs a TG300B reset on a connected tone generator. This merges all data received over the specified MIDI channel with the data generated by the CBX-K2. This function can be set independently for each channel. (For details about MIDI Merge, refer to page 34.) This determines the Device Number when independently transmitting certain messages (such as XG On) to one of several connected MIDI devices.
-
Page 30: Assignable Wheel & Slider - Controller Number List
Assignable Wheel & Slider — Controller Number List For further details on these various control numbers refer to the MIDI Data Format supplement. Controller Name Modulation Depth Breath Control Foot Control Portamento Time Data Entry MSB Main Volume Expression Hold 1 (Damper) Portamento Sostenuto (Chord Hold) Soft Pedal... -
Page 31: About Midi
Messages which control sustain on/off. Setting the value between 64 - 127 turns the sustain on, between 0 - 63 turns the sustain off. On the CBX-K2, a connected footswitch can be assigned to control sustain when “SUS” is set. - Page 32 About MIDI Portamento Switch (Control #065) Messages which control portamento on/off. Setting the value between 64 -127 turns the portamento on, between 0 - 63 turns the portamento off. Sostenuto Switch (Control #066) Messages which control sostenuto on/off. Setting the value between 64 - 127 turns sostenuto on, between 0 - 63 turns sostenuto off.
-
Page 33: System Messages
Clears all notes currently on for the specified channel. However, if Sustain Switch or Sostenuto Switch is on, notes will continue sounding until these are turned off. This message cannot be sent by any CBX-K2 operation; however, when a MIDI error occurs, this message is sent automatically. -
Page 34: Midi Data Format
* When the CBX-K2 is set to send <<F8>> messages, <<F8>> messages from an external device will not be merged. * When the CBX-K2 is not set to send <<F8>> messages, <<F8>> messages from an external device can be merged. -
Page 35: Transmitted Data
* When pressing several keys simultaneously, after touch of only the highest note number is output. * Though the keyboard of the CBX-K2 itself has no after touch, after touch data can be transmitted from the Assignable Wheel or Slider when Channel pressure or Polyphonic key pressure is assigned to the controller. -
Page 36: Midi Implementation Chart
YAMAHA [ MIDI Sound Keyboard ] Model CBX-K2 +----------------------------------------------------------------------+ Function ... : :-------------------+----------------+----------------+----------------: :Basic Default :Channel Changed : 1 - 16 :-------------------+----------------+----------------+----------------: Default :Mode Messages Altered : ************** : x :-------------------+----------------+----------------+----------------: :Note : 0 - 127 :Number : True voice: ************** : x... -
Page 37: Troubleshooting
MIDI clock messages, or MIDI clock mes- sages are not sent. — Make sure that the Tempo setting on the CBX-K2 is set to a value other than oFF. Also make sure that the connected device is set properly for receiving MIDI clock messages. If... -
Page 38: Error Messages
Active Sensing error This error occurs when a MIDI cable is connected to the MIDI IN terminal of the CBX-K2 and Active Sensing messages <<FE>> have not been received for a certain amount of time or the MIDI cable has been acci- dently disconnected. -
Page 39: Specifications
Input/Output Terminals MIDI IN, MIDI OUT, DC IN, FOOTSWITCH Power Supply Yamaha PA-1D AC Power Adaptor, or six “AA” size, SUM-3, R-6 or equivalent batteries. Dimensions (W x D x H) 817 x 202 x 85 mm (32-1/8" x 8" x 3-1/3") Weight (without batteries) 2.6 kg (5 lbs., 12 oz.) -
Page 40: Index
Index All Sound Off (all channels) ... 28 All Sound Off (current channel) ... 26 Assignable Slider ... 9, 18 Assignable Wheel ... 9, 18 Bank LSB (Display) ... 26 Bank LSB ... 17 Bank MSB (Display) ... 26 Bank MSB ... 17 Bank Select ... - Page 42 Compliance with FCC This applies only to products distributed by YAMAHA CORPORATION OF AMERICA. Entsorgung leerer Batterien (nur innerhalb Deutschlands) Leisten Sie einen Beitrag zum Umweltschutz. Verbrauchte Batterien oder Akkumulatoren dürfen nicht in den Hausmüll.
- Page 43 For details of products, please contact your nearest Yamaha or the authorized distributor listed below. Pour plus de détails sur les produits, veuillez-vous adresser à Yamaha ou au distributeur le plus proche de vous figurant dans la liste suivante. NORTH AMERICA CANADA Yamaha Canada Music Ltd.
- Page 44 M.D.G., EMI Division © Yamaha Corporation 1998 VZ96900 801POCP1.3-01A0 Printed in Japan...