Advertisement
Quick Links
Installationsanleitung
Alarmgeber IQ8Alarm
Installation Instruction
Alarm device IQ8Alarm
(Art.-Nr. / Part No. 807xxx)
Technische Änderungen vorbehalten!
798946
Technical changes reserved!
D
GB
09.2008
© 2008 Honeywell International Inc.
Novar GmbH a Honeywell Company
Dieselstraße 2, D-41469 Neuss
Internet:
www.esser-systems.de
E-Mail:
info@ esser-systems.de
D
Achtung !
•
Nationale Richtlinien und regionale Auflagen beachten.
•
Gerät
nur
für
den
bestimmungsgemäßen
Gebrauch
einsetzen.
•
Installation nur durch einen fachkundigen Servicetechniker.
•
Montage
nur
im
spannungsfreien
Zustand
bzw.
abgeschalteter Analog-Ringleitung.
•
Gerät niemals an 230 V AC Netzspannung anschließen.
•
max.
Anzahl
der
Alarmgeber
in
Abhängigkeit
Leitungslänge einsetzen.
•
Abstrahlwinkel und Erkennbarkeit der Warnsignale beachten.
Allgemein
Abhängig vom Alarmgebertyp können bis zu 32 IQ8Alarm an die
®
esserbus
-PLus Ringleitung des Brandmeldesystems IQ8Control
angeschlossen
werden.
Diese
Anzahl kann
durch
busfähige Alarmgeber und der Ringleitungslänge eingeschränkt
werden. Die Alarmierung erfolgt im Alarmfall, abhängig vom
eingesetzten Alarmgebertyp, wahlweise per Warnton, Blitzleuchte
und/oder Sprachmeldung.
Systemvoraussetzungen
•
Brandmelderzentrale BMZ IQ8Control ab Version V3.04
•
®
esserbus
-PLus Funktionalität
•
Programmiersoftware tools 8000 ab Version V1.09
Es stehen verschiedene Alarmgebertypen zur Auswahl:
Art.-Nr.
Alarmgebertyp
807205 /-06
akustisch
807212/-13/-14
optisch
807224
akustisch und optisch
807322 / 807322.SVxx
akustisch und Sprache
807332 / 807332.SVxx
akustisch und Sprache
807372 / 807372.SVxx
akustisch und optisch und Sprache
Berechnung der maximalen Alarmgeberanzahl
Die max. mögliche Anzahl von busfähigen Alarmgebern auf der
Analog-Ringleitung ist abhängig vom Alarmgebertyp und der
Ringleitungslänge. Hierzu ist der individuelle Lastfaktor (LF) der
einzelnen Busteilnehmer zu addieren (siehe Technische Daten).
Der max. zulässige Gesamtlastfaktor einer Ringleitung beträgt 96.
Montage (Abb.1 / 2)
Der Alarmgeber muss an einem sauberen und trockenen Ort, mit
geeignetem Befestigungsmaterial an den dafür vorgesehenen
Befestigungslöchern
montiert werden. Die Maße sind in der
Abbildung
und
dargestellt. Die erforderliche Montagelage ist
durch den Markierungspfeil im Gehäuseunterteil
gekennzeichnet.
Zum Öffnen des Alarmgebers ist, wie in der Abb.
angedeutet,
vorsichtig ein schmaler Schlitzschraubendreher in die seitliche
Gehäuseöffnung einzuführen und das Gehäuseunterteil mit
leichtem Druck aufzuhebeln. Um das Gehäuse zu schließen, wird
das
Gehäuseoberteil
wieder
lagerichtig
auf
das
aufgesteckt bis es einrastet. Die entfernten Sollbruchstellen
Gehäuses für die Kabeleinführung müssen mit geeigneten
Gummidichtungen oder Kabelverschraubungen gegen Schmutz
und Feuchtigkeit verschlossen werden. Der Alarmgeber mit
flachem Gehäuseunterteil entspricht der Schutzart IP 30.
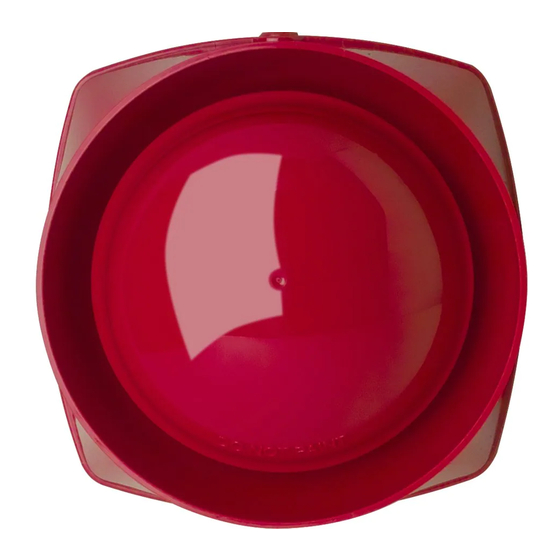
Auswechseln der optischen Kalotte (Abb. 3)
Kalotte mit leichtem Druck gegen die abgeschrägte Gehäusewand
(A), gegenüber der Kalottenmarkierung (B), nach oben aus der
Halterung
hebeln.
Kalotte
inkl.
Dichtungsring
entnehmen.
Dichtungsring (C) auf die neue Kalotte setzen. Kalotte in gezeigter
Lage von unten an der Gehäusemarkierung (B) ausrichten und
vorsichtig wieder in das Gehäuse drücken, bis sie einrastet.
Auswechseln
des
Gehäuseoberteiles
beim
optischen
Alarmgeber (Abb. 4)
Das Gehäuse öffnen und die transparente Kunststoffabdeckung
(D) entfernen. Die Platine vorsichtig an den vier Kunststoffclips (E)
lösen und aus dem Oberteil entnehmen (F). Die neue Gehäuse-
abdeckung aufsetzen und die Platine an dem Markierungsstift (G)
ausrichten. Platine vorsichtig in das neue Gehäuseoberteil drücken
bis sie wieder in die Halteclips einrastet (H).
GB
Important !
•
Refer national and regional regulations.
•
The unit must only be used in its intended application.
•
Installation only by an experienced service technician.
•
The unit must only be installed with disconnected power supply
bei
or while the analog loop is switched off.
•
Never connect the device to 230 V AC mains voltage.
•
Observe the maximum permitted number of alarm devices
der
corresponding to the loop length.
•
Check the orientation of the device and its unobstructed visually
and audibly.
General
Depending on the alarm device type a maximum of 32 IQ8Alarm
®
can be connected to any esserbus
PLus loop of the series
andere
IQ8Control fire alarm system. This number may be limited by the
presence of other alarm devices and the length of the loop. The
alarm is given by means of sound, strobe and/or a speech
message of the appropriate alarm device.
System requirements
•
Fire alarm control panel FACP IQ8Control from version V3.04
•
®
esserbus
PLus (powered loop) function
•
Programming software tools 8000 from version V1.09
Different types of alarm devices are available:
Part No.
Alarm device type
807205 /-06
audible
807212 /-13/-14
visual
807224
audible and visual
807322 / 807322.SVxx
audible and speech
807332 / 807332.SVxx
audible and speech
807372 / 807372.SVxx
audible and visual and speech
Calculating the maximum number of alarm devices
The maximum permitted number of alarm devices on a loop
depends on the device type and loop length and may be calculated
by adding the individual load factor (LF) of the alarm devices (refer
to specifications). The maximum load factor of a loop must not
exceed 96.
Mounting (Fig. 1 / 2)
The alarm devices may only be installed in clean and dry locations
using appropriate mounting material and the mounting holes
provided on the device. The dimensions depend on the device
type. They are given in fig.
and
. The proper orientation is
indicated by an arrow on the back-box
. To open the alarm
device enter a small screw driver into the opening at the side of the
housing and carefully prise it off the back-box applying slight
pressure ref. Fig.
. To close the housing position the upper part
on the back-box in the correct orientation and push until it clicks
Unterteil
into place. Any pre-punched cable entries
des
opened for connecting the unit must be appropriately sealed
against dirt and moisture, e.g. with rubber grommets or screw-in
cable glands. In combination with the shallow back-box the alarm
device is suitable for mounting in accordance to protection
class IP 30.
Changing the lens cap (Fig. 3)
Insert a screw driver into the side of the device opposite to the
marking (B) and prise it off by applying slight pressure against the
outer cabinet (A). Remove the lens cap and the sealing ring. Put
the sealing ring (C) on the new lens cap. Align the lens cap as
shown with marking (B) on the housing and click it on.
Changing the lens of the visual alarm device (Fig. 4)
Open the alarm device housing and remove the transparent cover
(D). Remove the printed circuit board carefully from the four plastic
clips (E) and take it out of the lens (F). Insert the printed circuit
board into the new lens, and align it with the mark (G). Apply slight
pressure to the printed circuit board until it engages in the plastic
clips (H) of the new lens.
Maße / Dimensions
60
A
B
B
A
A
1
B
B
A
112
2
3
112
35
4
Abb. 1: Maße (in mm)
Fig. 1: Dimensions (in mm)
Demontage / Remounting
(A)
(B)
which have been
(C)
(B)
Abb. 3: Auswechseln der optischen Kalotte
Fig. 3: Changing the lens cap
Zusammenbau / Mounting
5
Flaches Gehäuse /
shallow back box
6
Gehäuse IP 65 (Option) /
back box IP65 (optional)
8
7
Abb. 2: Montage
Fig. 2: Mounting
(D)
(F)
(E)
(G)
(H)
Abb. 4: Auswechseln des Gehäuseober-
teiles beim optischen Alarmgeber
Fig. 4: Changing the lens of the visual
alarm device
Advertisement

Related Manuals for Honeywell ESSER IQ8Alarm


Summary of Contents for Honeywell ESSER IQ8Alarm
- Page 1 Sprache 807372 / 807372.SVxx audible and visual and speech 09.2008 © 2008 Honeywell International Inc. Berechnung der maximalen Alarmgeberanzahl Calculating the maximum number of alarm devices Die max. mögliche Anzahl von busfähigen Alarmgebern auf der The maximum permitted number of alarm devices on a loop Analog-Ringleitung ist abhängig vom Alarmgebertyp und der...
- Page 2 Inbetriebnahme Commissioning Die Alarmreaktion jedes IQ8Alarm wird in der Kundendatenprogrammierung des Brandmeldesystems IQ8Control eingestellt. Für jeden akustischen The required alarm signals of the IQ8Alarm are selected as part of the series IQ8Control fire alarm system’s customer data programming. Up to Alarmgeber können bis zu vier unterschiedliche akustische Signale, z.B.