Table of Contents
Advertisement
Advertisement
Table of Contents
Troubleshooting

Related Manuals for Frigidaire FFLE3911QW


Summary of Contents for Frigidaire FFLE3911QW
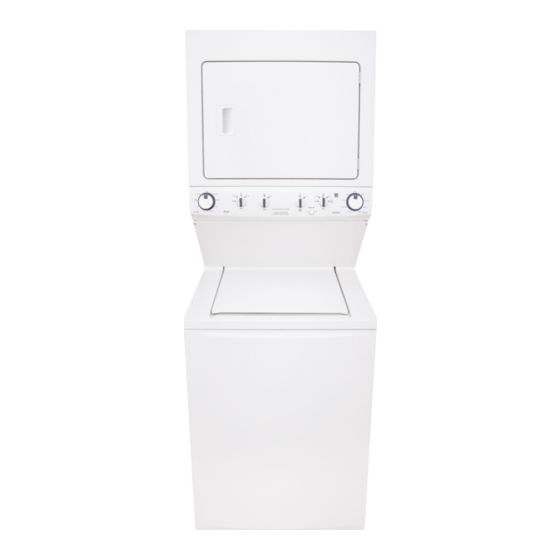
- Page 1 Technical Service Manual Laundry Center Publication #5995666392 October 2015...
-
Page 3: Table Of Contents
7.2 WASHING CYCLE SELECTION ..........56 9.7.1 General Characteristics ................... 89 7.3 WASHING CYCLE SETTINGS ............ 57 9.8 OUTLET THERMAL LIMITER - FFLE3911QW ....89 7.4 DRYING PROCEDURES ............... 59 9.8.1 General Characteristics ................... 89 7.5 DRYING CYCLE SELECTION ............. 61 9.9 HIGH LIMIT THERMOSTAT -... - Page 4 9.9.1 General Characteristics ................... 91 11.6.2 Drum Accessibility ....................109 9.10 DRAIN PUMP - FFLE3911QW AND FFLG4033QW ..92 11.6.3 Exhaust Thermistor Accessibility ............111 9.10.1 General Characteristics ..................92 11.6.4 Thermostat (Safety) Accessibility ............111 9.11 PRESSURE SENSOR - FFLE3911QW AND 11.6.5 Inlet Thermal Limiter Accessibility............
- Page 5 14.10 SOLENOID / WATER VALVE ACCESSIBILITY ....148 E94: CYCLE CONFIGURATION ERROR ........188 15. DIAGNOSTIC SYSTEM - E97: SOFTWARE SELECTOR AND CYCLES FFLE3911QW AND FFLG4033QW (WASHER) CONFIGURATION ERROR ............188 15.1 READING ERROR CODES............149 E98: MOTOR CONTROL TO MAIN BOARD SOFTWARE ERROR ..............189 15.2 DIAGNOSTIC MODE ..............149...
- Page 6 Safety Information Read the entire manual before attempting to Install, Assemble or Operate this product. Pay attention to all Warnings, Cautions and Notes. Failure to do so could result in serious personal injury and /or equipment damage. DEFINITIONS WARNING Indicates a hazardous situation which, if not avoided, could result in death or serious injury. CAUTION Used with the safety alert symbol, indicates a hazardous situation which, if not avoided, could result in minor or moderate injury.
-
Page 7: Purpose Of This Manual
1. Purpose of this Manual Purpose of this Manual This manual provides repairing procedures for appliances. It also provides information regarding Laundry Center with gas and electric dryers fitted with the Electronic Control System. This manual is intended to use for service engineers of Electrolux. The manual includes: •... -
Page 8: Warnings
2. Warnings Warnings • Any work on electrical appliances must be carried out by qualified professionals. • Confirm that the power system is operational before working on the appliance. • Check that the appliance is restored to its original safety condition after the operation is complete. •... -
Page 9: Product Features
3. Product Features... - Page 10 Laundry Center (LC) Key Features Difference Description FFLE/FFLG3911QW FFLE/FFLG4033QW Electric Electric Heater Assembly Moisture Bar 2 Valve 3 Valve Softener Valve Bleach Dispenser Bleach, Softner Dispenser Bleach / Softener Dispenser Energy Saver Option...
-
Page 11: Model Specifications
4. Model Specifications 4.1 Specification – Top Load Laundry Center - FFLE/FFLG3911QW and FFLE/FFLG4033QW Model No. FFLE/FFLG3911QW FFLE/FFLG4033QW HE Top Load HE Top Load Total Capacity D.O.E. (Cu. Ft.) 2.95 Controls Ready-Select® Ready-Select® Washer Interior Polypropylene Polypropylene Vibration Control System Suspension System Sure-Spin™... - Page 12 4.1 Specification – Top Load Laundry Center - FFLE/FFLG3911QW and FFLE/FFLG4033QW Model No. FFLE/FFLG3911QW FFLG/FFLE4033QW Sound Package Silent Design™ Dry Cycles Dry Cycles / Specialty Cycles 8 / 0 9 / 0 Dryer Options Temperature Selections Dryness Level Selections Timed Dry (Minutes) 15, 30, 60, 90 60, 90 Optional Accessories...
- Page 13 • For planning purposes only. Always consult local and national electrical and plumbing codes. Refer to Product Installation Guide on the web at www.frigidaire.com for detailed installation instructions. • 1 Rigid metal duct preferred, semi-rigid optional and allow deductions for elbows and vents. Refer to Installation Guide on the web at www.frigidaire.com for additional information.
-
Page 14: Exploded View And List Of Parts
5. Exploded View and List of Parts 5.1 FFLE3911QW 5.1.1 Upper Cabinet / Drum Heater... - Page 15 5.1.1 Upper Cabinet / Drum Heater POS. NO DESCRIPTION Panel, left side, white Panel, top Panel, Rear, Dryer, stainless Ball, grounding Clip, Ball, Steel, flat nut Duct, air Seal, air duct Limiter, thermal, heater Panel, motor access, washed Bearing, drum support Bracket, bearing support Screw, bracket mtg., 10-16B x 1.375, cr/sq drive Heater Asmy w/hsg, w/thermistor...
- Page 16 5.1.1 Upper Cabinet / Drum Heater POS. NO DESCRIPTION Handle, door, white Panel, inner door, white Panel, outer door, white Door Strike Insulator, heat shield, outer door Insulator, heater housing Terminal Block, heater housing 54*# Wiring Harness, door switch, w/o light Screw, 10-16AB x 0.500 Screw, pan head, 8-18B x 0.31 # Functional parts...
-
Page 17: Motor/Blower/Belt
5.1.2 Motor/Blower/Belt... - Page 18 5.1.2 Motor/Blower/Belt POS. NO DESCRIPTION Seal, air duct Shield, air duct Fastener, push-in Duct, air Seal, housing, to air duct Clamp Housing, blower, front w/seal Housing, blower, rear Blower Wheel Thermistor, control Screw, pan head, 8-18AB x 0.375 Cradle, motor w/idler Pan ,Upper L/C, dryer, formed Spring, idler Idler Arm Assy, with pulley...
-
Page 19: Control Panel
5.1.3 Control Panel... - Page 20 5.1.3 Control Panel POS. NO DESCRIPTION Control Board, main, with housing Wiring Harness, dryer, LC upper Knob,switch Harness, UI, washer, LC PC Board, communication, with housing Switch, PTS cycle select, 8 position Console, decorated, white Knob, Cycle Selector Screw ,#8 pan head, 10-10B x 0.500, cr/sq drive 23 # Wiring Harness, main, LC 23*#...
-
Page 21: Fflg4033Qw
5.2 FFLG4033QW 5.2.1 Upper Cabinet / Drum Heater... - Page 22 5.2.1 Upper Cabinet / Drum Heater POS. NO DESCRIPTION Panel, left side, white Panel, top Panel, rear, dryer, stainless Clip, ball, steel, flat nut Limiter, thermal, heater Panel, motor access, washed Bearing, drum support Bracket, bearing support Screw, bracket mtg. 10-16B x 1.375, cr/sq drive 15 # Housing, heater, gas Baffle, heater shield...
- Page 23 5.2.1 Upper Cabinet / Drum Heater POS. NO DESCRIPTION Panel, inner door, white Panel, outer door, white Door Strike Insulator, heat shield, outer door 52 # Terminal block, heater housing 54*# Harness, Door, SW w/sensor Screw, 10-16AB x 0.500 Screw, pan head, 8-18B x 0.31 # Functional parts * Non-Illustrated parts...
-
Page 24: Motor / Blower / Belt
5.2.2 Motor / Blower / Belt... - Page 25 5.2.2 Motor / Blower / Belt POS. NO DESCRIPTION Seal, air duct Clip, end cap mtg, U-type Duct, air Seal, housing, to air duct Screw, pan head, 6-18AB x 0.60 Clamp Housing, blower, front, with seal Housing, blower, rear Blower Wheel 15 # Thermistor, control Screw, pan head, 8-18AB x 0.375...
- Page 26 5.2.2 Motor / Blower / Belt POS. NO DESCRIPTION Collar, alignment, gas valve 77 # Burner, gas 79 # Sensor, radiant Screw, pan head, 8-18B x 0.31 80A# Tube, burner Shield, heat Plate, adapter Cable Tie, push mount, 5.20 inch LP Conversion Kit, natural to LP # Functional parts * Non-Illustrated parts...
-
Page 27: Control Panel
5.2.3 Control Panel... - Page 28 5.2.3 Control Panel POS. NO DESCRIPTION Control Board, main, with housing Wiring Harness, dryer, LC upper Knob, Switch Harness, upper LC, wash PC Board, communication, with housing 13 # Switch, on/off, white, round 15 # Switch, PTS cycle select, 9 pos Console, decorated, control panel Knob, Cycle Selector Screw, #8 pan head, 10-10B x 0.500, cr/sq drive...
-
Page 29: Ffle3911Qw And Fflg4033Qw
5.3 FFLE3911QW and FFLG4033QW 5.3.1 Motor Gear Box Assembly / Tub 5.3.1 Motor Gear Box Assembly / Tub POS. NO DESCRIPTION Motor Gear Box Assembly Screw, 10 PLCS Screw, 2 PLCS Motor Brake Actuator, Clutch Drain Pump Assembly Screw, 3 PLCS... -
Page 30: Control Board Washer
5.3.2 Control Board Washer 5.3.2 Control Board Washer POS. NO DESCRIPTION Motor Access Panel Screw, 2 PLCS Screw, 2 PLCS Main Board Assy UN, Main Board Assy PRO # Functional parts... -
Page 31: Wash Assembly
5.3.3 Wash Assembly 5.3.3 Wash Assembly POS. NO DESCRIPTION Washer Cabinet Assembly Cushion Pads , 2 PLCS Suspension Rods Assembly, 4 PLCS Pivots , 4 PLCS Cushion Pads (Felt Only), 2 PLCS LPA CAP Screw Agitator Assembly Screw,8 PLCS Spin Tub Assembly Hub Assembly Splash Tub Assembly Suspension Assembly , 4 PLCS... - Page 32 5.3.3 Wash Assembly POS. NO DESCRIPTION Screw ,2 PLCS Lock, Hub # Functional parts...
-
Page 33: Cabinet Assembly
5.3.4 Cabinet Assembly... - Page 34 Structural Bracket (RH) Base Assembly Structural Bracket (LH) Screw, 4 PLCS 3 Coil water valve (Model FFLG4033QW) #11A 2 Coil water valve (Model FFLE3911QW) Low Frequency Analog Pressure Sensor Top Panel and Lid Assembly Lid Lock Fastener Screw UIMC Assembly...
-
Page 35: Installation-Ffle3911Qw And Fflg4033Qw
6. Installation-FFLE3911QW and FFLG4033QW Precautions • Dispose the carton and plastic bags after the Laundry Center is unpacked. Children might use them for playing. Cartons covered with rugs, bedspreads, or plastic sheets can become air tight chambers causing suffocation. Place all the materials in a garbage container or keep the materials away from children. -
Page 36: Installation Requirements
6.2 Installation Requirements • Recreational vehicles and areas where local codes does not permit grounding through the neutral conductor. 6.2.1 Electrical Requirements Outlet Receptable for Laundry Center with Electric Locate receptable NEMA 10-30R or NEMA14-30R so that Dryer the power supply cord is accessible when the dryer is in the installed position. -
Page 37: Electrical Requirements For Laundry Center
the gas supply line, if codes allow. The tubing MUST be NOTE constructed of stainless steel or plastic - coated brass. Install an individual shut off valve in the gas supply line Laundry Centers manufactured for sale in Canada in accordance with the B149.1, Natural Gas and Propane have factory-installed, 4-wire power supply cord Installation Code. - Page 38 NOTE For installations requiring a longer drain hose, have a qualified technician install a longer drain hose (according to your model number) available from an authorized parts distributor. For drain systems in the floor, install a syphon break kit available from your local hardware store.
-
Page 39: Exhaust System Requirements
6.2.6 Exhaust System If your product is made up of plastic duct or metal foil duct, replace it with a rigid or semi-rigid metal duct. Also, ensure Requirements the duct is free of any lint, prior to installing the dryer duct. Use only 4 inches (102 mm) diameter (minimum) rigid or flexible metal duct and approved vent hood, which WARNING... - Page 40 WARNING WARNING FIRE HAZARD FIRE HAZARD Do not install the Laundry Center where gasoline Exceeding the length of duct pipe or number of or other flammables are kept or stored. If the dryer elbows as seen in “MAXIMUM LENGTH” charts can is installed in a garage, it must be a minimum of 18 cause an accumulation of lint in the exhaust system.
-
Page 41: Manufactured Or Mobile Home Installation
Running the exhaust system through an uninsulated To exhaust upwards, add an 11 inches (28 cm) length of area may cause condensation and faster accumulation of standard 4 inches (102 mm) diameter duct and a 90° elbow. lint. The unit will be positioned about 4.5 inches (11.5 cm) away from the wall (flush to wall exhausting may be done by going Compression or crimping of the exhaust system will below the dryer rather than sideways). -
Page 42: Installation In A Recess Or Closet
WARNING DO NOT INSTALL YOUR LAUNDRY CENTER Do not set your Laundry Center under the following circumstances: In an area exposed to dripping water or outside weather conditions. In an area where it will come in contact with curtains, drapes, or anything that will obstruct the flow of combustion and ventilation of air. -
Page 43: Laundry Center Dimensions
WARNING EXPLOSION HAZARD Do not install the dryer where gasoline or other flammables are kept or stored. If the dryer is installed in a garage, it must be a minimum of 18 inches (45.7 cm) above the floor. Failure to do so can result in death, explosion, fire or burns. -
Page 44: Electrical Installation
6.5 Electrical Installation NOTE The following are specific requirements for proper and safe electrical installation of your dryer. Failure to follow these Dryers operating on 208 volts power supply will take instructions can create electrical shock and /or a fire hazard. longer time for drying than the dryers operating on 240 volts power supply. -
Page 45: Grounding Requirements - Electric Dryer (Canada)
6.5.1 Grounding Requirements - DO NOT modify the plug provided with this appliance. If it does not fit the outlet, a qualified electrician must install Electric Dryer (Canada) the proper outlet. For a grounded, cord-connected dryer: WARNING ELECTRICAL SHOCK HAZARD Improper connection of the equipment grounding conductor can result in a risk of electrical shock. -
Page 46: Electrical Connection (Non-Canada) - 4 Wire Cord
Turn OFF the power supply to the outlet. Remove the screw securing the terminal block access cover in the lower corner on the back of the dryer. Install a UL-approved strain relief according to the power cord / strain relief manufacturer’s instructions in the power cord entry hole below the access panel. - Page 47 Disconnect the internal (WHITE) dryer harness ground Use adjustable pliers to adjust the leveling of legs so wire from the (GREEN) ground screw next to the terminal that the Laundry Center is levelled front-to-rear and side- block. to-side, and stable corner-to-corner. Attach the ground (GREEN) power cord wire to the Press down on alternate corners and sides and feel for cabinet with the ground (GREEN) screw.
- Page 48 Connecting Vents Connect the HOT inlet hose to the HOT inlet connection on the washer and the COLD inlet hose to the COLD inlet connection on the washer. Tighten by hand until Remove the two screws (items A, to the right) securing it fits properly.
- Page 49 Connecting Drain and Electrical Form a “U” shape at the end of the drain hose with the hose pointed towards the drain. Place the “U” shape end in a laundry tub or a standpipe and secure the drain hose with the cable tied (provided in the enclosure package) to the standpipe, inlet hose, laundry tub, and so on, so that the hose does not come out due to the force of the water.
- Page 50 Universal Appliance Wrench NOTE P/N 137019200 A wiring diagram and technical data sheet are located A Universal Appliance Wrench is available to aid in dryer / washer feet adjustment. behind the dryer access panel. Touch Up Paint Pens* White Touch Up Pen - P/N 5304468812 *Other colors may be available.
-
Page 51: Gas Connection
Unpacking Instructions IMPORTANT To prevent vibration, possible machine damage and maximize performance, complete the following steps: If foam tub block has been removed, reinsert it now and retape the lid securely. Use a rug, blanket or piece of cardboard to protect the floor, and carefully lay the Laundry Center on its left side. -
Page 52: Water Supply Requirements
Check for gas system leakages with a manometer. If a manometer is not available, test all the connections by applying a soapy water solution. WARNING EXPLOSION HAZARD NEVER test for gas leakages with an open flame. Water Connection (Steam Model IMPORTANT only) The supply line must be equipped with an approved... - Page 53 NOTE For installations requiring a longer drain hose, get a qualified technician to install a longer drain hose(according to your model number) available from an authorized parts distributor. For drain systems in the floor, install a syphon break kit, available from your local hardware store. be: Minimum height: 33 in.
-
Page 54: Operating Instructions - Ffle3911Qw And Fflg4033Qw
7. Operation Instructions - FFLE3911QW and FFLG4033QW 2. Prepare Items for Washing WARNING Empty pockets. To reduce the risk of fire, electrical shock or Brush off lint and dirt. Shake out rugs and beach towels. injury to persons, refer to IMPORTANT SAFETY... - Page 55 4. Add a measured amount of 6. Add laundry load to washer detergent to the wash tub before adding the laundry load For best washing performance, dry load level should not be higher than the upper row of holes in the wash tub. Do not overload the washer.
- Page 56 7. If recommended, add liquid Other Wash Products fabric softener to fabric softener • You may add water conditioner, detergent booster and enzyme products with the detergent. dispenser (available on some models). For models with built-in 8. Select the appropriate cycle dispenser: and settings for the load Add liquid softener to the dispenser, according to the...
-
Page 57: Washing Cycle Selection
10. Remove items when the 7.2 Washing Cycle Selection cycle is completed FFLE3911QW For your safety, the lid is locked during the operation of the washer. It will unlock at the end of the cycle, after the tub has come to a complete stop. -
Page 58: Washing Cycle Settings
Normal Rinse and Spin Use this load for light to normally soiled cottons, towels, Select rinse & spin for loads that need a cold water rinse shirts, denims, and mixed loads. For the best combination of or to add fabric softener that may have been omitted in a energy and water saving and washing performance, perform regular cycle. - Page 59 The water heater setting and its distance from the washer, water usage at home, and seasonally low ground water NOTE temperature in some geographic areas can affect water temperature. If you select the auto water level, the washer will perform a dry load sensing the procedure, before adding water to the tub.
-
Page 60: Drying Procedures
For Successful Stain Removal • Remove stains promptly. • Determine the kind of stain, and follow the recommended treatment in the stain removal chart on the next page. • To pretreat stains, use a prewash product, liquid detergent, or a paste made from powder detergent and water. - Page 61 3. Load the dryer and close the door Load items loosely. The average wet load will fill the drum with 1/3 to 1/2 full. The items need room to tumble freely for drying and to cause less wrinkling. If required, place a dryer fabric softener sheet on top of the load at the beginning of the cycle.
-
Page 62: Drying Cycle Selection
(on certain models) sense the moisture level of the load as it tumbles through the heated air. With Auto Dry cycles, the load will automatically be dried at the selected FFLE3911QW temperature to a specific dryness level. Auto Dry cycles save time and energy and protect fabrics. - Page 63 Normal Select this Timed Dry cycle to quickly dry a small load made up of just a few items. It provides approximately 20 minutes of tumbling followed by a cool down period. Select this cycle to dry everyday fabrics including cottons, linens and sheets.
- Page 64 Other Features Drying Rack (Some Models) Use the drying rack to dry items which should not be tumble dried. If your model does not have a drying rack, you may order one. Open the dryer door and remove the lint screen. Insert the drying rack into the dryer drum.
-
Page 65: Electrical Characteristics
8. Electrical Characteristics - FFLE3911QW and FFLG4033QW 8.1 Electronic Control The Electronic control includes the following: Electronic Control Board (applicable for dryer). Main Control Board (applicable for washer). User Interface (UI) Board.(applicable for washer). Motor Control Board (applicable for washer). - Page 66 Electronic Control Board - FFLE3911QW and FFLG4033QW (Dryer) NOTE The Dryer Electronic Control Board controls all the functions of dryer, whereas the Washer User Interface and the Motor Control Board is accommodated separately for specific functions.
-
Page 67: Main Control Board (Washer)
8.1.2 Main Control Board (Washer) The Main Control Board supplies the power to the User Interface (UI) Board, Motor Control Board (Washer) and all other electrical components. The commands acquired by the User Interface (UI) Board (by turning the selector and so on) are sent to the Main Control Board, which powers all the electrical components (Lid Lock, Solenoid Valve, Pressure sensor, Drain Pump, Negative Thermal Co efficient (NTC), Motor Brake Clutch and so on). -
Page 68: User Interface (Ui) Board Washer)
(ON / OFF) Fabric softener if required. It also accommodates Energy Saver option (for model FFLG4033QW). It is possible to select the programmes by turning the Selector Knob. The buzzer where featured is powered by the User Interface Board. User Interface of Laundry Center – FFLE3911QW... - Page 69 User Interface of Laundry Center – FFLG4033QW...
- Page 70 User Interface User Interface (UI) Board FFLE3911QW (Washer) User Interface (UI) Board FFLG4033QW (Washer)
-
Page 71: Motor Control Board (Washer)
If the motor control is not working properly, the drive motor might not spin at all or might spin at the wrong speed. Motor Brake Clutch functions is controlled by the Main control Board and the Motor Control Board is powered by the Main Control Board. Motor Control Board - FFLE3911QW and FFLG4033QW (Washer) -
Page 72: Schematic Diagram For Laundry Center Dryer Electronic Control Board Ffle3911Qw And Fflg4033Qw
8.2 Schematic Diagram for Laundry Center Dryer Electronic Control Board – FFLE3911QW and FFLG4033QW... -
Page 73: Schematic Diagram For Laundry Center Washer Main Control Board - Ffle3911Qw And Fflg4033Qw
8.3 Schematic Diagram for Laundry Center Washer Main Control Board – FFLE3911QW and FFLG4033QW... -
Page 74: Schematic Diagram For Laundry Center Washer User Interface (Ui) - Ffle3911Qw And Fflg4033Qw
8.4 Schematic Diagram for Laundry Center Washer User Interface (UI) – FFLE3911QW and FFLG4033QW... -
Page 75: Schematic Diagram For Laundry Center Washer Motor Control Board - Ffle3911Qw And Fflg4033Qw
8.5 Schematic Diagram for Laundry Center Washer Motor Control Board – FFLE3911QW and FFLG4033QW... -
Page 76: Wiring Diagram - Ffle3911Qw (Electric Dryer Model)
8.6 Wiring Diagram – FFLE3911QW (Electric Dryer Model) -
Page 77: Wiring Diagram - Fflg4033Qw (Gas Dryer Model)
8.7 Wiring Diagram – FFLG4033QW (Gas Dryer Model) -
Page 78: Wiring Diagram - Ffle3911Qw And Fflg4033Qw (Washer Model)
8.8 Wiring Diagram – FFLE3911QW and FFLG4033QW (Washer Model) -
Page 79: Electrical Components - Ffle3911Qw And Fflg4033Qw
9. ELECTRICAL COMPONENTS - FFLE3911QW and FFLG4033QW 9.1 Electrical Component Resistance and Specification Table FFLE3911QW and FFLG4033QW - DRYER S.No Component Specification Inlet / Outlet Control Resistance = 50KΩ ± 5% at (25ºC) Thermistor Resistance = 12.4KΩ ± 2% at (60ºC) Operating Temp.= - 40˚C to +105˚C... - Page 80 9.1 Electrical Component Resistance and Specification Table FFLE3911QW and FFLG4033QW - DRYER S.No Component Specification U.L. Rated : 240V, 10A F.L.A and 60A L.R.A at 350ºF, C.S.A . Rated: 120V 15A Resistive. Outlet Thermal Limiter Opening Temp: 222ºF ± 8ºF, Closing Temp: -31ºF.
- Page 81 FFLE3911QW and FFLG4033QW – WASHER S.No Component Specification Internal contacts : 120 / 240 VAC, 50 / 60 Hz; Electrical Life: 15000 cycles @ 3A; External Micro switch: 16A , 250V, Lid Lock Power : 1 HP @ 125 VAC, 2 HP @ 250 VAC,105 Ω ± 10% (Resistance @ 25 ˚C).
-
Page 82: Heating Element - Ffle3911Qw And Fflg4033Qw
9.2.1 General Characteristics For Electrical Models The heating element converts electrical power into heat through the process resistive heating. Electrical current passing through the element encounters resistance, resulting in the heating of the element. Wiring Diagram - Electrical Dryer (FFLE3911QW) - Page 83 Specifications S.NO Component Specifications Wattage: 4500W ± 3%, Heater (Electrical Model) Resistance Across The Terminals:11Ω ± 10%. Wiring Diagram - Gas Dryer (FFLG4033QW)
-
Page 84: Outlet Control Thermistor - Ffle3911Qw And Fflg4033Qw
Outlet Thermistor is used to check the temperature of air at exahust. Wiring Diagram - FFLE3911QW... - Page 85 Wiring Diagram - FFLG4033QW Specifications S.NO Component Specifications Resistance = 50KΩ ± 5% at (25ºC) Outlet Control Thermistor Resistance = 12.4KΩ ± 2% at (60ºC) Operating Temp.= - 40˚C to +105˚C...
-
Page 86: Door Switch And Drum Light - Ffle3911Qw And Fflg4033Qw
Drum Light will be ON when the door is opened. The Drum Light is not applicable for Electrical and Gas Dryer Models FFLE3911QW and The Dryer Door Switch also senses the position of the door FFLG4033QW. (open or closed), thus allowing the dryer to start its function only when the door is closed. -
Page 87: Single -Phase Induction Motor - Ffle3911Qw And Fflg4033Qw (Dryer)
9.5 Single -Phase Induction Motor - FFLE3911QW and FFLG4033QW (Dryer) 9.5.1 General Characteristics Connection Diagram - FFLE3911QW and FFLG4033QW A single-phase AC current supplies the main winding that produces a pulsating magnetic field.The pulsating field could be divided into two fields, which are rotating in opposite directions.The interaction between the fields and the current induced in the rotor bars generates opposing torque. - Page 88 Wiring Diagram - FFLE3911QW Wiring Diagram - FFLG4033QW Specifications - FFLE3911QW and FFLG4033QW (Dryer) Performance Specifications Voltage - cycles 115V-60Hz ,4.8 AMPS Breakdown torque, ft - oz 24.4 nom Locked rotor current, amps 47 max Full load torque, ft - oz 12.2 nom...
-
Page 89: Contact / Moisture Sensor - Ffle3911Qw And Fflg4033Qw
9.6 Contact / Moisture When the contact is made with wet Sensor - FFLE3911QW and clothing, a short circuit is created between FFLG4033QW the two strips allowing the power to flow to the Electronic Control Board, which then acts upon that... -
Page 90: Inlet Thermal Limiter - Ffle3911Qw And Fflg4033Qw
9.7 Inlet Thermal Limiter 9.7.1 General Characteristics - FFLE3911QW and Limiter is a heat-sensitive fuse attached to the heating FFLG4033QW element, and it disconnects electrical power to the heater when the dryer gets overheated. The specific purpose of the WARNING Thermal Limiter is to prevent overheating and fire. - Page 91 Wiring Diagram - FFLE3911QW Wiring Diagram - FFLG4033QW...
-
Page 92: High Limit Thermostat - Ffle3911Qw And Fflg4033Qw
9.9 High Limit Thermostat - FFLE3911QW and FFLG4033QW 9.9.1 General Characteristics Thermostat is a device that is used to control a heating or cooling system so that it maintains a certain temperature or maintains the temperature within a certain range. It acts as a switch that opens or closes the circuit. -
Page 93: Drain Pump - Ffle3911Qw And Fflg4033Qw
Wiring Diagram - FFLG4033QW 9.10 Drain Pump - It can turn by a quarter of a revolution approximately, FFLE3911QW and without turning the wheel. Consequently, if a foreign FFLG4033QW body is stuck in the wheel, the rotor can perform small movements clockwise 9.10.1 General Characteristics... - Page 94 Wiring Diagram - FFLE3911QW and FFLG4033QW Specifications S.NO Component Specifications 12 to 17 Ω (Resistance at 25 ºC) 120 V AC, 60 Hz, 1.4 A, 80W, Drain Pump Discharge Rate (Under Variable Head): At 3 FT height from floor: 12...
-
Page 95: Pressure Sensor - Ffle3911Qw And Fflg4033Qw
Main Control Operating frequency varies according to the quantity of Board. water in the tub. A tube is connected between the bottom of the Tub and the Pressure sensor. Wiring Diagram - FFLE3911QW and FFLG4033QW... - Page 96 Specifications S.NO Component Specifications Nominal Voltage : 5 ± 0.25 VdC; maximum current: <5 mA; Pressure Sensor Maximum Operating Temperature: 85 ºC (65 ºC for UL application); Pressure working range 0 - 600 mm of H2O. Presssure Frequency Diagram ( At Water Level “0” mm (empty tub) Frequency will be 45.4 Hz ) Pressure (mm H2O) Nominal frequency (Hz) Water Level at 0*...
-
Page 97: Lid / Door Lock - Ffle3911Qw And Fflg4033Qw
The Lid Lock is the electrical device which locks the door when the user selects the program. When the user after placing the clothes inside the drum, closes the door and Wiring Diagram - FFLE3911QW and FFLG4033QW Specifications S.NO Component Specifications Internal contacts: 120 / 240 VAC, 50 / 60 Hz;... -
Page 98: Three - Phase Synchronous Motor - Ffle3911Qw And Fflg4033Qw
Z-Y), 6 ohm to 8 ohm (contacts X-Y), 6 to 8 ohm (contacts permanent magnets or electromagnets turns in step with X-Z). the stator field at the same rate and as a result, the rotor Wiring Diagram - FFLE3911QW and FFLG4033QW Specifications S.NO Component Specifications 150 V/180 V, 54.2/83.3 Hz... -
Page 99: Solenoid / Water Valves (Inlet Valve) - Ffle3911Qw And Fflg4033Qw
ALARM will be signalled. 10. Water outlet NOTE Model FFLG4033QW Washer unit has 3 coil (hot water, cold water, and softener) Solenoid Valve. Model FFLE3911QW Washer unit has 2 coil (hot water and cold water) Solenoid Valve. - Page 100 Wiring Diagram - FFLE3911QW and FFLG4033QW Specifications S.NO Component Specifications Dispenser Solenoid Valve 1375 Ω ± 10% (Resistance at 25 ºC); 120 V, 60 Hz, 6 / 5 Watts.
-
Page 101: Motor Brake Clutch (Mbc) - Ffle3911Qw And Fflg4033Qw
Incase of a door lock failure, and when the user opens the door while the program is running, the MBC applies the brake to stop the rotation of motor. Wiring Diagram - FFLE3911QW and FFLG4033QW Specifications S.NO... -
Page 102: Heater (Gas) Assembly Characteristics - Fflg4033Qw
10. Heater (Gas) Assembly Characteristics - FFLG4033QW 10.1 Burner 10.4 Radiant / Flame Sensor 10.1.1 General Characteristics WARNING A gas burner is used to When replacing the Radiant/Flame sensor, refer to generate a flame to heat up the code shown on the list of spare parts related to products using a gaseous the appliance. -
Page 103: Electrical Component Accessibility - Fle3911Qw And Fflg4033Qw (Dryer)
11. Electrical Component Accessibility - FFLE3911QW and FFLG4033QW (Dryer) 11.1 Control Panel Accessibility Step: 3 – FFLE3911QW (Electric Dryer) Hold the Control Panel at the bottom and pull (See Fig. 2) it out. Then detach the connectors (See Fig. 3) to removethe control panel. -
Page 104: Electronic Control Board Accessibility
11.1.1 Electronic Control Board Step: 2 Accessibility Detach the connector from Cycle Selector Switch (See Fig. 2) and unfasten the (2) snaps to remove the switch from the console (See Fig. 3). Step: 1 Detach the connectors from the Electronic Control Board (See Fig.1), Cycle Selector (Switch, 8 positions) and Temperature Selector (Switch, Option 3 pos.) (See Fig. -
Page 105: Control Panel Accessibility - Fflg4033Qw (Gas Dryer)
Step: 2 Step: 2 Loosen the Control Panel screws (2) that fixes with the left Detach the connector from the Temperature Selector and right panel of the dryer. Switch (See Fig. 2) and unfasten the (2) snaps to remove the switch from the console (See Fig. -
Page 106: Electronic Control Board Accessibility
11.2.1 Electronic Control Board Step: 2 Accessibility Detach the connector from the Cycle Selector Switch (See Fig. 2) and unfasten the (2) snaps to remove the switch from the console (See Fig. 3). Step: 1 Detach the connectors from the Electronic Control Board (See Fig.1), Cycle Selector (Switch, 9 positions) Temperature Selector (Switch, Option 4 positions) and Chime Selector (Switch, Option 2 positions) (See Fig. -
Page 107: Chime Selector Accessibility
Step: 2 Step: 2 Detach the connector from the Temperature Selector Detach the connector from the Chime Switch (See Fig. 2) Switch (See Fig. 2) and unfasten the (2) snaps to remove the and unfasten the (2) snaps to remove the switch from the switch from the console (See Fig. -
Page 108: Door Switch Accessibility
Step: 2 Step: 2 Loosen the 2 screws (See Fig. 2) that are fixed with the left Press the snaps (See Fig. 3) and pull it out from the front and right panel of the dryer to remove the entire Front side of the panel assembly to remove the Door Switch. -
Page 109: Components Accessibility From Front Panel
11.6.1 Motor / Blower Step: 2 Accessibility Detach the Moisture Sensor Terminal and take it out. Step: 1 Loosen the screws (2) which are fixed to the Dryer Back Panel (Motor Access Panel) and take out the Motor Access Panel. 11.6 Components Accessibility from the Front Panel Motor / Blower Assembly... -
Page 110: Drum Accessibility
11.6.2 Drum Accessibility Step: 6 Detach the connector of the motor (See Fig. 5) and the Step: 3 earth terminal from the Motor Cradle (See Fig. 6). Loosen the screws (3) that fixes with the Drum Support Shaft (Ball Hitch) and carefully pull out the drum from the dryer cabinet. - Page 111 NOTE Step: 12 To separate the motor from the Blower Assembly, Loosen the screws (2) to remove the Motor and Cradle Assembly from the Blower rear housing. follow these steps: Step: 9 Loosen the screws (6) to remove the Front housing of the Blower.
-
Page 112: Exhaust Thermistor Accessibility
11.6.3 Exhaust Thermistor 11.6.4 Thermostat (Safety) Accessibility Accessibility Step: 1 Detach the Thermostat terminals (See Fig.1) and loosen the screws (2) (See Fig. 2) which is fixed with the Heating Detach the terminals of the Blower Exhaust Thermistor. Element Assembly. Step: 2 Loosen the screws (2) to remove the Blower Exhaust Thermistor. -
Page 113: Outlet Thermal Limiter Accessibility
NOTE NOTE 1. To access the Inlet Thermal Limiter, access the 1. To access the Outlet Thermal Limiter, access the Front Panel Assembly and the Drum has to be Front Panel Assembly and the Drum. accessed. 2. Refer to the Front Panel Accessibility and Drum 2. -
Page 114: Heater (Gas) Assembly Accessibility
Step: 2 NOTE Detach the Thermostat (Safety) (See Fig.1), Inlet Thermal limiter (See Fig. 2), Heater Assembly Terminal block (See Fig. 1. To access the Heater Assembly, access the Front 3) and Outlet Thermal Limiter (See Fig. 4) terminals. Panel Assembly and the Drum. 2. -
Page 115: Radiant / Flame Sensor Accessibility
Step: 2 Slide and pull out the LCD Support Cover as shown in Figs. 1 and 2. Step: 5 Detach the connector (See Fig. 5) and pull out the Heater Assembly. Then detach the Radiant Sensor terminals (2) (See Fig. 6) while taking the Gas Assembly outside. Step: 3 Detach the connectors from the Solenoid Gas valve, that is Secondary coil, Booster coil, Figs. -
Page 116: Igniter Accessibility
11.8.2 Igniter Accessibility Step: 1 Loosen the screws of the Heat shield (1, 2 and 3) which is fitted with the Burner Tube. Step: 2 Remove the wire clip (1) and loosen the screw (2) from the Adapter plate to separate the igniter. NOTE The Igniter material is soft and brittle. -
Page 117: Diagnostic System - Ffle3911Qw And Fflg4033Qw (Dryer)
12. Diagnostic System – FFLE3911QW and FFLG4033QW (DRYER) This information is intended for qualified technicians only. CAUTION DISCONNECT ELECTRICAL CURRENT BEFORE SERVICING. Acronym Table - Clockwise - Counter Clockwise COLD POWER ON - When the unit is powered for the first time... - Page 118 NOTE If the Diagnostic Mode cannot be entered even after the correct execution of Steps 1— 4, check the wiring and the edge connectors, i.e.; J7 (LC-Main Board), J7A (FSD-UI Board), J8 (LC-Main Board), J8A (FSD-UI Board), J10 (LC & FSD-Main Board), J10A (FSD_UI Board) and J9 (FSD-UI Board) and the edge connectors / wiring for the Dryness encoder and Cycle Selector.
- Page 119 Diagnostic Mode (All Cycle Selector positions in this table are going clockwise from Position-0) Selector Test/Activated Encoder Positions Operator Check Position Components A) Temp Selector: Low Contact Sensor Shorted: Beeper/LED Active B) Rocker Switches (select models): OFF Contact Sensor Open: Beeper/LED Inactive C) Dryness Level Dryness Level Selector Position: Selector Positions...
- Page 120 ERROR CODE TABLE - FFLE3911QW and FFLG4033QW - (ELECTRIC and GAS DRYER) S.No Error Code Fault Condition Page No Moisture Sensors (for models with moisture bars only) Door Open NOTE 1. 1E followed by the numbers mean that it is the first error code recorded. Similarly 2E followed by the numbers mean that it is the second error code recorded and so forth.
- Page 121 ERROR CODE TABLE - FFLE3911QW and FFLG4033QW - (ELECTRIC and GAS DRYER) S.No Error Code Fault Condition Page No Heater Sensing failure on Main Board NTC Failure NTC Failure Program Selector/Encoder Key-Stuck Software Configuration Software Configuration Software Configuration Line Frequency...
-
Page 122: Troubleshooting Based On Alarm Codes - Ffle3911Qw And Fflg4033Qw (Dryer Model)
13. Troubleshooting Based on Alarm Codes – FFLE3911QW and FFLG4033QW (Dryer Model) E31: Contact Sensor (Moisture Sensor) frequency is too high/low Main Board defective, short across sensor bars, wiring open, bars contacting bulk head, and foreign object interfering with contact sensors. -
Page 123: E41: Door Open
E41: Door Open Door is open when cycle starts, Wiring, and Door Switch defective. WARNING Checks to perform: Check that all the connectors are correctly inserted Clean and repeat the Diagnostic Cycle to check for any Check for any foreign object blockage on Door Switch? YES further alarms. -
Page 124: E51: Motor Relay Failure
E51: Motor Relay failure Motor Relay stuck open, locked rotor, harness, low power supply, Thermal Limit- er – open, and Motor Centrifugal Switch -1 stuck open or closes. WARNING Checks to perform: Check that all the connectors are correctly inserted Turn ON the dryer and measure the continuity Replace the Electronic Control Board and repeat the between J2-1 and J2-2 Connectors of Electronic... -
Page 126: E52: Motor Relay Stuck Close
E52: Motor Relay Stuck Close Motor relay stuck close and main board defective. WARNING Checks to perform: Check that all the connectors are correctly inserted Turn ON the dryer and measure the continuity Replace the Electronic control Board and repeat the Between J2-1 and J2-2 Connectors of Electronic Diagnostic Cycle to check for any further alarms. -
Page 127: E53: Motor Fault- Motor Stopped In The Middle Of A Cycle
E53: Motor Fault- Motor Stopped in the middle of a cycle Motor Protector Open, Laundry Load too heavy and wiring problem. WARNING Checks to perform: Check that all the connectors are correctly inserted Provide required power supply and repeat the Check the power supply is as per product specifications. -
Page 128: E54: Motor Centrifugal Switch 2, Heater
E54: Motor Centrifugal Switch 2, Heater, Thermal Limiter-2, Wiring failure Centrifugal Switch 2 stuck open (domestic electric only), Heater open or horted to ground, Thermal Limiter 2 open (domestic electric only), Centrifugal Switch 2 stuck closed (domestic electric only) and wiring. Checks to perform: WARNING Check that all the connectors are correctly inserted... -
Page 129: E55: Motor Sensing Failure On Main Board
E55: Motor Sensing Failure on Main Board Electronic Control Board defective WARNING Checks to perform: Check that all the connectors are correctly inserted Replace the Electronic Control Board and repeat the Diagnostic Cycle to check for any further alarms. E56: Belt Fault Belt Broke and Loose Belt WARNING Checks to perform:... -
Page 130: E61: Heater Relay Failure
E61: Heater Relay Failure Heater relay stuck open or closed and defective wiring WARNING Checks to perform: Check that all the connectors are correctly inserted Measure resistance between the connectors RELAY Replace the Control board and repeat the Diagnostic COM and RELAY NO terminals of the Electronic Cycle to check for any further alarms. -
Page 131: E62: Heating Timeout
E62: Heating timeout Thermal Limiter 2 open (Domestic GAS only and international electrical only) WARNING Checks to perform: Check that all the connectors are correctly inserted Clean the ventilation and repeat the Diagnostic Cycle to Check if any foreign material restricting the passage of check for any further alarms. -
Page 132: E65: High Limit Thermostat Trip Count Is Too High
E65: High Limit Thermostat trip count is too high Excessive exhaust blockage, high limit thermostat defective and wiring failure. WARNING Checks to perform: Check that all the connectors are correctly inserted Check whether the ventilation of the dryer is proper? Clean the ventilation and repeat the Diagnostic Cycle to (See Fig.1) check for any further alarms... -
Page 133: E71: Ntc Open Circuit
E71: NTC Open Circuit NTC open circuit, wiring and main board defective. Checks to perform: WARNING Check that all the connectors are correctly inserted Detach the connector and measure directly on Measure the value of the Exhaust Thermistor the Exhaust Thermistor. Replace the Thermistor and repeat between terminals of J4 wiring connector. -
Page 134: E72: Ntc Closed Circuit
E72: NTC Closed Circuit NTC Closed Circuit, and Wiring or Main Board Defective Checks to perform: WARNING Check that all the connectors are correctly inserted Detach the connector and Measure the value of the Thermistor measure directly on the Replace the Thermistor and repeat between terminals of J4 wiring connector. -
Page 135: E81: Program Selector / Encoder Fault
E81: Program selector / Encoder fault Main Board, wiring, Encoder and cycle selector/software faulty. Checks to perform: WARNING Check that all the connectors are correctly inserted Check whether the Wiring for the Selector Knobs is Correct the Wiring and repeat the Diagnostic Cycle to properly connected? check for any further alarms. -
Page 136: E93: Software Configuration Error
E93: Software Configuration error Wrong MCF data loaded WARNING Checks to perform: Check that all the connectors are correctly inserted Replace the Electronic Control Board and repeat the Diagnostic Cycle to check for any further alarms. E94: Software Configuration error Microprocessor corrupted WARNING Checks to perform:... -
Page 137: Ea1: Main Supply Frequency Out Of Range
EA1: Main supply Frequency out of Range Power supply frequency out of configured range. (46 – 54Hz for 50Hz system and 56-64Hz for 60Hz system) Checks to perform: WARNING Check that all the connectors are correctly inserted IMPORTANT The appliance remains in alarm status until the mains frequency returns to the correct values or the appliance is switched Off. -
Page 138: Ea3: Voltage Too Low
Is the supply line disturbed or the main voltage out of Replace the Electronic Control Board and repeat the range? (V>264Vrms for 240V system, (V>138Vrms Diagnostic Cycle to check for any further alarms. for 120V system Have the electrical system of the home checked/ repaired by the proper Body. -
Page 139: Electrical Component Accessibility - Ffle3911Qw And Fflg4033Qw (Washer)
14. Electrical Component Accessibility - FFLE3911QW and FFLG4033QW (Washer) 14.1 Control Panel Accessibility Step: 3 Hold the Control Panel at the bottom and pull it out Figs. Step: 1 2 and 3, then detach the connector (See Fig. 4) to remove the Control Panel. -
Page 140: Program Selector Accessibility
14.1.2 Program Selector 14.1.3 Temperature Selector Accessibility Accessibility Step: 1 Step: 1 Remove the Program Selector knob from the console as Remove the Temperature Selector knob from the console shown in Fig.1. as shown in Fig.1. Step: 2 Detach the connector from the Cycle Selector Switch (See Step: 2 Fig. -
Page 141: Fabric Softener Accessibility
14.1.4 Fabric Softener 14.1.5 Energy Saver Switch Accessibility Accessibility Step: 1 Step: 1 Remove the Fabric Softener knob from the console as Detach the Energy Saver Switch terminals. shown in Fig.1. Step: 2 Detach the connector from the Softener switch (See Fig. 2), Step: 2 and then unfasten the snaps (2) to remove the switch from the console (See Fig. -
Page 142: Front Panel Accessibility
14.2 Front Panel Accessibility Step: 1 14.3 Motor Control Board Loosen the screws (2) which are fitted to the Base Assembly Bracket (See Fig.1). Accessibility Step: 2 Step: 1 Release the clip that fits in the pocket of the Top Panel (See Fig.1), and then lift the Front Panel to remove the panel Loosen the screws (2) that fits with the Bracket of the Left from the machine (See Fig. -
Page 143: Drain Pump Accessibility
14.4 Drain Pump Accessibility Step: 1 Lean down the machine safely on the floor as shown in Fig.1, so that the bottom of the machine is completely visible. Then loosen the Screws (3) that are fitted with the Washer Tub (See Fig. 2). Step: 2 Step: 2 Detach the connectors (2) of the Motor Control Board from... -
Page 144: Motor Brake Clutch (Mbc) Accessibility
14.5 Motor Brake Clutch (MBC) Accessibility Lean down the machine safely on the floor as shown in Fig.1 so that the bottom of the machine is completely visible. Then detach the connector (See Fig. 2) and loosen the Screws (2) that are fitted to the Washer Tub (See Fig. 3) to remove the Motor Brake Clutch. -
Page 145: Main Control Board Accessibility
Step: 4 Remove the Agitator cap by detaching the snaps (See Fig. 3), loosen the Agitator Screw as shown in Fig. 4, and then take it out. Step: 5 Loosen the Allen Screws (2) by using the Allen key as shown in Fig. -
Page 146: Lid / Top Panel Assembly Accessibility
Step: 2 Detach the connector and loosen the screws (2) to separate the Main Board Assembly from the cover as shown in Figs. 3 and 4 14.8 Lid / Top Panel Assembly Accessibility Step: 1 Remove the Softener and the Bleach Dispenser Cover as shown in Fig.1. -
Page 147: Lid Lock Accessibility
14.8.1 Lid Lock Accessibility Press the snap of the lock and slide it up. Now press it from the Top Panel Assembly and pull it out through the other side as shown in Fig.1d. Step: 3 Slide and lift the Lid and the Top Panel Assembly as shown in Figs. -
Page 148: Pressure Sensor Accessibility
14.9 Pressure Sensor Accessibility NOTE 1. Remove the dryer unit to access the Solenoid Valve and Pressure sensor. 2. Remove a total of 7 screws and two service professionals are required to remove in the dryer unit. Step: 1 Below figure shows top view of washer unit after dryer unit is removed. Step: 2 Detach the Pressure Sensor snap that fits with the Rear Panel of the washer unit (Figs. -
Page 149: Solenoid / Water Valve Accessibility
14.10 Solenoid / Water Valve Accessibility Step: 1 Loosen the Solenoid Valve screw that fits with the Rear Panel of the washer (See Fig.1). Then detach the Suspension Spring from the Tub hook (See Fig.2), which has been attached to the Motor Tub for easy accessibility of the Solenoid Valve. -
Page 150: Diagnostic System - Ffle3911Qw And Fflg4033Qw (Washer)
>= 4 seconds to clear all error codes. knob at the far left CCW position hot for LC1 (Model – FFLE3911QW) & LC2 (Model – FFLG4033QW) and press the Selector knob momentarily (<1 second). The other Error Code Display Method - knobs and switches do not matter. -
Page 151: Diagnostic Tests
15.4 Diagnostic Tests • After draining the clutch actuator will start moving continuously, for about 1 minute The Cycle Selector knob in the Normal 12 o’ clock Turn the Cycle Selector knob (6) clicks clockwise from position is the zero position where the switches can be Normal position. -
Page 152: User Interface Test
15.6 User Interface Test Selector position Position 0, 12 o’clock, top center, the normal wash position Purpose of the test Function of switches and buzzer Activated components Buzzer with a switch change UI behaviour Change switch positions and the buzzer beeps Working conditions Drum stopped, Door unlocked 15.7 Hot Water Valve Test... -
Page 153: Three Water Valves Test
15.10 Three Water Valves Test Selector position Turn 4 clicks clockwise from the top Purpose of the test To test both hot and cold and, if present, the softener water valves and the softener siphon drains fully, agitate function Activated components Door lock, three water valves, main motor UI behaviour None... -
Page 154: Alarms Summary Table
15.14 Alarms Summary Table Action Alarm Fault Machine Action/ Page S. NO. Alarm Code Possible Fault Description Condition Status Clear Difficulties in Water fill takes Tap closed or water flow too Cycle Paused START water fill for too long RESET washing (timeout occurs Wrong drain pipe position... - Page 155 15.14 Alarms Summary Table Action Alarm Fault Machine Action/ Page S. NO. Alarm Code Possible Fault Description Condition Status Clear Door / Lid lock Door will not Door lock Cycle Paused START failure unlock after 3 Low input AC voltage Wiring RESET attempts Door / Lid lock...
- Page 156 15.14 Alarms Summary Table Action Alarm Fault Machine Action/ Page S. NO. Alarm Code Possible Fault Description Condition Status Clear Motor control DC bus voltage High input AC voltage Cycle abort ON/OFF over voltage above the Motor control board RESET maximum (430V) Motor Control...
- Page 157 15.14 Alarms Summary Table Action Alarm Fault Machine Action/ Page S. NO. Alarm Code Possible Fault Description Condition Status Clear Machine Incorrect Main board Cycle blocked OFF/ON 187 configuration configuration of error appliance Cycle Incorrect Main Board Cycle blocked OFF/ON 188 Configuration configuration of error...
- Page 158 15.14 Alarms Summary Table Action Alarm Fault Machine Action/ Page S. NO. Alarm Code Possible Fault Description Condition Status Clear Motor Control Incongruence Motor Control Board Relay Safety drain RESET Board Relay between defective (EHE) Cycle abort error safeties relay Wiring or main board sensing and defective...
-
Page 159: Troubleshooting Based On Alarm Codes - Ffle3911Qw And Fflg4033Qw (Washer Model)
16 Troubleshooting Based on Alarm Codes – FFLE3911QW and FFLG4033QW (Washer Model) E11: Difficulties in water fill for washing Water tap closed, water flow rate too low, pressure sensor defective, Water inlet valve defective, Wrong drain pipe position (siphon), Water leak, wiring or Main Board. - Page 160 Check whether the tap is open, if the water pressure Is one or all the Solenoid Valves not working? is too low and make sure the tubes are connected and not kinked. (See Fig. 3) Is the resistance measurement of the solenoid valve Replace the Solenoid Valve and repeat the Diagnostic approximately 1375Ω...
-
Page 162: E13: Water Leakage
E13: Water leakage Wrong drain pipe position (siphon), Water leak, Water flow too low, Water inlet valve, Pressure sensor or hose. WARNING Checks to perform: Check that all the connectors are correctly inserted Repair the water circuit and repeat the Diagnostic Cycle Are the washing machine’s water lines efficient (leaking)? to check for any further alarms. - Page 163 Reconnect the connector and measure approximately 1375Ω ± 10% on the Solenoid Valve wiring connector on Replace / Repair the wiring and repeat the Diagnostic the circuit board side between terminals J20-1 & J20-3, Cycle to check for any further alarms. J18-1&...
-
Page 164: E21: Draining Problem
E21: Draining problem Drain pipe blocked, Drain pump defective or rotor locked, Pressure Sensor defective or blocked, Drain pump is not energized (wiring or main board). Checks to perform: WARNING Check that all the connectors are correctly inserted Clean Drain pipe and repeat the Diagnostic Cycle to Is the drain pipe clean? (Check for blockage) check for any further alarms. -
Page 166: E31: Pressure Sensor Fault
E31: Pressure sensor fault Pressure sensor defective, wiring or Main Control Board defective. WARNING Checks to perform: Check that all the connectors are correctly inserted Is the air tube connected properly (check also for kinking Replace or Repair the air tube and repeat the Diagnostic and leaking)? (Disconnect the tubes and blow into them to Cycle to check for any further alarms. -
Page 167: E32: Electronic Pressure Sensor Calibration Problems
E32: Electronic Pressure Sensor calibration problems Water inlet valve defective, Pressure Sensor defective, Drain pump defective, defective. Drain pipe blocked, wiring or Main Control Board Checks to perform: WARNING Check that all the connectors are correctly inserted. Is the air tube connected properly (check also for kinking Replace or Repair the air tube and repeat the Diagnostic and leaking)? (Disconnect the tubes and blow into them to Cycle to check for any further alarms. -
Page 169: E35: Water Overload
E35: Water Overload Pressure sensor hose blocked, Water inlet valve. WARNING Checks to perform: Check that all the connectors are correctly inserted. Is the air tube connected properly (check also for kinking Replace or Repair the air tube and repeat the Diagnostic and leaking) ? (Disconnect the tubes and blow into them to Cycle to check for any further alarms. -
Page 171: E41: Door / Lid Opened
E41: Door / Lid opened Lid lock device defective, wiring defective, Main Control Board defective. Checks to perform: WARNING Check that all the connectors are correctly inserted. Are there any obstacles on the Lid lock which prevents Clear the obstacles and repeat the Diagnostic Cycle to locking the door? check for any further alarms. -
Page 172: E42: Door / Lid Lock Failure
E42: Door / Lid lock failure Lid lock device defective, Low input AC voltage, wiring defective. Checks to perform: WARNING Check that all the connectors are correctly inserted Make the Power supply as per product specification and Is the power supply as per product specification? (Voltage = repeat the Diagnostic Cycle to check for any further 240V (Electric), 120V (Gas) Models andFrequency = 60HZ) alarms. -
Page 173: E43: Door / Lid Lock Triac Failure
E43: Door / Lid lock triac failure Lid lock device defective, wiring defective, Main Control Board defective. Checks to perform: WARNING Check that all the connectors are correctlyinserted. Are there any obstacles on the Lid lock which prevents Clear the obstacles and repeat the Diagnostic Cycle to locking the door? check for any further alarms. -
Page 174: E44: Door / Lid Closed Sensing Failure
E44: Door / Lid closed sensing failure Lid lock device defective, wiring defective, Main Control Board defective. Checks to perform: WARNING Check that all the connectors are correctly inserted. Clear the obstacles and repeat the Diagnostic Cycle to Are there any obstacles on the Lid lock which prevents check for any further alarms. -
Page 175: E45: Door / Lid Triac Sensing Failure
E45: Door / Lid triac sensing failure Lid lock device defective, wiring defective, Main Control Board defective. Checks to perform: WARNING Check that all the connectors are correctly inserted. Clear the obstacles and repeat the Diagnostic Cycle to Are there any obstacles on the Lid lock which prevents check for any further alarms. -
Page 176: E55: Motor Under-Speed Failure
E55: Motor Under-speed failure Foam or drum weight overload, Drum mechanical drag, Motor, Drain pump. WARNING Checks to perform: Check that all the connectors are correctly inserted. Make the power supply proper as per product Is the power supply as per product specification? (Voltage = specification and repeat the Diagnostic Cycle to check 240V (Electric), 120V (Gas) Models and Frequency = 60HZ) for any further alarms. - Page 177 Is the resistance measurement of the Drain pump Is the resistance measurement of the approximately 12Ω to 17Ω? Replace the Drain pump and repeat Drain pump approximately 12Ω to (Measure it directly on the the Diagnostic Cycle to check for 17Ω? (Measure it directly on the Drain connector on the Main Control any further alarms.
-
Page 178: E58: Motor Over Current
E58: Motor over current Foam or drum weight overload, Motor, wiring, Motor Control Board defective Checks to perform: WARNING Check that all the connectors are correctly inserted. Make the power supply proper as per product Is the power supply as per product specification? (Voltage = specification and repeat the Diagnostic Cycle to check 240V (Electric), 120V (Gas) Models. -
Page 180: E59: Motor Not Following
E59: Motor not Following Drum mechanical locked, Motor, Wiring or motor control board. WARNING Checks to perform: Check that all the connectors are correctly inserted. Make the power supply proper as per product Is the power supply as per product specification? (Voltage = specification and repeat the Diagnostic Cycle to check 240V (Electric), 120V (Gas) Models and Frequency = 60HZ) for any further alarms. -
Page 182: E5A: Motor Control Over Heating
E5A: Motor Control over heating Drum weight overload, Motor control board, Motor. Checks to perform: WARNING Check that all the connectors are correctly inserted. Make the power supply proper as per product Is the power supply as per product specification? (Voltage = specification and repeat the Diagnostic Cycle to check 240V (Electric), 120V (Gas) Models. -
Page 184: E5H: Motor Control Under Voltage
E5H: Motor control under voltage Low input AC voltage, Wiring or motor control board, Main board. Checks to perform: WARNING Check that all the connectors are correctly inserted. Make the power supply proper as per product Is the power supply as per product specification? (Voltage = specification and repeat the Diagnostic Cycle to check 240V (Electric), 120V (Gas) Models and Frequency = 60HZ) for any further alarms. -
Page 185: E5D: Motor Control Board Unknown Message
E5D: Motor Control Board unknown message Communication wiring , Motor control board, Main board, Software not matching. WARNING Checks to perform: Check that all the connectors are correctly inserted. Is the wiring between Main Control Board and Motor Replace / Repair the wiring and repeat the Diagnostic Control Board proper? (Check for the continutity) Cycle to check for any further alarms. -
Page 186: E5F: Motor Control Board Fault
E5F: Motor Control Board fault Wiring problem, Motor Control Board defective, Main Control Board defective. Checks to perform: WARNING Check that all the connectors are correctly inserted. Is the wiring between Main Control Board and Motor Replace / Repair the wiring and repeat the Diagnostic Control Board proper? (Check for the continutity) Cycle to check for any further alarms. -
Page 187: E87: User Interface Microcontroller Fault
E87: User Interface microcontroller fault User Interface defective. Checks to perform: WARNING Check that all the connectors are correctly inserted. Replace the User Interface Board and repeat the Diagnostic Cycle to check for any further alarms. E91: User interface and Main Board communication error Wiring problem, Motor Control Board defective, Main Control Board defective, User Interface Board defective. -
Page 188: E92: User Interface And Main Board Protocol Incongruence Error
E92: User interface and Main Board protocol incongruence error Main board, User interface board defective. Checks to perform: WARNING Check that all the connectors are correctly inserted. Disconnect the connector J17(Main Control Board) which Replace the User Interface Board and repeat the connects Main Control Board and User Interface Board. -
Page 189: E94: Cycle Configuration Error
E94: Cycle configuration error Main Control Board defective. Checks to perform: WARNING Check that all the connectors are correctly inserted. Replace the Main Control Board and repeat the Diagnostic Cycle to check for any further alarms. E97: Software selector and cycles configuration error Main Control Board defective. -
Page 190: E98: Motor Control To Main Board Software Error
E98: Motor Control to Main Board software error Main board, Motor control board defective. Checks to perform: WARNING Check that all the connectors are correctly inserted. Disconnect the connector J12 (Main Control Board) which Replace the Motor Control Board and repeat the connects Main Control Board and Motor Control Board. -
Page 191: Eb1:(Eh1): Power Supply Frequency Out Of Mits.190
EB1 (EH1): Power supply frequency out of limits EB1 (EH1) EB1 (EH1) AC input, Main board defective. WARNING Checks to perform: Check that all the connectors are correctly inserted. IMPORTANT The appliance remains in alarm status until the mains frequency returns to the correct values or the appliance is switched OFF. -
Page 192: Eb3:(Eh3): Power Supply Voltage Too Low
EB3 (EH3): Power supply voltage too low EB3 (EH3) EB3 (EH3) Low AC voltage input, Main Control Board defective. WARNING Checks to perform: Check that all the connectors are correctly inserted. IMPORTANT The appliance remains in alarm status until the mains frequency returns to the correct values or the appliance is switched OFF. -
Page 193: Ec6: Clutch Alarm
EC6: Clutch alarm Clutch mechanism failure, Main board defective, Wiring/connection problem. WARNING Checks to perform : Check that all the connectors are correctly inserted. Replace / Repair the Clutch and repeat the Diagnostic Is Clutch assembled properly? (Check for any damage) Is Cycle to check for any further alarms. -
Page 194: Ec7: Clutch Triac Sensing Failure
EC7: Clutch TRIAC sensing failure Clutch mechanism failure, Main board defective, Wiring/connection problem. Checks to perform : WARNING Check that all the connectors are correctly inserted. Is Clutch assembled properly? (Check for any damage) Is Replace / Repair the Clutch and repeat the Diagnostic Clutch in good condition? Cycle to check for any further alarms. -
Page 195: Ef2: Foam Warning
EF2: Foam warning Incorrect or excessive detergent, Drain pipe blocked or clogged. Checks to perform : WARNING Check that all the connectors are correctly inserted. This is an excessive detergent dosing warning. The system detected dense foam during the drain phases. Therefore, use the correct quantity of detergent and make sure the filter and drain circuit are clean.