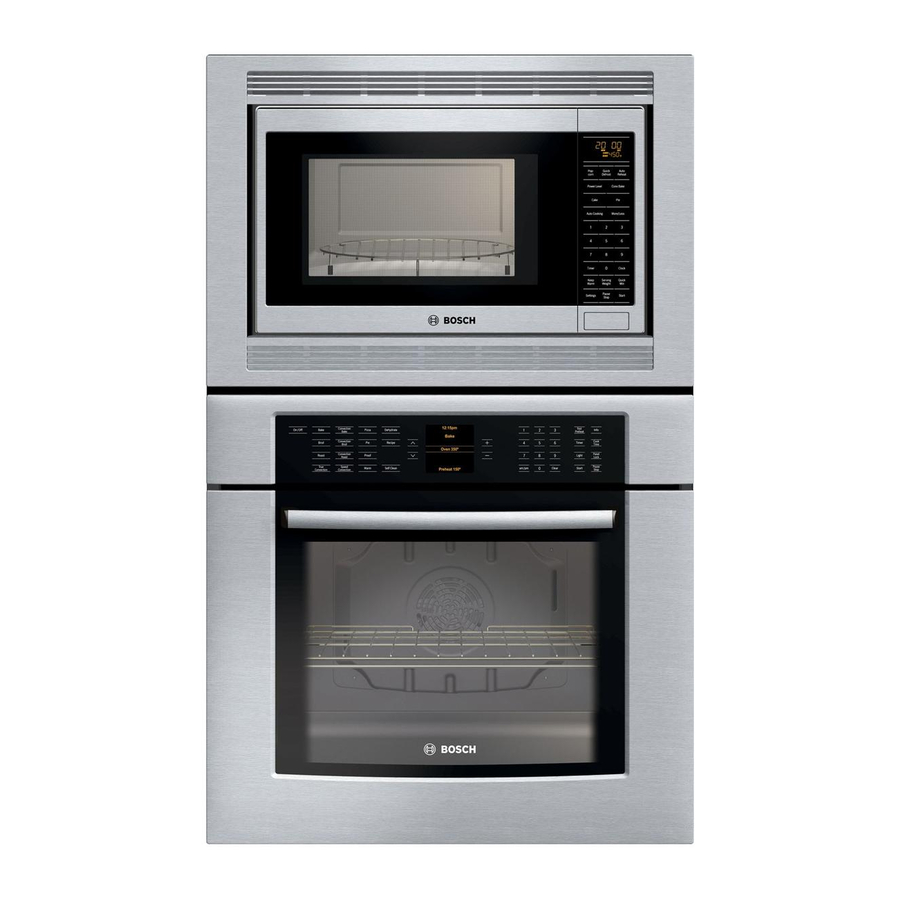
Bosch HBL8550 Use And Care Manual
Bosch built-in oven use & care manual
Hide thumbs
Also See for HBL8550:
- Manual d’utilisation et d’entretien (116 pages) ,
- Installation manual (56 pages) ,
- Use and care manual (56 pages)
Table of Contents
Advertisement
Quick Links
Advertisement
Table of Contents

Related Manuals for Bosch HBL8550


Summary of Contents for Bosch HBL8550
- Page 1 Use and Care Manual Built-In Ovens Models: HBL8750, HBL8550, HBL8650...
-
Page 2: Table Of Contents
Table of Contents About This Manual ......1 How This Manual is Organized ......... 1 Safety . - Page 3 Convection Bake ........... 29 True Convection .
-
Page 4: About This Manual
About This Manual How This Manual is Organized English 1 You can get the most out of your new oven by reading this manual from beginning to end. This way you will systematically get to know your appliance and become familiar with its operation and features. -
Page 5: Safety
Safety Important Safety Instructions READ AND SAVE THESE INSTRUCTIONS Proper Installation and Maintenance Fire Safety WARNING: When properly cared for, your new appliance has been designed to be safe and reliable. Read all instructions carefully before use. These precautions will reduce the risk of burns, electric shock, fire and injury to persons. - Page 6 Important Safety Instructions READ AND SAVE THESE INSTRUCTIONS Burn Prevention English 3 Use this appliance only for its intended purpose as described in this manual. For example, never use the appliance for warming or heating the room. Never use the appliance for storage.
- Page 7 Important Safety Instructions READ AND SAVE THESE INSTRUCTIONS Child Safety Cleaning Safety Always place oven racks in desired location while oven is cool. If a rack must be moved while oven is hot, do not let potholder contact the heating elements. Always use dry potholders.
- Page 8 Important Safety Instructions READ AND SAVE THESE INSTRUCTIONS Cookware Safety English 5 Wipe out excessive spillage before self-cleaning the oven. Birds have very sensitive respiratory systems . Keep pet birds out of the kitchen or other rooms where kitchen fumes could reach them. During self-clean, fumes are released that may be harmful to birds.
-
Page 9: Getting Started
Getting Started Parts and Accessories Parts* Door Lock Door Gasket Door Hinge Oven Vent Cooling Fan Oven Vent Heating 170¡ Roast Oven 350¡ Probe 200¡ 12:12 pm Convection Bake Oven 200¡ Preheating 12:30 pm * Picture shows double oven. Your appliance may vary slightly. The cooling fan runs during all cooking modes. -
Page 10: Accessories
Convection Fan Oven Bottom Note: Do not place food directly on the oven bottom. Accessories English 7 the vent, and condensation may collect in this area. This area may be warm when the oven is in use. Do not block the vent, since it is important for air circulation. The convection fan operates during all convection modes. -
Page 11: Inserting Rack
Inserting Rack Flat Rack Telescopic Rack The rack is designed with a stop so it will stop before coming completely out of the oven and not tilt. CAUTION: To avoid burns, place oven racks in desired positions before turning oven on. Always use oven mitts when the oven is warm. If a rack must be moved while the oven is hot, do not let oven mitts contact hot heating elements. - Page 12 English 9 5. Lift the rack up. 6. Push the rack in completely. 7. Engage the rack’s front hooks in the accessory brackets. This is very important to ensure that the rack is installed correctly (see the enlarged picture).
-
Page 13: Control
Control* Cooking Mode Touchpads Convection Pizza On/Off Bake Bake Convection Broil Broil Convection Upper Roast Proof Roast True Speed Lower Warm Convection Convection Touchpads: You only have to press lightly on the touchpads to operate them. The touchpads will Display Heating 170°... -
Page 14: Display Symbols
Display Symbols* Timer — Is displayed when Timer is active. ã Fast Preheat Symbol — Is displayed when Fast Preheat is active. Panel Lock Indicator — Symbol is displayed when Panel Lock is turned on. ä Probe Symbol — Appears when a probe is detected. -
Page 15: Before Using The Oven For The First Time
Before Using the Oven for the First Time • Oven must be properly installed by a qualified technician before use. • Remove all packing materials from inside and outside the oven. • While cool, wipe with a clean, damp cloth and dry. •... -
Page 16: Operation
Operation About the Appliance Basic Features Turning the Oven On and Off Setting the Clock English 13 Your new oven combines premium cooking results and simple operation. The oven design has been optimized to improve heat distribution in the oven cavity. The result is even browning, shorter cooking times and lower energy consumption. -
Page 17: Setting The Date
Setting the Date To set the clock: 1. The oven must be turned off in order to access the “Setup” menu. Press Info for two seconds. The "Setup" menu appears: Clock with 12 hours Clock: 12:00 pm Press Info to quit 2. - Page 18 English 15 2. Use the arrows to select the "Date" menu item. The year display now appears between the two lines: Clock: 10:30 am Press Info to quit 3. Use “+” and “-” or the numeric touchpads to set the year. After two seconds, the month display will appear: Press Info to quit 4.
-
Page 19: Selecting The Upper Or Lower Oven
Selecting the Upper or Lower Oven Setting the Cooking Mode and Temperature Note: • Info Heating Time Limitation To set a heating mode and temperature in a double oven, the corresponding oven has to be active. To select an oven, press Upper or Lower. To set the cooking mode and temperature: 1. -
Page 20: Panel Lock
Panel Lock Timer Note: • English 17 The panel lock is a child safety mechanism to prevent children from accidentally turning on the oven or changing an oven setting. Turning the panel lock on and off: To turn the panel lock on, press and hold the Panel Lock key for four seconds. The Panel Lock symbol will appear in the display. -
Page 21: Fast Preheat
Fast Preheat Note: • Special Features Fast Preheat heats the oven quicker than standard preheat. It is available for Bake, Roast, True Convection, Convection Bake, Convection Roast, Pizza and Pie modes. To set Fast Preheat: 1. Set the cooking mode and temperature. 2. -
Page 22: Cook Time
Cook Time Note: • English 19 Use the Cook Time feature to operate the cooking mode for a set period of time. The oven starts immediately and then turns off automatically when the set time is CAUTION: To maintain food safety, do not leave food in the oven for more than one hour before or after cooking. -
Page 23: End Time/Start Time
End Time/Start Time Use End Time or Start Time to delay the start of a timed mode. Enter the desired time for the mode to end or start. The oven calculates the proper start time or end time. It starts and stops automatically. To set the End Time: 1. - Page 24 English 21 To set the Start Time: 1. Set the Cook Time. 2. Press The Start Time appears between the lines: End time Start Time Cook time Press Cook Time to quit 3. Use “+” and “-” or the numeric touchpads to set the start time; for instance, 11:00 am: End time Start Time...
-
Page 25: Recipe
Recipe Recipe contains functions with pre-programmed settings. The cooking mode, temperature and cook time are automatically activated based on the items you choose in the menu. However, it is possible to change temperature and cooking time manually. CAUTION: To maintain food safety, do not leave food in the oven for more than one hour before or after cooking. - Page 26 Note: • English 23 It is necessary to preheat for baked goods, pie, and pizza. • When using an automatic program, it is not necessary to preheat the oven when roasting meat or poultry. • If the food is not cooked to the desired degree of doneness, continue by using a normal heating mode (refer to the cooking charts).
- Page 27 3. Press The name of the first program of the selected category appears between the two lines: 4. Use “+” and “-” to select the desired program; for instance, Breast. 5. For programs that include weight, press 6. If desired, the cook time can be changed now by pressing Cook Time. Use “+” and “-”...
-
Page 28: Probe
Probe Note: • English 25 The probe measures the internal temperature of the food. The probe is available for Bake, Roast and all convection cooking modes except Convection Broil. Inserting the probe: Insert the tip of the probe in the middle and thickest part of the meat. Make sure the probe is not touching fat, bone, parts of the oven or pan. -
Page 29: Sabbath Mode
Sabbath Mode Note: • Setup • The range for the internal temperature is between 135°F and 200°F (60°C and 100°C). • Always use the handle of the probe for inserting and removing. • Always use a potholder to remove the probe since it becomes hot. •... - Page 30 English 27 The following can be set: Menu item Clock with 12-hour or 24-hour display mode. Clock Sets the clock. Year Sets the date. Month Beeps Setting of beep length for finished cook process, timer and error: Short (10 sec), Medium (2 min), Long (5 min).
-
Page 31: Getting The Most Out Of Your Appliance
Getting the Most Out of Your Appliance General Tips Pan Placement Preheating the Oven For Best Results Baking Pans and Dishes High Altitude Baking Condensation Baking results are better if pans are placed in the center of the oven. If baking more than one pan on a rack, allow at least 1"... -
Page 32: Bake
Bake Tips: • Convection Bake English 29 Bake is cooking with dry, heated air. Both the upper and lower elements cycle to maintain the oven temperature. The Bake mode can be used to prepare a variety of food items, from pastries to casseroles. -
Page 33: Convection Bake Chart
Tips: • Auto Convection Conversion Convection Bake Chart Place food in shallow, uncovered pans, such as cookie sheets without sides. • If baking more than one pan on a rack, allow at least 1” to 1½” of air space around the pan. Stagger pans so that one is not directly above the other (see graphic below). -
Page 34: True Convection
True Convection Tips • Auto Convection Conversion English 31 True Convection cooks with heat from a third element behind the back wall of the oven. The heat is circulated throughout the oven by the convection fan. True Convection is well suited for cooking individual serving-sized foods such as cookies and biscuits. -
Page 35: Pie
True Convection Chart Tips: • Food Item 1 rack Cakes Cupcakes Layers (8" or 9") Cookies Sugar Chocolate Chip Breads Dinner Rolls Biscuits Muffins Cream Puffs Fresh *These temperatures have been reduced by 25 °F. Use these temperature if the Auto Convection Conversion feature is turned off. á... -
Page 36: Pizza
Pie Chart Pizza Tips: • English 33 Food Rack 2 Crust Fruit Pie scratch frozen Custard Pie scratch Pie Shell scratch Meringue Topping Pie scratch Nut Pie scratch á In the Pizza mode, heat from the upper and lower elements is circulated throughout the oven by the convection fan. -
Page 37: Roast
Roast Tips: • Convection Roast Tips: • Roast uses both the upper and lower elements to maintain the oven temperature. Roasting uses more intense heat from the upper element than the lower element. This results in more browning of the exterior while the inside remains especially moist. Roast is best suited for large cuts of meat and poultry. -
Page 38: Convection Roast Chart
Convection Roast Chart Broil English 35 Rack Food Item Pos. Beef Rib Eye Roast (boneless) Medium rare Medium Rump, eye, tip, sirloin (boneless) Medium rare Medium Tenderloin Roast (medium rare) Pork Loin Roast (boneless or bone in) Loin Roast (boneless or bone in) Tenderloin Poultry Chicken, whole... - Page 39 Tips: • Broil Chart Preheat oven 3–4 minutes. Do not preheat for more than 5 minutes. • Steaks and chops should be at least ¾" thick. • Brush fish and poultry with butter or oil to prevent sticking. • Use the broil pan and grid included with the oven. •...
-
Page 40: Convection Broil
Convection Broil Tips: • Convection Broil Chart English 37 à Convection Broil is similar to Broil. It combines intense heat from the upper element with heat circulated by a convection fan. Convection Broil mode is well suited for cooking thick, tender cuts of meat, poultry and fish. -
Page 41: Speed Convection
Speed Convection Tips: • Speed Convection Chart Speed Convection uses all heating elements as well as the convection fan to evenly distribute heat throughout the oven cavity. The main difference between speed convection and other convection modes is that it does not require preheating. Speed Convection is well suited for frozen convenience foods such as fish sticks and chicken nuggets. -
Page 42: Proof
Proof Warm English 39 In Proof, the oven uses the upper and lower elements to maintain a low temperature to proof bread or other yeast doughs. • Proofing is the rising of yeast dough. • The Proof mode temperature range is 85 ºF to 110 ºF. •... -
Page 43: Dehydrate
Dehydrate Tips: • Dehydrate Chart Dehydrate dries with heat from a third element behind the back wall of the oven. The heat is circulated throughout the oven by the convection fan. Use Dehydrate to dry and/or preserve foods such as fruits, vegetables and herbs. This mode holds an optimum low temperature (100 ºF –... - Page 44 English 41 Food Item Preparation Vegetables Peppers Wash and towel dry. Remove membrane of peppers, coarsely chopped about 1" pieces. Mushrooms Wash and towel dry. Cut off stem end. Cut into 1/8" slices. Tomatoes Wash and towel dry. Cut thin slices, 1/8" thick, drain well.
-
Page 45: Cleaning And Maintenance
Cleaning and Maintenance Cleaning Self-Clean Note: • During Self-Clean, the oven is heated to a very high temperature. Soil is burned off at this temperature. IMPORTANT: Wipe out excessive spillage before self-cleaning the oven. IMPORTANT: Do not clean parts or accessories in the Self-Clean oven. To set the Self-Clean mode: 1. -
Page 46: Avoid These Cleaners
Avoid These Cleaners Cleaning Guide English 43 • The special heat-resistant enamel and the polished components in the oven can become discolored over time. This is normal and does not affect operation. Do not use scouring pads or abrasive cleaners to treat discolorations. Do not use commercial oven cleaners such as Easy Off®. -
Page 47: Maintenance
Maintenance Replacing an Oven Light Part Stainless Steel Surfaces Always wipe or rub in the direction of the grain. Clean with a soapy sponge, then rinse and dry, or wipe with Fantastik® or Formula 409® sprayed on a paper towel. Protect and polish with Stainless Steel Magic®... - Page 48 English 45 To replace the halogen bulb on the oven sidewall: 3. Remove the halogen bulb and replace. Grasp the new bulb with a clean, dry cloth. 4. Screw the glass cover back on. 5. Turn power back on at the main power supply (fuse or breaker box).
-
Page 49: Removing The Oven Door
Removing the Oven Door CAUITION: When removing the door: • Make sure oven is cool and power to the oven has been turned off before removing the door. Failure to do so could result in electrical shock or burns. • The oven door is heavy and fragile. -
Page 50: Service
Service Before Calling Service Troubleshooting Chart Oven Problem Oven door is locked and will not open, even after cooling. Oven is not heating. Oven is not cooking evenly. Baking results are not as expected. Food takes longer to cook than expected. Food is overcooked. -
Page 51: Data Plate
Oven Problem Warm air or steam escapes from oven vent. Cooling fan runs even when the oven is turned off. Data Plate How to Obtain Service or Parts Possible Causes and Suggested Solutions It is normal to see or feel steam or warm air escaping from the oven vent. Do not block the vent. -
Page 52: Statement Of Limited Product Warranty
STATEMENT OF LIMITED PRODUCT WARRANTY What this Warranty Covers & Who it Applies to How Long the Warranty Lasts Repair/Replace as Your Exclusive Remedy Out of Warranty Product English 49 The limited warranty provided by BSH Home Appliances Bosch in this Statement of Limited Product Warranty applies only to the Bosch appliance sold to you, the first using purchaser, provided that the Product was purchased: •... - Page 53 Warranty Exclusions The warranty coverage described herein excludes all defects or damage that are not the direct fault of Bosch, including without limitation, one or more of the following: • Use of the Product in anything other than its normal, customary and intended manner (including without limitation, any form of commercial use, use or storage of an indoor product outdoors, use of the Product in conjunction with air or water-going vessels).
- Page 54 Notes:...
- Page 56 5551 McFadden Avenue, Huntington Beach, CA 92649 • 800-944-2904 • www.boschappliances.com 9000226561 • 5V0AND • Rev. B • 04/07 © BSH Home Appliances Corporation, 2007 • All rights reserved Litho in USA...