
Related Manuals for Samsung NV75N7647 Series


Summary of Contents for Samsung NV75N7647 Series
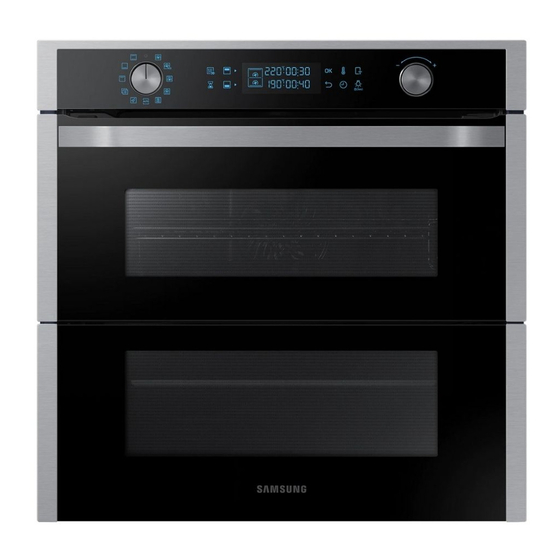
- Page 1 Built-in Oven User & installation manual NV75N7647** NV75N7647RS_SA_DG68-01056N-00_EN.indd 1 2020-04-17 오후 3:40:03...
-
Page 2: Table Of Contents
Contents Contents Steam cleaning Using this manual Timer The following symbols are used in this User Manual: Sound on/off Wi-Fi on/off Safety instructions Using the smart control feature Important safety precautions Cooking smart Auto energy saving function Manual cooking Installation Auto cook programmes What’s included Test dishes... -
Page 3: Using This Manual
Using this manual Safety instructions Thank you for choosing SAMSUNG Built-In Oven. Installation of this oven must be performed only by a licensed electrician. The This User Manual contains important information on safety and instructions installer is responsible for connecting the appliance to the mains power supply in intended to assist you in the operation and maintenance of your appliance. - Page 4 Safety instructions For stationary appliances permanently connected to the During use the appliance becomes hot. Care should be fixed wiring, compliance with this requirement to be met taken to avoid touching heating elements inside the if the instruction concerning disconnection incorporation oven.
- Page 5 A short term cooking process has to be supervised result in considerable danger to you and others. If your oven needs repair, contact a SAMSUNG Service center or your dealer. continuously. Electrical leads and cables should not be allowed to touch the oven.
-
Page 6: Auto Energy Saving Function
Safety instructions This oven has been designed only for the cooking of household foods. WARNING: Do not disconnect the appliance from the main power supply even after During use, the oven interior surfaces become hot enough to cause burns. Do not the cooking process is completed. -
Page 7: Installation
What’s included Make sure all parts and accessories are included in the product package. If you have a problem with the oven or accessories, contact a local Samsung customer Wire rack Wire rack insert * Baking tray * centre or the retailer. -
Page 8: Prepare To Install The Oven
Cabinet mount If installing the oven in a built-in cabinet, the cabinet must have its plastic surfaces and adhesive parts resistant up to 90 °C. Samsung is not responsible for damage to Phillips Screwdriver Drill furniture from the oven’s heat emission. - Page 9 Mounting the oven Built-in cabinet (mm) Make sure to leave a gap (A) of at least Min. 550 5 mm between the oven and each side of Min. 560 the cabinet. Min. 50 Min. 590 - Max. 600 Min. 460 x Min. 50 NOTE The built-in cabinet must have vents (E) to ventilate heat and circulate the air.
-
Page 10: Before You Start
Before you start Installation Before you start After installation is complete, remove the protective film, tape, and other packing Initial settings material, and take out the provided accessories from inside the oven. To remove When you power on the oven for the first time, the default time of “12:00” appears the oven from the cabinet, first disconnect power to the oven and remove on the display where the hour element (“12”) blinks. -
Page 11: New Oven Smell
New oven smell Accessories Before using the oven for the first time, clean inside the oven to remove the new For first time use, clean the accessories thoroughly with warm water, detergent oven smell. and a soft clean cloth. Remove all accessories from inside the oven. •... - Page 12 Before you start Universal tray * The universal tray (depth : 30 mm) is used for cooking and Telescopic rails * Use the telescopic rail plate to insert the tray as follows: roasting. Use the wire-tray insert to prevent liquid from Stretch the rail plate out from the oven.
-
Page 13: Flexible Door
Flexible Door How to use the full door Hold the lever-less area of the handle, This oven has a unique Flexible Door that is hinged in the middle, so you only and then pull. need to open the top half to access the upper zone. When you’re using the Dual Cook capability, you can access the top oven space much more easily and with greater energy efficiency. -
Page 14: Dual Cook Mode
Before you start Operations Dual cook mode Control panel You can use both the upper and lower compartments to cook two different recipes, The front panel comes in a wide range of materials and colours. For improved or simply choose one compartment to cook with. quality, the actual appearance of the oven is subject to change without notice. -
Page 15: Common Settings
Common settings 11 Oven light / Press to turn the internal light on or off. Hold down Child Lock for 3 seconds to activate Child lock, or hold down for It is common to change the default temperature and/or cooking time across all 3 seconds again to deactivate the lock on the control cooking modes. - Page 16 Operations Cooking time End time Turn the mode selector to choose a Turn the mode selector to choose a mode or function. mode or function. Press the button, and then turn the Press twice, and turn the value dial value dial to set a desired time up to to set a desired end time.
- Page 17 Delay End To clear the cooking time Delay End is designed to make cooking more convenient. You can clear the cooking time. This is useful if you want to stop the oven manually at any time during the process. Case 1 While the oven is cooking, press the Suppose you select a one-hour recipe at 2:00 PM and you want the oven to button to display the default cooking...
-
Page 18: Cooking Modes (Except For Grill)
Operations To clear the end time Cooking modes (except for grill) You can clear the end time. This is useful if you want to stop the oven manually at Turn the mode selector to select an any time during the process. cooking mode. - Page 19 Dual cook mode The oven starts preheating until the internal You can use the provided divider to separate the cooking chamber in the upper temperature reaches the target temperature. and lower compartments. This allows users to enable two different cooking modes Preheating is recommended for all cooking simultaneously, or to simply choose one compartment to cook with.
-
Page 20: Cooking Modes (Grill)
Operations Cooking modes (grill) Temperature range (°C) Suggested Mode Dual temperature (°C) Single Turn the mode selector to select Upper Lower Dual * 40-275 40-250 40-250 Bottom heat The bottom heating element generates heat, which is + Convection evenly distributed by the convection fan. Use this mode for pizza, bread, or cake. -
Page 21: Dual Cook Mode Temperature Setting Range
Dual cook mode temperature setting range Turn the mode selector to select By default, only Large grill (G 1) is You can use both the upper and lower compartments simultaneously for different selected automatically. cooking operations. In Dual Cook mode, the temperature range of one compartment is affected by the temperature settings of the other compartment. -
Page 22: To Stop Cooking
Operations To stop cooking Upper compartment is limited to (°C) If Lower is set to (°C) Minimum Maximum Oven light The oven light turns on automatically when the oven starts operation. While cooking is in process, turn the mode selector to “ ”. -
Page 23: Special Function
Special function Auto cook Add special or additional functions to improve your cooking experience. Special For inexperienced cooks, the oven offers a total of 50 auto cooking recipes. Take functions are not enabled in Dual cook mode. advantage of this feature to save you time or shorten your learning curve. The cooking time and temperature will be adjusted according to the selected recipe. -
Page 24: Steam Cleaning
Operations Dual cook mode Turn the value dial to select a serving size. The weight range depends on the Insert the divider in level 3 to activate programme. Dual cook mode. Press OK to start cooking. NOTE For more information, see the Auto cook programmes section in this manual. Steam cleaning Turn the mode selector to select This is useful for cleaning light soiling with steaming. -
Page 25: Timer
Timer Use a dry cloth to clean inside the oven. Timer helps you check the time or operating duration while cooking. Press WARNING Turn the value dial to set the time, and Do not open the door before the cycle is complete. The water inside the oven is then press OK. -
Page 26: Wi-Fi On/Off
Operations Wi-Fi on/off NOTE • When you press the Smart Control 1. Press for 3 seconds. button while the Wi-Fi is off, “AP” will be displayed on the display. • “AP” means that the oven is searching for a router. (It takes up to 30 seconds) •... -
Page 27: Cooking Smart
Cooking smart Manual cooking Baking We recommend to preheat the oven for best results. WARNING on acrylamide Type of Food Accessory Level Temp. (°C) Time (min.) Acrylamide produced while baking starch-contained food such as potato chips, heating French fries, and bread may cause health problems. It is recommended to cook Sponge cake Wire rack, 160-170... - Page 28 Cooking Smart Type of Type of Food Accessory Level Temp. (°C) Time (min.) Food Accessory Level Temp. (°C) Time (min.) heating heating Frozen puff Universal tray 180-200 20-25 Poultry (Chicken/Duck/Turkey) pastry, filled Chicken, Wire rack + 65-80 * Quiche Wire rack, 180-190 25-35 Whole, 1.2 kg *...
- Page 29 Grilling Frozen ready-meal We recommend preheat the oven using large grill mode. Turn over after half of Type of time. Food Accessory Level Temp. (°C) Time (min.) heating Type of Wire rack 200-220 15-25 Frozen pizza, Food Accessory Level Temp. (°C) Time (min.) heating 0.4-0.6 kg...
- Page 30 Cooking Smart Pro-Roasting Dual cook This mode includes an automatic heating-up cycle up to 220 °C. The top heater Before using dual cook function insert the divider into the oven. We recommend and the convection fan are operating during the process of searing the meat. After preheat the oven for best results.
- Page 31 You can also use upper or lower compartment only to save power. The cooking Zone Food Accessory Level Type of Temp. Time time can be extended when you use separated compartment. We recommend heating (°C) (min.) preheat the oven for best results. Upper Chicken, Wire rack...
- Page 32 Cooking Smart ECO convection Dual cook – eco convection mode You can alse use eco convection mode at upper or lower compartment to save This mode uses the optimized heating system so that you save the energy during power. cooking your dishes. The times of this category are suggested to not be preheated The times of this category are sugessted to not be preheated before cooking for before cooking for saving more energy.
-
Page 33: Auto Cook Programmes
Auto cook programmes Code Food Weight (kg) Accessory Level 1.2-1.5 Wire rack CAUTION Prepare pasta gratin using 22-24 cm ovenproof Pasta bake Foods that can easily spoil (such as milk, eggs, fish, meat, or poultry) should not dish. Start programme, after preheating beep stand in the oven for more than 1 hour before cooking begins, and should be sounds, put dish on the centre of rack. - Page 34 Cooking Smart Code Food Weight (kg) Accessory Level Code Food Weight (kg) Accessory Level 0.4-0.5 Wire rack 0.8-1.2 Wire rack Put the dough into a black metal buttered Put fresh fruits (raspberries, blackberries, apple Fruit flan base baking dish for cake base. Start programme, slices, or pear slices) into oven dish 22-24 cm.
- Page 35 Code Food Weight (kg) Accessory Level Code Food Weight (kg) Accessory Level Wire rack Wire rack 0.8-1.3 1.0-1.5 Universal tray Universal tray A 26 Chicken, Whole A 20 Roast sirloin of beef Season the beef and leave in refrigerator for Rinse and clean chicken.
- Page 36 Cooking Smart Code Food Weight (kg) Accessory Level Code Food Weight (kg) Accessory Level 0.3-0.8 Universal tray 0.8-1.3 Universal tray A 32 Sole Put sole on baking paper on the universal tray. Prepare homemade pizza with the yeast dough Cut surface with knife. and put it on the universal tray.
- Page 37 Dual cook Code Food Weight (kg) Accessory Level The following table presents 10 auto programmes for cooking, roasting and 0.5-1.0 Universal tray baking. You can use only upper zone or lower zone and use the upper and lower Cut large potatoes (each 200 g) into halves zone at the same time.
-
Page 38: Test Dishes
Cooking Smart Test dishes Code Food Weight (kg) Accessory Level According to standard EN 60350-1 0.3-0.8 Wire rack Start programme, after preheating beep 1. Baking sounds, put the frozen pizza on the middle Frozen Pizza The recommendations for baking refer to a preheated oven. Do not use the fast of the wire rack. -
Page 39: Collection Of Frequent Auto Cook Recipes
2. Grilling Collection of frequent auto cook recipes Preheat the empty oven for 5 minutes using Large Grill function. Potato gratin Type of Type of Temp. Time Accessory Level food heating (°C) (min.) Ingredients 800 g potatoes, 100 ml milk, 100 ml cream, 50 g beaten whole White bread Wire rack egg, 1 tbsp each of salt, pepper, nutmeg, 150 g grated cheese,... - Page 40 Cooking Smart Lasagne Apple pie 2 tbsp olive oil, 500 g minced beef, 500 ml tomato sauce, Pastry: 275 g flour, tbsp salt, 125 g white castor sugar, Ingredients Ingredients • 100 ml beef stock, 150 g dried lasagne sheets, 1 onion 8 g vanilla sugar, 175 g cold butter, 1 egg(beaten) (chopped), 200 g grated cheese, 1 tsp each of dried parsley •...
- Page 41 Quiche Lorraine Homemade pizza Pastry: 200 g plain flour, 80 g butter, 1 egg Pizza dough: 300 g flour, 7 g dried yeast, 1 tbsp olive oil, Ingredients • Ingredients • • Filling: 75 g cubed fatless bacon, 125 ml cream, 125 g 200 ml warm water, 1 tbsp sugar and salt crème fraiche, 2 eggs, beaten, 100 g grated cheese from •...
-
Page 42: Maintenance
Cooking Smart Maintenance Herb roasted lamb chops Cleaning For easier cleaning, regularly clean the oven. 1 kg lamb chops (6 pieces), 4 large garlic cloves (pressed), Ingredients 1 tbsp fresh thyme (crushed), 1 tbsp fresh rosemary(crushed), WARNING 2 tbsp salt, 2 tbsp olive oil •... - Page 43 Door Ceiling (applicable models only) 1. Tie the wet tissue to stick. Put down the grill heater. For this, turn the circular nut anticlockwise while holding the grill heater. The grill heater is not a removable part. Do not force the grill heater down.
-
Page 44: Detaching The Door
Maintenance Side racks (applicable models only) Detaching the door Press the top line of the left side rack, WARNING and lower by approximately 45°. The oven door is heavy. 1. Open the door and flip open the clips at both hinges. Pull and remove the bottom line of the 2. -
Page 45: Replacement
Replacement Checkpoints If you encounter a problem with the oven, first check the table below and try the Bulbs suggestions. If the problem continues, contact a local Samsung service centre. Remove the glass cap by turning anti- Problem Cause Action clockwise. - Page 46 Troubleshooting Problem Cause Action Problem Cause Action The oven exterior • If the oven is installed • Keep the gaps The brightness inside • The brightness • Power output changes is too hot during in a place without specified in the the oven varies.
-
Page 47: Information Codes
(or the heater of the cavity local Samsung service centre. temperature of the that is not being used may operate. cavity is hot). English 47 NV75N7647RS_SA_DG68-01056N-00_EN.indd 47... -
Page 48: Technical Specifications
Troubleshooting Technical specifcations SAMSUNG strives to improve its products at all times. Both the design Code Meaning Action specifications and these user instructions are thus subject to change without notice. The divider must not be removed during cooking in Connection voltage 230–240 V ~ 50 Hz... -
Page 49: Appendix
It is also possible to obtain the complete corresponding source code in a physical medium such as a CD-ROM; a minimal charge will be required. The following URL http://opensource.samsung.com/opensource/SMART_AT_051/ seq/0 leads to the download page of the source code made available and open source license information as related to this product. - Page 50 Memo NV75N7647RS_SA_DG68-01056N-00_EN.indd 50 2020-04-17 오후 3:40:29...
- Page 51 Memo NV75N7647RS_SA_DG68-01056N-00_EN.indd 51 2020-04-17 오후 3:40:29...
- Page 52 NEW ZEALAND 0800 726 786 www.samsung.com/nz/support CHINA 400-810-5858 www.samsung.com/cn/support www.samsung.com/hk/support (Chinese) HONG KONG 3698 4698 www.samsung.com/hk_en/support (English) 1800 40 SAMSUNG (1800 40 7267864) (Toll-Free) INDIA www.samsung.com/in/support 1800 5 SAMSUNG (1800 5 7267864) (Toll-Free) 09612300300 BANGLADESH www.samsung.com/in/support 08000300300 (Toll free) 021-5699-7777 INDONESIA www.samsung.com/id/support...