Advertisement
Quick Links
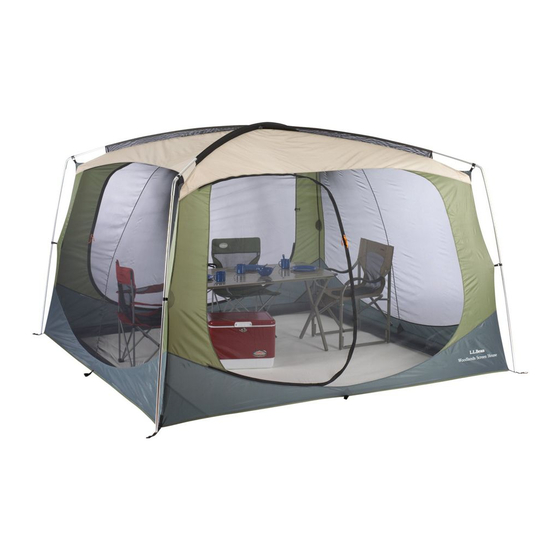
Woodlands Screen House
Becoming Familiar With Your Tent
Before your first adventure we recommend that you
set the tent up to become familiar with the parts
and set-up procedure involved. Your tent storage
bag will include:
• Screen House
• One pole bag containing two long, straight ridge
poles and four short corner poles with pre-bent
elbows
• One stake bag with stakes and guy lines
Note: An optional rain fly and clip-in floor are avail-
able for the Woodlands Screen House.
Selecting a Site
Select a site that is clear of debris and other objects
that could damage the screen house. Check above
the tent for any potentially dangerous tree limbs
that could fall on the screen house.
WARNING: Keep all flame and heat
sources away from this tent fabric.
This tent meets the flammability
requirements of CPAI-84. The fabric may
burn if left in continuous contact with
any flame source. The application of any
foreign substance to the tent fabric may
render the flame resistant properties
ineffective.
WARNING: Do not use fuel-burning
devices inside or near this tent.
Use of such devices in this tent could
cause death or serious injuries to you
or others using this tent due to carbon
monoxide poisoning.
For more information regarding the use and setup of this tent, please call our Product Support Team at 800-CAMPLLB.
Setting Up Your Tent
Follow these steps to set up your tent:
1. Unroll the tent and separate the components.
Spread out the screen house body with the tan
roof facing up. Assemble the tent poles. Slide one
of the long, straight ridge poles through one of
the mesh pole sleeves on the roof of the screen
house. Repeat this step with the second ridge
pole (Figure 1).
Fig. 1
2. Take one of the 4 corner poles and slide its elbow
end over the end of one of the ridge poles until it
is fully seated (Figure 2).
Fig. 2
Fig. 3
Next, take the opposite end of the corner pole
and insert its tip into the grommet of the screen
house's corner stake-out loop (Figure 3).
Repeat this step on the opposite end of the
ridge pole. This will form an arched pole from
corner to corner of the screen house (Figure 4).
Fig. 4
3. Repeat step 2 with the second set of corner poles.
The screen house will now stand up (Figure 5).
Fig. 5
Advertisement

Summary of Contents for L.L.Bean Woodlands Screen House
- Page 1 Woodlands Screen House Setting Up Your Tent Becoming Familiar With Your Tent Follow these steps to set up your tent: Repeat this step on the opposite end of the Before your first adventure we recommend that you ridge pole. This will form an arched pole from set the tent up to become familiar with the parts 1.
- Page 2 Leave No Trace Fly and Clip-in Floor (Sold Separately) Principles of Follow these steps to attach the optional rain fly: Outdoor Ethics 1. Unfold the rain fly and locate the L.L.Bean logo. This will be positioned on the side panel of the fly (Figure 7). • Plan Ahead and Prepare Fig. 7 4.