Table of Contents
Advertisement
Available languages
Available languages
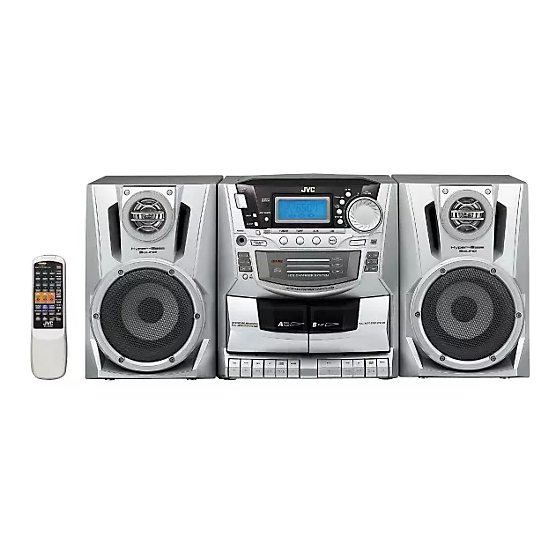
CD PORTABLE COMPONENT SYSTEM
SISTEMA PORTÁTIL CON REPRODUCTOR DE DISCOS COMPACTOS
PC-XC370
INSTRUCTIONS
MANUAL DE INSTRUCCIONES
For Customer Use:
Enter below the Model No. and Serial
No. which are located either on the rear,
bottom or side of the cabinet. Retain this
information for future reference.
Model No.
Serial No.
601-370000-010
LVT1094-001A
[J]
Advertisement
Chapters
Table of Contents

Related Manuals for JVC PC-XC370


Summary of Contents for JVC PC-XC370
- Page 1 CD PORTABLE COMPONENT SYSTEM SISTEMA PORTÁTIL CON REPRODUCTOR DE DISCOS COMPACTOS PC-XC370 INSTRUCTIONS For Customer Use: Enter below the Model No. and Serial MANUAL DE INSTRUCCIONES No. which are located either on the rear, bottom or side of the cabinet. Retain this information for future reference.
- Page 2 Warnings, Cautions and Others Mises en garde, précautions et indications diverses CAUTION CAUTION To reduce the risk of electrical shocks, fire, etc.: 1. Do not remove screws, covers or cabinet. RISK OF ELECTRIC SHOCK DO NOT OPEN 2. Do not expose this appliance to rain or moisture. CAUTION: TO REDUCE THE RISK OF ELECTRIC SHOCK, ATTENTION...
- Page 3 Instructions for safe use (Statement in accordance with the UL standards) Read Instructions — Read carefully this instructions Power Cord Protection — Power supply cords should for your safe use before this appliance is installed, be routed so that they are not likely to be walked on or wire-connected, and operated.
- Page 4 Introduction We would like to thank you for purchasing one of our JVC products. Before operating this unit, read this manual carefully and thoroughly to obtain the best possible performance from your unit, and retain this manual for future reference.
-
Page 5: Table Of Contents
Contents Location of the Buttons and Controls ..... 3 Front Panel ..............4 Remote Control ............5 Getting Started ............6 Unpacking ..............6 Putting the Batteries into the Remote Control ..6 Connecting Speakers ..........6 Connecting Other Equipment ........7 Power Supply ............ -
Page 6: Location Of The Buttons And Controls
Location of the Buttons and Controls Become familiar with the buttons and controls on your unit. Display Window STEREO MONO REPEAT ALL ALL DISC PROGRAM RANDOM LONG PLAY – 3 –... -
Page 7: Front Panel
Continued Display window See pages in the parentheses for details. (timer) indicator Front Panel 2 STEREO indicator, MONO indicator indicator 1 TAPE button (9, 16, 18) 4 REPEAT/REPEAT ALL/REPEAT ALL ALL DISC Pressing this button also turns on the unit. indicators 2 TUNER button (9, 11) 5 RANDOM indicator... -
Page 8: Remote Control
Remote Control Remote Control 1 Number buttons (11, 12, 14) 2 0 (CD tray open/close) buttons (13) Pressing one of these buttons also turns on the unit. 3 CD playback buttons (13) Pressing one of these buttons also turns on the unit. 4 TUNER, TAPE, AUX (source selection) buttons (9) 5 PROGRAM button (14) 6 REPEAT button (15) -
Page 9: Getting Started
Getting Started Continued Unpacking Connecting Speakers After unpacking, check to be sure that you have all the Right speaker Left speaker following items. The number in the parentheses indicates the quantity of the pieces supplied. • AC power cord (1) •... -
Page 10: Connecting Other Equipment
AUX jacks for illustration for correct connection. playing the other equipment. • DO NOT use any AC cord other than the JVC power cord provided with this unit; otherwise malfunction or damage to the unit may occur. -
Page 11: Resetting The Unit
If normal operations are disabled, reset the unit. batteries to avoid a malfunction or damage to the unit. • When the JVC power cord provided with this unit is 1 Turn off the power. connected, the power is automatically switched from the... -
Page 12: Common Operations
Common Operations Turning On or Off the Power Selecting the Sources When you press the play button for a particular source To turn on the unit, press POWER (TUNER, TAPE, AUX, and CD 6), the unit turns on, and the unit starts playing the source if it is ready. To turn off the unit (on standby), press POWER again. -
Page 13: Reinforcing The Bass Sound
Reinforcing the Bass Sound Selecting the Sound Modes You can enjoy powerful bass sound with the Hyper Bass You can select one of the 4 preset sound modes. The sound Sound function provided for this unit. modes can be applied only to playback sounds, and cannot be used for recording. -
Page 14: Listening To Fm And Am Broadcasts
Listening to FM and AM Broadcasts Tuning in a Station Presetting Stations You can preset 15 FM and 15 AM stations. 1 Press TUNER. TUNER To preset stations automatically The unit automatically turns on, and tunes in the previously tuned station 1 Press TUNER to select the (either FM or AM). -
Page 15: Tuning In A Preset Station
Tuning in a Preset Station 1 Press TUNER to select the TUNER band, FM or AM. 2 Select a preset number. On the unit: Press TUNING PRESET repeatedly until the desired preset number appears. On the remote control: Press the number buttons. For preset number 5, press 5. -
Page 16: Playing Back Cds
Playing Back CDs Using 0 ALL NOTES ON CD-R AND CD-RW DISCS When you press 0 ALL, three disc trays • This unit can play back CD-R and CD-RW discs as well as conventional audio CDs. However, note that a CD-R or a come out at the same time. -
Page 17: Playing Back The Entire Disc - Continuous Play
Continued To stop during play, press STOP 7 on the unit or 7 on the To go to another track remote control. Press UP ¢ or DOWN 4 repeatedly during playback or in stop To remove the disc, press CD1 0, CD2 0, or CD3 0, mode. -
Page 18: Playing At Random - Random Play
4 Press the number buttons to Playing at Random — Random Play select a track from the CD The tracks of all loaded CDs can be played back at random, selected in the above step. using the remote control. • For how to use the number buttons, •... -
Page 19: Playing Back Tapes
Playing Back Tapes To stop during playback, press STOP/EJECT §. Use only the type I tapes. To pause playback, press PAUSE 8. To resume playback, 1 Press TAPE. TAPE press PAUSE 8 again. The unit automatically turns on. To fast wind to the left or to the right, press REW 1 or FF ¡... -
Page 20: Recording
Recording Recording Tapes on Deck A IMPORTANT: • It should be noted that it may be unlawful to re-record pre-recorded tapes, records, or discs without the 1 Press STOP/EJECT § for the deck A. consent of the owner of copyright in the sound or video recording, broadcast or cable program and in any literary, dramatic, musical, or artistic embodied therein. -
Page 21: Dubbing Tapes
Dubbing Tapes When recording an AM station - Beat cancel While recording an AM broadcast, beats may be heard (which are never heard when listening to the broadcast 1 Press TAPE. without recording it). If this happens, press BEAT CANCEL 2 Press STOP/EJECT §... -
Page 22: Using The Timers
Using the Timers There are two timers available - daily timer and sleep timer. 6 Press TIMER. Before using the timers, you need to set the clock built into The source name (“TUNER” or the unit. (See page 9.) “Cd”) blinks on the display. Using Daily Timer With the daily timer, you can wake to your favorite music or radio program. -
Page 23: Using Sleep Timer
Using Sleep Timer With the sleep timer, you can fall asleep to music. You can set the sleep timer when the unit is turned on using the remote control. How the sleep timer actually works The unit automatically turns off after the specified time length passes. -
Page 24: Maintenance
Maintenance To get the best performance of the unit, keep your discs, tapes, and mechanism clean. Handling discs Handling cassette tapes • Remove the disc from its case by • If the tape is loose in its cassette, take holding it at the edge while pressing up the slack by inserting a pencil in the center hole lightly. -
Page 25: Troubleshooting
Troubleshooting If you are having a problem with your unit, check this list for a possible solution before calling for service. If you cannot solve the problem from the hints given here, or the unit has been physically damaged, call a qualified person, such as your dealer, for service. - Page 26 Introducción Nos gustaría darle las gracias por haber comprado uno de nuestros productos JVC. Antes de utilizar esta unidad, lea atentamente todo este manual para obtener el mejor funcionamiento posible de su unidad y conserve este manual para futuras referencias.
- Page 27 Índice Posición de los botones y los mandos ....... 3 Panel frontal .............. 4 Mando a distancia ............. 5 Antes de comenzar ............ 6 Desembalaje.............. 6 Colocación de las pilas en el mando a distancia ..6 Conexión de los altavoces ......... 6 Conexión a otro equipo ..........
-
Page 28: Posición De Los Botones Y Los Mandos
Posición de los botones y los mandos Familiarícese con los botones y mandos de su unidad. Ventana de visualización STEREO MONO REPEAT ALL ALL DISC PROGRAM RANDOM LONG PLAY – 3 –... -
Page 29: Panel Frontal
Continúa Ventana de visualización Consulte las páginas indicadas entre paréntesis para obtener más detalles. 1 Indicador (temporizador) 2 Indicador STEREO, indicador MONO Panel frontal 3 Indicador (Grabación) 4 Indicadores REPEAT/REPEAT ALL/REPEAT ALL 1 Botón TAPE (Cinta) (9, 16, 18) ALL DISC (Repetir/Repetir todo/Repetir todo de todos Si pulsa este botón, la unidad se encenderá. -
Page 30: Mando A Distancia
Mando a distancia Mando a distancia 1 Botones numéricos (11, 12, 14) 2 Botones 0 (Apertura/cierre del compartimento de discos compactos) (13) Si pulsa cualquiera de estos botones, la unidad se encenderá. 3 Botones de reproducción de discos compactos (13) Si pulsa cualquiera de estos botones, la unidad se encenderá. -
Page 31: Antes De Comenzar
Antes de comenzar Continúa Desembalaje Conexión de los altavoces Tras desembalar la unidad, compruebe que posee los Altavoz derecho Altavoz izquierdo siguientes elementos. El número entre paréntesis indica la cantidad de piezas suministradas. • Cable eléctrico de CA (1) • Mando a distancia (1) En caso de que falte algún elemento, póngase inmediatamente en contacto con su punto de venta. -
Page 32: Conexión A Otro Equipo
Remítase la ilustración para comprobar su correcta conexión. enchufes AUX para utilizar el otro equipo. • Utilice ÚNICAMENTE el cable JVC de CA suministrado con esta unidad, ya que en caso contrario, puede funcionar incorrectamente o dañarse. Para funcionar con pilas... -
Page 33: Reseteo De La Unidad
Use un adaptador de automóvil opcional exclusivo para estos 4 Ajuste el reloj. (Consulte la página 9.) fines (modelo JVC CA-R120) para conectar la toma DC IN 12V que encontrará en la parte posterior de la unidad al En caso de necesidad, presintonice las emisoras desadas de encendedor del automóvil. -
Page 34: Operaciones Básicas
Operaciones básicas Conexión y desconexión del aparato Selección de las fuentes de sonido Para conectar la unidad, pulse POWER Cuando pulse el botón de reproducción de cualquier fuente de sonido (TUNER, TAPE, AUX y CD 6), la unidad se Para desconectar la unidad (en modo de encenderá... -
Page 35: Realce Del Sonido De Baja Frecuencia
Realce del sonido de baja frecuencia Selección de los modos de audio Puede disfrutar de un magnífico sonido de baja frecuencia Puede seleccionar uno de los 4 modos de audio mediante la función Hyper Bass Sound presente en la unidad. preseleccionados. -
Page 36: Recepción De Emisoras De Fm Y Am
Recepción de emisoras de FM y AM Sintonización de una emisora Presintonización de una emisora Puede presintonizar 15 emisoras FM y otras 15 AM. 1 Pulse TUNER. TUNER Para presintonizar emisoras automáticamente La unidad se conectará automáticamente y emitirá la 1 Pulse TUNER para emisora de radio previamente TUNER... -
Page 37: Sintonización De Una Emisora Presintonizada
Sintonización de una emisora presintonizada 1 Pulse TUNER para TUNER seleccionar la banda, FM o 2 Seleccione un número presintonizado. En la unidad: Pulse TUNING PRESET repetidas veces hasta que aparezca el número deseado. En el mando a distancia: Pulse los botones numéricos Para el número presintonizado 5, pulse Para el número presintonizado 12, pulse +10 y después, 2. -
Page 38: Reproducción De Discos Compactos
Reproducción de discos compactos Uso de 0 ALL NOTAS SOBRE DISCOS CD-R Y CD-RW Cuando pulse 0 ALL, los tres • Esta unidad puede reproducir CD-R (discos grabables) y CD-RW (discos pregrabables) así como discos compactos compartimentos de disco se abrirán de convencionales. -
Page 39: Reproducción De Todo Un Disco - Reproducción Continua
Continúa Para interrumpir la reproducción, pulse STOP 7 en la unidad Para saltar a otra pista o 7 en el mando a distancia. Pulse UP ¢ o DOWN 4 repetidas veces durante la reproducción o con el Para extraer el disco, pulse CD1 0, CD2 0 o CD3 0 disco parado. -
Page 40: Reproducción Aleatoria
4 Pulse los botones numéricos Reproducción aleatoria para seleccionar una pista Las pistas de todos los discos cargados se reproducen del disco compacto aleatoriamente, utilizando el mando a distancia. seleccionado en el paso • Para repetir la reproducción aleatoria, pulse REPEAT tras anterior. -
Page 41: Reproducción De Cintas
Reproducción de cintas Utilice únicamente cintas del tipo I. Para detener la reproducción, pulse STOP/EJECT §. 1 Pulse TAPE. TAPE Para hacer una pausa en la reproducción, pulse PAUSE 8. La unidad se conectará Para reanudar la reproducción, pulse de nuevo PAUSE 8 . automáticamente. -
Page 42: Grabación
Grabación Grabación de cintas en la platina A IMPORTANTE: • Debemos advertir que la grabación de cintas, grabaciones o discos pregrabados sin el consentimiento 1 Pulse STOP/EJECT § en la platina A. del propietario de la patente en grabaciones audio o vídeo, emisiones de radio o por cable así... -
Page 43: Copia De Cintas
Para grabar una emisora AM – Eliminación del ritmo Copia de cintas de fondo Cuando grabe una emisión AM, es posible que se escuche un 1 Pulse TAPE. ritmo de fondo (que no se oye nunca cuando se está únicamente escuchando la emisión sin grabarla). 2 Pulse STOP/EJECT §... -
Page 44: Uso De Los Temporizadores
Uso de los temporizadores Hay dos temporizadores disponibles – el temporizador de 6 Pulse TIMER. encendido y el de apagado. Antes de utilizar los temporizadores, El nombre de la fuente de sonido necesita configurar el reloj integrado en la unidad. (Consulte la (“TUNER”... -
Page 45: Uso Del Temporizador De Apagado
Uso del temporizador de apagado Con el temporizador de apagado, puede dormirse escuchando música. Puede configurar el temporizador de apagado cuando la unidad esté conectada mediante el mando a distancia. Funcionamiento del temporizador de apagado La unidad se desconecta automáticamente cuando transcurre el período de tiempo especificado. -
Page 46: Mantenimiento
Mantenimiento Para obtener el mejor funcionamiento de su unidad, mantenga limpios sus discos, cintas y mecanismos. Manipulación de discos Manipulación de cintas • Saque el disco de su funda • En caso de que la cinta se haya sujetándolo por el borde al mismo soltado en su funda, rebobínela tiempo que presiona ligeramente el introduciendo un lápiz en una de sus... -
Page 47: Guía De Solución De Problemas
Guía de solución de problemas En caso de que tenga un problema con su unidad, consulte esta lista por si le ofreciera una solución antes de solicitar asistencia técnica. En caso de que no pueda resolver el problema siguiendo los consejos que se le ofrecen aquí, o en caso de que la unidad sufriera daños físicos, conecte con una persona cualificada. - Page 48 VICTOR COMPANY OF JAPAN, LIMITED EN, SP 0503TMMMDWMST © 2003 VICTOR COMPANY OF JAPAN, LIMITED...