Table of Contents
Advertisement
COMBINATION COLOR
TELEVISION AND VIDEO CASSETTE
RECORDER
MV13Q41
MV20Q41
OWNER'S MANUAL
©2005 Toshiba Corporation
Before operating the unit, please read this manual thoroughly.
5S20101A [E]Cover
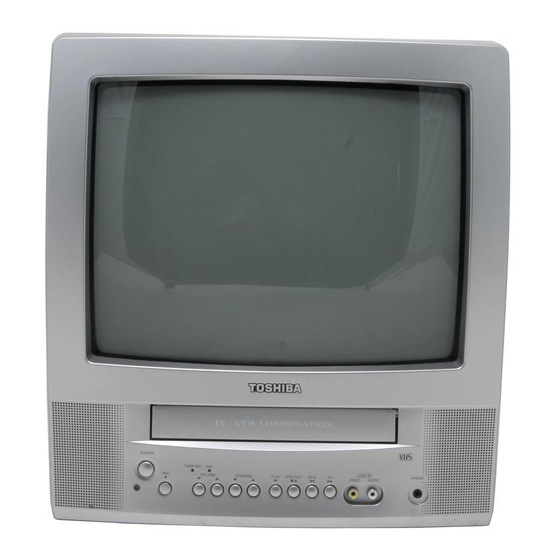
Illustration of MV13Q41
1
12/16/04, 4:27 PM
Introduction
2
Connections
11
Basic setup
13
TV operation
18
Playback
27
Recording
32
Others
37
Advertisement
Table of Contents

Related Manuals for Toshiba MV13Q41


Summary of Contents for Toshiba MV13Q41
- Page 1 COMBINATION COLOR TELEVISION AND VIDEO CASSETTE RECORDER MV13Q41 MV20Q41 OWNER’S MANUAL ©2005 Toshiba Corporation Before operating the unit, please read this manual thoroughly. 5S20101A [E]Cover Illustration of MV13Q41 12/16/04, 4:27 PM Introduction Connections Basic setup TV operation Playback Recording Others...
-
Page 2: Introduction
Introduction IMPORTANT SAFEGUARDS CAUTION RISK OF ELECTRIC SHOCK DO NOT OPEN CAUTION: TO REDUCE THE RISK OF ELECTRIC SHOCK, DO NOT REMOVE COVER (OR BACK). NO USER-SERVICEABLE PARTS INSIDE. REFER SERVICING TO QUALIFIED SERVICE PERSONNEL. WARNING: TO PREVENT FIRE OR SHOCK HAZARD, DO NOT EXPOSE THIS APPLIANCE TO RAIN OR MOISTURE. - Page 3 8. ACCESSORIES Do not place this unit on an unstable cart, stand, tripod, bracket, or table. The unit may fall, causing serious injury, and serious damage to the unit. 8A. An appliance and cart combination should be moved with care. Quick stops, excessive force, and uneven surfaces may cause the appliance and cart combination to overturn.
- Page 4 Introduction IMPORTANT SAFEGUARDS 18. SERVICING Do not attempt to service this unit yourself as opening or removing covers may expose you to dangerous voltage or other hazards. Refer all servicing to qualified service personnel. For example: When the power-supply cord or plug is damaged. If liquid has been spilled, or objects have fallen into the unit.
-
Page 5: Power Source
Power source AC Outlet Wider Hole and Blade Polarized AC Cord Plug (One blade is wider than the other.) IMPORTANT RECYCLING INFORMATION This product uses both Cathode Ray Tube (CRT) and other components that contain lead. In your community there might be regulations that require you to dispose these materials properly under environmental considerations. -
Page 6: Precautions
Introduction Precautions Notes on handling When shipping the unit, the original shipping carton and packing materials come in handy. For maximum protection, repack the unit as it was originally packed at the factory. Do not use volatile liquids, such as insect spray, near the unit. -
Page 7: Table Of Contents
Contents Introduction IMPORTANT SAFEGUARDS ... 2 Power source ... 5 Precautions ... 6 Contents ... 7 Identification of controls ... 8 Connections Antenna connections ... 11 Cable TV connections ... 12 Basic setup Starting setup ... 13 Clock setting ... 14 Setting the language ... -
Page 8: Identification Of Controls
Introduction Identification of controls See the page in for details. Front panel Illustration of MV13Q41 Power button Remote sensor REC button VOLUME Rear panel Illustration of MV13Q41 ANT. jack 5S20101A [E]p06-10 LINE IN (VIDEO/AUDIO) FF (Fast Forward) button buttons REW (Rewind) button... - Page 9 Remote control The instructions in this manual describe the functions on the remote control. See the page in EJECT button TV MONITOR button Direct channel selection buttons (0-9) Number buttons (0-9) DISPLAY button PROGRAM button button INPUT button CH RTN button Direction buttons / / / MENU button...
- Page 10 • Operate the remote control within 30° angle on either side of the remote sensor, up to a distance of approx. 5 meters. 5S20101A [E]p06-10 Install two “R03/AAA” batteries (supplied), paying attention to the polarity diagram in the battery compartment. 12/16/04, 4:27 PM Replace the compartment cover. Illustration of MV13Q41 Approx. 5 meters...
-
Page 11: Connections
Connections Antenna connections If you are using an indoor or outdoor antenna, follow the instructions below that correspond to your antenna system. If you are using a cable TV service (CABLE), see page 12 for Cable TV connections. Combination VHF/UHF antenna (Single 75 ohm cable or 300 ohm twin-lead wire) Antenna jack 75 ohm coaxial cable... -
Page 12: Cable Tv Connections
Connections Cable TV connections This unit has an extended tuning range and can tune most cable channels without using a Cable TV converter box. Some cable companies offer “premium pay channels” in which the signal is scrambled. Descrambling these signals for normal viewing requires the use of a descrambler device which is generally provided by the cable company. -
Page 13: Basic Setup
Basic setup Starting setup The STARTING SETUP function makes installing your unit easily. It leads you the Language selection, TV/CABLE selection and auto channel memory automatically. IMPORTANT: Make sure that the antenna or cable TV system connection is made! Starting setup Press POWER. -
Page 14: Clock Setting
Basic setup Clock setting The auto clock function will automatically set the built-in clock (Month, Day, Year and Time) when the unit is connected to an antenna or cable system and it is turned off. As the unit searches for a receivable station in your area and it receives a broadcast signal for auto clock, the auto clock needs several minutes to set itself. - Page 15 To set standard time In the rare event that you live within broadcast range of two stations in two different time zones, the unit may recognize the wrong station for the auto clock set. To correct the situation: Press MENU, then press B or A to select option.
-
Page 16: Manual Clock Setting
Basic setup Clock setting (continued) Manual clock setting You must set the date and time manually for timer recordings, ON/OFF timer and daylight saving time if the auto clock process did not set them correctly. EXAMPLE: Setting the clock to “8:30 AM”, 26th. (SAT) March, 2005. -
Page 17: Setting The Language
Setting the language/ TV/VCR operation status Setting the language This unit can display the on screen language in English, Spanish or French. Press MENU, then press B or A to select option. LANGUAGE/ PICTURE PICTURE PREFERENCE Press to select “LANGUAGE/IDIOMA/ LANGUE”, then press A. -
Page 18: Tv Operation
TV operation TV operation TV operation To turn on the unit, press POWER. Adjust the volume level by pressing VOL The volume level will be indicated on the screen by green bars. As the volume level increases, so do the number of bars. If the volume decreases, the number of green bars also decreases. - Page 19 Insert a monaural headphones (not supplied) with a 1/ 8” mini plug into the PHONE jack on the front panel. If you connect headphones, the sound from TV speakers is muted. Illustration of MV13Q41 MUTE 12/16/04, 4:27 PM SLEEP CH RTN VOL +/–...
-
Page 20: Closed Captions
TV operation Closed captions WHAT IS CLOSED CAPTIONING? This television has the capability to decode and display closed captioned television programs. Closed captioning will display text on the screen for hearing impaired viewers or it will translate and display text in another language. -
Page 21: To Memorize Channels
To memorize channels This unit is equipped with a channel memory feature which allows channels to skip up or down to the next channel set into memory, skipping over unwanted channels. Before selecting channels, they must be programmed into the unit’s memory. In addition to normal VHF and UHF channels, this unit can receive up to 113 cable TV channels. -
Page 22: Setting The V-Chip
TV operation Setting the V-Chip An age limitation can be set to forbid children to watch programs according to “TV RATING” and “MOVIE RATING” level set. To use the V-Chip function, you must register a password. Notes: • If you forget the password, you cannot set the V-Chip. •... - Page 23 To set the V-Chip In the V-CHIP menu, press CHIP SET”, then press A A A A A . V-CHIP V-CHIP SET CHANGE PASSWORD Press to select “TV RATING”, then press B B B B B or A A A A A to display the desired setting. After setting, press ENTER.
-
Page 24: To Set The On Timer
TV operation To set the on timer This feature allows you to have the unit automatically turn on at a predetermined time. If you program the ON TIMER once, the unit will turn on the programmed day (daily/weekly) at the same time to the same channel. -
Page 25: To Set The Off Timer
To set the off timer This feature allows you to have the unit turn off automatically at a predetermined time. If you program the OFF TIMER once, the unit will automatically turn off at the same time everyday. To set the off timer EXAMPLE: Turning off the TV at 11:30 PM. -
Page 26: Picture Control Adjustment
TV operation Picture control adjustment/ Adjusting the picture preference Picture controls are factory preset but you can adjust them individually as follows: And also you can select four picture modes—Standard, Sports, Movie, and Memory—as described in the following table: Picture control adjustment Press MENU, then press B B B B B or A A A A A to select option. -
Page 27: Playback
Playback Loading and unloading a cassette tape Use only video cassette tapes marked Loading Push the center of the tape until it is automatically inserted. Automatic power ON When you insert a cassette tape the unit power will turn ON automatically. Automatic playback When loading a cassette tape without an erase prevention tab, playback will start automatically. -
Page 28: Cassette Tape Playback
This unit selects the playback tape speed SP or SLP automati- cally. 5S20101A [E]p27-31 PLAY STOP/EJECT Illustration of PLAY MV13Q41 STOP/EJECT Rewind or forward the tape Stop the playback or recording with STOP. To rewind the tape: Press REW on the front panel or press REV on the remote. -
Page 29: Special Playback
Special playback Picture search Reverse picture search function Press REV once or twice during the playback. Forward picture search function Press FF once or twice during the playback. To return to playback, press PLAY. SPEED SEARCH TIMES PICTURE SEARCH SPEED TAPE SPEED PRESS ONCE SP (Standard Play) -
Page 30: Convenient Function
Playback Convenient function Repeat playback The entire video tape will be played until its end. The tape will automatically rewind to the beginning and the playback will be repeated. Press MENU, then press B or A to select option. Press to select “AUTO REPEAT”. -
Page 31: Zero Return Function
Zero return function The zero return function provides a convenient method of rap- idly returning to the starting point of recording or playback. The starting point can be indexed for any location on the tape by pressing COUNTER RESET and ZERO RETURN. Press DISPLAY. -
Page 32: Recording
Recording Recording a TV program Recording and viewing the same TV program. Recording a TV program Load a cassette tape with the erase prevention tab intact. The unit will automatically turn on. Press SPEED to select the desired tape speed SP or SLP. -
Page 33: One-Touch Timer Recording (Otr)
One-touch Timer Recording (OTR) The One-touch timer recording feature provides a simple and convenient way to make a timed recording. One-touch timer recording (OTR) Example: One-touch timer recording for 30 minutes. Load a cassette tape with the erase prevention tab intact. The unit will automatically turn on. -
Page 34: Timer Recording
Recording Timer recording Timer recording can be programmed on-screen with the remote control. The built-in timer allows automatic unattended recording of up to 8 programs within 1 month. Timer recording Preparation: • Load a cassette tape with the erase prevention tab intact. - Page 35 To set daily/weekly timer Weekly (e.g. WKL-TUE: each Tuesday) or daily (e.g. MON-SAT: Monday to Saturday) Timer recording Follow the procedure of timer recording on the previous page. At picture 4 press B or A repeatedly until the desired setting appears. Then press ENTER. When you press repeatedly, the indicator at DATE will change as follows, in this case the day is Friday.
-
Page 36: Duplicating A Video Tape
(not supplied) LINE To VIDEO IN Connection with Camcorder Playback Camcorder Recording VCR Illustration of MV13Q41 To VIDEO IN To AUDIO IN Audio/Video cable (not supplied) For duplicating a previously recorded tape from a camcorder, follow the camcorder manufacturer’s instructions. A typical camcorder dubbing hookup is shown above. -
Page 37: Others
Others Reception disturbances Most types of television interference can be remedied by adjusting the height and position of the VHF/UHF antenna. Outdoor antennas are recommended for best results. The most common types of television interference are shown below. If one of these symptoms appear when the unit is connected to a Cable TV system, the disturbance may be caused by the local Cable TV company broadcast. -
Page 38: Troubleshooting
Others Troubleshooting Check the following guide for the possible cause of a problem before contacting service. SYMPTOMS POWER The AC power cord is not connected. No power. Although the power is on, the Cassette is not inserted. unit does not operate. The TIMER REC button is depressed. -
Page 39: Video Head Cleaning
SYMPTOMS RECORDING The video cassette's erase prevention tab TV recording does not work. is broken off. The time is not set correctly. The recording start/end time is not set Timer recording does not correctly. work. The TIMER REC button have not been pressed (the TIMER REC indicator is not lit). -
Page 40: Specifications
Remote control Batteries (2 x AAA) *Screen size is approximate. • Designs and specifications are subject to change without notice. • Tape Speed shown is approximate. 5S20101A [E]p37-40 MV13Q41 20 inches* (508.0 mm diagonal) 2-13 14-69 37-59 (AA)-(WW) 60-85 (AAA)-(ZZZ) -
Page 41: Limited Warranty
Limited warranty Toshiba America Consumer Products, L.L.C. (“TACP”) makes the following limited warranties. These limited warranties extend to the original consumer purchaser or any person receiving this set as a gift from the original consumer purchaser and to no other purchaser or transferee. - Page 42 ( 1 ) Call the TACP toll free number 1-800-631-3811 after you find a defective product or part to find the nearest Toshiba Authorized Service Station. ( 2 ) Please present your bill of sale or other proof to the Authorized Service Station.
- Page 43 Memo 5S20101A [E]p41-Back 12/16/04, 4:28 PM...
- Page 44 05/01 K Printed in Thailand 5S20101A [E]p41-Back 12/16/04, 4:28 PM...