Table of Contents
Advertisement
Advertisement
Table of Contents

Related Manuals for Philips DMVC300K/00


Summary of Contents for Philips DMVC300K/00
- Page 1 Philips FunCam Instructions for use...
-
Page 2: Introduction
Philips FunCam DMVC 300K The Philips FunCam DMVC 300K you have just purchased is manufactured to the highest standards and will give you years of trouble-free use. This new digital camera is the most advanced means of recording high quality movies or still photos quickly and easily on your PC or laptop computer. -
Page 3: Table Of Contents
Using the camera as a PC-camera (webcam) ...23 6. Using the applications ...24-28 Philips VLounge...24 Video Chat ...25-26 ® Microsoft Netmeeting ...25-26 ® Microsoft MSN Messenger and Yahoo! Image...26-27 Philips Photo Manager...26-27 Video...27-28 Philips VRecord ...27-28 7. Problem solving...29 8.Technical specifications ...30 ® Messenger...26 ENGLISH... -
Page 4: Things You Should Know
ENGLISH 9. Important information...31-32 Disclaimer ...31 FCC compliance ...31 End of life directives ...32 System requirement ...32 Disclaimer of warranty...32 Limitation of damages ...32 10. Helpline ...33 11.Warranty ...34 1. Things you should know... -
Page 5: Safety Precautions
Never point the camera lens at the sun. Copyright Copyright© 2003 by Philips Consumer Electronics B.V. All rights reserved. No part of this publication may be reproduced, transmitted, transcribed, stored in a retrieval system or translated into any language or computer language, in any form or by any means, electronic, mechanical, magnetic, optical, chemical, manual or otherwise, without prior written permission from Philips. -
Page 6: Pack Contents
ENGLISH Pack contents Please check that the following items are packed in the Philips FunCam box. They are provided to help you set up and use your Philips FunCam. The Philips FunCam DMVC 300K Neckstrap Desktop stand with USB/ microphone cable attached... -
Page 7: Quick Start
Place the installation CD-ROM in your computer’s CD-ROM-/DVD drive. Select your language. Select at least ‘FunCam drivers’ and ‘Philips Photo Manager’. Click ‘Start to install’ to start installation. Note! If the the ‘Language Selection’ screen does not appear automatically, open Windows Explorer and double-click the ‘Autorun.exe’... - Page 8 ENGLISH Charging Turn on the PC. Be sure to run the installation CD-ROM first, before connecting the camera to the PC. Connect the USB plug of the USB/Microphone cable to the USB port of the PC. Place the camera’s USB connector on the USB connector in the desktop stand. Push it down gently until it clicks in position.
- Page 9 Transferring photos/video clips to your PC Make sure the PC is turned on and that ‘FunCam drivers’ and ‘Philips Photo Manager’ are installed. Connect the desktop stand to the PC: • Connect the USB plug of the USB/microphone cable to the USB port of the PC.
- Page 10 > If the transfer is complete the following screen will appear. Notes! – If the ‘Philips FunCam’ screen does not appear, you can start ‘Philips Photo Manager’ and click on the 'Get Photo' icon. Select you camera (Philips FunCam) to start the transfer.
-
Page 11: Functional Overview
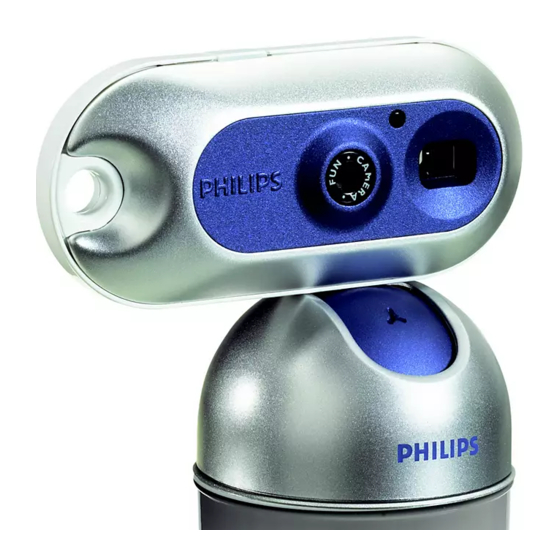
3. Functional overview Strap hole for connecting neck strap or belt clip Shutter button for taking photos and making video recordings Lens Timer LED blinks red for 10 seconds when the self-timer has been set Viewfinder for framing you photo subject USB port for connecting the camera to the USB connector of the desktop stand Charge LED... - Page 12 ENGLISH 10 Desktop stand for placing the camera in when: – (re-)charging the battery – using the camera as a PC-camera – tranferring/viewing photos and video clips 11 Microphone 12 USB connector for connecting to the camera’s USB port 13 USB/microphone cable –...
-
Page 13: Installation
‘Autorun.exe’ icon in the CD-ROM directory. > The software installation screen will now appear. Select at least ‘FunCam drivers’ and ‘Philips Photo Manager’. There are three clusters of application software to install: - software for video chat (Video Conference): - software for image applications (Image);... - Page 14 ENGLISH Click ‘Start to install’ to start installation. Note! If your Operating System is Windows XP, continue the installation process when the dialog box below appears on the screen. (In Windows 2000/NT, the same dialog box may also appear. You may then continue the installation process.) Follow the instructions on the screen to complete the installation.
-
Page 15: Connecting The Camera To Your Pc
Connecting the camera to your PC Be sure to run the installation CD first, before connecting the camera to the PC. Turn on the PC. Connect the desktop stand to the PC: • Connect the USB plug of the USB/Microphone cable to the USB port of the PC. •... -
Page 16: Selecting Low Resolution Mode
ENGLISH Selecting low resolution mode Default setting is VGA (high resolution mode). In (320x240) size photos. Press the Mode button until the currently selected resolution mode appears on the display: Press the Shutter button if you wish to change the resolution mode. >... -
Page 17: Recharging The Battery
Recharging the battery Make sure the camera is turned off. Turn on the PC. Connect the USB plug of the USB/Microphone cable to the USB port of the PC. Place the camera’s USB connector on the USB connector in the desktop stand. Push it down gently until it clicks into position. -
Page 18: Operating The Camera
ENGLISH 5. Operating the camera Turning the camera On and Off • Press and hold the Mode button for two seconds to turn on the camera. > You will hear a beeping sound, the display lights up blue and the Charge LED lights up red. >... -
Page 19: Setting The Self-Timer
Setting the self-timer Make sure the camera is turned on. Press the Mode button until Press the Shutter button to enter Self-timer mode. Press the Shutter button again, within five seconds. > You will hear a beep twice. >The Timer LED starts blinking red and you will hear a beep every second. >... -
Page 20: Making A Video Recording
ENGLISH Press the Shutter button within five seconds. > The camera will automatically take three photos in a row. > You will hear a beep each time a photo is taken. Making a video recording Make sure the camera is turned on. Press the Mode button until Press the Shutter button within 5 seconds to start video recording. - Page 21 Press the Shutter button to enter Clear Last mode. > You will hear a beep.The camera is now in Clear Last mode. Press the Shutter button again within five seconds to confirm that you wish to clear the last stored photo/video recording. >...
-
Page 22: Tranferring/Viewing Photos And Video Clips To Your Pc
ENGLISH Transferring photos/video clips to your PC Make sure the PC is turned on and that ‘Philips FunCam drivers’ and ‘Philips Photo Manager’ are installed. Connect the desktop stand to the PC: • Connect the USB plug of the USB/Microphone cable to the USB port of the PC. -
Page 23: Using The Camera As A Pc-Camera (Webcam)
> If the transfer is complete the following screen will appear. Note! If the ‘Philips FunCam’ screen does not appear you can start ‘Philips Photo Manager’ and click on the 'Get Photo' icon. Select your camera (Philips FunCam) to start the transfer. -
Page 24: Using The Applications
All applications can be accessed via the Philips V(ideo)-Lounge application. VLounge is the central application for easy access to your Philips FunCam and all image and video applications installed during setup. You can start VLounge through the Windows QuickLaunch menu in your taskbar, via the program group ‘Philips FunCam’, or by clicking the VLounge icon... -
Page 25: Video Chat
Video Chat ® Microsoft Netmeeting ® Microsoft NetMeeting enables you to communicate with others over the Internet or your local intranet. To initiate a video chat: Start NetMeeting by clicking the NetMeeting button in the VLounge selection screen. Click on ‘Help’ -> ‘About NetMeeting’ and find out your local IP address. You can ask your meeting partner to find out his/her IP address in the same way. -
Page 26: Microsoft ® Msn Messenger And Yahoo! ® Messenger
Click on the ‘Philips Photo Manager’ button in the VLounge selection screen. If you are using ‘Philips Photo Manager’ for the first time, click the ‘Search’ icon in the tool bar if the search for photos and video recordings does not start automatically. -
Page 27: Video
Select a file name in the File menu using 'Set Capture File'. Click 'Devices' to set the video and audio source you want to use. Enable 'Preview' in the Options menu to see the live Philips USB Web Camera preview, then adjust your audio and video settings if necessary. -
Page 28: Video
If 'Use Frame Rate' is enabled in Capture - Set Frame Rate it determines the software frame rate in which VRecord captures the movie independently from the hardware frame rate delivered by the Philips USB Web Camera according to the Frame Rate setting in the Options - VideoFormat menu... -
Page 29: Problem Solving
• Properly connect USB cable to both desktop stand and PC and make USB driver not installed • Install USB driver and ‘Philips Photo Manager’ on your PC. Not all images The RAM memory installed in your computer may not have can be transferred sufficient storage space. -
Page 30: Technical Specifications
ENGLISH 8. Technical specifications Image resolution ...VGA (640 x 480) Sensor ...1/4”VGA CMOS PC camera resolution (connected to PC)...VGA (640 x 480) up to 15 fps or CIF (320 x 240) up to 25 fps Video resolution (disconnected from PC)...CIF (320 x 240) up to 15 fps Built-in battery...Li-polymer battery. -
Page 31: Important Information
9. Important information Disclaimer Philips makes no warranty of any kind with regard to this material, including, but not limited to, the implied warranties of merchantability and fitness for a particular purpose. Philips assumes no responsibility for any error that may appear in this document. Philips makes no commitment to update nor to keep current the information contained in this document. -
Page 32: End Of Life Directives
ENGLISH End of life directives Philips is paying a lot of attention to producing environmentally-friendly in green focal areas. Your new camera contains materials which can be recycled and reused. At the end of its life specialised companies can dismantle the discarded camera to concentrate the reusable materials and to minimise the amount of materials to be disposed of. -
Page 33: Helpline
10. Helpline Need Help? If you have any questions about the Philips FunCam, please contact our helpline for assistance! You can find the number in the list below. Before you call, please read this manual carefully. You will be able to solve most of your problems. -
Page 34: Warranty
6 meses de garantía para las pilas recargables 6 Monate Garantie auf wiederaufladbare Batterien 6 maanden garantie op oplaadbare batterijen Garanzia di 6 mesi sulle batterie ricaricabili www.philips.com Data subject to change without notice Certificat de garantie Certificado de garantia...