Table of Contents
Advertisement
Available languages
Available languages
Quick Links
INTERFACE 2
pioneerdj.com/support/
rekordbox.com/
The Pioneer DJ site shown above offers FAQs, information on software, and various other types of information
and services to allow you to use your product in greater comfort.
Le site Pioneer DJ indiqué ci-dessus propose une FAQ, des informations sur le logiciel et divers types
d'informations et de services qui permettent une utilisation plus confortable de ce produit.
Die oben angegebene Pioneer DJ-Website enthält häufig gestellte Fragen, Informationen über Software und
andere wichtige Informationen und Dienste, die Ihnen helfen, Ihr Produkt optimal zu verwenden.
Il sito Pioneer DJ indicato qui sopra offre una sezione FAQ, informazioni sul software ed informazioni e servizi
di vario tipo, per permettere un uso più confortevole dei nostri prodotti.
Op bovengenoemde Pioneer DJ website vindt u FAQ's, informatie over software, en andere informatie en
diensten voor nog meer gebruiksgemak van uw product.
El sitio de asistencia Pioneer DJ mostrado arriba ofrece las preguntas frecuentes, información del software y
varios otros tipos de información y servicios que le permitirán usar su producto con mayor confort.
O site de suporte da Pioneer DJ mostrado acima oferece FAQs, informações sobre o software e outros tipos
de informações e serviços para permitir utilizar o produto com um maior conforto.
На
а а
а
а
а
а
Operating Instructions (Quick Start Guide)
Mode d'emploi (Guide de démarrage rapide)
Bedienungsanleitung (Kurzanleitung)
Istruzioni per l'uso (Guida di avvio veloce)
Handleiding (Snelstartgids)
Manual de instrucciones (Guía de inicio rápido)
Manual de instruções (Guia de início rápido)
И
Pioneer DJ
а
, а а
а
а
а а
(К а
AUDIO INTERFACE
INTERFACE AUDIO
AUDIOSCHNITTSTELLE
INTERFACCIA AUDIO
AUDIO-INTERFACE
INTERFAZ DE AUDIO
INTERFACE DE ÁUDIO
ИНТЕРФЕЙС АУДИО
а
а
а а а
а
а
.
,
,
а
)
Advertisement
Chapters
Table of Contents

Related Manuals for Pioneer INTERFACE 2


Summary of Contents for Pioneer INTERFACE 2
- Page 1 Informationen und Dienste, die Ihnen helfen, Ihr Produkt optimal zu verwenden. Il sito Pioneer DJ indicato qui sopra offre una sezione FAQ, informazioni sul software ed informazioni e servizi di vario tipo, per permettere un uso più confortevole dei nostri prodotti.
- Page 2 Thank you for buying this Pioneer DJ product. Please read through these operating instructions so you will know how to operate your model properly. After you have finished reading the instructions, put them away in a safe place for future reference.
-
Page 3: Table Of Contents
Thank you for buying this Pioneer DJ product. Be sure to read this manual and the Operating Instructions that is available on the Pioneer DJ site. Both documents include important information that you should understand before using this product. In particular, be sure to read “IMPORTANT SAFETY INSTRUCTIONS.”... -
Page 4: Before Start
(for example by keeping the AC power connected) when using rekordbox. 4 Type [INTERFACE 2] into the search bar and click ! Use of the Internet requires a separate contract with a provider the link that appears. -
Page 5: Installing Rekordbox
Setting DVS with rekordbox Installing rekordbox 1 Access rekordbox.com. rekordbox.com/en/store/ ! The page content is subject to change without notice. 2 Check the Get Started guide and then click [Free To Download]. There are four kinds of DVS modes ABSOLUTE, RELATIVE, INTERNAL, THROUGH. -
Page 6: Part Names
Part names Rear panel 1 DC indicator 6 SIGNAL GND terminal 2 DECK2 input indicator 7 Input selector switch 3 DECK1 input indicator 8 DECK2 input terminals 4 Cord hook 9 DECK1 input terminals 5 DC IN terminal a Kensington security slot... -
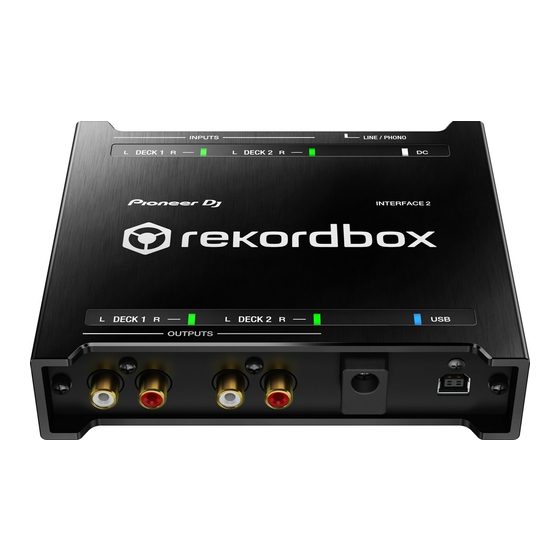
Page 7: Front Panel
Front panel 1 DECK1 output indicator 2 DECK2 output indicator 3 USB indicator 4 DECK1 output terminals 5 DECK2 output terminals 6 USB cable hook 7 USB port (Type B) -
Page 8: Connections
Connections ! Connect the power cord after all connections between devices have been completed. Be sure to remove the USB cable and unplug the power cord from the power outlet whenever making or changing connections. ! Be sure to use the supplied power cord and AC adaptor. ! Power is supplied by the AC adaptor or USB bus power. - Page 9 Front panel Audio will output at line level. Audio cable Audio cable USB cable (supplied) (supplied) (supplied) Computer Mixer How to attach the rubber feet Attach the rubber feet to the unit if needed. Depending on where placing the unit, attach the rubber feet accordingly. Rubber foot...
- Page 10 How to use the cord hook/USB cable hook The power cord of the AC adaptor/USB cable is fixed by hooking to the cord hook/USB cable hook. Hook the power cord of the AC adaptor/USB cable to avoid accidentally disconnecting them from the unit. For the position to hook the power cord of the AC adaptor/USB cable, use the width of the unit as a guide.
-
Page 11: Additional Information
Audio Section trademarks Sampling rate ............44.1 kHz/48 kHz/96 kHz D/A converter ..................32 bits • Pioneer DJ is a trademark of PIONEER CORPORATION, and is used A/D converters ..................24 bits under license. Frequency characteristic • rekordbox is a trademark or registered trademark of the Pioneer DJ LINE ................. - Page 12 Nous vous remercions d’avoir acquis un produit Pioneer DJ. Veuillez lire attentivement ce mode d’emploi afin de connaître la manière d’utiliser l’appareilcomme il convient. Cela fait, conservez le mode d’emploi de façon à pouvoir vous y référer en cas de nécessité.
- Page 13 Merci d’avoir acheté ce produit Pioneer DJ. Veuillez lire ce manuel et le « Mode d’emploi » qui est disponible sur le site Pioneer DJ. Ces deux documents comprennent des informations importantes que vous devez connaître avant d’utiliser ce produit.
-
Page 14: Informations Préliminaires
être insuffisante. Notamment pour les ordinateurs portables, assurez- 4 Tapez [INTERFACE 2] dans la barre de recherche et vous que l’ordinateur est en état de fournir sa performance optimale cliquez sur le lien qui apparaît. -
Page 15: Installation De Rekordbox
Réglage du mode DVS avec rekordbox Installation de rekordbox 1 Accédez à rekordbox.com. rekordbox.com/fr/store/ ! La page de contenu est soumise à modification sans notification préalable. 2 Consultez le guide de démarrage, puis cliquez sur [Téléchargement]. Il existe quatre types de modes DVS : ABSOLUTE, RELATIVE, INTERNAL et THROUGH. -
Page 16: Noms Des Éléments
Noms des éléments Panneau arrière 1 Indicateur DC 6 Prise SIGNAL GND 2 Indicateur d’entrée DECK2 7 Sélecteur d’entrée 3 Indicateur d’entrée DECK1 8 Prises d’entrée DECK2 4 Crochet de cordon 9 Prises d’entrée DECK1 5 Prise DC IN a Fente de sécurité Kensington... -
Page 17: Face Avant
Face avant 1 Indicateur de sortie DECK1 2 Indicateur de sortie DECK2 3 Indicateur USB 4 Prises de sortie DECK1 5 Prises de sortie DECK2 6 Crochet de cordon USB 7 Port USB (type B) -
Page 18: Raccordements
Raccordements ! Lorsque tous les appareils ont été raccordés, vous pouvez brancher le cordon d’alimentation. Veillez à toujours ôter le câble USB et à débrancher le cordon d’alimentation de la prise secteur avant de raccorder un appareil ou de changer les liaisons. - Page 19 Face avant Le son audio sortira au niveau line. Câble audio Câble audio Câble USB (fourni) (fourni) (fourni) Ordinateur Table de mixage Comment fixer les pieds en caoutchouc Fixez les pieds en caoutchouc sur l’appareil si nécessaire. En fonction de l’emplacement de l’appareil, fixez les pieds en caoutchouc en conséquence.
- Page 20 Comment utiliser le crochet du cordon / crochet du câble USB Le cordon d’alimentation de l’adaptateur secteur / câble USB se fixe en s’accrochant au crochet du cordon / crochet du câble USB. Accrochez le cordon d’alimentation de l’adaptateur secteur /câble USB afin d’éviter de les débrancher accidentellement de l’appareil.
-
Page 21: Informations Complémentaires
éléments de « En cas de panne » figurant dans Alimentation ..........CC 100 V à 240 V, 50 Hz/60 Hz le Mode d’emploi, et consultez les [FAQ] pour [INTERFACE 2] sur le Courant nominal ..................0,4 A site de Pioneer DJ. - Page 22 Vielen Dank, dass Sie sich für dieses Pioneer DJ-Produkt entschieden haben. Bitte lesen Sie diese Bedienungsanleitung gründlich durch, um sich mit der Bedienung des Geräts vertraut zu machen. Nachdem Sie die Bedienungsanleitung gelesen haben, legen Sie sie griffbereit zum Nachschlagen ab.
- Page 23 Mischen Sie dieses Produkt, wenn Sie es entsorgen wollen, nicht mit gewöhnlichen Haushaltsabfällen. Es gibt ein getrenntes Sammelsystem für gebrauchte elektronische Produkte, über das die richtige Behandlung, Rückgewinnung und Wiederverwertung gemäß der bestehenden Gesetzgebung gewährleistet wird. Privathaushalte in den Mitgliedsstaaten der EU, in der Schweiz und in Norwegen können ihre gebrauchten elektronischen Produkte an vorgesehenen Sammeleinrichtungen kostenfrei zurückgeben oder aber an einen Händler zurückgeben (wenn sie ein ähnliches neues Produkt kaufen).
- Page 24 Inhalt Zum Lesen dieser Anleitung Vielen Dank, dass Sie sich für dieses Pioneer DJ-Produkt entschieden haben. Bitte achten Sie darauf, sowohl diese Anleitung als auch die mitgelieferte Bedienungsanleitung zu lesen, die über die Pioneer DJ-Website verfügbar sind. Beide Dokumente enthalten wichtige Informationen, die Sie verstehen sollten, bevor Sie dieses Produkt benutzen.
-
Page 25: Vor Der Inbetriebnahme
Kompatibilität und unterstützten Betriebssysteme von rekordbox BEDIENUNGSANLEITUNGEN]. finden Sie unter [System Requirements] auf der nachstehenden rekordbox.com-Website. 4 Geben Sie [INTERFACE 2] in die Suchleiste ein und rekordbox.com/ klicken Sie auf den Link, der angezeigt wird. ! Die richtige Funktion kann nicht auf allen Computern garantiert werden, auch wenn diese mit den hier beschriebenen 5 Klicken Sie in der Liste auf die gewünschte... -
Page 26: Installieren Von Rekordbox
Einstellen von DVS mit rekordbox Installieren von rekordbox 1 Gehen Sie zu rekordbox.com. rekordbox.com/en/store/ ! Der Seiteninhalt kann ohne Ankündigung geändert werden. 2 Lesen Sie die Kurzanleitung und klicken Sie auf [Free To Download]. Es gibt vier DVS-Modi: ABSOLUTE, RELATIVE, INTERNAL, THROUGH. Klicken Sie auf die DECK-Nummer , um den Modus über das Menü... -
Page 27: Teilenamen
Teilenamen Rückseite 1 DC-Anzeige 6 SIGNAL GND-Anschluss 2 DECK2-Eingangsanzeige 7 Eingangsauswahlschalter 3 DECK1-Eingangsanzeige 8 DECK2-Eingangsanschlüsse 4 Kabelhaken 9 DECK1-Eingangsanschlüsse 5 DC IN-Anschluss a Kensington-Diebstahlsicherung... -
Page 28: Frontplatte
Frontplatte 1 DECK1-Ausgangsanzeige 2 DECK2-Ausgangsanzeige 3 USB-Anzeige 4 DECK1-Ausgangsanschlüsse 5 DECK2-Ausgangsanschlüsse 6 USB-Kabelhaken 7 USB-Anschluss (Typ B) -
Page 29: Anschlüsse
Anschlüsse ! Schließen Sie das Netzkabel an, nachdem alle Anschlüsse zwischen den Geräten vorgenommen wurden. Trennen Sie das USB-Kabel und ziehen Sie das Netzkabel aus der Netzsteckdose, bevor Sie Geräte anschließen oder die Anschlüsse ändern. ! Verwenden Sie immer das mitgelieferte Netzkabel und Netzteil. ! Die Stromversorgung erfolgt über das Netzteil oder den USB-Bus. - Page 30 Frontplatte Die Audioausgabe erfolgt mit dem Bezugspegel. Audiokabel Audiokabel USB-Kabel (mitgeliefert) (mitgeliefert) (mitgeliefert) Computer Mixer So bringen Sie die Gummifüße an Bringen Sie die Gummifüße bei Bedarf am Gerät an. Abhängig davon, wo das Gerät platziert wird, sollten Sie die Gummifüße entsprechend anbringen.
- Page 31 So verwenden Sie den Kabelhaken/ USB-Kabelhaken Das Netzkabel des Netzteils/das USB-Kabel wird fixiert, indem es in den Kabelhaken/USB-Kabelhaken eingehängt wird. Führen Sie das Netzkabel des Netzteils/USB-Kabel durch den Haken, um ein versehentliches Abziehen von diesem Gerät zu vermeiden. Verwenden Sie die Breite des Geräts als Richtwert für die Position, in der das Netzkabel des Netzteils/das USB-Kabel eingehakt werden sollte.
-
Page 32: Zusätzliche Informationen
• Pioneer DJ ist ein Markenzeichen der PIONEER CORPORATION und Signalrauschabstand (Nennleistung)* wird unter Lizenz verwendet. USB ....................112 dB • rekordbox ist eine Marke oder eingetragene Marke der Pioneer DJ LINE ....................103 dB Corporation. PHONO..................100 dB • Windows ist ein eingetragenes Markenzeichen der Microsoft Gesamtklirrfaktor* Corporation in den USA und anderen Ländern. - Page 34 Vi ringraziamo per avere acquistato questo prodotto Pioneer DJ. Vi preghiamo di leggere queste queste istruzioni per l’uso in modo da sapere usare correttamenteil proprio modello. Dopo aver letto queste istruzioni, riporle in un luogo sicuro per poterle consultare di nuovo al momento del bisogno.
- Page 35 Se si vuole eliminare questo prodotto, non gettarlo insieme ai rifiuti domestici. Esiste un sistema di raccolta differenziata in conformità alle leggi che richiedono appositi trattamenti, recupero e riciclo. I privati cittadini dei paesi membri dell’UE, di Svizzera e Norvegia, possono restituire senza alcun costo i loro prodotti elettronici usati ad appositi servizi di raccolta o a un rivenditore (se si desidera acquistarne uno simile).
- Page 36 Vi ringraziamo per avere acquistato questo prodotto Pioneer DJ. Accertarsi di leggere questo manuale e le Istruzioni per l’uso disponibili sul sito di Pioneer DJ. Entrambi i documenti includono informazioni importanti da comprendere prima di utilizzare questo prodotto. In particolare, assicurarsi di leggere la sezione “NORME DI SICUREZZA IMPORTANTI”.
-
Page 37: Prima Di Cominciare
(ad esempio 4 Digitare [INTERFACE 2] nella barra di ricerca e fare tenendo l’adattatore di alimentazione CA collegato). clic sul link che viene visualizzato. -
Page 38: Installazione Di Rekordbox
Impostazione di DVS con rekordbox Installazione di rekordbox 1 Accedere a rekordbox.com. rekordbox.com/it/store/ ! Il contenuto della pagina è soggetto a modifiche senza preavviso. 2 Leggere la Guida rapida e quindi fare clic su [Download Gratis]. Esistono quattro tipi di modalità DVS: ABSOLUTE, RELATIVE, INTERNAL, THROUGH. -
Page 39: Nomi Delle Parti
Nomi delle parti Pannello posteriore 1 Indicatore DC 6 Terminale SIGNAL GND 2 Indicatore ingresso DECK2 7 Selettore di ingresso 3 Indicatore ingresso DECK1 8 Terminali di ingresso DECK2 4 Gancio del cavo 9 Terminali di ingresso DECK1 5 Terminale DC IN a Slot di sicurezza Kensington... -
Page 40: Pannello Anteriore
Pannello anteriore 1 Indicatore di uscita DECK1 2 Indicatore di uscita DECK2 3 Indicatore USB 4 Terminali di uscita DECK1 5 Terminali di uscita DECK2 6 Gancio del cavo USB 7 Porta USB (Tipo B) -
Page 41: Collegamenti
Collegamenti ! Collegare il cavo di alimentazione dopo che tutti i collegamenti fra dispositivi sono stati fatti. Prima di fare o modificare collegamenti, non mancare di rimuovere il cavo USB e di scollegare il cavo di alimentazione. ! Utilizzare esclusivamente il cavo di alimentazione e l’adattatore CA in dotazione. ! L’alimentazione viene fornita dall’adattatore CA o dal bus USB. - Page 42 Pannello anteriore L’audio sarà emesso a livello di linea. Cavo audio Cavo audio Cavo USB (in dotazione) (in dotazione) (in dotazione) Computer Mixer Come attaccare i piedini in gomma Se necessario, attaccare i piedini in gomma all’unità. A seconda del posizionamento dell’unità, attaccare opportunamente i piedini in gomma.
- Page 43 Come utilizzare il gancio del cavo/gancio del cavo USB Il cavo di alimentazione dell’adattatore CA/cavo USB viene fissato agganciandolo al gancio del cavo/gancio del cavo USB. Agganciare il cavo di alimentazione dell’adattatore CA/cavo USB onde evitare un loro scollegamento accidentale dall’unità. Per la posizione di aggancio del cavo di alimentazione dell’adattatore CA/cavo USB, utilizzare la larghezza dell’unità...
-
Page 44: Ulteriori Informazioni
• Pioneer DJ è un marchio di PIONEER CORPORATION e viene Caratteristiche di frequenza riportato su licenza. LINE ................da 20 Hz a 20 kHz • rekordbox è un marchio o un marchio registrato di Pioneer DJ Rapporto S/R (uscita dichiarata)* Corporation. USB ....................112 dB • Windows è... - Page 46 Hartelijk dank voor uw aankoop van dit Pioneer DJ product. Lees deze gebruiksaanwijzing aandachtig door om bekend te raken met de juiste bedieningvan uw apparaat. Na het doorlezen van de gebruiksaanwijzing dient u deze te bewaren op een veilige plaats, voor latere naslag.
- Page 47 Deponeer dit product niet bij het gewone huishoudelijk afval wanneer u het wilt verwijderen. Er bestaat een speciaal wettelijk voorgeschreven verzamelsysteem voor de juiste behandeling, het opnieuw bruikbaar maken en de recycling van gebruikte elektronische producten. In de lidstaten van de EU, Zwitserland en Noorwegen kunnen particulieren hun gebruikte elektronische producten gratis bij de daarvoor bestemde verzamelplaatsen of een verkooppunt (indien u aldaar een gelijkwaardig nieuw product koopt) inleveren.
- Page 48 Inhoud Opmerkingen over deze handleiding Hartelijk dank voor uw aankoop van dit Pioneer DJ-product. Zorg dat u zowel deze handleiding als de handleiding op de website van Pioneer DJ gelezen heeft. Beide documenten bevatten belangrijke informatie die u moet begrijpen voordat u dit product gebruikt.
-
Page 49: Voordat U Begint
! Afhankelijk van de instellingen voor stroombesparing enzovoort van de computer bestaat de kans dat de CPU en de harde schijf niet 4 Noteer [INTERFACE 2] in de zoekbalk en klik op de volledig toereikend zijn. Vooral bij notebooks moet u ervoor zorgen koppeling die verschijnt. -
Page 50: Rekordbox Installeren
Het instellen van DVS met rekordbox Rekordbox installeren 1 Ga naar rekordbox.com. rekordbox.com/en/store/ ! De pagina kan zonder kennisgeving gewijzigd worden. 2 Selecteer de snelstartgids en klik op [Free To Download]. Er zijn vier soorten DVS-modi ABSOLUTE, RELATIVE, INTERNAL, THROUGH. Klik op het DECK-nummer om de modus vanaf het menu te selecteren. -
Page 51: Namen Van Onderdelen
Namen van onderdelen Achterpaneel 1 DC-lampje 6 SIGNAL GND-aansluiting 2 DECK2 ingangslampje 7 Ingangkeuzeschakelaar 3 DECK1 ingangslampje 8 DECK2 ingang-aansluitingen 4 Snoerhaak 9 DECK1 ingang-aansluitingen 5 DC IN-aansluiting a Kensington beveiligingssleuf... -
Page 52: Voorpaneel
Voorpaneel 1 DECK1 uitgangslampje 2 DECK2 uitgangslampje 3 USB-lampje 4 DECK1 uitgang-aansluitingen 5 DECK2 uitgang-aansluitingen 6 USB-kabelhaak 7 USB-aansluiting (Type B) -
Page 53: Aansluitingen
Aansluitingen ! Sluit het netsnoer pas aan nadat alle aansluitingen tussen apparaten zijn voltooid. Trek altijd eerst de USB-kabel en de stroomstekker van het netsnoer los voordat u wijzigingen in de aansluitingen aanbrengt. ! Gebruik alleen de bijgeleverde netsnoer en de bijgeleverde netadapter. ! De stroomvoorziening loopt via de netadapter of de USB-aansluiting. - Page 54 Voorpaneel Het geluid wordt weergegeven via lijnregeling. Audio-kabel Audio-kabel USB-kabel (meegeleverd) (meegeleverd) (meegeleverd) Computer Mengpaneel Bevestigen van het rubberen pootje Bevestig zo nodig het rubberen pootje op het apparaat. Bevestig het rubberen pootje overeenkomstig de locatie waar het apparaat geplaatst wordt.
- Page 55 Het gebruik van de haak van het snoerhaak/de USB-kabel Het netsnoer van de netadapter/USB-kabel zit vastgehaakt aan de haak van het netsnoer/de USB-kabel. Haak het netsnoer van de netstroomadapter/USB-kabel vast om te voorkomen dat de stekker per ongeluk van het apparaat loskomt. Gebruik als richtlijn de breedte van het apparaat voor de positie waarin het netsnoer van de netadapter/USB-kabel moet worden vastgehaakt.
-
Page 56: Aanvullende Informatie
Netstroomadapter de onderwerpen van "Problemen oplossen" in de handleiding en lees Stroom ............AC 100 V tot 240 V, 50 Hz/60 Hz het onderdeel [FAQ] (Veelgestelde vragen) voor [INTERFACE 2] op de Nominale stroom ................... 0,4 A website van Pioneer DJ. - Page 58 Le damos las gracias por la adquisición de este producto Pioneer DJ. Lea a fondo estas instrucciones de utilización para que aprenda a utilizar correctamente su modelo. Después de haber terminado de leer estas instrucciones, guárdelas en un lugar seguro para, en caso de ser necesario, consultarlas en el futuro.
- Page 59 Gracias por adquirir este producto Pioneer DJ. Asegúrese de leer este Manual y el Manual de instrucciones disponible en el sitio de Pioneer DJ. Ambos incluyen información importante que debe entender antes de utilizar esta unidad. Asegúrese, en concreto, de leer las “INSTRUCCIONES IMPORTANTES DE SEGURIDAD”.
-
Page 60: Antes De Empezar A Usar La Unidad
CPU y el disco duro no ofrezcan funciones de procesamiento suficientes. Para ordenadores notebook en 4 Escriba [INTERFACE 2] en la barra de búsqueda y particular, asegúrese de que el ordenador está en las condiciones haga clic en el enlace que aparece. -
Page 61: Instalación De Rekordbox
Configuración de DVS con rekordbox Instalación de rekordbox 1 Acceda a rekordbox.com. rekordbox.com/es/store/ ! El contenido de la página está sujeto a cambios sin previo aviso. 2 Consulte la Guía de inicio y haga clic en [Descarga Gratis]. Existen cuatro tipos de modos de DVS: ABSOLUTE, RELATIVE, INTERNAL y THROUGH. -
Page 62: Nombres De Las Partes
Nombres de las partes Panel trasero 1 Indicador DC 6 Terminal SIGNAL GND 2 Indicador de entrada DECK2 7 Conmutador selector de entrada 3 Indicador de entrada DECK1 8 Terminales de entrada DECK2 4 Gancho de cables 9 Terminales de entrada DECK1 5 Terminal DC IN a Ranura de seguridad Kensington... -
Page 63: Panel Frontal
Panel frontal 1 Indicador de salida DECK1 2 Indicador de salida DECK2 3 Indicador de USB 4 Terminales de salida DECK1 5 Terminales de salida DECK2 6 Gancho para cable USB 7 Puerto USB (Tipo B) -
Page 64: Conexión De Los Terminales De Entrada/Salida
Conexiones ! Conecte el cable de alimentación después de terminar las conexiones entre los aparatos. Asegúrese de desconectar el cable USB y desenchufar el cable de alimentación de la toma de corriente siempre que haga o cambie conexiones. ! Asegúrese de usar el cable de alimentación y el adaptador de CA suministrados. ! La alimentación se suministra mediante el adaptador de CA o la alimentación de bus USB. - Page 65 Panel frontal El audio se emitirá a nivel de línea. Cable de audio Cable de audio Cable USB (suministrado) (suministrado) (suministrado) Ordenador Mezclador Cómo montar los pies de goma Monte los pies de goma en la unidad si fuese necesario. Monte los pies de goma como corresponda en función de donde coloque la unidad.
- Page 66 Cómo usar el gancho de cables / gancho para cable USB La alimentación del adaptador de CA / cables USB se fija enganchándola al gancho de cables / gancho para cables USB. Enganche el cable de alimentación del adaptador de CA / cable USB para evitar desconectarlo accidentalmente de la unidad.
-
Page 67: Información Adicional
“Solución de problemas” en el Manual de Alimentación ..........CA 100 V a 240 V, 50 Hz/60 Hz instrucciones y compruebe las [FAQ] para [INTERFACE 2] en el sitio Corriente nominal .................. 0,4 A de Pioneer DJ. - Page 68 Obrigado por adquirir este produto da Pioneer DJ. Leia atentamente estas instruções de funcionamento de modo a saber como utilizar correctamente oseu modelo. Após terminar de ler as instruções, coloque-as num local seguro para futura referência. Em alguns países ou regiões, a forma da ficha de alimentação e da tomada por vezes podem diferir das apresentadas nos desenhos explicativos.
- Page 69 Obrigado por adquirir este produto da Pioneer DJ. Certifique-se de que lê este manual e o Manual de instruções que está disponível no site da Pioneer DJ. Ambos os documentos incluem informações importantes que deve compreender antes de utilizar este produto.
-
Page 70: Antes De Começar
! Dependendo das definições de poupança de energia, etc., a CPU e 4 Digite [INTERFACE 2] na barra de procuras e clique o disco rígido podem não fornecer capacidades de processamento no link que é apresentado. -
Page 71: Instalação Do Rekordbox
Definir DVS com o rekordbox Instalação do rekordbox 1 Aceda a rekordbox.com. rekordbox.com/en/store/ ! Os conteúdos da página estão sujeitos a alterações sem aviso prévio. 2 Selecione o guia Como Começar e, em seguida, clique em [Free To Download]. Há quatro tipos de modos DVS: ABSOLUTE, RELATIVE, INTERNAL, THROUGH. -
Page 72: Nomes De Peças
Nomes de peças Painel posterior 1 Indicador DC 6 Terminal SIGNAL GND 2 Indicador de entrada DECK2 7 Interruptor seletor de entrada 3 Indicador de entrada DECK1 8 Terminais de entrada DECK2 4 Gancho do cabo 9 Terminais de entrada DECK1 5 Terminal DC IN a Ranhura de segurança Kensington... -
Page 73: Painel Frontal
Painel frontal 1 Indicador de saída DECK1 2 Indicador de saída DECK2 3 Indicador USB 4 Terminais de saída DECK1 5 Terminais de saída DECK2 6 Gancho do cabo USB 7 Porta USB (Tipo B) -
Page 74: Ligações
Ligações ! Ligue o fio elétrico depois de terminar de fazer todas as ligações entre os dispositivos. Certifique-se de que retira o cabo USB e desliga o fio da tomada sempre que fizer ou mudar as ligações. ! Certifique-se de que utiliza o cabo de alimentação e o transformador de CA fornecidos. ! A alimentação é... - Page 75 Painel frontal O áudio é reproduzido ao nível de linha. Cabo de áudio Cabo de áudio Cabo USB (fornecido) (fornecido) (fornecido) Computador Misturador Como colocar os pés de borracha Coloque os pés de borracha na unidade, se necessário. Dependendo de onde posicionar a unidade, coloque os pés de borracha em conformidade.
- Page 76 Como utilizar o gancho do cabo/gancho do cabo USB O cabo de alimentação do transformador de CA/cabo USB é fixo prendendo-o ao gancho do cabo/gancho do cabo USB. Prenda o cabo de alimentação do transformador de CA/cabo USB para evitar a desconexão acidental da unidade. Para posicionar o cabo de alimentação do transformador de CA/cabo USB, utilize a largura da unidade como guia.
-
Page 77: Informação Complementar
Transformador de CA os itens da “Resolução de problemas” no Manual de instruções e Energia............CA 100 V a 240 V, 50 Hz/60 Hz verifique as [FAQ] do [INTERFACE 2] no site da Pioneer DJ. Corrente nominal ................... 0,4 A pioneerdj.com/support/ Saída nominal ................CC 5 V, 2 A... - Page 78 Благодарим вас за покупку данного изделия Pioneer DJ. Пожалуйста, внимательно изучите данные инструкции по эксплуатации для надлежащего использования данной модели. По завершению изучения инструкций, храните их в надежном месте для справок в будущем. В некоторых странах или регионах форма вилки питания и розетки может иногда отличаться от того, что отображено на иллюстрациях.
- Page 79 Е а а а а а . С а а а а а а а а а а а а Чac а а - а ЕС, Ш а Н а а а а а В а а , а а а...
- Page 80 Содержание Как следует читать данное руководство Благодарим Вас за покупку этого изделия компании Pioneer DJ. Ознакомьтесь с данным руководством и Инструкциями по эксплуатации, которые доступны на сайте Pioneer DJ. В этих документах содержится важная информация, которую необходимо изучить перед началом работы с устройством.
-
Page 81: До Начала
3 Нажмите [FIND TUTORIALS & MANUALS]. ! Не гарантируется функционирование на всех компьютерах, даже если выполняются все указанные здесь условия по 4 Введите [INTERFACE 2] в строку поиска и операционной среде. нажмите отобразившуюся ссылку. ! В зависимости от настроек энергосбережения и др. -
Page 82: Установка Rekordbox
Настройка DVS на rekordbox Установка rekordbox 1 Откройте rekordbox.com. rekordbox.com/en/store/ ! Содержание страницы может изменяться без предварительного уведомления. 2 Ознакомьтесь с руководством по началу работы нажмите [Free To Download]. Доступно четыре режима DVS: ABSOLUTE, RELATIVE, INTERNAL, THROUGH. Нажмите номер DECK для... -
Page 83: Названия Деталей
Названия деталей Задняя панель 1 Индикатор DC 6 Терминал SIGNAL GND 2 Индикатор входа DECK2 7 Переключатель селектора входа 3 Индикатор входа DECK1 8 Терминалы входа DECK2 4 Крюк проводки 9 Терминалы входа DECK1 5 Терминал DC IN a Слот замка Кенсингтона... -
Page 84: Фронтальная Панель
Фронтальная панель 1 Индикатор выхода DECK1 2 Индикатор выхода DECK2 3 Индикатор USB 4 Индикаторы выхода DECK1 5 Индикаторы выхода DECK2 6 Крюк кабеля USB 7 Порт USB (тип B) -
Page 85: Подключения
Подключения ! После завершения всех подключений между устройствами подключите силовой кабель. При выполнении или изменении подключений обязательно отключите кабель USB и отсоедините силовой кабель от розетки. ! Используйте прилагаемый силовой кабель и адаптер переменного тока. ! Питание осуществляется за счет адаптера переменного тока или шины USB. ! Подключите... - Page 86 Фронтальная панель Аудио будет выводиться на линейном уровне. Аудиокабель Аудиокабель Кабель USB (входит в (входит в (входит в комплект) комплект) комплект) Компьютер Микшер Крепление резиновых ножек При необходимости прикрепите к устройству резиновые ножки. В зависимости от места размещения устройства прикрепите резиновые...
- Page 87 Использование крюка проводки/крюка кабеля USB Кабель питания адаптера переменного тока/кабеля USB фиксируется с помощью крюка кабеля/крюка кабеля USB. Зафиксируйте силовой кабель адаптера переменного тока/кабеля USB во избежание случайного отсоединения от устройства. Для расположения крепления силового кабеля адаптера переменного тока/кабеля USB руководствуйтесь шириной устройства.
-
Page 88: Дополнительная Информация
! Если вы считаете, что с данным устройством что-то не так, прочтите пункты в разделе “Возможные неисправности и способы их устранения” в Инструкциях по эксплуатации Технические характеристики данного устройства, а также раздел [FAQ] для [INTERFACE 2] на сайте Pioneer DJ. Адаптер переменного тока pioneerdj.com/support/ Кроме... - Page 89 П а К а Па Д а а а а а а а Р а А а П а а Д а ( а . .): 5 D3-7-10-6b_B1_Ru И а а ЕАЭС: У а а а ТР ТС 004/2011, 020/2011, 017/2011 ООО...
- Page 92 © 2017 Pioneer DJ Corporation. All rights reserved. © 2017 Pioneer DJ Corporation. Tous droits de reproduction et de traduction réservés. PDJ_001_all С а Ма а Printed in Malaysia / Imprimé en Malaisie <DRH1441-A>...