Advertisement
Quick Links
Troubleshooting
The power indicator blinks red.
‐The ID of this product is not yet registered
in the Center Module and a wireless
connection cannot be made. Register ID in
the Center Module of the target.
The power indicator lights red.
‐The battery is almost exhausted. Replace
the battery with a charged one.
Cannot turn on the headset.
‐The battery is exhausted. Replace the
battery with a charged one.
‐The battery is not inserted correctly.
Position the battery properly.
Cannot communicate with another
headset or the speaker post.
‐The Center Module may be turned off. Make
sure the Center Module has power. If no
remedy exists, consult your dealer for
repairs.
‐The headset ID is not registered in the
Center Module of the target. Register ID in
the Center Module of the target.
‐The [S] +[P] or [S] + [T] buttons may have
been pressed at the same time, causing the
extended functions to start. Turn the headset
power off and then back on.
Cannot hear or talk to the speaker post,
but communications with other headsets
are working properly.
‐The vehicle detector may be malfunctioning
because the detector is not plugged into the
Center Module, no power is supplied, or the
detecting function is out of order. Check that
the vehicle detector is plugged in and has
power.
Cannot "talk" or "page" in certain areas.
‐Radio waves cannot reach the area Remove
any metal obstacles blocking radio waves.
If no remedy exists, consult your dealer for repairs.
Charging
Use the supplied charging attachment to
charge the battery with the battery charger.
The charging time is approximately 3 hours
(when charged from empty to full). For
details on the indicator during charging,
refer to the operating instructions for the
battery charger.
When the charging attachment (accessory) is
attached to the battery charger as shown in
the figure below, insert the battery while
matching the terminals
Included Accessories
PGGX1006ZAC1 ‐ Color tips – Black
PGGX1006ZBC1 ‐ Color Tip – Red
PGGX1006ZCC1 ‐ Color Tip – Blue
PGGX1006ZDC1 ‐ Color Tip – Green
PGGX1006ZEC1 ‐ Color Tip – Yellow
2FA1CH455P ‐ Charging attachment
Optional Accessories
WX‐SB100 ‐ Battery
(Li‐ion 3.7 V DC, 700 mAh)
WX‐Z3040A ‐ Battery Charger
CONSUMABLES
PGHG1521ZAC1 ‐ Head Pad
(Adjustment Slide Pad)
PGHG1520ZAC1 ‐ Ear Pad
PGUR1108ZAC1 ‐ Headband
.
PANASONICA
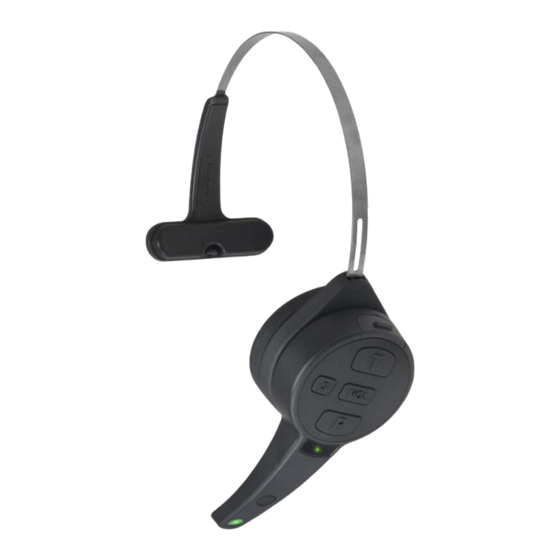
ATTUNE II
HD3 HEADSET
WX-CH455
CHEAT SHEET
12/17/2018 r1.0
Advertisement

Summary of Contents for Panasonic ATTUNE II HD3 WX-CH455
-
Page 1: Troubleshooting
Troubleshooting Charging The power indicator blinks red. Use the supplied charging attachment to ‐The ID of this product is not yet registered charge the battery with the battery charger. in the Center Module and a wireless The charging time is approximately 3 hours connection cannot be made. Register ID in (when charged from empty to full). For the Center Module of the target. details on the indicator during charging, refer to the operating instructions for the The power indicator lights red. battery charger. ‐The battery is almost exhausted. Replace the battery with a charged one. When the charging attachment (accessory) is attached to the battery charger as shown in Cannot turn on the headset. the figure below, insert the battery while ‐The battery is exhausted. Replace the matching the terminals battery with a charged one. ‐The battery is not inserted correctly. Position the battery properly. Cannot communicate with another headset or the speaker post. ‐The Center Module may be turned off. Make sure the Center Module has power. If no remedy exists, consult your dealer for repairs. ‐The headset ID is not registered in the Included Accessories Center Module of the target. Register ID in the Center Module of the target. PGGX1006ZAC1 ‐ Color tips – Black ‐The [S] +[P] or [S] + [T] buttons may have PGGX1006ZBC1 ‐ Color Tip – Red PANASONICA been pressed at the same time, causing the PGGX1006ZCC1 ‐ Color Tip – Blue extended functions to start. Turn the headset... - Page 2 ID registration Talk Button Functions: Before using this product, the unit ID must be Modes: registered in the Center Module. After the ID Push to Talk: is registered in the Center Module, wireless communication between this product and the Adjustable Headband Click and hold to talk. Center Module is enabled Release button to listen. Talk Lock: 1) Set the Center Module to “ID Registration” mode. Click button once to talk. Refer to the operating instructions of the Center Head Pad Module. Click button again to listen. 2) Rotate the microphone boom to turn off the Page Button Functions: ...


