Advertisement
Available languages
Available languages
Quick Links
Built-in Trim Kit
Installation Instructions
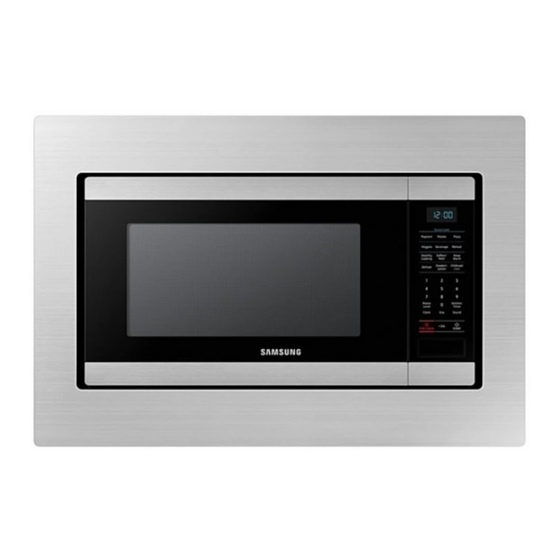
MA-TK8020**
MA-TK8020_AA_II_DE68-04476A-01_EN.indd 1
2017-06-01
6:16:02
Advertisement

Related Manuals for Samsung MA-TK8020 Series

Summary of Contents for Samsung MA-TK8020 Series
- Page 1 Built-in Trim Kit Installation Instructions MA-TK8020** MA-TK8020_AA_II_DE68-04476A-01_EN.indd 1 2017-06-01 6:16:02...
-
Page 2: Before You Begin
Contents Contents Before you begin Read these instructions completely and carefully. Before you begin IMPORTANT Parts included in the kits • Save these instructions for local inspector’s use. • Observe all governing codes and coordinates. Tools needed • Be sure to disconnect the plug of the microwave oven from the electrical outlet before installing the Builtin Kit. - Page 3 Parts included in the kits Tools needed Screwdriver Pencil Drill with 7/64 or #35 Drill Trim Frame (1 EA) Duct Base (1 EA) Duct Side (1 EA) Scissors Tape measure T15H Torx driver Duct Rear (1 EA) Install Bracket (2 EA) Install hook Screw A Screw B...
- Page 4 Installation Installation STEP 2 STEP 1 CUTOUT DIMENSIONS Height 16 3/4" ± 1/16" Width 25 1/2" ± 1/16" CENTER Width Depth 21 1/2" ± 1/16" LINE Height TRIM DIMENSIONS Depth Height 20 1/16" ± 1/64" 3" min Electric Heat Width 29 3/4"...
- Page 5 STEP 4 4. Tight 2 screws together on the Install hook by using provided 1. Place oven on the Duct Base. SCREW A. (2 EA) NOTE You may not be assembled when using the thicker Drill bit. Duct Base 2. Tight 2 screws together on the STEP 3 back side with Duct base by using provided SCREW C.
- Page 6 Installation STEP 5 4. Tight 4 screws to Duct base and Duct side on the left side by using 1. Slide the oven with Duct Base into provided SCREW C. (4 EA) Check the assembly cabinet until Duct Base touch the between Install hook Duct Side front of cabinet.
- Page 7 5. Tight Install Bracket 4 holes by 2. Open the oven door. Tight 4 screws using provided SCREW A. (4 EA) Trim frame by using provided SCREW B. (4 EA) STEP 6 1. Press the Trim Frame into the opening until all sides snap into place.
- Page 8 DE68-04476A-01 MA-TK8020_AA_II_DE68-04476A-01_EN.indd 8 2017-06-01 6:16:05...
- Page 9 Kit de marco embellecedor para empotrar Instrucciones de instalación MA-TK8020** MA-TK8020_AA_II_DE68-04476A-01_MES.indd 1 2017-06-01 6:15:46...
- Page 10 Contenido Contenido ANTES DE COMENZAR Lea estas instrucciones con detenimiento en su totalidad. ANTES DE COMENZAR IMPORTANTE Piezas incluidas en los kits • Conserve estas instrucciones para que puedan ser consultadas por el inspector de su localidad. Herramientas necesarias • Cumpla todos los códigos y coordenadas exigidos por las autoridades pertinentes.
- Page 11 Piezas incluidas en los kits Herramientas necesarias Destornillador Lápiz Perfore con mecha de 7/64 o #35. Marco embellecedor Conducto base (1 ud.) Conducto lateral (1 ud.) (1 ud.) Tijeras Cinta de Medir Destornillador Torx T15H Conducto posterior (1 ud.) Ménsula de instalación Gancho de instalación (2 uds.) Tornillo A...
- Page 12 Instalación Instalación PASO 2 STEP 1 DIMENSIONES DE LA ABERTURA RECORTADA Altura 16 3/4" ± 1/16" Ancho 25 1/2" ± 1/16" Ancho LÍNEA CENTRAL Altura Profundidad 21 1/2" ± 1/16" Profundidad DIMENSIONES DEL BORDE 3” mín. Altura 20 1/16" ± 1/64" Modelo con fuente de calor eléctrica Ancho...
- Page 13 PASO 4 4. Ajuste 2 tornillos en el gancho de instalación; use los TORNILLOS A 1. Coloque el horno en el conducto (2 uds.) provistos. base. NOTA Si la mecha es más gruesa, es posible que no pueda instalarlo. Conducto base 2.
- Page 14 Instalación PASO 5 4. Ajuste 4 tornillos en el conducto base y el conducto lateral por el 1. Deslice el horno con el conducto lado izquierdo; use los TORNILLOS C Verifique el conjunto entre base hasta el gabinete hasta que el (4 uds.) provistos.
- Page 15 5. Ajuste los 4 agujeros de la ménsula 2. Abra la puerta del horno. Ajuste los de instalación; use los TORNILLOS A 4 tornillos del marco embellecedor; (4 uds.) provistos. use los TORNILLOS B (4 uds.) provistos. STEP 6 1. Presione el marco embellecedor en la abertura hasta que los lados encajen en su lugar.
- Page 16 DE68-04476A-01 MA-TK8020_AA_II_DE68-04476A-01_MES.indd 8 2017-06-01 6:15:48...