Table of Contents
Advertisement
KENMORE ELITE LIMITED WARRANTY
FOR FIVE YEARS from the date of sale this appliance is warranted against defects in
material or workmanship.
WITH PROOF OF SALE, return a defective appliance to the retailer from which it was
purchased for free replacement.
This warranty is void if this appliance is ever used for other than private household purposes.
This warranty gives you specific legal rights, and you may also have other rights which vary
from state to state.
Sears Brands Management Corporation, Hoffman Estates, IL 60179
Use & Care Guide
Manual de Uso y Cuidado
English / Español
Kenmore Elite
Digital
Countertop Oven
Model/Modelo: 100.76771410
Sears Brands Management Corporation
Hoffman Estates, IL 60179 U.S.A.
www.kenmore.com
www.sears.com
P/N 0000000000
®
Advertisement
Table of Contents

Related Manuals for Kenmore 100.76771410


Summary of Contents for Kenmore 100.76771410
- Page 1 KENMORE ELITE LIMITED WARRANTY Use & Care Guide FOR FIVE YEARS from the date of sale this appliance is warranted against defects in Manual de Uso y Cuidado material or workmanship. English / Español WITH PROOF OF SALE, return a defective appliance to the retailer from which it was purchased for free replacement.
-
Page 2: Table Of Contents
TABLE OF CONTENTS IMPORTANT SAFETY INSTRUCTIONS Before Using Your Digital Countertop Oven................2 7. Do not let the power cord hang over the edge of a table or counter, or touch Important Safety Instructions....................2 - 6 hot surfaces. Parts and Features........................7- 8 8. -
Page 3: Important Safety Instructions
IMPORTANT SAFETY INSTRUCTIONS IMPORTANT SAFETY INSTRUCTIONS 21. The use of any accessory attachments not recommended by Kenmore may 40. Do not, under any circumstances, cut or remove the third (ground) prong from cause injuries. the power cord or use an adapter. -
Page 4: Parts And Features
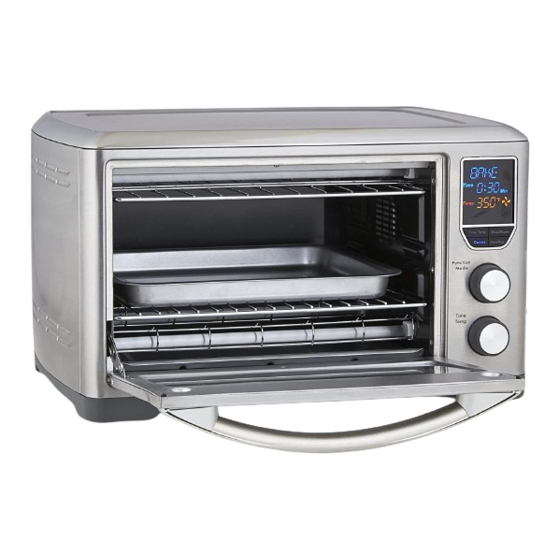
IMPORTANT SAFETY INSTRUCTIONS PARTS AND FEATURES It is important to know your Digital Countertop Oven parts and features to ensure WARNING: HOT SURFACES its proper and safe use. Review these before using your Digital Countertop Oven. Do not touch body of Digital Countertop Oven when in use. This Digital Countertop DIGITAL COUNTERTOP OVEN Oven is hot when in use, to avoid burns, do not let bare skin touch hot surfaces. -
Page 5: Parts And Features
PARTS AND FEATURES OPERATING INSTRUCTIONS DIGITAL CONTROL PANEL PREPARING THE OVEN FOR USE Fig. 2 1. Remove and safely discard any packing material, promotional labels and tape from the oven. 2. Remove the crumb tray, wire rack, broil rack, baking pan and pizza pan from the polyfoam packaging. -
Page 6: Operating Instructions
OPERATING INSTRUCTIONS OPERATING INSTRUCTIONS HEATING ELEMENT ACTION This cooking technology allows foods to cook more evenly and quickly, significantly This oven features a unique cooking technology that varies the cooking element reducing cooking times. The oven’s preset cooking temperatures and times, as well combinations for optimum cooking results. - Page 7 OPERATING INSTRUCTIONS OPERATING INSTRUCTIONS RACK HEIGHT POSITIONS LED SCREEN VISIBILITY Fig. 7 When the oven is plugged into a wall outlet, the oven alert will sound one time. Cooking results are significantly affected The LED screen will illuminate for two minutes and then go dark if no further action by the position of the wire rack as this Time is taken to input a cooking cycle.
- Page 8 OPERATING INSTRUCTIONS OPERATING INSTRUCTIONS BAKE FUNCTION BAKE FUNCTION cont. Fig. 10 digits begin counting down in one minute increments. Immediately open the door ELEMENTS to place food in the oven. Place food in the supplied enamel baking pan (or Top and bottom heating elements cycle on other oven-safe dish), and position pan on the center of the oven rack so that and off...
- Page 9 1. Insert the wire rack into the bottom rack Fig. 14 height position. Position the rack with the spokes facing upwards. Count 2. Place food on the Kenmore enamel baking down pan or in an oven-safe dish, then place on begins Time...
- Page 10 NOTE: When broiling, the broiling rack must be inserted into temperature is reached the Kenmore enamel baking pan. When assembled together, 6. Press the Start/Stop control button to begin broiling cycle. The Start/Stop control the broiling rack is designed to drain grease and fats away Temp button words will light up and the oven alert will sound.
- Page 11 OPERATING INSTRUCTIONS OPERATING INSTRUCTIONS TOAST FUNCTION TOAST FUNCTION cont. As a general guide: Desired Toast Color Setting ELEMENTS 6. Press the Start/Stop button to start Top and bottom heating elements cycle on and off to regulate the correct toasting. The oven alert will sound, Light color toast 1 or 2 temperature.
- Page 12 OPERATING INSTRUCTIONS OPERATING INSTRUCTIONS PIZZA FUNCTION PIZZA FUNCTION cont. Fig. 21 ELEMENTS 6. While the oven is preheating, the Temp digits will flash the escalating temperature of the oven interior Top and bottom heating elements cycle on and off to regulate the correct on the LED display.
- Page 13 OPERATING INSTRUCTIONS OPERATING INSTRUCTIONS BAGEL FUNCTION BAGEL FUNCTION cont. As a general guide: ELEMENTS b) Press the Slice/Shade control Desired Bagel Color Setting Top and bottom heating elements cycle on and off to regulate the correct button again. Shade will flash in Light color toast 1 or 2 temperature.
-
Page 14: Care And Maintenance
CARE AND MAINTENANCE CARE AND MAINTENANCE Ensure the oven is turned OFF by pressing the START/STOP button on the control CLEANING THE CRUMB TRAY panel. The oven is OFF when the Start/Stop control button words cease to be 1. After each use, slide out the crumb tray and discard crumbs. Wipe the tray with illuminated. -
Page 15: Troubleshooting
TROUBLESHOOTING NOTES POSSIBLE PROBLEM EASY SOLUTION Oven will not switch“ON” • Check that the power plug is securely inserted into the outlet • Insert the power plug into an independent outlet • Insert the power plug into a different outlet •...