Table of Contents
Advertisement
Quick Links
Read
This
First
Operating Instructions
Personal Entertainment Organizer
PEG-NX70V
PEG-NX60
© 2002 Sony Corporation
4-667-217-11 (1)
Checking the package contents
1
™
Sony CLIÉ
Handheld components
Setting up your Sony
2
™
CLIÉ
Handheld
Performing the initial
3
settings
Basic operations of your
4
™
Sony CLIÉ
Handheld
Enjoying your CLIÉ
Handheld
Using applications
™
Advertisement
Chapters
Table of Contents

Related Manuals for Sony PEG-NX60 Intellisync Lite


Summary of Contents for Sony PEG-NX60 Intellisync Lite
-
Page 1: Operating Instructions
Read This First Operating Instructions Personal Entertainment Organizer PEG-NX70V PEG-NX60 © 2002 Sony Corporation 4-667-217-11 (1) Checking the package contents ™ Sony CLIÉ Handheld components Setting up your Sony ™ CLIÉ Handheld Performing the initial settings Basic operations of your ™... -
Page 2: About This Manual
This manual provides an overview of your CLIÉ ™ about setting up your CLIÉ Checking the package contents ™ Sony CLIÉ Handheld components Setting up your Sony ™ CLIÉ Handheld Performing the initial settings Basic operations of your ™ Sony CLIÉ... - Page 3 Refer to the following with this manual together. Handbook (A PDF file in the CD-ROM) • When using CLIÉ handheld for the first time • CLIÉ handheld advanced operations CLIÉ Application Manual (HTML format: Start up on a computer) The manual explains about how to use the supplied applications in detail.
- Page 4 TV technician for help. If you have a question about this product, call the Sony Customer Information Center at keep on next line 1-877-760-7669; or write to the Sony Customer Information Center at 12451 Gateway Boulevard, Fort Myers, FL 33913. The number below is for FCC-related matters only.
- Page 5 • In no event will SONY be liable for any financial damage or loss of profits, including claims made by third parties, arising out of the use of the software supplied with this product.
- Page 6 Recycling Lithium-Ion batteries Lithium-Ion batteries are recyclable. You can help preserve our environment by returning your used rechargeable batteries to the collection and recycling location nearest you. For more information regarding recycling of rechargeable batteries, call toll free 1-800-822-8837, or visit the website (http://www.rbrc.org/). When you dispose a CLIÉ...
-
Page 7: Table Of Contents
... . 11 Locating the parts of your Sony CLIÉ Handheld ....11 Changing the operating style. - Page 8 Prior to taking pictures/movies and recording voices, check that those files are normally saved in your CLIÉ handheld or a “Memory Stick” media by testing. No guarantee for lost data or damaged data Sony does not provide any guarantee for lost data or damaged data caused by improper operations. Copyrights Television programs, films, video tapes, and other materials may be copyrighted.
-
Page 9: Checking The Package Contents
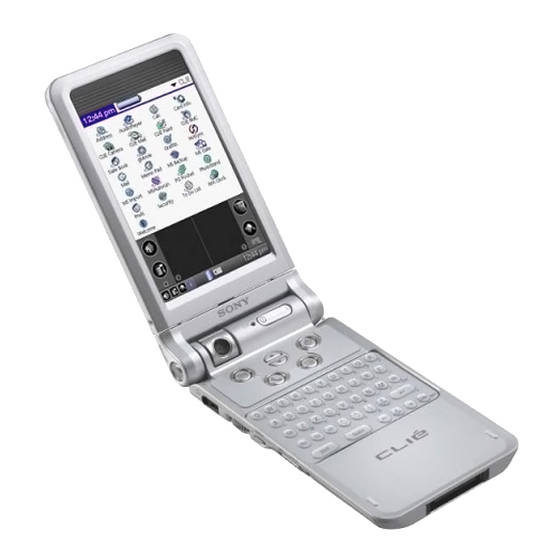
Checking the package contents Please check the accessories in the package at the beginning. CLIÉ handheld (1) The illustration is for PEG-NX70V. AC power adapter (1) Stylus (1) The stylus is stored in your CLIÉ handheld at the factory. Cradle (1) Headphones (1) Audio remote control (1) Continued on next page... - Page 10 Software licenses agreement (1) Other printed materials Make sure that the package contains all of the listed accessories. If any item is missing, contact the Sony Customer Information Service Center or a Sony dealer. Attaching the strap Plug adapter attachment (1)
-
Page 11: Sony Clié™ Handheld Components
™ Sony CLIÉ Handheld components Each part of the CLIÉ handheld and of the supplied accessories is explained. Locating the parts of your Sony CLIÉ Handheld Front panel A Camera (PEG-NX70V only) (Page 33) B CAPTURE/REC Button (for PEG-NX70V) (Page 32, 55, 58, 60) -
Page 12: Back Panel
Back panel A Display Panel (Page 13) B Screen (Page 40) C Graffiti Writing Area (Page 40) D Application Buttons (Page 45) E Scroll Button (Page 34) F Hardware Keyboard (Page 37) A IR port (Page 36) B “Memory Stick” LED (Page 35) C “Memory Stick”... -
Page 13: Changing The Operating Style
Changing the operating style Your CLIÉ handheld can be used with the display panel set in three different styles. Carrying style Set your CLIÉ handheld to the “carrying style,” when carrying it around in your baggage or pocket to guard the screen from damage. Opened style Set your CLIÉ... - Page 14 Turned style Set your CLIÉ handheld to “turned style” to make it compact when you operate it with the Stylus or use it in the Camera mode (PEG-NX70V only). Open the display and rotate it clockwise until it clicks into place Note Do not turn the display panel in any direction other than that specified and do not put too much force.
-
Page 15: Locating Cradle Components
Locating cradle components A Stylus holder Stores the stylus. B Interface Connector (Page 16) C HotSync Button (Page 28, 49) Locating the controls on the supplied audio remote control You can use the audio remote control when you play back music or audio movies with an application such as Audio Player or Movie Player. -
Page 16: Setting Up Your Sony Clié™ Handheld
Charging your CLIÉ handheld. Installing software on your computer. Connecting your computer to the CLIÉ handheld. Step 1: Charging your Sony CLIÉ Handheld Note Before you use your CLIÉ handheld for the first time, make sure to charge it. Connect the AC adapter to the cradle. - Page 17 Insert your CLIÉ handheld at an angle in the cradle and lay it back to fit into place. The POWER LED indicator of your CLIÉ handheld turns on. It takes about four hours for your CLIÉ handheld to be fully charged for the first time. The POWER LED indicator of your CLIÉ...
- Page 18 Connect the AC code to the AC adapter. How to connect the supplied plug adapter attachment Connect the supplied plug adapter attachment as illustrated. Plug adapter attachment AC adapter Plug adapter How to remove the plug adapter Remove by pressing the plug adapter on both sides as illustrated.
-
Page 19: Installing The Palm™ Desktop For Clié Software On Your Computer
• If you use Windows 2000 Professional or Windows XP, log on with a User Name in the Administrators group before installing the software. • If you are already using a Sony CLIÉ Handheld, follow the procedures described in this section to upgrade to the new version of Palm™ Desktop for CLIÉ software. Do not uninstalling the old version manually. - Page 20 You need Internet access for the online customer registration. You can take advantage of Sony’s commitment to quality customer support and 9 months of the extended limited warranty for a total of 12 months from the original date of purchase when you register your CLIÉ handheld.
-
Page 21: Connecting The Cradle To Your Computer
Step 3: Connecting the cradle to your computer When you complete the Palm™ Desktop for CLIÉ software installation, connect the cradle to a USB connector on your computer to synchronize the information on your CLIÉ handheld with the Palm™ Desktop for CLIÉ software on your computer. -
Page 22: Performing The Initial Settings
The first time you turn on your CLIÉ handheld, the initial settings are required before operating your CLIÉ handheld. Follow the on-screen instructions to configure the initial settings and to get accustomed to operations on your CLIÉ handheld. Step 1: Turning on your Sony CLIÉ Handheld for the first time Press the POWER button. - Page 23 Take out the Stylus. You can use the stylus to enter data or to select applications. Notes • Always use the point of the stylus for tapping or making strokes on the CLIÉ handheld screen. Never use a real pen, pencil, or other sharp object to write on the screen.
- Page 24 “tapping” may not work as expected, or other problems may occur. For re-configuring the digitizer, refer to “Customizing your Sony CLIÉ Handheld: Adjusting the digitizer” in “Handbook.” After calibration is completed, a screen for setting the time and date appears.
- Page 25 Tap OK. The Set Time screen closes. Tap the Set Date box. The Set Date screen appears. Tap the arrow b or B next to the year to select the current year. Tap the current month and then tap the current date. The Set Date screen closes.
- Page 26 Tap the region to set the time zone and then tap OK. Tap the arrow V next to Daylight Saving and select ON or OFF. Tap Next. Tap Next. The Enter Data screen appears.
-
Page 27: Setting The User Name
Tap Done. The initial settings are complete, and the CLIE Launcher screen appears. Initial settings are complete. Step 2: Setting the user name Place your CLIÉ handheld on the cradle. Continued on next page • • • • • • • • • • • • • • • • • • • • • • • • • • •... - Page 28 When you transfer data between CLIÉ handhelds Refer to “Using data with another Sony CLIÉ handheld” in “Handbook.” Click OK on your computer window. A beep sounds and the HotSync Your user name selected in step 3 is transferred to the CLIÉ...
-
Page 29: Basic Operations Of Your Sony Clié™ Handheld
Basic operations of your Sony CLIÉ Handheld This chapter describes how to start applications, enter data, and perform other basic operations. Basic operations Using the stylus With your CLIÉ handheld, you can use the supplied stylus to enter characters or specify an application you want to run. -
Page 30: Using The Jog Dial™ Navigator
Dragging Using the Jog Dial™ navigator Your CLIÉ handheld is equipped with a Jog Dial™ navigator, which allows you to perform all major operations without the stylus. You can operate your CLIÉ handheld using the Jog Dial™ navigator with just one hand. Rotating the Jog Dial™... -
Page 31: Functions Of Parts
Functions of parts POWER Button Turning on your CLIÉ handheld POWER Button When you turn on your CLIÉ handheld for the first time, the Setup screen appears (page 22). Note When you cannot turn on your CLIÉ handheld, make sure that if the HOLD switch is not in the HOLD position. -
Page 32: Power Led
POWER LED Lights green Lights orange Blinks orange Blinks green (three times) CAPTURE/REC Button (for PEG-NX70V) VOICE REC Button (for PEG-NX60) For details, refer to “Enjoying your CLIÉ™ Handheld” on page 55. LED indicator shows the status of your CLIÉ handheld by its color. The status of your CLIÉ... -
Page 33: Hold Switch
Camera (for PEG-NX70V only) For details, refer to “Enjoying your CLIÉ Handheld” on page 55. REC LED For details, refer to the explanation of each application in “CLIÉ Application Manual” on your computer. HOLD Switch Note When you cannot turn on or operate your CLIÉ handheld, check if the HOLD switch is not in the HOLD position. -
Page 34: Back Button
BACK Button For details, refer to the explanation of each application in “CLIÉ Application Manual” on your computer. Scroll Button For details, refer to the explanation of each application in “CLIÉ Application Manual” on your computer. Cancels the selection of an item and cancels the operation. - Page 35 “Memory Stick” Slot For details, refer to “Using “Memory Stick” media” in “Handbook.” Inserting a “Memory Stick” media Notes • Insert “Memory Stick” media in the right direction. If “Memory Stick” media is forcibly inserted in the wrong direction, the “Memory Stick” slot may be damaged. •...
- Page 36 IR port For details, refer to “Beaming” in “Handbook.” You can also use your CLIÉ handheld as a remote control with the CLIE Remote Commander software. For details, refer to “CLIÉ Application Manual” on your computer. Note Be sure not to conceal the IR port with the display panel when your CLIÉ handheld is set to “opened style.”...
-
Page 37: Key Combinations
Hardware Keyboard Input commands list You can carry out commands using the hardware keys in combination. Key combinations Example: Ctrl+C t Hold down the Ctrl key and press the key of the character C. Combination Fn + character Shift + character Shift + t/T Shift + Ctrl + T Shift + Ctrl + t... - Page 38 Wireless Communication Slot For details, refer to “Connecting to the Internet” (page 67). Operation confirmed network card Wireless LAN card SONY PEGA-WL100 Notes • Only the compact flash type data network card can be inserted into the wireless communication slot. Network cards or memory cards other than the above-mentioned will not work.
- Page 39 Inserting the network card The protect card is inserted into the wireless communication slot at the factory. Note If the network card is forcibly inserted in the wrong direction or angle, the CLIÉ handheld may cause a malfunction. Removing the network card Make sure that your CLIÉ...
-
Page 40: Locating The Components Of The Front Panel
Locating the components of the front panel If a different screen is displayed, tap “3 Home icon.” A CLIE Launcher Groups List The list of CLIE Launcher groups is displayed. B Favorite Applications (shortcuts) You can create shortcuts to favorite applications. -
Page 41: Application Manager Icon
Brightness Adjustment Icon For details, refer to “Customizing your Sony CLIÉ Handheld: Adjusting the digitizer” in “Handbook.” Application Manager Icon For details, refer to “Sony CLIÉ™ Handheld basic operations: Using “CLIE Launcher”: Application manager icon” in “Handbook.” Functions may be added when you install some applications. -
Page 42: Status Bar
Icons for switching the Graffiti/Software Keyboard Status Bar Displays the following icons for all applications. Additional icons appear according to the applications in use. : Tap this icon to display the CLIE Launcher screen. : Tap this icon to display the menus of the current application. : Tap this icon to open the Find dialog box. - Page 43 : Displays the current time. To change the display format, tap the Time in the Formats Preference. For details, refer to “Customizing your Sony CLIÉ handheld: Setting the Date & Time preferences” in “Handbook.” :Tap this icon to show or hide the Graffiti writing area (for Graffiti compatible applications only).
-
Page 44: Using Applications
You can also tap the desired application icon in the CLIE Launcher screen to start the application. For details, refer to “Sony CLIÉ™ Handheld basic operations: Starting an application” or “Sony CLIÉ™ Handheld basic operations: Using “CLIE Launcher”” in “Handbook.”... - Page 45 • Even when your CLIÉ handheld is turned off, pressing an application button turns on your CLIÉ handheld to start an application. • You can assign your desired application to each application button. For details, refer to “Customizing your Sony CLIÉ handheld: Assigning applications to application buttons” in “Handbook.” Quitting an application and opening another application You can only operate one application at a time in your CLIÉ...
-
Page 46: Opening/Playing Back Files (Clie Viewer)
Opening/Playing back files (CLIE Viewer) You can use “CLIE Viewer” to view image files and movie files on your CLIÉ handheld and to open voice memo or handwriting memos. For details, refer to “CLIÉ Application Manual” on your computer. Opening/Playing back files Tap the Home screen. - Page 47 Selecting/Deleting files in CLIE Viewer You can select the file from the list screen in CLIE Viewer when attaching image files or movie files of your CLIÉ handheld to your e-mails, when using the image files in PhotoStand (page 73), CLIE Album (page 72) and Photo Editor (page 73), or when deleting files.
-
Page 48: Entering Data
You can enter data using an exclusive input system called Graffiti you get used to writing with Graffiti using the on-screen keyboard. For details on using Graffiti, refer to “Entering data in your Sony CLIÉ™ Handheld: Using Graffiti z HotSync with a computer You can enter data using your computer keyboard with a HotSync operation. -
Page 49: Exchanging And Updating Data Using A Hotsync ® Operation
Exchanging and updating data using a HotSync operation What is a HotSync ® A HotSync operation is a one-step operation that allows you to synchronize data between your CLIÉ handheld and your computer, back up the data of your CLIÉ handheld on your computer, or install add-on applications. For details, see “Exchanging and updating data using a HotSync “Handbook.”... - Page 50 Double-click the Palm™ Desktop for CLIÉ software icon on the Windows desktop. Or click Start, select Programs (All Programs in Windows XP), Sony Handheld, and click Palm Desktop for CLIÉ. The Palm™ Desktop for CLIÉ...
- Page 51 Click the Date Book icon. The Date Book window is displayed. The detail of the schedule for the selected date in Step 2 will be displayed.
-
Page 52: Resetting Your Sony Clié Handheld
Resetting your Sony CLIÉ Handheld Under normal circumstances, you do not have to reset your CLIÉ handheld. On rare occasions, however, your CLIÉ handheld may no longer respond to buttons or commands due to insufficient memory or other reasons. In this case, you need to perform a reset to get your CLIÉ handheld running again. -
Page 53: Performing A Hard Reset
Performing a hard reset If the soft reset does not solve the problem, you need to perform a hard reset to restart your CLIÉ handheld. Notes • With a hard reset, all records and add-on applications stored in your CLIÉ handheld are erased. - Page 54 A hard reset is performed on your CLIÉ handheld. After restarting, the system displays “palm powered,” “CLIÉ,” and “SONY,” followed by the digitizer calibration screen and then by the Preferences screen for setting the time and date. Refer to “Performing the initial settings” on page After a hard reset, only the current date and time are retained.
-
Page 55: Enjoying Your Clié™ Handheld
Enjoying your ™ CLIÉ Handheld Enjoying image files Taking images (for PEG-NX70V only) Press the CAPTURE/REC button to start “CLIE Camera.” You can also tap the CLIE Camera icon in “CLIE Launcher”(page 44) to start “CLIE Camera.” Point the built-in camera directly at the subject. Capture the subject in the viewfinder and press the CAPTURE/REC button. - Page 56 Viewing image files You can view image files in “CLIE Viewer.” For details, refer to “Opening/Playing back files (CLIE Viewer)” (page 46). You can also start “CLIE Viewer” from the Enjoying image files Preparing Taking images CLIE Camera...page 71 Importing image files from your computer Image Converter ...page 71 Viewing/Selecting Viewing/Selecting image files by searching...
-
Page 57: Enjoying Movies
Enjoying movies Note A “Memory Stick” media is required to take and view movies. Taking movies (for PEG-NX70V only) Insert the “Memory Stick” media that you will use to save movie files. Select Movie Rec and start it. Point the built-in camera directly at the subject. icon in “CLIE Launcher”... -
Page 58: Preparing
Capture the subject in the viewfinder and press the CAPTURE/REC button. Start recording the movie. Press the CAPTURE/REC button once again when you have finished recording the movie. Viewing movies You can view movies in “CLIE Viewer.” For details, refer to “Opening/Playing back files (CLIE Viewer)” (page 46). Enjoying movies Preparing Taking movies... -
Page 59: Viewing Image Files And Movie Files Taken With "Memory Stick" Compliant Devices On Your Clié Handheld
Movie files: Movie Player format (movie formats shot with your CLIÉ handheld or converted using the Image Converter software), MPEG Movie format (MPEG1 format movie files shot with a Sony Digital Still Camera or Handycam) For formats of pictures that can be taken in your “Memory Stick” compliant devices, refer to their respective operating instructions. -
Page 60: Using Voice Recorder
Using voice recorder Recording a voice memo Select Voice Rec and start it. Press the CAPTURE/REC button (for PEG-NX70V) or the VOICE REC button (for PEG-NX60). The recording starts. Speak into the built-in microphone. For PEG-NX60, press the VOICE REC button (page 32) to start “Voice Recorder”... -
Page 61: Listening To Music
Listening to music Note You need to perform the following steps to listen to music on your CLIÉ handheld. Transfer your personal music that you want to play back, from your computer to your CLIÉ handheld. For details, refer to “Music” in “CLIÉ Application Manual” on your computer. Connect the supplied remote control and headphones to the CLIÉ... -
Page 62: Managing Schedules (Date Book)
Managing schedules (Date Book) Entering a schedule Press the Tap New and set the start time and end time of the schedule. Enter the schedule. button to start the “Date Book.” 1 Tap to set the start time. 2 Tap to set the end time. 3 Tap to determine the settings. - Page 63 Deleting a schedule Tap the schedule you want to delete and tap the Menu icon from the Date Book list screen. Tap Delete Event... from the Record menu. The confirmation message is displayed. Tap OK.
-
Page 64: Managing Addresses And Telephone Numbers (Address)
Managing addresses and telephone numbers (Address) Entering a new address Press the Tap New and enter the details. You can scroll the screen by tapping the v/V arrow at the bottom right. Deleting an address entry Tap the address you want to delete and tap the Menu icon. -
Page 65: Exchanging The Date Book And Address Data Between Your Clié Handheld And Computer
Exchanging the Date Book and Address data between your CLIÉ handheld and computer ® HotSync operation (page 49) enables you to exchange the Date Book data or the Address data between your CLIÉ handheld and computer. Depending on the applications that you are using in your computer, there are two ways to exchange data. -
Page 66: Viewing Microsoft ® Word And
Viewing Microsoft documents on your CLIÉ handheld (Documents To ® Note Perform the following steps before using “Documents To Go” software. Install “Documents To Go” in your computer and CLIÉ handheld. Transfer documents from your computer to your CLIÉ handheld. Start “Documents To Go”... -
Page 67: Connecting To The Internet
Connecting to the Internet Note For an internet connection, you must have a network card that is compliant with your CLIÉ handheld and a service of Internet service provider. Contact your Internet service provider to confirm compatibility. Installing applications in your CLIÉ handheld Install the applications in your CLIÉ... -
Page 68: Using Applications
Using applications This chapter describes how to use add-on applications and “CLIÉ Application Manual.” For details about add-on applications, refer to the manuals that come with each add-on application. About add-on applications Applications are divided into three types as follows: •... - Page 69 Opening CLIÉ Application Manual Double click the CLIÉ info icon on the Windows desktop. “CLIÉ info” window is displayed. Select the manual by following the on-screen instructions. Tips • To close CLIÉ Application Manual, click the CLIÉ Application Manual window. •...
-
Page 70: Installing Add-On Applications On Your Clié Handheld
Installing add-on applications on your CLIÉ handheld You can install applications with the supplied Installation CD-ROM by following the steps below. Prior to installing applications, install the Palm™ Desktop for CLIÉ software on your computer with the supplied Installation CD-ROM and connect the cradle to your computer. -
Page 71: Introducing Add-On Applications
Introducing add-on applications Taking images (for PEG-NX70V only) Application to be used CLIE Camera Keyword JPEG (DCF) format Summary For taking images using the built-in camera of the CLIÉ handheld. Preparation for use Installed For details, refer to “CLIÉ Application Manual” on your computer. Importing image/movie files from your computer Application to be used... -
Page 72: Clie Viewer
Viewing/Playing back a file after searching from the list Application to be used CLIE Viewer Summary For managing and displaying image files, movie files, handwriting memos and Voice memo files. Preparation for use Installed For details, refer to “CLIÉ Application Manual” on your computer. Managing image files in albums Application to be used CLIE Album... -
Page 73: Displaying Image Files Automatically
Displaying image files automatically Application to be used PhotoStand Keyword JPEG (DCF) format Summary For displaying automatically image files one after the other. Preparation for use Installed For details, refer to “CLIÉ Application Manual” on your computer. Editing images Application to be used Photo Editor Keyword JPEG (DCF) format... -
Page 74: Preparation For Use
Importing image files from your CLIÉ handheld to your computer Application to be used PictureGear Studio Summary For importing image files from your CLIÉ handheld to your computer and managing the image files. • Creates albums or binders for image files •... - Page 75 CLIÉ handheld or converted using the Image Converter software), MPEG Movie format (MPEG1 format movie files shot with a Sony Digital Still Camera or Handycam), Play List, Repeat function, Index function Summary For playing back movies recorded with the built-in camera of the CLIÉ handheld (for PEG-NX70V only) or playing back movies in your CLIÉ...
- Page 76 Listening to music with your CLIÉ handheld Application to be used Audio Player Keyword MP3, ATRAC3 Summary For playing back music files saved in a “Memory Stick” media. Preparation for use Installed Needs to be connected to your computer Requires “Memory Stick” For details, refer to “CLIÉ...
-
Page 77: Attaching Image Files To The Address Address
Recording voice memo Application to be used Voice Recorder Summary For recording and playing back a voice memo using the built-in microphone of your CLIÉ handheld. Preparation for use Installed For details, refer to “CLIÉ Application Manual” on your computer. Managing addresses and telephone numbers Application to be used... - Page 78 Managing schedules and events Application to be used Date Book Summary For managing schedules and events such as meetings or business trips. Preparation for use Installed For details, refer to “CLIÉ Application Manual” on your computer. Managing tasks and things to do Application to be used To Do List CLIÉ...
- Page 79 Taking memos Application to be used Memo Pad CLIÉ Handheld Summary For taking memos or displaying documents created in your computer. Preparation for use Installed For details, refer to “CLIÉ Application Manual” on your computer. Taking handwriting memos using the stylus Application to be used CLIE Memo Summary...
-
Page 80: Clie Mail
Using the calculator Application to be used Calculator Summary For calculating with your CLIÉ handheld. You can save and recall calculations with the calculator’s memory. Preparation for use Installed For details, refer to “CLIÉ Application Manual” on your computer. Sending and receiving e-mail messages Application to be used CLIE Mail Summary... -
Page 81: Browsing Websites
Browsing websites Application to be used NetFront CLIÉ Handheld Keyword Websites, Internet, WWW browser Summary For browsing websites with your CLIÉ handheld. Preparation for use Must be installed Installation CD-ROM Menu “CLIÉ Desktop” – “CLIÉ Add-ons” For details, refer to “CLIÉ Application Manual” on your computer. Using as a remote control Application to be used CLIE Remote Commander... - Page 82 Displaying the worldwide local time Application to be used World Alarm Clock CLIÉ Handheld Summary For displaying the worldwide local time. You can also use the application as an alarm clock. Preparation for use Must be installed Installation CD-ROM Menu “CLIÉ...
-
Page 83: Memory Stick Import
Making a back up in a “Memory Stick” media Application to be used Memory Stick Backup CLIÉ Handheld Summary For making a backup of the application or data in a “Memory Stick” media. Preparation for use Installed Requires “Memory Stick” For details, refer to “CLIÉ... - Page 84 Customizing the sound settings Application to be used Sound Utility Summary For managing the audio data converted with Sound Converter 2. The audio data files are transferred from your computer to your CLIÉ handheld via a HotSync Preparation for use Installed Needs to be connected to your computer For details, refer to “CLIÉ...
- Page 85 Using Microsoft Application to be used Documents To Go CLIÉ handheld Keyword doc format, xls format, txt format Summary For opening or editing Microsoft Word/Excel data in your CLIÉ handheld. Preparation for use Must be installed Installation CD-ROM Menu “CLIÉ Utilities” For details, refer to “CLIÉ...
-
Page 86: Troubleshooting
Memory Stick Backup application. This is the most convenient way to make a backup. “Memory Stick” media (optional) is required. For details, refer to “Backing up data of your Sony CLIÉ Handheld: Backing up all data to a “Memory Stick” media (using the Memory Stick Backup application)” in “Handbook.”... - Page 87 For details on applications that cannot be backed up, refer to manuals for each application. When you want to make a complete backup, use the Memory Stick Backup application. ® For details on HotSync, refer to “Exchanging and updating data using a HotSync operation”...
-
Page 88: Solving Problems
Solving problems Should you encounter problems, please follow the procedure below. Sony recommends that you take a note for displayed messages or alerts to find the key to solve the problem. Step 1 Refer to “Troubleshooting Q&A” or manuals for each application. -
Page 89: Getting Help
For CLIÉ handheld and applications other than the above mentioned: Sony offers several support options for your CLIÉ handheld. When you have questions or trouble, please refer to one of the following for a solution: Read This First (this guide), Handbook (supplied), and Troubleshooting Q&A (supplied) describes how to use your CLIÉ... - Page 90 Sony fax-back service, call 1-877-760-SONY (7669). The Sony Customer Information Service Center offers information about your CLIÉ handheld and other Sony products that work with your computer. To contact the Sony Customer Information Service Center, call 1-877-760-SONY (7669).
-
Page 91: Additional Information
Additional information Notes on use About handling • Be sure not to scratch or damage your CLIÉ handheld’s screen or the ® Graffiti writing area. Always use the supplied stylus or a plastic-tipped pointer to tap on the screen. Do not use a real pen, pencil, or other sharp object on the screen. •... -
Page 92: Battery Considerations
• Change the automatic power-off time setting so that your CLIÉ handheld will automatically turn off after a short period of inactivity. For details, refer to “Customizing your Sony CLIÉ Handheld (Preferences): Setting the automatic power-off time” in “Handbook.” • If you play audio files with... - Page 93 Do not let the remaining battery indicator read 0 If your battery drains and you leave your CLIÉ handheld in an uncharged state for an extended period of time, all of the stored data will be erased. Sony recommends that you charge your CLIÉ handheld frequently.
-
Page 94: Specifications
Specifications ® Palm OS 5 (ver.5.0) PXA250 200 MHz Memory 16 MB (RAM) User memory range: approx. 11 MB External input/output Interface connector IrDA (1.2) IR port for AV control “Memory Stick” slot Wireless communication slot ® (CompactFlash type II) Display TFT color display with backlight, 320 ×... -
Page 95: Power Requirements
Others (for PEG-NX70V only) White Balance (Auto, Indoor A (incandescent light), Indoor B (fluorescent light), Outdoor) Picture effect (Off, B&W (monotone), Sepia (sepia tone), Neg. Art (negative art), Solarization) Brightness Control (–2 to +2) Self-timer function (for image file only) Picture size (when recording) (for PEG-NX70V only) Image file: 640 ×... - Page 96 Recording voice memos (in continuous): Approx. 6 hours (when recording movie files with the HOLD switch on) Approx. 2.5 hours (when recording movie files with the HOLD switch off and maximum backlight) Performing data communication (in continuous): Approx. 2.5 hours (when performing data communication with PEGA-WL100) * The battery life span varies depending...
- Page 97 • CPU: Pentium II 400MHz or more (Pentium III 500MHz or more is recommended) • RAM: 96MB or more (128MB or more is recommended, 256MB or more is recommended for Windows • Hard drive space: 200MB (350MB or more is recommended)* * Requires 185MB or more to install CD database using the SonicStage 1.5 software and space equivalent to...
-
Page 98: Index
INDEX AC adapter ....16 Add-On applications ... . . 70 Address. - Page 99 Hardware keyboard ... . . 37 HOLD Switch....33 ® HotSync ....27 Icons for switching the Graffiti/Software Keyboad .
- Page 100 Index Scroll Button ....34 Set date ..... . 25 Set time .
- Page 104 For the latest information on support and accessories, check our official Sony CLIÉ Web site http : //www.sony.com/clie/...