
Related Manuals for Sony A845


Summary of Contents for Sony A845
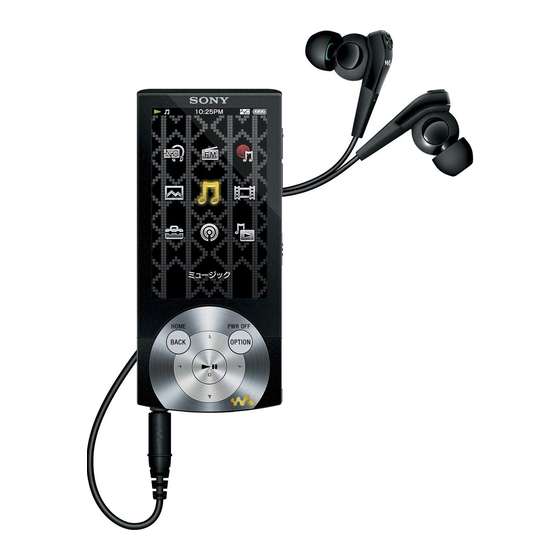
- Page 1 Click! You can directly jump Transferring Music Transferring Videos/Photos/Podcasts Troubleshooting Operation Guide NWZ-A844 / A845 / A846 / A847 ©2009 Sony Corporation 4-164-613-12(1)
-
Page 2: Browsing The Operation Guide
Note Depending on the country/region in which you have purchased the player, some models may not be available. Browsing the Operation Guide To use the buttons in the Operation Guide Click the buttons located in the upper right of the pages of this manual to jump to “Table of Contents, ”... -
Page 3: Table Of Contents
Table of Contents Basic Operations and Screens Parts and Controls ...6 Turning the Player On and Off ...9 About the Home Menu ...10 How to Use the Home Menu ...13 How to Use the Option Menu ...16 About the Software ...18 Bundled Software ...18 Compatible Software ...18 Prepairing the Player... - Page 4 Watching Videos Playing a Video [Videos] Video playback screen ...60 Video list screen ...61 Searching for Videos ...62 Browsing scenes (Scene Scroll) Enjoying Videos on a Television ...64 Outputting videos to a television ...64 [TV Output(Video)] Selecting the television aspect ratio ...65 [TV Output Size] Switching the television signal format...
- Page 5 Formatting memory [Format] Using USB connection mode [USB Connection Mode] Selecting the display language ... 110 [Language Settings] Useful Facts About Battery Life ...111 What are Format and Bit Rate? ...112 What is audio format? ... 112 What is video format? ... 113 What is photo format? ...
-
Page 6: Basic Operations And Screens
Basic Operations and Screens Basic Operations and Screens Parts and Controls BACK/HOME button Press to go up one list screen level, or to return to the previous menu. Press and hold the BACK/HOME button to display the Home menu ( ... - Page 7 Basic Operations and Screens HOLD switch You can protect the player against accidental operation during transportation by setting the HOLD switch. By sliding the HOLD switch in the direction of the arrow , all operation buttons are disabled. If you slide the HOLD switch in the opposite position, the HOLD function is released.
- Page 8 Basic Operations and Screens Installing the earbuds If the earbuds do not fit your ears correctly, the noise canceling effect will not be optimal. To optimize noise canceling and to enjoy better sound quality, change the earbuds to another size, or adjust the earbud position to fit your ears comfortably and snugly.
-
Page 9: Turning The Player On And Off
Basic Operations and Screens Turning the Player On and Off To turn on the player Press any button to turn the player on. Hint If appears on the top of the screen, slide the HOLD switch in the opposite direction of the arrow ... -
Page 10: About The Home Menu
Basic Operations and Screens About the Home Menu The following table shows the items of the Home menu. For details on the item list of each menu, see p. 11. For details about each menu item, refer to the specified reference page. [Go to video playback screen] [Go to video playback screen]... - Page 11 Basic Operations and Screens [Go to video playback screen] ... 60 [FM Radio] ... 87 [Noise Canceling] [Noise Canceling: On/Off] ...95 [NC Modes] ...96, 98 [Photos] ... 81 [Music] ... 39 [Videos] ... 59 [Settings] [Music Settings] [Play Mode] ... 50 [Playback Range] ...
- Page 12 Basic Operations and Screens About the information area The icons shown in the table below appear in the information area. The icons vary according to the playback status, setting or screen. For details about the icons, see each reference page. Icons , , , , , , etc...
-
Page 13: How To Use The Home Menu
Basic Operations and Screens How to Use the Home Menu The Home menu is the starting point of each application, such as searching for songs, changing settings, etc. You can display the Home menu by pressing and holding the BACK/HOME button of the player. - Page 14 Basic Operations and Screens In this manual, operating instructions from the Home menu are described as below. Example: From the Home menu, select album The actual operations for the example above are shown below. Press and hold the BACK/HOME button. The Home menu appears.
- Page 15 Basic Operations and Screens Press the /// button to select an album, and then press the button to confirm. The song list for the selected album appears. Press the /// button to select a song, and then press the button to confirm.
-
Page 16: How To Use The Option Menu
Basic Operations and Screens How to Use the Option Menu The option menu items vary depending on the function, allowing you to change the settings of each application. You can display the option menu by pressing the OPTION/PWR OFF button. Press the OPTION/PWR OFF button once more to dismiss the option menu. - Page 17 Basic Operations and Screens Press the /// button to select [Play Mode], and then press the button to confirm. Press the /// button to select [Shuffle], and then press the button to confirm. The play mode changes to [Shuffle]. The items in the option menu differ, depending on the screen on which you press the OPTION/PWR OFF button.
-
Page 18: About The Software
Basic Operations and Screens About the Software Bundled Software Content Transfer Content Transfer can transfer music, videos or photos from a computer to the player by a simple drag-and-drop operation. You can use Windows Explorer or iTunes, etc., to drag-and-drop data to Content Transfer. Content Transfer can also convert a video file of a format not supported by the player into a playable format. -
Page 19: Prepairing The Player
Prepairing the Player Prepairing the Player Charging the Battery The player’s battery is recharged while the player is connected to a running computer. When you connect the player to your computer, use the supplied USB cable. When the remaining battery indication in the upper right corner of the display shows: , charging is completed (charging time is approx. - Page 20 Prepairing the Player Note If you charge the player when it has not been used for a long period, your computer may not recognize the player or nothing may appear on the display. Charge the player for about 5 minutes, and it starts operating properly. ...
-
Page 21: Selecting The Display Language
Prepairing the Player Selecting the Display Language You can select from a variety of languages for menus and messages. From the Home menu, select desired language setting. Language [Deutsch] [English] [Español] [Français] [Italiano] [Português] [Русский] Japanese display may not be available, depending on the release region of the player. BACK/HOME button 5-way button [Settings]... -
Page 22: Setting The Date And Time
Prepairing the Player Setting the Date and Time Some applications of the player do not work correctly until the date and time are set. Set the current date and time before using the player. From the Home menu, select [Clock Settings] ... -
Page 23: Transferring Music
Transferring Music Selecting the Way to Transfer Music You can import music from audio CDs or from the Internet, etc. To import music into your computer, use appropriate software. You can transfer music to the player in the following three ways. ... - Page 24 For details about supported file formats, see “Supported file format” ( p. 160). The player does not use SonicStage software (SonicStage software, developed by Sony, manages music on a computer or transfers music to other types of players). For this player, you can transfer music in the above three ways, not using SonicStage.
-
Page 25: Transferring Music Using Windows Media Player 11
Transferring Music Transferring Music Using Windows Media Player 11 You can import songs from your CDs, etc., to your computer, and transfer them to the player using Windows Media Player 11. Hint For details about usage, or support on Windows Media Player, refer to the Windows Media Player information from the following web site: http://support.microsoft.com/ Importing music from CDs... - Page 26 Transferring Music Click [Start Rip]. Windows Media Player 11 begins to import the CD. The imported songs are indicated as [Ripped to library]. Wait until all songs have been imported. Hint Imported songs are stored in the [My Music] folder (Windows XP) or [Music] folder (Windows Vista) of the computer.
-
Page 27: Transferring Music
Transferring Music Transferring Music You can use Windows Media Player 11 to transfer music from your computer to the player. Note If Content Transfer starts automatically after connecting the player to your computer using the supplied USB cable, close or ignore Content Transfer as Content Transfer need not be used. - Page 28 Transferring Music Click the [Sync] tab on the Windows Media Player 11 window. Drag-and-drop the desired songs to the Sync List on the right side of the window. The songs are added to the Sync List. Click [Start Sync] to start synchronization. When synchronization is complete, a message confirming you can disconnect the player appears on the Sync List.
-
Page 29: Transferring Music Using Content Transfer
Transferring Music Transferring Music Using Content Transfer If you have already managed music with iTunes, etc., you can transfer them to the player using Content Transfer. You can use iTunes, etc., to drag-and-drop music to Content Transfer. Note Content Transfer cannot be used for Windows Media Player contents. ... - Page 30 Transferring Music Select the desired songs from iTunes, etc., and drag-and-drop them to Content Transfer. Content Transfer recognizes the type of data by filename extension, and sends it to the appropriate folder of the player. iTunes, etc. Content Transfer...
-
Page 31: Transferring Music Using Windows Explorer
Transferring Music Transferring Music Using Windows Explorer You can directly transfer data by drag-and-drop using Windows Explorer on your computer. Connect the player to your computer using the supplied USB cable. Insert the connector of the USB cable into the player with the facing up. - Page 32 Transferring Music Drag-and-drop files or folders into the [MUSIC] folder, or one of its subfolders. Music files or folders in your computer Accessibility to files and folders beyond the 8th level is not guaranteed. Note Do not disconnect the USB cable while [Do not disconnect.] appears on the player. Otherwise, data being transferred or stored on the player may be damaged.
-
Page 33: Transferring Videos/Photos/Podcasts
Transferring Videos/Photos/Podcasts Transferring Videos/Photos/Podcasts Selecting the Way to Transfer Videos/Photos/ Podcasts Before transferring videos/photos/podcasts to the player, you need to import them into your computer. You can import videos from recorded videos or from the Internet, etc., or photos from a digital camera, etc., and import podcast episodes from the Internet. -
Page 34: Transferring Videos/Photos/Podcasts Using Content Transfer
Transferring Videos/Photos/Podcasts Transferring Videos/Photos/Podcasts Using Content Transfer You can transfer videos/photos/podcasts stored on your computer to the player using Content Transfer. You can transfer videos/photos/podcasts by drag-and- drop of the desired videos/photos/podcasts from Windows Explorer to Content Transfer. Note ... - Page 35 Transferring Videos/Photos/Podcasts Select the desired videos/photos/podcasts from Windows Explorer, and drag-and-drop them to Content Transfer. Content Transfer recognizes the type of data by filename extension, and sends it to the appropriate folder of the player. Video/photo/podcast files or folders in your computer Content Transfer...
-
Page 36: Transferring Videos/Photos/Podcasts Using Windows Explorer
Transferring Videos/Photos/Podcasts Transferring Videos/Photos/Podcasts Using Windows Explorer You can directly transfer data by drag-and-drop using Windows Explorer on your computer. Hint Some WMV files can be played back only by transferring using Windows Media Player Connect the player to your computer using the supplied USB cable. Insert the connector of the USB cable into the player with the facing up. - Page 37 Transferring Videos/Photos/Podcasts Drag-and-drop files or folders into the [VIDEO], [PICTURE], [PICTURES], [DCIM] or [PODCASTS] folder or one of its subfolders. Video files or folders: drag-and-drop into the [VIDEO] folder, or one of its subfolders. Photo files or folders: drag-and-drop into the [PICTURE], [PICTURES] or [DCIM] folder, or one of their subfolders.
- Page 38 Transferring Videos/Photos/Podcasts Drag and drop files or folders into the correct folder as shown in the following illustrations. The player can play back videos on the 1st to 8th level of the [VIDEO] folder, and can display photos on the 1st to 8th level of the [PICTURE], [PICTURES] and [DCIM] folders.
-
Page 39: Playing Music
Playing Music Playing Music Playing Music To play music, select screen. From the Home menu, select The music menu appears. You can select the desired search method to display the music list screen and search for songs. For details, see “Search method” of “Searching for Songs”... -
Page 40: Music Playback Screen
Playing Music Music playback screen Information area Song name Artist name Album title Current song number/Total song number to be played Elapsed time/Total time Progress bar Play Mode ( p. 50), Playback Range ( p. 51), Equalizer ( p. 51), VPT (Surround) ( ... -
Page 41: Music List Screen
Playing Music Music list screen The following are examples of music list screens. Song list screen Hint You can change the display format of the album list to display the cover arts only ( p. 55). Operations on the music list screen Confirm an item in the list Move the cursor up or down Move the cursor left/right when... -
Page 42: Searching For Songs
Playing Music Searching for Songs When you select the search menu appears. You can select the desired search method on the search menu to search the music list for a desired song. On the music playback screen or the list screen, press the OPTION/ PWR OFF button. -
Page 43: Browsing Cover Arts To Select An Album (Album Scroll)
Playing Music Search method Method [All Songs] [Album] [Artist] [Genre] [Release Year] [Playlists] [Folder] “The” at the beginning of the artist name is omitted when arranging the list. Playlists are created by using Windows Media Player 11. For information on how to create a playlist, refer to the Help of the Windows Media Player 11. - Page 44 Playing Music Press the / button to browse album covers. The cover art images are arranged by title in alphabetical order. Select the cover art of the desired album, then press the button. The music playback screen reappears and playback of the selected album begins.
-
Page 45: Enjoying Music Playback On A Television
Playing Music Enjoying Music Playback on a Television You can connect the player to a television to output the music screen and audio. You can view cover art, etc., on a larger screen. Outputting the music playback screen and audio to a television [TV Output(Music)] ... -
Page 46: Switching The Television Signal Format
Playing Music Note If you connect the player to a computer while outputting to a television, the TV output stops because the USB connection has precedence over the TV output. Some televisions may suffer screen burn if you continue to display a still image on the screen for a long time. -
Page 47: Deleting Songs
Playing Music Deleting Songs When you delete songs from the player, use the software you used to transfer the songs, or Windows Explorer. For details about using the software, see the Help of the software. Note The player itself cannot delete songs without connecting to a computer. -
Page 48: Using The Music Option Menu
Playing Music Using the Music Option Menu You can bring up the music option menu by pressing the OPTION/PWR OFF button on the music list or on the music playback screen. For details on how to use the option menu, see p. 16. The option items shown on the option menu vary depending on the screen from which you bring it up. -
Page 49: Displaying The Detailed Information Screen [Detailed Information]
Playing Music Displaying the detailed information screen From the music playback screen, press the OPTION/PWR OFF button to bring up the option menu. Select [Detailed Information]. Detailed information screen Song name Artist name Album title Genre Release year Length of Song Codec While playing back copyright protected songs, [Secured] appears. -
Page 50: Changing The Music Settings
Playing Music Changing the Music Settings To change the music settings, select select [Music Settings]. Setting the play mode The player offers a variety of play modes, including random play and selected repeat play. From the Home menu, select ... -
Page 51: Setting The Playback Range [Playback Range]
Playing Music Setting the playback range You can set the playback range of songs. From the Home menu, select [Playback Range] Type (icon) [All Range] (No icon) [Selected Range] ( Setting the sound quality You can set the sound quality according to the music genre, etc. ... - Page 52 Playing Music Customizing sound quality You can preset the value of CLEAR BASS (bass) and 5 band Equalizer as [Custom 1] or [Custom 2]. From the Home menu, select [Equalizer] Press the / button to select CLEAR BASS or the frequency range setting, and press the /...
-
Page 53: Customizing The Surround Sound [Vpt(Surround)]
[Matrix] ( [Karaoke] ( VPT, which stands for Virtual Phone Technology, is a proprietary sound processing technology developed by Sony. Note The [VPT(Surround)] setting is not applied while playing a video, FM radio, a video podcast, or external input audio. -
Page 54: Listening With Dsee (Sound Enhance)
[DSEE(Sound Enhance)] Type [On] [Off] DSEE, which stands for Digital Sound Enhancement Engine, is a technology developed by Sony, to enhance the sound quality of compressed audio files by restoring high-range sound removed by the compression process. Note The [DSEE(Sound Enhance)] setting is not applied while playing a video, FM radio, a video podcast, or external input audio. -
Page 55: Adjusting The Volume Level [Dynamic Normalizer]
Playing Music Adjusting the volume level You can reduce the volume level between songs. With this setting, when listening to album songs in the shuffle play mode, the volume level between songs is moderated to minimize the difference in their recording levels. ... -
Page 56: Using The Language Learning Function
Using the Language Learning Function Using the Language Learning Function Using the Language Learning Function When you set [Language Learning Mode] to [On], you can use the [Quick Replay] function and the A-B repeat function. This section also explains about the playback speed control function. -
Page 57: Rewinding Slightly [Quick Replay]
Using the Language Learning Function Rewinding slightly You can rewind about 3 seconds to listen to audio again. Press the button during playback on the music playback screen. Hint When point A (starting point of A-B repeat) is set, if you press the button within 3 seconds of point A, playback returns to point A. -
Page 58: Adjusting The Playback Speed (Dpc)
Using the Language Learning Function Adjusting the playback speed You can adjust the playback speed between half and double normal speed by using the DPC (Digital Pitch Control) function. The audio is played back in natural tones by means of the digital processing function. ... -
Page 59: Watching Videos
Watching Videos Watching Videos Playing a Video To play a video, select screen. From the Home menu, select The [Videos] screen appears. You can select the desired search method to display the video list screen and search for videos. For details, see “Search method” of “Searching for Videos”... -
Page 60: Video Playback Screen
Watching Videos Video playback screen Operations on the video playback screen While the player is playing back a video in landscape orientation, the / buttons and / buttons swap functions. While the player outputs video to a television ( p. 64), the 5-way button works in the normal portrait orientation. -
Page 61: Video List Screen
Watching Videos Video list screen The following is an example of video list screens. Playback icon New icon Icons of videos The following icons are displayed in the video field. Icon (New icon) (Playback icon) Operations on the video list screen Select an item Move the cursor up or down Display the previous/next screen of... -
Page 62: Searching For Videos
Watching Videos Searching for Videos When you select search menu appears. You can select the desired search method on the search menu to search the video list for a desired video. On the video playback screen or the list screen, press the OPTION/ PWR OFF button. - Page 63 Watching Videos On the video playback screen, press the OPTION/PWR OFF button. Select [Scene Scroll]. The scene scroll screen appears. Press the / button to scroll the images. Select the desired image, then press the button to confirm. The video playback screen reappears and playback begins from the beginning of the scene you selected.
-
Page 64: Enjoying Videos On A Television
Watching Videos Enjoying Videos on a Television You can connect the player to a television to output video and audio. You can watch videos on the larger screen. Outputting videos to a television Note Set the [TV Output Size] setting in accordance with your television before outputting videos to the television ( ... -
Page 65: Selecting The Television Aspect Ratio
Watching Videos Selecting the television aspect ratio Select [16:9] or [4:3] according to the television you intend to connect. From the Home menu, select [TV Output Size] Type [16:9] [4:3] Switching the television signal format You can select the player’s video output signal. Select the signal format that is appropriate to the television you intend to connect, if necessary. -
Page 66: Deleting Videos
Watching Videos Deleting Videos You can delete videos from the player. Deleting currently playing video From the playback screen of the video, press the OPTION/PWR OFF button to bring up the option menu. Select [Delete Video] The video is deleted. Deleting videos by selecting from a list ... -
Page 67: Using The Video Option Menu
Watching Videos Using the Video Option Menu You can bring up the video option menu by pressing the OPTION/PWR OFF button on the video list or on the video playback screen. For details on how to use the option menu, see p. 16. The option items shown on the option menu vary depending on the screen from which you bring it up. -
Page 68: Changing The Video Settings
Watching Videos Changing the Video Settings To change the video settings, select select [Video Settings]. Setting the zoom function You can zoom in the currently playing video. When the video is output to a television, it is enlarged in accordance with the [TV Output Size] setting ( p. - Page 69 Watching Videos Type Description [Auto] The video image is resized to fit the display area, maintaining the original aspect ratio (Default setting). When a 16:9 (wide size) video image is displayed on a 4:3 television, black bands appear on the top and bottom of the screen. When a 4:3 video image is displayed on a wide television, black bands appear on the right and left of the screen.
- Page 70 Watching Videos Type Description [Full] The video image is resized to fill the available display area, maintaining the aspect ratio. When a 16:9 (wide size) video image is displayed on a 4:3 television, the right/left sides of the image are trimmed to fit. When a 4:3 video image is displayed on a wide television, the top and bottom of the video image are trimmed to fit.
-
Page 71: Playing Only Video Sound
Watching Videos Playing only video sound You can set to turn off the video screen during the player is on hold, allowing you to enjoy the sound of videos only. Setting this option to [No] saves battery power for longer battery life. ... -
Page 72: Enjoying Podcast
Enjoying Podcast Enjoying Podcast Playing Podcast To play a podcast, select [Podcast List] screen. What is a podcast? A “podcast” is a group of audio or video files that is published on the Internet. The files, called episodes, can be downloaded to a computer automatically by using RSS, to play back. -
Page 73: Podcast Playback Screen
Enjoying Podcast Podcast playback screen Audio playback screen Information area Episode name Artist name Podcast name Elapsed time Total time Progress bar Operations on the audio playback screen To (Screen indication) Play ()/pause () Fast forward ()/fast rewind () Find the beginning of the episode Return to the list screen During pause, if there is no operation for a while, the player automatically enters standby mode. - Page 74 Enjoying Podcast Video playback screen Operations on the video playback screen While the player is playing back a video in landscape orientation, / buttons and / buttons interchange their functions with each other. To (Screen indication) Play ()/pause () Fast forward ()/fast rewind () *2*3 Fast forward ()/fast rewind...
-
Page 75: Episode List Screen
Enjoying Podcast Episode list screen Episodes are displayed in the episode list screen in name order. Podcast name Playback icon Audio icon New icon Video icon Icons of episodes The following icons are displayed in the episode field. Icon (Audio icon) (Video icon) (New icon) (Playback icon) -
Page 76: Podcast List Screen
Enjoying Podcast Podcast list screen Podcasts are displayed in the [Podcast List] screen in name order. Operations on the [Podcast List] screen To (Screen indication) Select an item Move the cursor up or down Display the previous/next screen of the list Icons which appear by pressing the OPTION/PWR OFF button Icon (Option Menu) -
Page 77: Deleting Podcasts
Enjoying Podcast Deleting Podcasts You can delete an episode, a podcast, or all transferred podcasts. Deleting the currently playing episode From the playback screen of the episode you intend to delete, press the OPTION/PWR OFF button to bring up the option menu. ... -
Page 78: Deleting All Podcasts
Enjoying Podcast Deleting all podcasts This operation deletes all episodes and podcasts. From the [Podcast List] screen, press the OPTION/PWR OFF button to bring up the option menu. Select [Delete All Podcasts] [Yes]. -
Page 79: Using The Podcast Option Menu
Enjoying Podcast Using the Podcast Option Menu You can bring up the podcast option menu by pressing the OPTION/PWR OFF button on the podcast playback screen or on the list screen. For details on how to use the option menu, see p. 16. The option items shown on the option menu vary depending on the screen from which you bring it up. - Page 80 Enjoying Podcast Option items appearing on the episode list screen Option items [Delete Episode] [Delete This Podcast] Option items appearing on the [Podcast List] screen Option items [Delete Podcast] [Delete All Podcasts] Description/reference page Displays the delete episode screen to select an episode to delete ( ...
-
Page 81: Viewing Photos
Viewing Photos Viewing Photos To view photos, select screen. From the Home menu, select [Photos] desired folder photo. The photo display screen appears. Press the / button to display the previous or next photo. For details on how to operate the photo display screen, see “Photo display screen”... -
Page 82: Photo Display Screen
Viewing Photos Photo display screen When a photo appears on the screen, information such as the photo’s file name is displayed for a few seconds. Operations on the photo display screen To (Screen indication) Display the next/previous photo Display the following/previous photos consecutively Return to the list screen Icons which appear by pressing the OPTION/PWR OFF button... -
Page 83: Photo List Screen
Viewing Photos Photo list screen The following are examples of photo list screens. [Thumbnail Only] Icon of photos The following icon is displayed in the photo field. Icon (Playback icon) Operations on the photo list screen To (Screen indication) Select an item Move the cursor up or down Display the previous/next screen of the list ([Thumbnail + Title]) -
Page 84: Deleting Photos
Viewing Photos Deleting Photos When you delete photos from the player, use the software you used to transfer the photos, or Windows Explorer. For details about using the software, see the Help of the software. Note The player itself cannot delete photos without connecting to a computer. -
Page 85: Using The Photo Option Menu
Viewing Photos Using the Photo Option Menu You can bring up the photo option menu by pressing the OPTION/PWR OFF button on the photo folder list or photo list, or on the photo display screen. For details on how to use the option menu, see p. 16. The option items shown on the option menu vary depending on the screen from which you bring it up. -
Page 86: Changing The Photo Settings
Viewing Photos Changing the Photo Settings To change the photo settings, select select [Photo Settings]. Setting the photo list display format The player offers 2 display formats. You can set the display format of the photo list as [Thumbnail + Title] ... -
Page 87: Listening To Fm Radio
Listening to FM Radio Listening to FM Radio To listen to FM Radio, select [FM Radio] screen. Note The headphone cord serves as an antenna, so extend it as far as possible. From the Home menu, select The [FM Radio] screen appears. ... -
Page 88: Fm Radio Screen
Listening to FM Radio FM Radio screen Frequency Preset number Note Depending on the country/region in which you have purchased the player, the screen appearance may differ. Operations on the [FM Radio] screen Select the previous/next frequency Select the previous/next receivable station Select the previous/next preset number If sensitivity is too high, change the [Scan Sensitivity] setting ( ... -
Page 89: Presetting Broadcast Stations Automatically [Auto Preset]
Listening to FM Radio Presetting broadcast stations automatically You can preset (up to 30) receivable broadcast stations in your area automatically by selecting [Auto Preset]. When you use the FM radio for the first time, or when you move to a new area, we recommend you preset receivable broadcast stations by selecting [Auto Preset]. -
Page 90: Presetting Broadcast Stations Manually [Save To Preset]
Listening to FM Radio Presetting broadcast stations manually You can manually preset broadcast stations that [Auto Preset] cannot detect ( p. 89). On the [FM Radio] screen, select the desired frequency. Press the OPTION/PWR OFF button to bring up the option menu. ... -
Page 91: Using The Fm Radio Option Menu
Listening to FM Radio Using the FM Radio Option Menu You can bring up the FM radio option menu by pressing the OPTION/PWR OFF button on the [FM Radio] screen. For details on how to use the option menu, see p. 16. The option items shown on the option menu vary depending on the screen from which you bring it up. -
Page 92: Changing The Fm Radio Settings
Listening to FM Radio Changing the FM Radio Settings To change the FM radio settings, select select [FM Radio Settings]. Setting the reception When you select stations using the [Auto Preset] function ( p. 89) or the / button, the FM receiver may receive unwanted broadcast stations as a result of sensitivity being too high. -
Page 93: Using The Noise Canceling Function
Using the Noise Canceling Function About Noise Canceling The internal microphone embedded in the headphones picks up ambient noise. The player generates an antiphase sound wave against the ambient noise to reduce it. The Noise Canceling function can reduce unwanted ambient noise especially in a vehicle such as an airplane, train, bus, etc., allowing you to enjoy music at a low volume. - Page 94 Using the Noise Canceling Function You may hear a slight noise when the Noise Canceling function is active. This is operational noise of the Noise Canceling function and not a malfunction. You may feel the Noise Canceling function does not work or noise is louder in a quiet environment or certain noises may not be canceled as effectively as others.
-
Page 95: Playing Back With The Noise Canceling Function [Noise Canceling]
Using the Noise Canceling Function Playing Back with the Noise Canceling Function [Noise Canceling] The internal microphone of the headphones catches the ambient noise, and the player outputs an antiphase sound wave to cancel the noise. Note If headphones other than those supplied are used, the Noise Canceling function will not work even if [Noise Canceling: On/Off] is set to [On]. -
Page 96: Listening To External Audio Sources [External Input Mode]
Using the Noise Canceling Function Listening to External Audio Sources [External Input Mode] You can enable the Noise Canceling function when you listen to audio from external audio sources, such as audio devices in airplanes. Using with external audio devices To headphone jack Using with in-flight entertainment systems Supplied plug adaptor... - Page 97 Using the Noise Canceling Function Hint You can change between [External Input Mode] and [Quiet Mode] ( p. 98) by pressing the button. If you disconnect the supplied audio input cable, the Noise Canceling function enters [Quiet Mode] ( ...
-
Page 98: Reducing Ambient Noise Without Playing Back Music [Quiet Mode]
Using the Noise Canceling Function Reducing Ambient Noise without Playing Back Music [Quiet Mode] You can use the Noise Canceling effect to obtain some peace and quiet. Connect the supplied headphone to the player, and from the Home menu, select [On]. -
Page 99: Changing The Noise Canceling Settings
Using the Noise Canceling Function Changing the Noise Canceling Settings To change the Noise Canceling settings, select menu, then select [NC Settings]. Selecting NC Environment You can select the digital filter that is most suitable for reducing the ambient noise at the location. ... -
Page 100: Adjusting The Noise Canceling Effect
Using the Noise Canceling Function Adjusting the Noise Canceling effect The player is designed to obtain the maximum effect of the Noise Canceling function ( p. 93). However, you may be able to enhance the effect depending on your ear shape or usage environment by increasing (or decreasing) the sensitivity of the microphone installed in the headphones. -
Page 101: Common Settings
Common Settings Common Settings Changing the Common Settings To change the common settings of the player, select Home menu, then select [Common Settings]. Displaying the player information Information such as model name, firmware version, etc., is displayed. From the Home menu, select [Unit Information]. -
Page 102: Limiting The Volume
Common Settings Limiting the volume You can set [AVLS (Volume Limit)] (Automatic Volume Limiter System) to limit the maximum volume to prevent auditory issues or distraction. With [AVLS (Volume Limit)], you can listen to music at a comfortable volume level. ... -
Page 103: Setting The Time For Blanking The Screen
Common Settings Setting the time for blanking the screen When there is no operation for a while, the player turns off the screen. You can set the waiting time for turning off the screen. From the Home menu, select [Screen Off Timer] Type [After 15 Sec]... -
Page 104: Adjusting The Brightness Of The Screen [Brightness]
Common Settings Adjusting the brightness of the screen You can set the display brightness to one of 5 levels. From the Home menu, select [Brightness]. Press the / button to select desired setting, and then press the button to confirm. You can adjust to any of 5 levels. -
Page 105: Setting Up Wallpaper [Wallpaper Settings]
Common Settings Setting up wallpaper You can set the wallpaper of the screen. From the Home menu, select [Wallpaper Settings] Type [No Wallpaper] [User’s Wallpaper] [User’s W.p.(dark)] To set a desired photo as the wallpaper You need to designate a photo on the player for the wallpaper before selecting [User’s Wallpaper] or [User’s W.p.(dark)] to set the photo as the wallpaper. -
Page 106: Setting The Current Time [Set Date-Time]
Common Settings Setting the current time You can set the date and time. From the Home menu, select [Clock Settings] Press the / button to select the year, and then press the / button to change the value. ... -
Page 107: Setting The Date Format
Common Settings Setting the date format You can set the date format displayed for the current date ( p. 106) as [YYYY/MM/DD], [MM/DD/YYYY], or [DD/MM/YYYY]. From the Home menu, select [Clock Settings] Type [YYYY/MM/DD] [MM/DD/YYYY] [DD/MM/YYYY] Setting the time format You can select the format to display the current time ( ... -
Page 108: Limiting The Charge Amount [Battery Care]
Common Settings Limiting the charge amount In the [Battery Care] mode, the player stops recharging when the battery is charged to 90%. You can use this mode to reduce deterioration caused by charge and discharge, i.e., extend the battery lifespan. ... -
Page 109: Formatting Memory [Format]
Common Settings Formatting memory You can format the built-in flash memory of the player. Note If the memory is formatted, all data (songs, videos, photos, etc., including sample data installed at the factory, bundled software installer, and the Operation Guide) will be erased. -
Page 110: Selecting The Display Language [Language Settings]
Common Settings Selecting the display language You can select from a variety of languages for menus and messages. From the Home menu, select desired language setting. Language [Deutsch] [English] [Español] [Français] [Italiano] [Português] [Русский] Japanese display may not be available, depending on the release region of the player. [Language Settings] [Settings] Messages and menus are displayed in... -
Page 111: Useful Facts
Useful Facts Useful Facts About Battery Life By adjusting the settings or managing the power supply properly, it is possible to save battery power for longer usage time between charges. The following hints will yield a longer battery life. Turn off the player manually If you press and hold the OPTION/PWR OFF button, the player enters standby mode and the screen turns off to save battery power. -
Page 112: What Are Format And Bit Rate
Useful Facts What are Format and Bit Rate? What is audio format? Audio format refers to the method used to import audio data from the Internet or audio CDs to a computer, and then save it as an audio file. Common formats include MP3 and WMA, etc. -
Page 113: What Is Video Format
Useful Facts What is the relationship between bit rate, sound quality, and storage size? Generally, higher bit rates provide better sound quality, but require more storage space for the same length of audio, so you can store fewer songs on the player. -
Page 114: Storing Data
Useful Facts Storing Data You can store computer data into the built-in flash memory of the player by transferring the data from your computer using Windows Explorer, or another transfer capable software. If the player is connected to the computer, the built- in flash memory appears in Windows Explorer as [WALKMAN]. -
Page 115: Upgrading The Player's Firmware
Useful Facts Upgrading the Player’s Firmware You can update the player’s firmware. Installing the latest player’s firmware allows you to add new features to the player. For details on the latest firmware information and how to install it, visit the customer support Web sites ( p. -
Page 116: Troubleshooting
Check information on the issue in the Help of each software. Look up information on the issue on one of the customer support Web sites ( p. 141). If the approaches listed above fail to resolve the issue, consult your nearest Sony dealer. - Page 117 Troubleshooting Operation There is no sound. The volume level is set to zero. Turn the volume up ( p. 6). The headphone plug is not connected properly. If the headphones are connected improperly, the sound from the headphones will be impaired.
- Page 118 Troubleshooting Transferred data is not displayed in its list. Videos and photos in unsupported format may not be recognized by the player and may not appear in a list ( p. 160). If you rename a video file that is transferred from a computer to the player, or move it to another folder, it may not be recognized by the player and may not appear in a video list.
- Page 119 Troubleshooting Noise Canceling function is not effective. The Noise Canceling function is disabled. Set [Noise Canceling: On/Off] to [On] ( p. 95). You are using headphones other than the supplied ones. Use the supplied headphones. ...
- Page 120 Troubleshooting There is no sound from the right channel of the headphones. Or the right channel sound is heard from both sides of the headphones. The headphone plug is not fully inserted. If the headphones are not connected correctly, sound will not be output properly. Insert the headphone plug into the jack until it clicks ( ...
- Page 121 Troubleshooting Display “” appears for a title. Characters that cannot be displayed on the player are included in the title. [Unknown] is displayed for an album or artist name, etc. Information such as album or artist name, etc., is not contained in the data. Garbled characters are displayed.
- Page 122 When usable battery life becomes half the usual time, even after charging the battery fully, the battery should be replaced. Consult your nearest Sony dealer. The player cannot charge the battery. The USB cable is not connected to a USB connector on your computer properly.
- Page 123 Troubleshooting Connection to a computer Cannot install the software. Your computer is installed with an operating system that is not supported by the player. Check the operating system of your computer ( p. 166). Other software is running on Windows. ...
- Page 124 Troubleshooting The computer is running another software other than the one used for transferring. Disconnect the USB cable, wait a few minutes, and reconnect it. If the problem persists, disconnect the USB cable, restart the computer, and then reconnect the USB cable.
- Page 125 Troubleshooting The data may be damaged. Delete the data that cannot be transferred from your computer, then import it to your computer again. When importing data to your computer or transferring data to the player, close any other applications to avoid data damage. ...
- Page 126 Troubleshooting FM Radio FM broadcasts are unclear. The received station is not fully tuned in. Tune the station in manually using the / button ( p. 88). Reception is weak and sound quality is poor. The radio signal is weak. ...
- Page 127 Troubleshooting Podcast Cannot play back an episode. The player does not support the file format of the episode. Check the file format playable on the player ( p. 160). TV output Music screen or video is not displayed on the television’s screen. ...
- Page 128 Troubleshooting The date and time have been reset. If you left the player for a while with the battery used up, the date and time may be reset. This is not a malfunction. Charge the battery until ( p. 19), and set the date and time again ( p. 22, 106). Noise is generated when plugging or unplugging the headphones.
-
Page 129: Messages
Troubleshooting Messages Follow the instructions below if a message appears in the display. [Cannot play; file format is not supported.] You are trying to play a file that cannot be played on the player. You cannot play a song in an unsupported format file ( p. 160). [Cannot play;... - Page 130 Troubleshooting [Not enough free space in memory. Delete files to ensure free space.] The player’s available capacity is insufficient. Connect the player to your computer using the supplied USB cable, and then delete any unnecessary data from the player using another software used for transferring, or Windows Explorer.
-
Page 131: Additional Information
The manufacturer of this product is Sony Corporation, 1-7-1 Konan Minato-ku, Tokyo, 108-0075 Japan. The Authorized Representative for EMC and product safety is Sony Deutschland GmbH, Hedelfinger Strasse 61, 70327 Stuttgart, Germany. For any service or guarantee matters please refer to the addresses given in separate service or guarantee documents. - Page 132 Additional Information Disposal of Old Electrical & Electronic Equipment (Applicable in the European Union and other European countries with separate collection systems) This symbol on the product or on its packaging indicates that this product shall not be treated as household waste. Instead it shall be handed over to the applicable collection point for the recycling of electrical and electronic equipment.
- Page 133 Additional Information Disposal of waste batteries (applicable in the European Union and other European countries with separate collection systems) This symbol on the battery or on the packaging indicates that the battery provided with this product shall not be treated as household waste. On certain batteries this symbol might be used in combination with a chemical symbol.
- Page 134 Do not touch the rechargeable battery with bare hands if it is leaking. Since battery liquid may remain in the player, consult your nearest Sony dealer if the battery has leaked. If the liquid gets into your eyes, do not rub your eyes as it may lead to blindness.
- Page 135 Additional Information On installation Do not put any heavy object on top of the player or apply a strong shock to the player. It may cause a malfunction or damage. Never use the player where it will be subjected to extremes of light, temperature, moisture or vibration.
- Page 136 Additional Information Do not expose the player to water. The player is not waterproof. Remember to follow the precautions below. Be careful not to drop the player into a sink or other container filled with water. Do not use the player in humid locations or bad weather, such as in the rain or snow. ...
- Page 137 Additional Information Note on static electricity In particularly dry air conditions, mild tingling may be felt on your ears. This is a result of static electricity accumulated in the body, and not a malfunction of the player. The effect can be minimized by wearing clothes made from natural materials. On heat build-up Heat may build up in the player while charging if it is used for an extended period of time.
- Page 138 Additional Information On the use When using a strap (sold separately), be careful to avoid hooking it on objects you pass by. Furthermore be careful not to swing the player by the strap to avoid bumping people. Refrain from using the player according to the in-flight announcements during take off or landing in an aircraft.
- Page 139 Be careful not to let water get into the player from the opening near the connector. Clean the headphone plug periodically. If you have any questions or problems concerning the player, please consult your nearest Sony dealer. Continued ...
- Page 140 In no event will SONY be liable for any financial damage, or loss of profits, including claims made by third parties, arising out of the use of the software supplied with this player.
- Page 141 The recorded song is limited to private use only. Use of the song beyond this limit requires permission of the copyright holders. Sony is not responsible for incomplete recording/downloading or damaged data due to problems of the player or computer.
-
Page 142: License And Trademark Notice
Additional Information License and Trademark Notice ATRAC is trademark of Sony Corporation. “WALKMAN” and “WALKMAN” logo are registered trademarks of Sony Corporation. is trademark of Sony Corporation. Microsoft, Windows, Windows Vista and Windows Media are trademarks or registered trademarks of Microsoft Corporation in the United States and/or other countries. - Page 143 Secure Content from the Internet or from a PC. Microsoft may, in conjunction with such license, also download revocation lists onto your device on behalf of Secure Content Owners. Program ©2009 Sony Corporation Documentation ©2009 Sony Corporation and ® marks are not...
- Page 144 Additional Information Information on Expat Copyright ©1998, 1999, 2000 Thai Open Source Software Center Ltd and Clark Cooper. Copyright ©2001, 2002, 2003, 2004, 2005, 2006 Expat maintainers. Permission is hereby granted, free of charge, to any person obtaining a copy of this software and associated documentation files (the “Software”), to deal in the Software without restriction, including without limitation the rights to use, copy, modify, merge, publish, distribute, sublicense, and/or sell copies of the Software, and to permit persons to...
- Page 145 Additional Information Redistribution and use in source and binary forms, with or without modification, are permitted provided that the following conditions are met: 1. Redistributions of source code must retain the above copyright notice, this list of conditions and the following disclaimer. 2.
- Page 146 General Public License (hereafter LGPL). Users have the right to obtain, modify and redistribute the source code of software in accordance with the attached GPL/LGPL. Sony provides these source codes on the following web site. Please visit the following web site to obtain the source codes.
- Page 147 Additional Information When we speak of free software, we are referring to freedom of use, not price. Our General Public Licenses are designed to make sure that you have the freedom to distribute copies of free software (and charge for this service if you wish); that you receive source code or can get it if you want it;...
- Page 148 Additional Information gain by limiting the free library to free software only, so we use the Lesser General Public License. In other cases, permission to use a particular library in non-free programs enables a greater number of people to use a large body of free software. For example, permission to use the GNU C Library in non-free programs enables many more people to use the whole GNU operating system, as well as its variant, the GNU/Linux operating system.
- Page 149 Additional Information You may charge a fee for the physical act of transferring a copy, and you may at your option offer warranty protection in exchange for a fee. 2. You may modify your copy or copies of the Library or any portion of it, thus forming a work based on the Library, and copy and distribute such modifications or work under the terms of Section 1 above, provided that you also meet all of these conditions: a) The modified work must itself be a software library.
- Page 150 Additional Information This option is useful when you wish to copy part of the code of the Library into a program that is not a library. 4. You may copy and distribute the Library (or a portion or derivative of it, under Section 2) in object code or executable form under the terms of Sections 1 and 2 above provided that you accompany it with the complete corresponding machine-readable source code, which must be distributed under the terms of Sections 1 and 2 above on a medium...
- Page 151 Additional Information a) Accompany the work with the complete corresponding machine-readable source code for the Library including whatever changes were used in the work (which must be distributed under Sections 1 and 2 above); and, if the work is an executable linked with the Library, with the complete machine-readable “work that uses the Library”, as object code and/or source code, so that the user can modify the Library and then relink to produce a modified executable containing the modified Library.
- Page 152 Additional Information 8. You may not copy, modify, sublicense, link with, or distribute the Library except as expressly provided under this License. Any attempt otherwise to copy, modify, sublicense, link with, or distribute the Library is void, and will automatically terminate your rights under this License.
- Page 153 Additional Information 13. The Free Software Foundation may publish revised and/or new versions of the Lesser General Public License from time to time. Such new versions will be similar in spirit to the present version, but may differ in detail to address new problems or concerns. Each version is given a distinguishing version number.
- Page 154 Additional Information <one line to give the library’s name and an idea of what it does.> Copyright (C) <year> <name of author> This library is free software; you can redistribute it and/or modify it under the terms of the GNU Lesser General Public License as published by the Free Software Foundation; either version 2.1 of the License, or (at your option) any later version.
- Page 155 Additional Information For example, if you distribute copies of such a program, whether gratis or for a fee, you must give the recipients all the rights that you have. You must make sure that they, too, receive or can get the source code. And you must show them these terms so they know their rights.
- Page 156 Additional Information b) You must cause any work that you distribute or publish, that in whole or in part contains or is derived from the Program or any part thereof, to be licensed as a whole at no charge to all third parties under the terms of this License. c) If the modified program normally reads commands interactively when run, you must cause it, when started running for such interactive use in the most ordinary way, to print or display an announcement including an appropriate copyright notice and a notice that...
- Page 157 Additional Information exception, the source code distributed need not include anything that is normally distributed (in either source or binary form) with the major components (compiler, kernel, and so on) of the operating system on which the executable runs, unless that component itself accompanies the executable.
- Page 158 Additional Information This section is intended to make thoroughly clear what is believed to be a consequence of the rest of this License. 8. If the distribution and/or use of the Program is restricted in certain countries either by patents or by copyrighted interfaces, the original copyright holder who places the Program under this License may add an explicit geographical distribution limitation excluding those countries, so that distribution is permitted only in or among countries not thus excluded.
- Page 159 Additional Information END OF TERMS AND CONDITIONS How to Apply These Terms to Your New Programs If you develop a new program, and you want it to be of the greatest possible use to the public, the best way to achieve this is to make it free software which everyone can redistribute and change under these terms.
-
Page 160: Specifications
Additional Information Specifications Supported file format Music (including podcasts Audio Formats (Codec) AAC-LC Linear PCM Video (including podcasts Video Formats (Codec) (H.264/AVC) MPEG-4 Windows Media Video Audio Formats AAC-LC (Codec) (for AVC, MPEG-4) (for Windows Media Video File size The number of files Media File format: MP3 (MPEG-1 Layer3) file format File extension: .mp3 Bit rate: 32 to 320 kbps (Supports variable bit rate (VBR)) - Page 161 Additional Information Photo Photo Format JPEG (Codec) The number of files The maximum recordable number of podcasts is 10,000. Sampling frequency may not correspond to all encoders. Copyright protected AAC-LC files cannot be played back. Non-standard bit rates or non-guaranteed bit rates are included depending on the sampling frequency. These numbers indicate the maximum resolution of playable video, and do not indicate the player’s display resolution.
- Page 162 Capacity (User available capacity) NWZ-A844: 8 GB (Approx. 6.99 GB = 7,513,243,648 bytes) NWZ-A845: 16 GB (Approx. 14.1 GB = 15,224,668,160 bytes) NWZ-A846: 32 GB (Approx. 28.5 GB = 30,699,978,752 bytes) NWZ-A847: 64 GB (Approx. 58.0 GB = 62,290,034,688 bytes) Available storage capacity of the player may vary.
- Page 163 Additional Information Antenna Headphone cord antenna Interface Headphone: Stereo mini-jack WM-PORT (multiple connecting terminal): 22 pins Hi-Speed USB (USB 2.0 compliant) Operating temperature 5 °C to 35 °C (41 ºF to 95 ºF) Power source Built-in rechargeable lithium-ion battery ...
- Page 164 Additional Information Battery life (continuous playback) Actual battery life may vary depending on settings. The estimated battery usage hours shown below are based on typical usage conditions with “Basic setting of battery life measurement (Longer battery life setting)” as shown in the table below. Note that even if the player is turned off for an extended period, a small amount of battery power is still consumed.
- Page 165 Additional Information Display 2.8-inch, OLED (Organic Light Emitting Diode) color display, WQVGA (400 × 240 pixels), 262,144 colors Dimensions (w/h/d, projecting parts not included) 46.8 × 104.9 × 7.2 mm (1 7/8 × 4 1/4 × 5/16 inches) Dimensions (w/h/d) 47.4 ×...
- Page 166 Additional Information System Requirements Computer IBM PC/AT or compatible computer preinstalled with the following Windows operating systems Windows XP Home Edition (Service Pack 2 or later) / Windows XP Professional (Service Pack 2 or later) / Windows Vista Home Basic (Service Pack 1 or later) / Windows Vista Home Premium (Service Pack 1 or later) / Windows Vista Business (Service Pack 1 or later) / Windows Vista Ultimate (Service Pack 1 or later) / Windows 7 Home Basic / Windows 7 Home Premium / Windows 7 Professional / Windows 7...
-
Page 167: Index
Additional Information Index Symbols 5-way button ... 6, 13 (Repeat) ... 50 (Shuffle) ... 50 (Shuffle&Repeat) ... 50 (Repeat 1 Song) ... 50 (Heavy) ... 51 (Pop) ... 51 (Jazz) ... 51 (Unique) ... 51 (Custom 1) ... 51 (Custom 2) ... 51 (Studio) ... - Page 168 Additional Information Firmware ... 115 [FM Radio] ... 10, 87 FM Radio ... 126 [Folder] ... 43 [Format] ... 109 [Genre] ... 43 Headphone jack ... 6 Headphones ... 6, 8 [Heavy] ... 51 HOLD switch ... 7 Home menu ... 10, 13 Information ...
- Page 169 Additional Information [Scan Sensitivity] ... 92 [Scene Scroll] ... 62 Screen (display) ... 6, 121 [Screen Off Timer] ... 103 Search for songs ... 42 [Selected Range] ... 51 [Select NC Environment] ... 99 [Set Date-Time] ...22, 106 [Set Noise Cancel Level] ... 100 [Settings] ...