Table of Contents
Advertisement
2-668-367-12 (1)
Mini HI-FI
Component
System
Operating Instructions
Owner's Record
The model and serial numbers are located on the rear of the unit. Record these
numbers in the space provided below. Refer to them whenever you call upon your
Sony dealer regarding this product.
Model No. ______________ Serial No. ______________
MHC-GX470
MHC-RG590S/RG490S/RG290/
RG190
© 2006 Sony Corporation
Advertisement
Table of Contents

Related Manuals for Sony 290


Summary of Contents for Sony 290
- Page 1 The model and serial numbers are located on the rear of the unit. Record these numbers in the space provided below. Refer to them whenever you call upon your Sony dealer regarding this product. Model No. ______________ Serial No. ______________...
- Page 2 WARNING To reduce the risk of fire or electric shock, do not expose this apparatus to rain or moisture. To reduce the risk of fire, do not cover the ventilation of the apparatus with newspapers, tablecloths, curtains, etc. And do not place lighted candles on the apparatus.
-
Page 3: Note To Catv System Installer
CD standard and may not be playable by this product. MPEG Layer-3 audio coding technology and patents licensed from Fraunhofer IIS and Thomson. is a U.S. ® partner, Sony ®... -
Page 4: Table Of Contents
Table of Contents Guide to parts and controls... 5 Getting Started Hooking up the system securely ... 8 Setting the clock ... 10 Basic Operations Playing a CD/CD-G/MP3 disc... 11 Listening to the radio ... 12 Playing a tape... 13 Using optional audio components... -
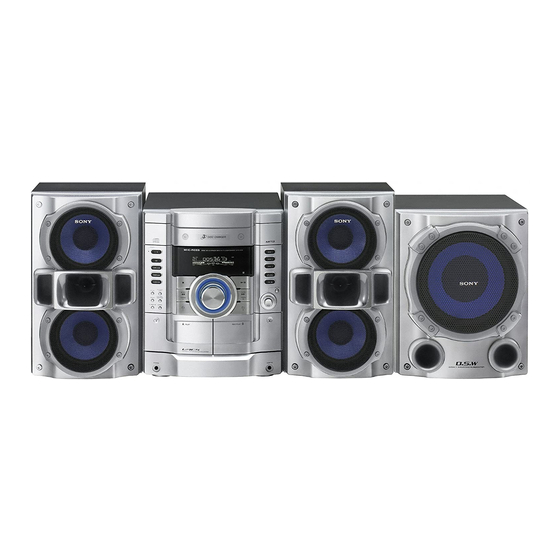
Page 5: Guide To Parts And Controls
Guide to parts and controls Unit Remote This manual mainly explains operations using the remote, but the same operations can also be performed using the buttons on the unit having the same or similar names. / (power) button (page 10, 21, Press to turn on the system. - Page 6 Mexican model: Unit: KARAOKE button (page 20) Press to activate the karaoke mode. Remote: DISPLAY button (page Press to change the information on the display. Other models: DISPLAY button (page 15) Press to change the information on the display. ...
- Page 7 Latin American model only: MIC jack (page 20) Connect the microphone. Mexican model comes with 2 microphone jacks. MIC LEVEL (page 20) Turn to adjust the microphone volume. Mexican model only: ECHO LEVEL (page 20) Turn to adjust the echo level. ...
-
Page 8: Getting Started Hooking Up The System Securely
Getting Started Hooking up the system securely When carrying this system Remove all discs to protect the CD mechanism. Press CD to select the CD function. Hold down the unit until “STANDBY” appears. After “LOCK” appears, unplug the power cord. Subwoofer (MHC-GX470/RG590S/ RG490S only) Place the subwoofer vertically to obtain a... - Page 9 Antennas Find a location and an orientation that provide good reception, and then set up the antenna. Keep the antennas away from the speaker cords to avoid picking up noise. Speakers and subwoofer Insert only the stripped portion of the cord. Video cable (supplied) Striped (Black/) Front speaker (left)
-
Page 10: Setting The Clock
To use the remote Slide and remove the battery compartment lid , and insert the two supplied R6 (size AA) batteries, side first, matching the polarities shown below. Notes • With normal use, the batteries should last for about six months. -
Page 11: Basic Operations Playing A Cd/Cd-G/Mp3 Disc
Basic Operations Playing a CD/CD-G/MP3 disc CD-G discs are supported only on the Mexican model. Select the CD function. Press CD Place a disc. Press on the unit, and place a disc with the label side up on the disc tray. To insert additional discs, press DISC SKIP ... -
Page 12: Listening To The Radio
Notes on Repeat Play • All tracks or files on a disc are played repeatedly up to five times. • You cannot select “REP” and “ALL DISCS SHUF” at the same time. • “REP1” indicates that a single track or file is repeated until you stop it. -
Page 13: Playing A Tape
Playing a tape Select a tape deck. Press TAPE (or TAPE A/B on the unit) repeatedly. Insert a tape. Press PUSH on the unit, and insert the TYPE I (normal) tape into the cassette holder with the side you want to play facing forward. -
Page 14: Using Optional Audio Components
Using optional audio components Connect additional audio component to the AUDIO IN jack on the unit using an audio analog cord (not supplied). Turn down the volume. Press VOLUME – (or turn the VOLUME control on the unit towards –) Select the AUDIO IN function. -
Page 15: Changing The Display
Changing the display Press Change the ILLUMINATION illumination the unit repeatedly. pattern around the VOLUME control Change DISPLAY information on when the system is turned the display Change Display DISPLAY mode (See when the system is turned below.) off. -
Page 16: Other Operations
Other Operations Creating your own CD program (Program Play) Use buttons on the remote to create your own program. Press CD to select the CD function. Press PLAY MODE until “PGM” appears while the player is stopped. Press DISC SKIP select a disc. -
Page 17: Presetting Radio Stations
Presetting radio stations You can preset your favorite radio stations and tune them in instantly by selecting the corresponding preset number. Use buttons on the remote to preset stations. Tune in the desired station (see “Listening to the radio” (page 12)). Press TUNER MEMORY Preset number ... -
Page 18: Recording Onto A Tape (Cd Synchro Recording/Manual Recording/Sound Mixing)
Recording onto a tape (CD Synchro recording/Manual recording/Sound Mixing) You can record on a TYPE I (normal) tape in three ways: CD Synchro Recording: You can record an entire CD onto a tape. The recording level is adjusted automatically. Manual Recording: You can record just the portions you like from a sound source, including connected audio components. -
Page 19: Creating Your Own Sound Effect
Start recording. While recording, you cannot listen to other sources. For CD Synchro Recording: Press REC PAUSE/START recording is completed, the CD player and the tape deck stop automatically. For Manual Recording: Press REC PAUSE/START start playing the desired recording source. If there is noise while recording from the tuner, reposition the appropriate antenna to reduce the noise. -
Page 20: Enjoying Karaoke (Latin American Model Only)
Enjoying karaoke (Latin American model only) You can sing along by connecting an optional microphone. Use buttons on the unit for karaoke. Turn MIC LEVEL down the microphone volume level. Connect an optional microphone to the MIC jack The Mexican model has 2 microphone jacks. -
Page 21: Using The Timers
Using the Timers The system offers three timer functions. You cannot activate both the Play Timer and the Rec Timer at the same time. If you use either with the Sleep Timer, the Sleep Timer has priority. Sleep Timer: You can fall asleep to music. This function works even if the clock is not set. - Page 22 To activate or check the timer again Press CLOCK/TIMER SELECT / repeatedly until “PLAY SELECT” or “REC SELECT” appears, and then press ENTER To cancel the timer Repeat the same procedure as above until “TIMER OFF” appears, and then press ...
-
Page 23: Others Troubleshooting
After the STANDBY indicator flashing, reconnect the power cord, and turn on the system. If the issue persists, contact your nearest Sony dealer. General The display starts flashing as soon as you plug in the power cord even though you have not turned on the system. - Page 24 Tape deck The sound exhibits excessive wow or flutter or dropout. • Clean the capstans and pinch rollers. Also, clean and demagnetize the tape heads. See “Precautions” for details (page 25). To change the AM tuning interval The AM tuning interval is factory-preset to 9 kHz (or 10 kHz, for some areas;...
-
Page 25: Messages
COMPLETE: The preset operation ended normally. LOCKED: The disc tray does not open. Contact your nearest Sony dealer. NO DISC: There is no disc in the player, or you have loaded a disc that cannot be played. NO STEP: All of the programmed tracks have been erased. -
Page 26: Precautions
Precautions Discs that this system CAN play • Audio CD • CD-G (CD-Graphics) (Mexican model only) • CD-R/CD-RW (audio data/MP3 files) Discs that this system CANNOT play • CD-ROM • CD-R/CD-RW other than those recorded in music CD format or MP3 format conforming to ISO9660 Level 1/Level 2, Joliet or multisession •... -
Page 27: Specifications
(reference): 145 + 145 watts (6 ohms at 1 kHz, 10% THD) Music power output (reference): 290 + 290 watts (6 ohms at 1 kHz, 10% THD) Subwoofer DIN power output (rated): 130 watts (6 ohms at 80 Hz, DIN) - Page 28 MHC-RG490S Front speaker DIN power output (rated): 95 + 95 watts (6 ohms at 1 kHz, DIN) Continuous RMS power output (reference): 125 + 125 watts (6 ohms at 1 kHz, 10% THD) Music power output (reference): 250 + 250 watts (6 ohms at 1 kHz, 10% THD) Subwoofer DIN power output (rated): 120 watts (6 ohms at 80 Hz, DIN)
-
Page 29: Tuner Section
Tape deck section Recording system: 4-track 2-channel, stereo Frequency response: 50 – 13,000 Hz (±3 dB), using Sony TYPE I cassettes Wow and flutter: ±0.15% W. Peak (IEC), 0.1% W. RMS (NAB), ±0.2% W. Peak (DIN) Tuner section FM stereo, FM/AM superheterodyne tuner... - Page 30 Other models: MHC-RG490S Front speaker SS-RG490AV/RG490S/RG490 for MHC-RG490S Speaker system: 3-way, 3-unit, bass-reflex type Speaker units: Subwoofer 13 cm, cone type, Woofer 13 cm, cone type, Tweeter 5 cm, horn type Nominal impedance: 6 ohms Dimensions (w/h/d): Approx. 220 × 360 × 240 mm Mass: Approx.
- Page 31 Mass (excl. speakers) North American model: MHC-GX470: Approx. 9.4 kg Canadian model: MHC-GX470: Approx. 9.4 kg European and Russian models: MHC-RG590S: Approx. 9.5 kg MHC-RG490S: Approx. 9.5 kg MHC-RG290: Approx. 9.3 kg MHC-RG190: Approx. 7.5 kg Other models: MHC-RG490S: Approx. 9.5 kg MHC-RG290: Approx.
- Page 32 Printed on 100% recycled paper using VOC (Volatile Organic Compound)-free vegetable oil based ink Printed in China...