Sony RCD-W10 Operating Instructions Manual
Cd/sacd players & changers: cd/cdr recorder/player
Hide thumbs
Also See for RCD-W10:
- Manual (51 pages) ,
- Operating instructions manual (35 pages) ,
- Service manual (100 pages)
Table of Contents
Advertisement
Compact Disc
Recorder
Operating Instructions
Owner's Record
The model and serial numbers are located on the rear panel. Record the serial number
in the space provided below. Refer to them whenever you call upon your Sony dealer
regarding this product.
Model No.
RCD-W50C/W10
©2002 Sony Corporation
4-242-051-13(1)
Serial No.
Advertisement
Table of Contents

Related Manuals for Sony RCD-W10


Summary of Contents for Sony RCD-W10
-
Page 1: Operating Instructions
Operating Instructions Owner’s Record The model and serial numbers are located on the rear panel. Record the serial number in the space provided below. Refer to them whenever you call upon your Sony dealer regarding this product. Model No. RCD-W50C/W10 ©2002 Sony Corporation... - Page 2 WARNING To prevent fire or shock hazard, do not expose the unit to rain or moisture. To prevent fire, do not cover the ventilation of the apparatus with newspapers, table-cloths, curtains, etc. And don’t place lighted candles on the apparatus. To prevent fire or shock hazard, do not place objects filled with liquids, such as vases, on the apparatus.
-
Page 3: Table Of Contents
Contents Getting Started Unpacking ... 6 Hooking Up the System ... 6 This Unit Can Use the Following Discs 7 Basic Operations Playing a CD ... 8 Using the Display ... 9 Locating a Specific Track ... 11 Locating a Particular Point in a Track ... 12 Playing Tracks/Discs Repeatedly (Repeat Play) ... -
Page 4: About This Manual
Welcome Thank you for purchasing this Sony Compact Disc Recorder. Before operating the unit, please read this manual thoroughly and retain it for future reference. About This Manual The instructions in this manual are for 2 models: RCD-W50C and RCD-W10. - Page 5 Note on High-Speed Synchro-Recording Certain CD conditions may cause sound dropout or noise in the recording results, or even create unwanted tracks on the CD-R or CD-RW. If this happens, clean the CD as instructed in “On cleaning” above, and record material to the CD-R or CD-RW using normal speed Synchro-Recording only.
-
Page 6: Getting Started
Getting Started Unpacking Check that the following items are included: • Audio connecting cords 2 (red/white) y Phono jack Phono jack 2 (red/white) (2) • Remote commander (remote) (1) • Size AA (R6) batteries (2) Inserting batteries into the remote You can control the unit using the supplied remote. -
Page 7: This Unit Can Use The Following Discs
Setting the voltage selector (voltage selector equipped models only) Check that the voltage selector on the rear panel of the unit is set to the local power line voltage. If not, set the selector to the correct position using a screwdriver before connecting the AC power cord to a wall outlet. -
Page 8: Basic Operations
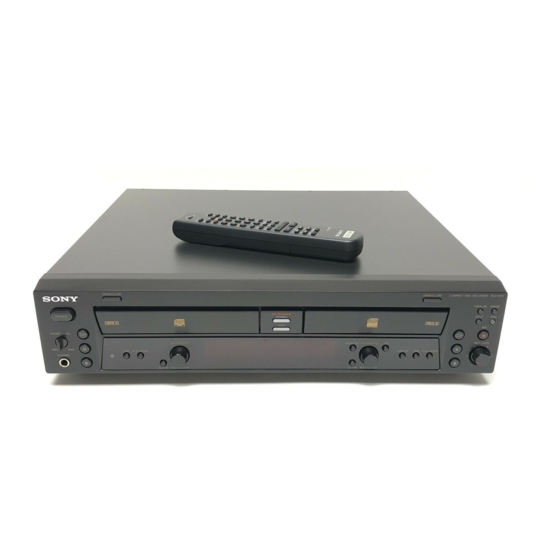
Basic Operations Playing a CD This unit has two decks. In this manual, the CD player section is just called DECK A, and the CD-R and CD-RW recording section is called DECK B. When using the remote, set SELECT to CD for operations on DECK A (the CD player section), or to CDR for operations on DECK B (the CD-R or CD-RW recording section). -
Page 9: Using The Display
Using the Display You can check information about the disc using the front panel display. When using the remote, set SELECT to CD for operations on DECK A, or to CDR for operations on DECK B. DISPLAY TIME Front Panel Display SELECT SCROLL DISPLAY... - Page 10 Display while playing Press TIME repeatedly while the unit is playing. Each time you press the button, the display for any deck that has a disc inside changes as follows: DECK A The track number and playing time TEXT DECK A TRACK CD TEXT CD - RW...
-
Page 11: Locating A Specific Track
The CD TEXT indicator When you put a CD containing a CD text in the disc tray, “CD TEXT” lights up. When “CD TEXT” is framed in red in the display of DECK B, CD TEXT information is not recorded. In this case, finalize the disc to record the information. -
Page 12: Locating A Particular Point In A Track
To locate Do the following: The next or During playback, turn AMS succeeding clockwise (or press > on the tracks remote repeatedly) until you find the track. The beginning During playback, turn AMS of the current or counterclockwise (or press . on preceding tracks the remote repeatedly) until you find the track. -
Page 13: Playing Tracks/Discs Repeatedly (Repeat Play)
Playing Tracks/Discs Repeatedly (Repeat Play) Z You can play tracks repeatedly in any play mode. Before using the remote, set SELECT to CD for operations on DECK A, or to CDR for operations on DECK B. SELECT REPEAT Repeating all tracks on the disc Press REPEAT repeatedly until “REPEAT”... -
Page 14: Playing In Random Order (Shuffle Play)
Playing in Random Order (Shuffle Play) You can have the unit “shuffle” tracks and play them in random order. When using the remote, set SELECT to CD for operations on DECK A, or to CDR for operations on DECK B. PLAY MODE SELECT PLAY MODE... -
Page 15: Creating Your Own Program (Program Play)
Creating Your Own Program (Program Play) You can specify the playback order of the tracks on a disc to create your own programs containing up to 25 tracks. When using the remote, set SELECT to CD for operations on DECK A, or to CDR for operations on DECK B. -
Page 16: Recording/Editing
Recording/Editing Notes on Recording • You cannot record over existing material. The unit automatically starts recording from the end of any existing material. • Make sure that the remaining recordable time on the CD-R or CD-RW is longer than the playing time of a source CD, especially if you want to record all the tracks on the CD. - Page 17 Using the Silent Pause function There has been no sound input for about 30 seconds during recording. The unit changes to recording pause after recording about 30 seconds of silence. If the unit continues pausing for about 3 minutes after the Silent Pause Function activated, recording stops automatically.
-
Page 18: Synchro-Recording A Cd To Cd-R Or Cd-Rw
Synchro-Recording a CD to CD-R or CD-RW You can easily make digital recordings from a CD to a CD-R or CD-RW. Before recording, see “Notes on Recording” on page 16. To record a CD at high speed, see page 19. There are 2 types of recording. - Page 19 Press POWER. Press OPEN/CLOSE of DECK B and place a recordable CD-R or CD-RW on the disc tray. Press OPEN/CLOSE of DECK B again to close the disc tray. With the label side up “TOC Reading” appears. The unit starts to read the TOC (Table of Contents) data and shows the type of the disc on the deck in the display.
-
Page 20: Recording On A Cd-R Or Cd-Rw Manually
Recording on a CD-R or CD-RW Manually You can start recording from the end of the existing material. Before recording, see “Notes on Recording” on page 16. When using the remote, set SELECT to CDR. • After recording, you must finalize the disc. Until the disc is properly finalized, it cannot be played on any other machine. -
Page 21: Adjusting The Recording Level
Adjusting the Recording Level Adjusting the recording level for digital recording You can adjust the recording level using the Setup Menu. (For details of “Using the Setup Menu,” see page 28.) When using the remote, set SELECT to CDR. MENU/NO SELECT MENU/NO ./>... -
Page 22: Marking Track Numbers While Recording
Marking Track Numbers While Recording You can mark track numbers either manually or automatically. By marking track numbers at specific points, you can quickly locate the points later using the AMS Function or Editing Functions. When using the remote, set SELECT to CDR. SELECT Marking track numbers manually... -
Page 23: Recording The Original Sound Of The Program Source (Direct Recording Function)
Recording the Original Sound of the Program Source (Direct Recording Function) Digital signals with a sampling frequency of 44.1 kHz can be recorded without using internal circuits of the unit. You can set this function using the Setup Menu. (For details on “Using the Setup Menu,”... -
Page 24: Finalizing A Cd-R Or Cd-Rw
Finalizing a CD-R or CD- Finalizing completes the recording of a disc. It enables you to play the disc on other players. (The player must be CD-RW compatible. ) When a recording is finished, a CD-R or CD- RW must be finalized. Once that is done, a CD- R may not be added or erased to. -
Page 25: Unfinalizing A Cd-Rw
Unfinalizing a CD-RW A finalized CD-RW is neither recordable nor rewritable. If you want to add new tracks or erase tracks, you must first unfinalize the disc. When using the remote, set SELECT to CDR. SELECT ERASE Place a finalized CD-RW in DECK B. Make sure that “TOC”... -
Page 26: Labeling Tracks/Discs
Turn AMS (or press ./> on the remote) to select the first of the tracks you want to erase. Press H (or YES). Erasing of the last track starts. During erasing, “Tr Erase” appears in the display and the remaining time for erasing the last track (may not be accurate) appears. - Page 27 Press NAME EDIT/SELECT repeatedly to select the character type as follows: DECK B CD TEXT CD - RW To select Capital letters and symbols* Small letters and symbols* Numbers * You can use the following symbols in titles: ’ – / , . ( ) : ! ? & + < > _ = ” ; # $ % @ To enter a space, press 10/0.
-
Page 28: Additional Information
Additional Information Using the Setup Menu You can make various settings on this unit by using the Setup Menu. When using the remote, set SELECT to CDR. Press MENU/NO. Turn AMS (or press ./> on the remote) to select the setup item, and press AMS (or YES). -
Page 29: Messages
Messages The following table explains the messages that appear in the display. Message Explanation Blank Disc A blank CD-R/CD-RW you have just bought or a CD-RW you have entirely erased is in the unit. Check Disc You are trying to record or edit a finalized disc or CD. -
Page 30: Self-Diagnosis Function
Self-diagnosis Function When the self-diagnosis function is activated to prevent the player from malfunctioning, three character service numbers in a combination with a message appears in the display. In this case, check the following table. Message Explanation C12/ You are trying to record a disc that Cannot Copy cannot be played back in DECK-A or with an external device, such as... -
Page 31: Troubleshooting
If the unit still does not operate properly, or if other problems not described above occur, turn off the unit, then reinsert the plug into the power outlet. Should any problem persist even after reinserting the power plug, consult your nearest Sony dealer. -
Page 32: Specifications
(Square optical connector jack) Wavelength: 660 nm Output level: –18 dBm PHONES (Phono jack) Load impedance: 32 ohms Output level: 12mW Sony Corporation Printed in Malaysia General Power requirements North American model: 120 V AC, 60 Hz Mexican model: 120 V AC, 60 Hz...